How to Implement Google Optimize on Magento
See how to implement Google Optimize and the page flickering snippet on Magento 1 and Magento 2

Brad Redding
Brad Redding is the Founder & CEO of Elevar. Specializing in analytics, tracking, GTM, and conversion optimization.
This guide shows how to implement Google Optimize on both Magento 1 and Magento 2 – in minutes.
If you aren’t familiar with Google Optimize, it as the free a/b testing tool from Google that is an alternative to Optimizely, Monetate, VWO, among others. There is also a 360 enterprise version that unlocks additional features.
I’m a big fan of the free version and actively use it on many existing Magento sites.
Step 1: Create Optimize Account
- Go to: https://optimize.google.com/ and create a new account
- Add a new container
- Link your new container to your Google Analytics property
Step 2: Implement the Google Optimize Plugin
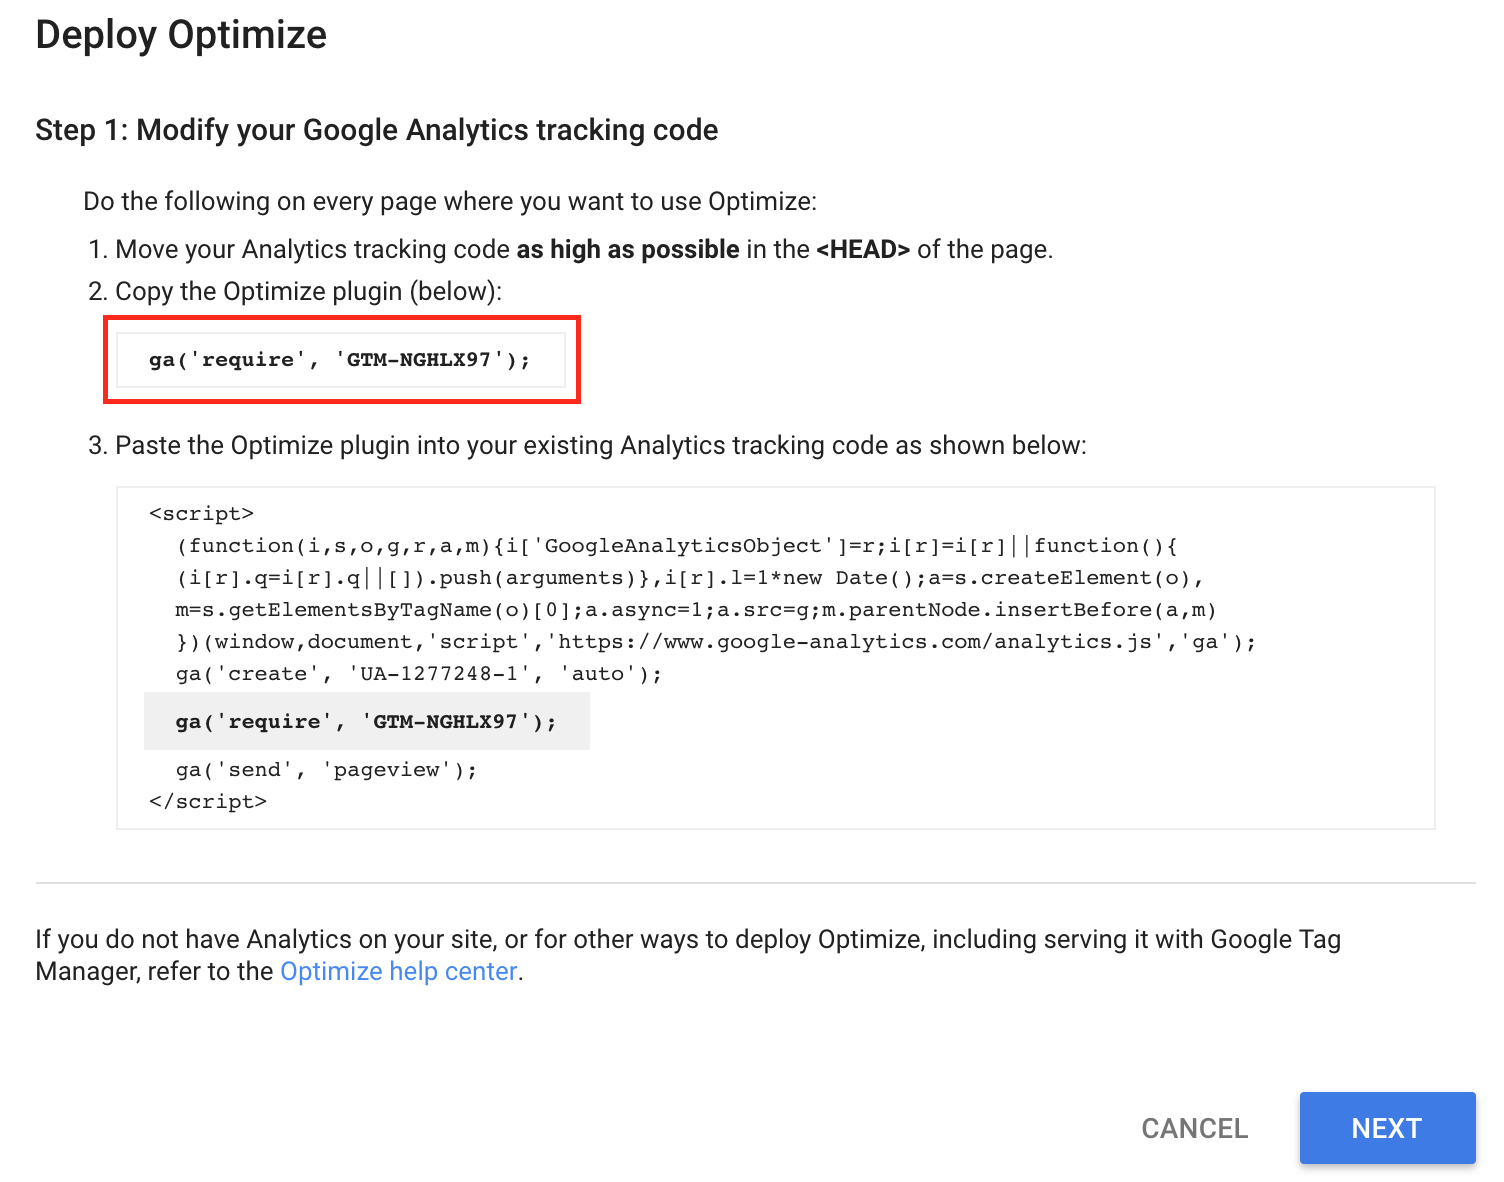
In your Optimize setup you will be asked to implement the Optimize plugin (shown below in red).
You have two options to implement this:
Option a) Via Google Tag Manager
If you have Google Tag Manager implemented for your Google Analytics pageview tracking then go to Google Tag Manager > Tags > Create New Tag > Google Optimize Tag
You’ll then need to configure your tag to include the following:
- Your Google Optimize container ID
- Your Google Analytics variable settings
- Set tag firing priority: this will differ based on your own GTM account but basically the higher the # the earlier this tag fires in order of all other GTM tags (I usually keep this pretty high!)
- Custom tag sequencing – Setup tag: this should be your sitewide Google Analytics pageview tag. When assigned this means your Google Optimize tag will fire right after your Google Analytics tag.
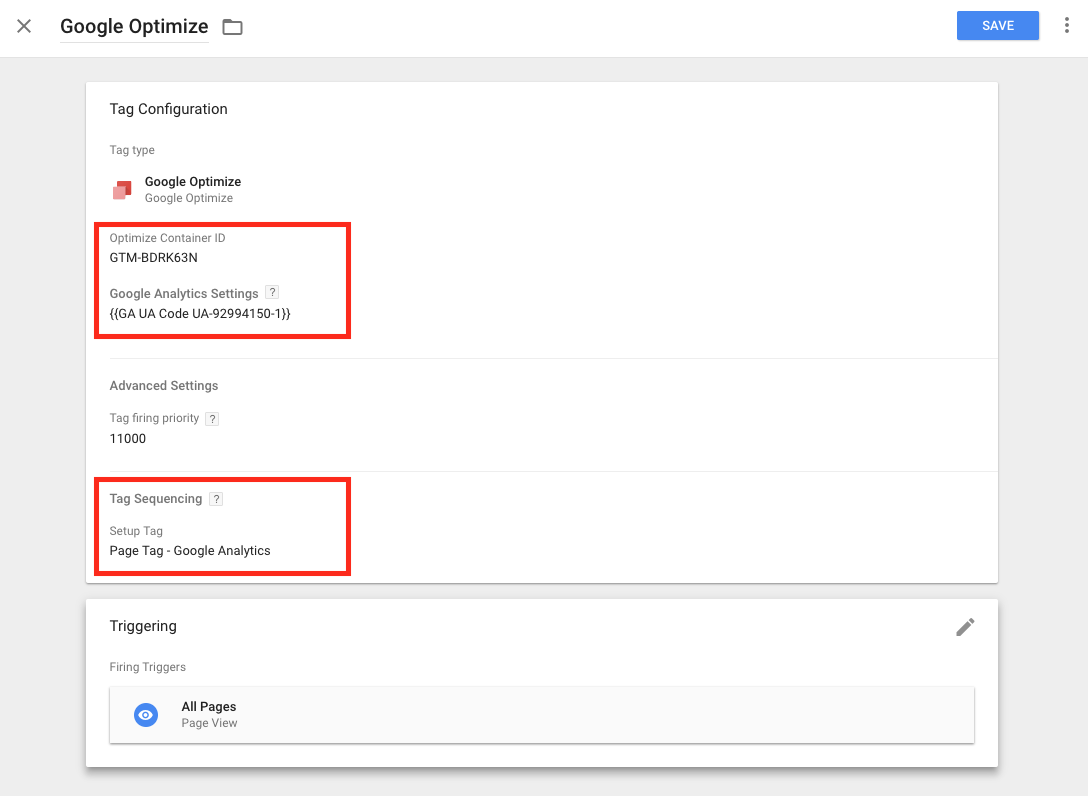
Once that is all set then you can set your trigger of All Pages and this step is complete!
Option b: Modify your Google Analytics tracking script
If you are using the native Google Analytics pageview tracking then this will require a small change to your tracking script which will require a small code deployment.
All you need to do is add your Optimize plugin to your GA snippet shown here:
![]()
This needs to be there on every page just like your GA script.
Step 3: Implement Page Flickering Snippet
This is a recommended step to help minimize “page flickering” that you might see when testing page variations. This code also helps ensure that users on slow connections have a better experience by only showing experiment variants when the Optimize container loads within the set timeout (4 seconds).
Again you have a few options to implement this.
Option a) In Magento Admin
Within Google Optimize, you need to copy your page flickering snippet in step 2 of setup:
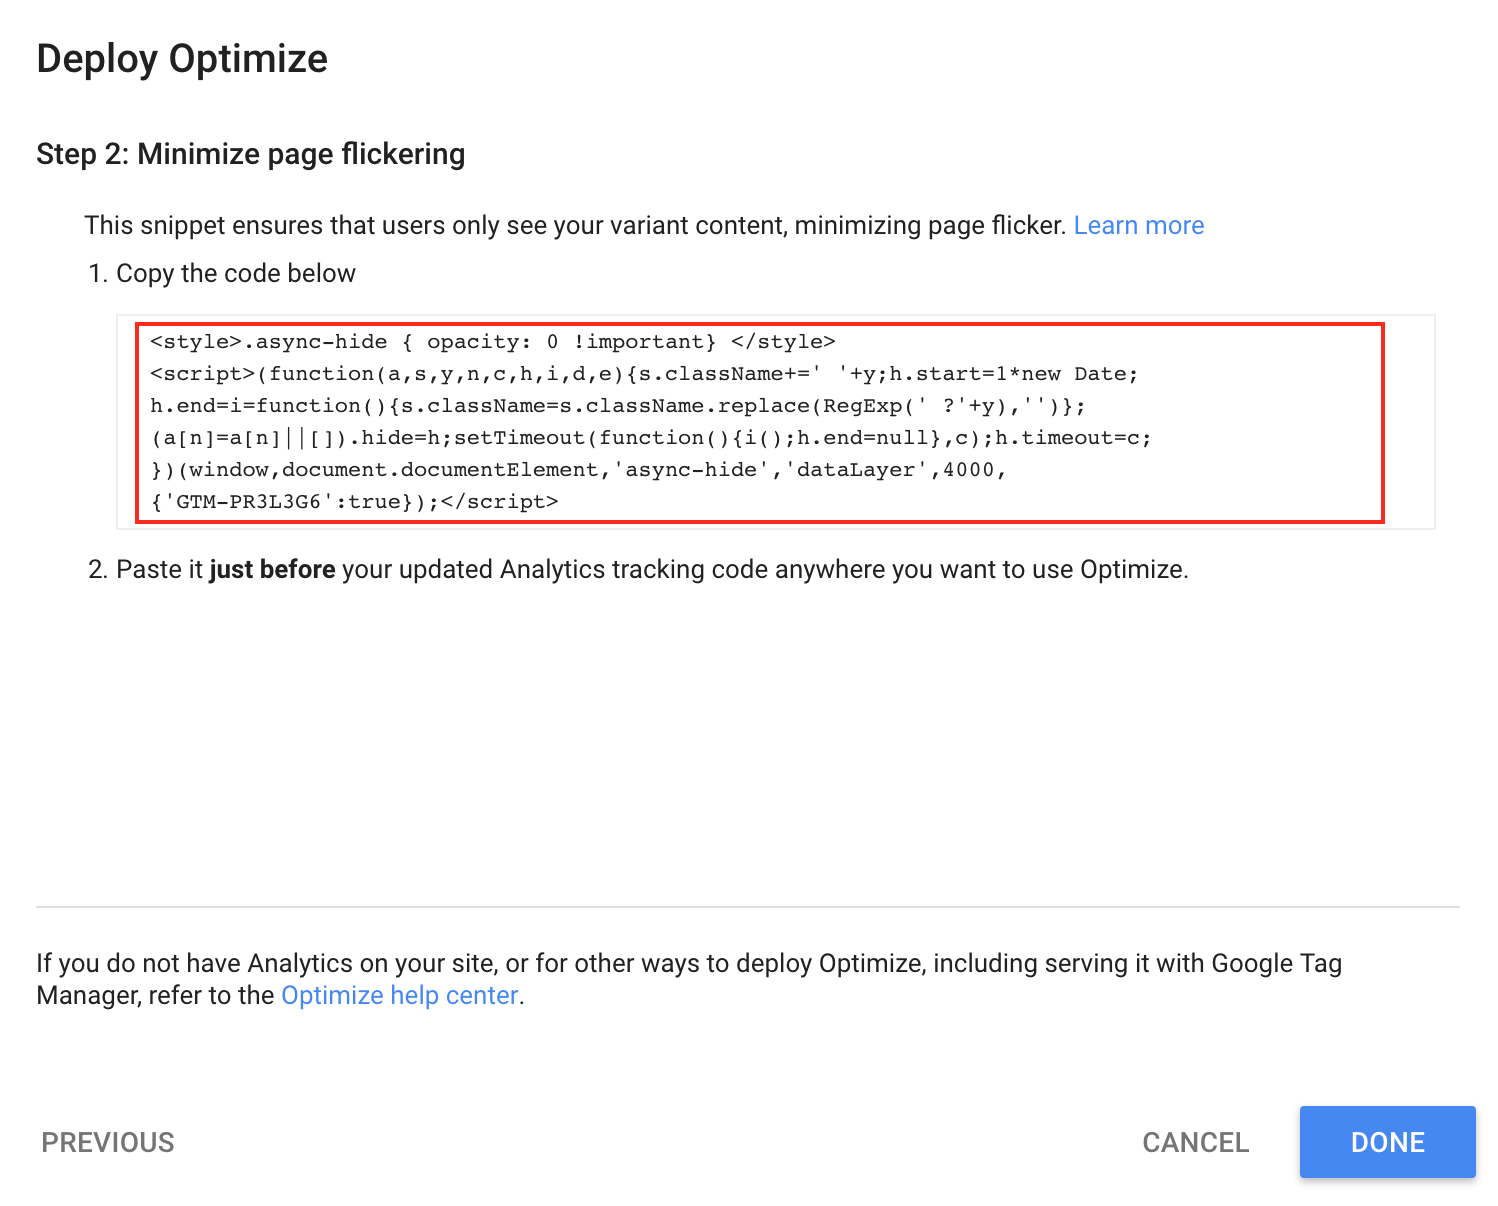
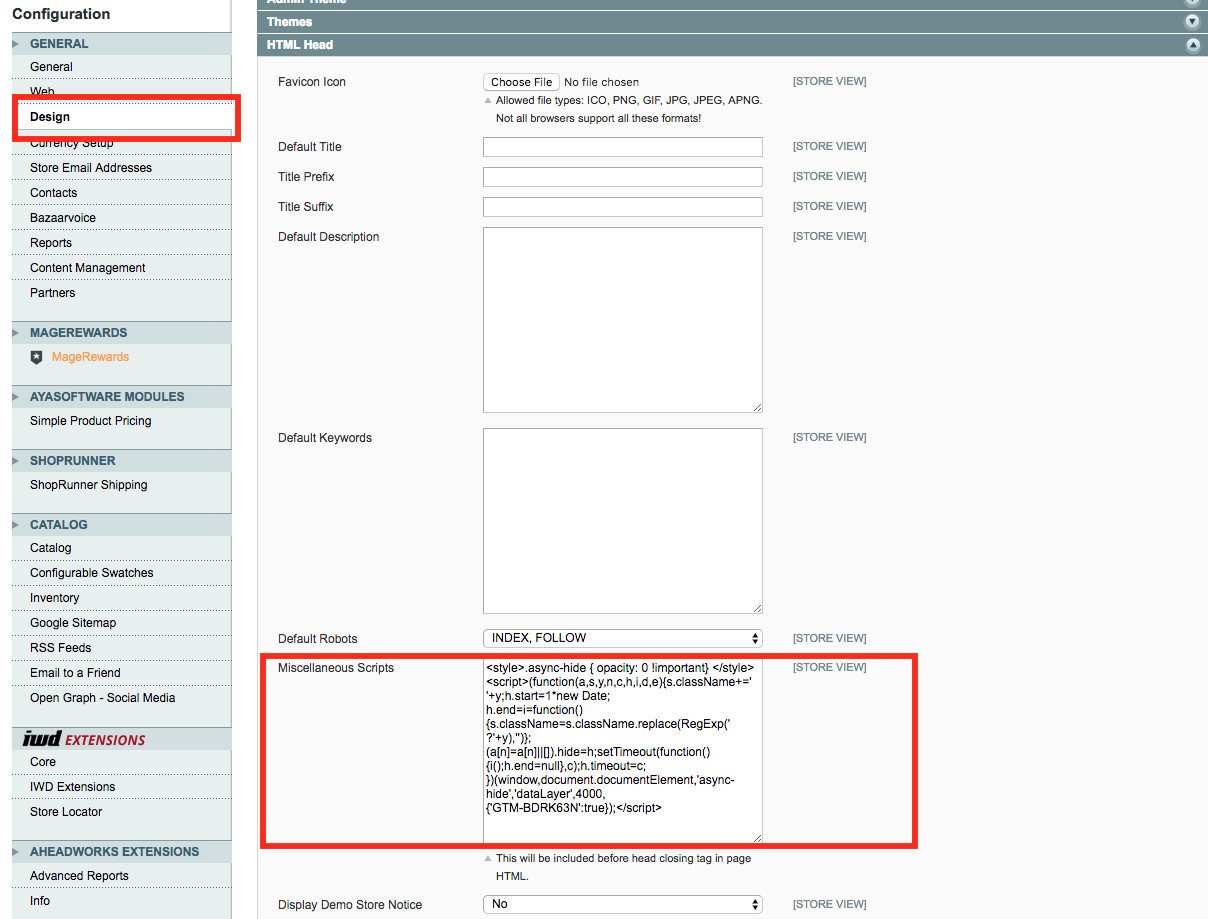
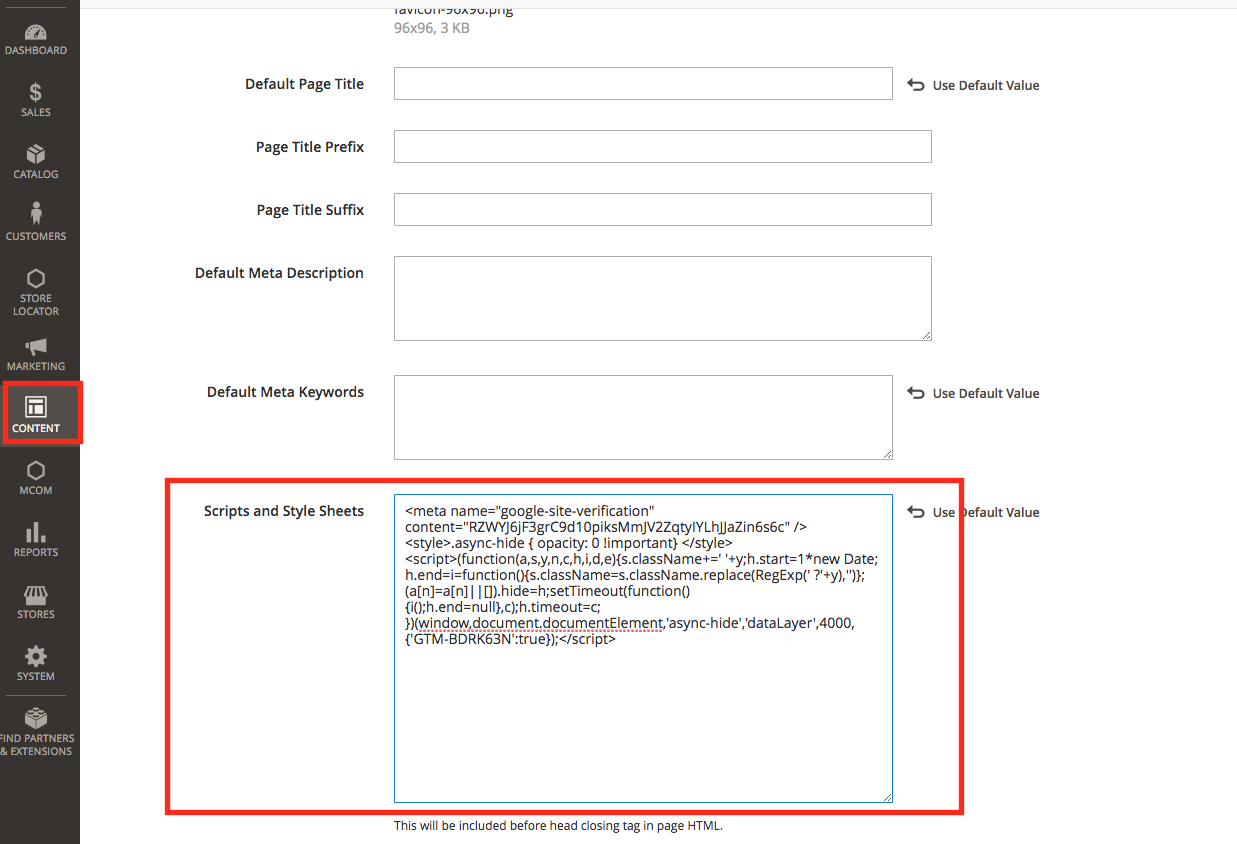
And then paste this into your HTML Head scripts configuration setting.
Here’s where this is in Magento 1:
System > Configuration > General > Design
Here’s where this is in Magento 2:
Content > Design > Configuration > Select Your Theme/Store > HTML Head:
A few caveats on this step ^
- If you’re a lone wolf and editing code in the admin is the norm then you should be fine.
- If you’re not a lone wolf and you have a team, agency, or someone else who manages your codebase then consider having them commit this change for you (inserting at top of <head>). While not mandatory, this is better practice to help catch potential bugs when testing on a non-production instance.
- Test on a staging site first (always).
- If you have full page cache or other caching mechanisms in place then this might not appear until cache is cleared.
Option b) Add Page Flickering Snippet via GTM
A safe way to implement the page flickering snippet is via Google Tag Manager.
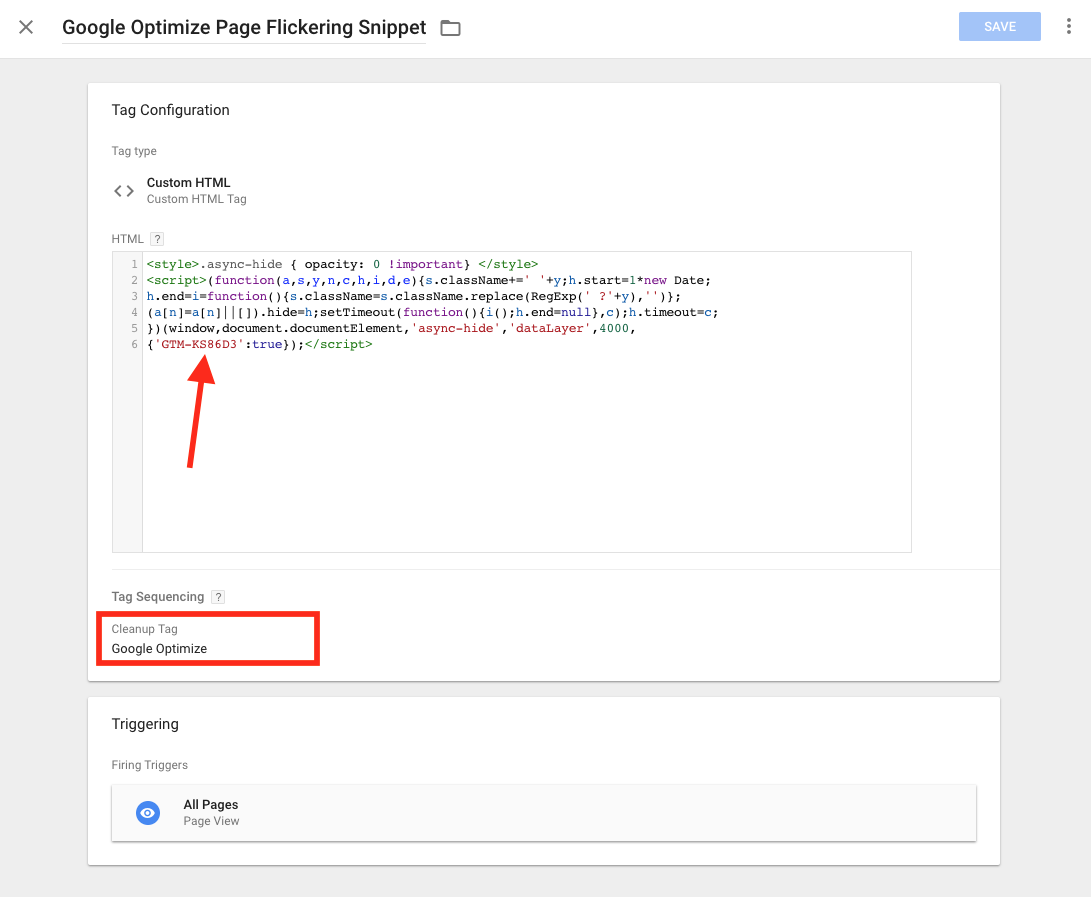
- Create New Tag > Custom HTML Tag Type > Copy the page flicker snippet from Google Optimize into the custom HTML section
- Change the “GTM-” to be your Google Tag Manager Container ID instead of your Google Optimize ID as shown below
- Set a tag sequence where Google Optimize fires AFTER this page flicker snippet tag
- Publish the new tag
Option c) Add to your theme
If during step 2 you had to use option b to implement the Optimize plugin then you should also have the page flickering snippet added right above the Google Analytics tracking code.
The reason is you need to ensure the page flickering snippet always fires BEFORE your actual Google Optimize plugin.
Step 4: Verify Google Optimize is Working
Create a new test in Google Optimize (it can be an A/A test where your variation does not have any changes) to verify it’s working.
When you publish your new test then Optimize will likely give you a validation message that everything is good or if there are errors detected.
Once it’s live, open up a website URL that is included as part of your experiment and then go to your experiment detail page and you should see active users:
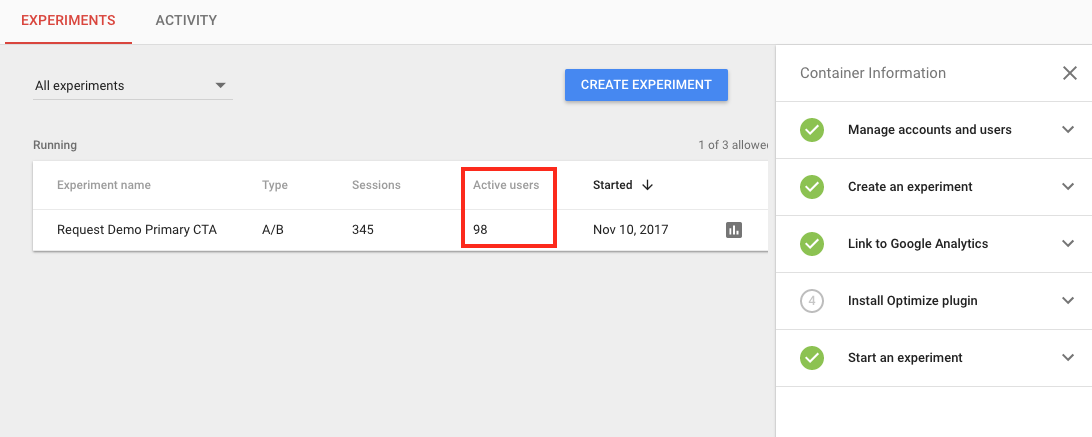
Give it a few minutes to propagate if you don’t see any data right away.
That’s it!
You’re now ready to create an experiment in Google Optimize and on your way to becoming a conversion optimization expert :).
Advanced Tips
If you’re utilizing a custom dataLayer and/or other JavaScript as part of running tests, Google recommends the following order to ensure everything functions as you expect:
- Any JavaScript (e.g. jQuery) that you wish to use in Optimize experiments.
- Initialization of any variables needed for targeting (data layer, JavaScript, cookies, etc).
- Page-hiding snippet.
- Modified Analytics tracking code with Optimize plugin.
- Tag Manager container snippet.
- Other JavaScript, trackers, and ad tags.
If you are seeing an allowLinker warning and you’ve implemented via GTM then you might need to set your allowLinker to true on your Google Analytics variable > Fields to Set setting:

Happy testing!

Automated Google Analytics Insights
See how Elevar automates insights to create faster data-driven conversion testing ideas.


Leave a Reply