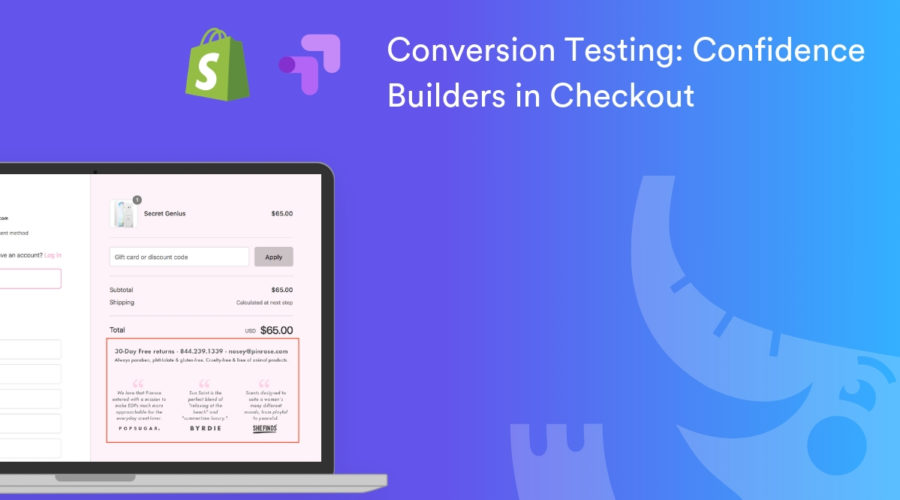
How to Test Confidence Builder in Shopify Checkout
Create your own checkout confidence builder test for your Shopify store in 5 easy steps.
Brad Redding
Brad Redding is the Founder & CEO of Elevar. Specializing in analytics, tracking, GTM, and conversion optimization.
Do you have a checkout funnel that is less than 60%? This means only 6 out of 10 people who start your checkout actually complete their purchase.
If so then you probably want to tweak and test it but feel constrained by Shopify’s lack of access to checkout.
Luckily there is a way to a/b test the checkout for all Shopify stores using Google Optimize.
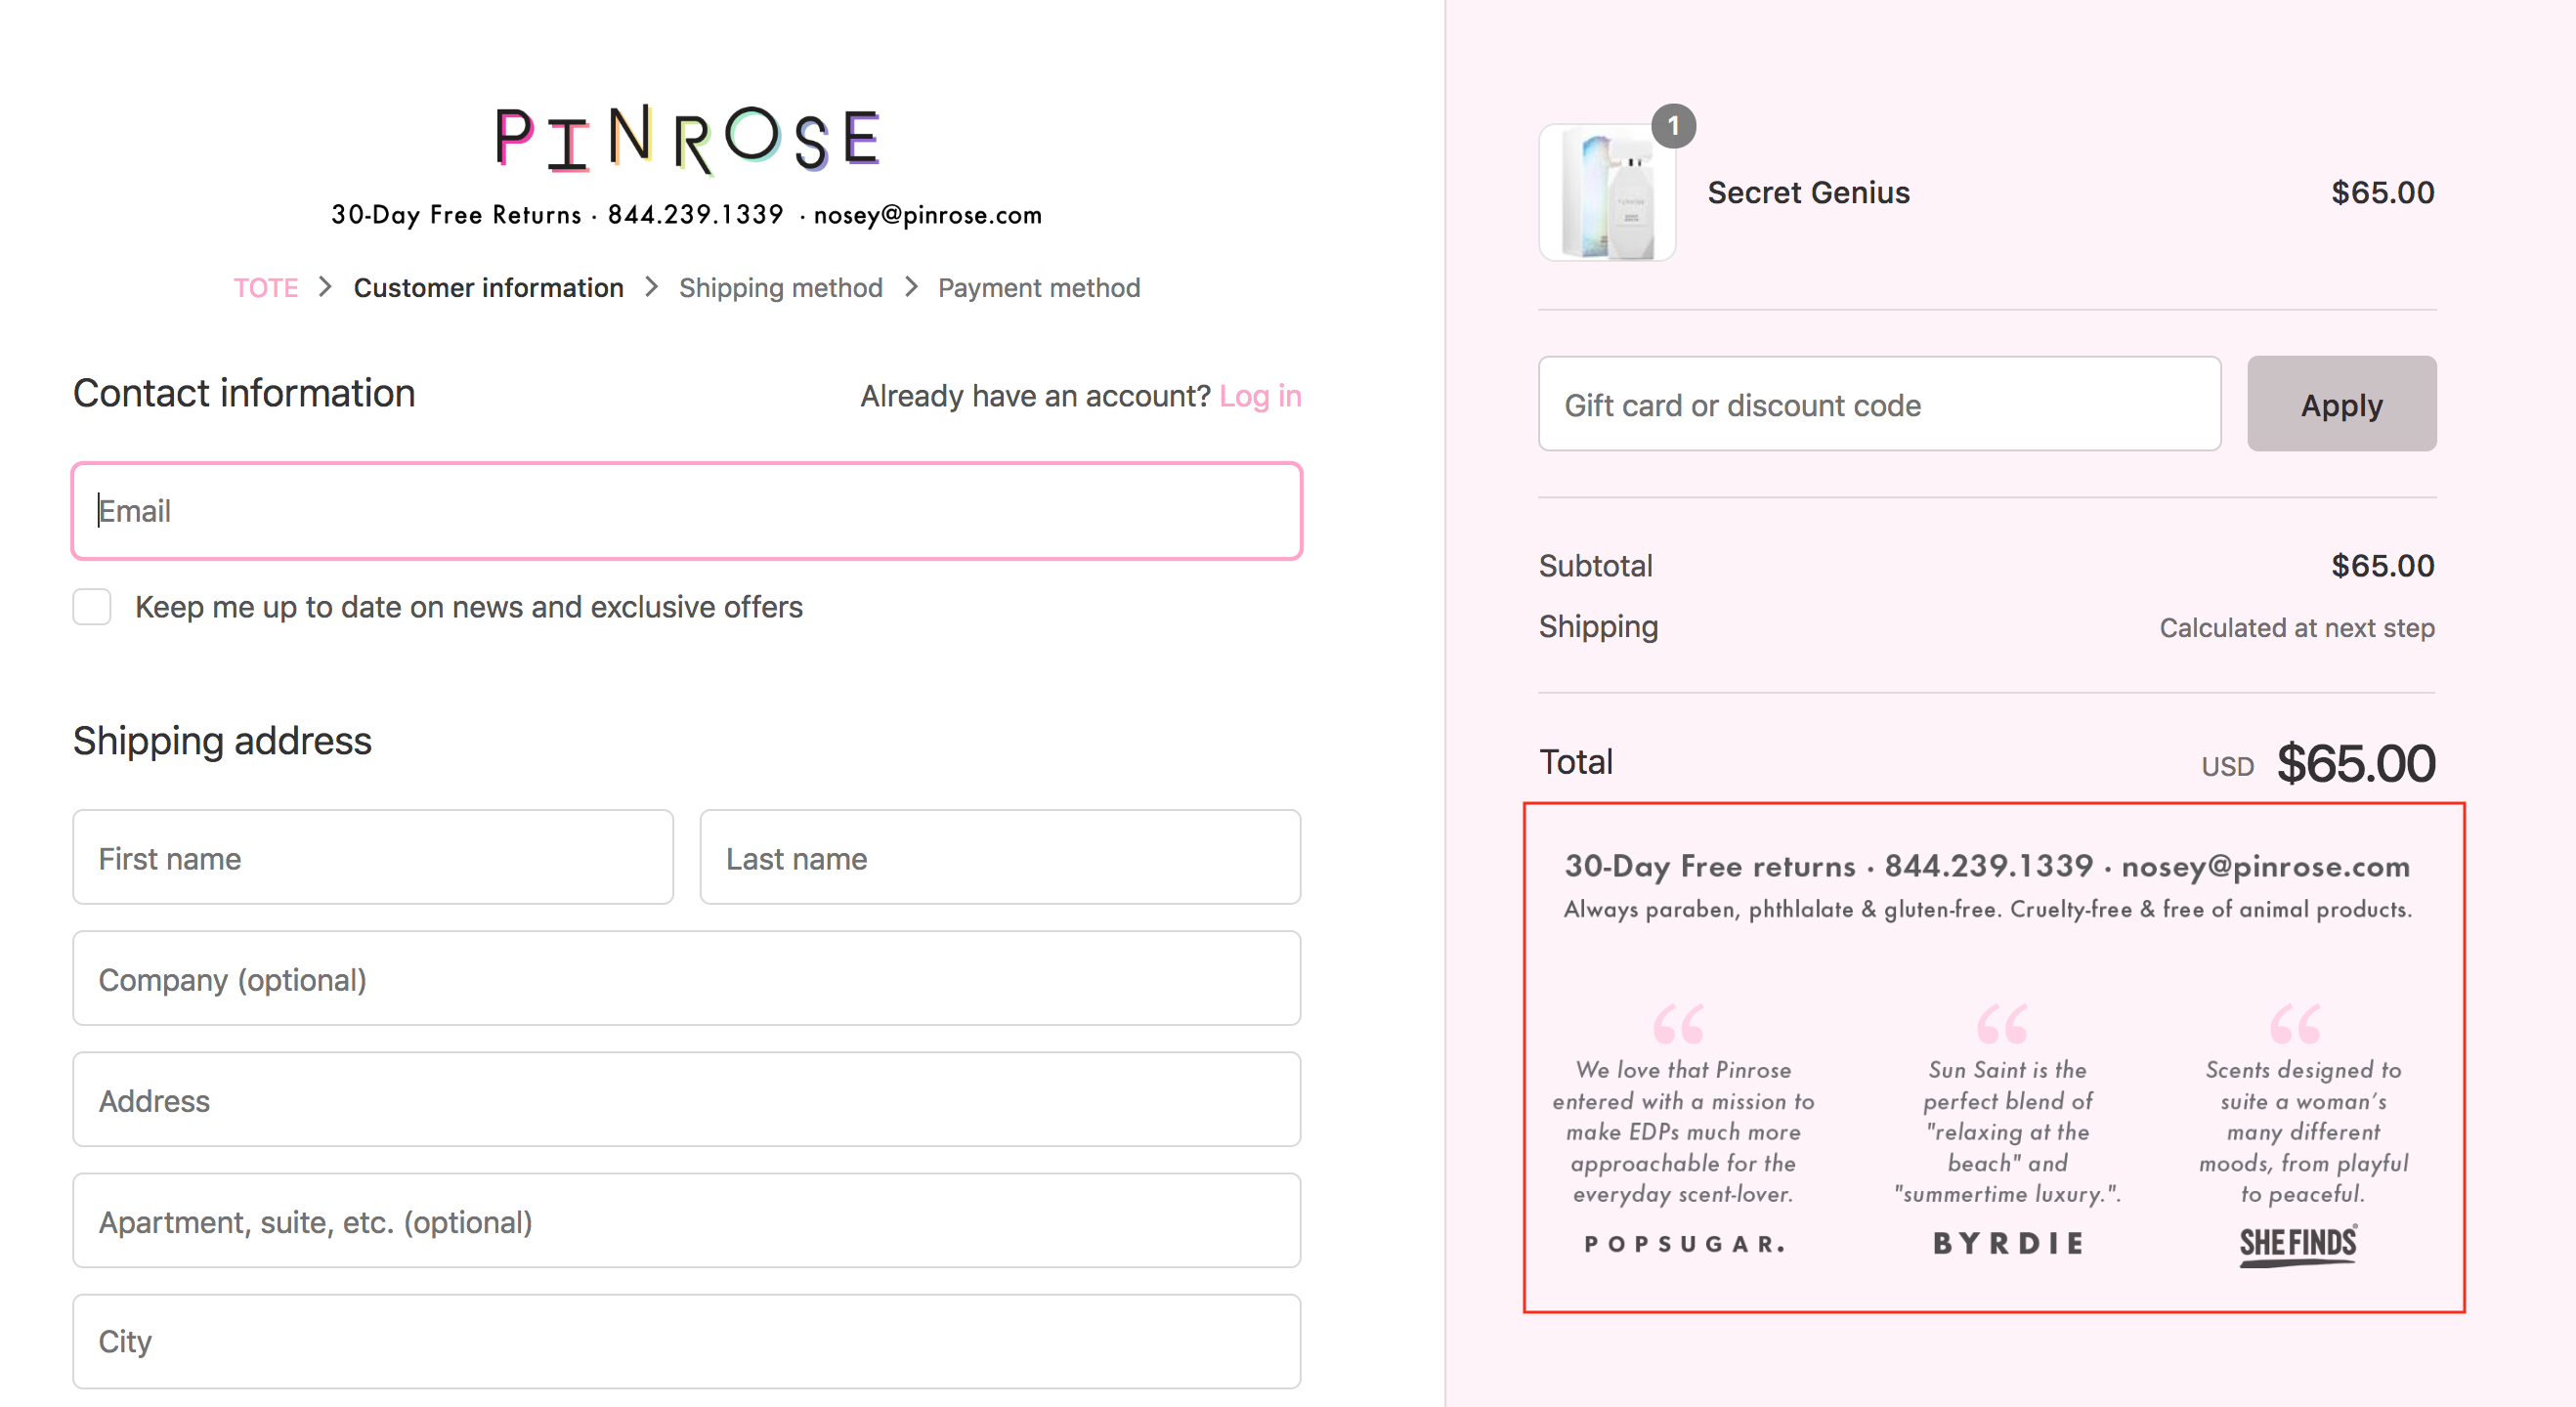
This guide shows you how to create your own test including confidence builders in checkout like this example:
Before we start – do you have Google Optimize setup already? If not then read our how to guide on configuring Google Optimize for your Shopify store here.
Let’s go!
Step 1: Ideate Your Confidence Builder
- What separates you from competition?
- Do reviews from your existing customer base play a large role for new customers deciding to purchase?
- How critical is your shipping and return policies for customers?
- Do you receive a lot of press?
These are all questions you will want to ask yourself when creating your own confidence builder to include within checkout.
This block can be icons only, actual security badges, reviews, shipping/return policies etc. Here’s another example:

Step 2: Create Your Confidence Builder
Once you’ve decided on your confidence builder, it’s time to create!
If you have a designer then they can put this together for you very quickly. Otherwise if you have to build yourself then consider a tool like Canva to create one yourself.
- Use a dimension size of ~ 1,000px wide by 500px high (or higher).
- Save your image as a transparent PNG file.
Step 3: Create New Experience in Optimize
In another browser window go to your website, add an item to your cart, and proceed to checkout.
Once here then copy the URL in your browser. It will be something like this: https://www.yourdomain.com/11193634/checkouts/2c28c29a003987ae57905456ebd31756
Now head over to Google Optimize and create a new experience. You will be prompted for the URL of the page you’d like to use to create your test
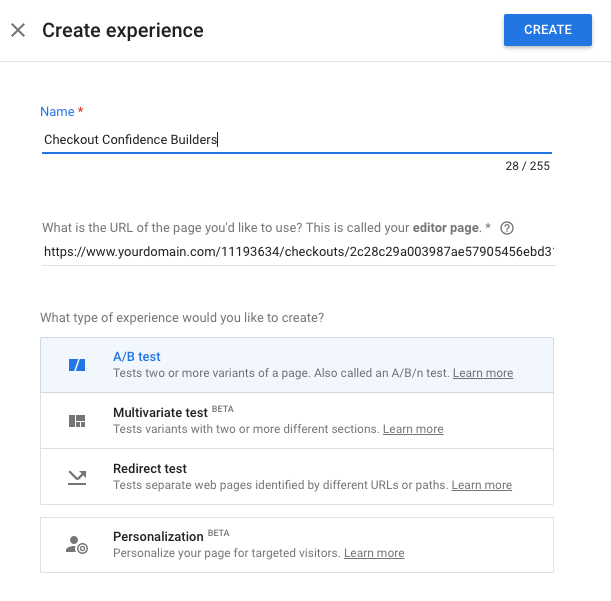 Copy the URL here and click Create:
Step 4: Configure Targeting Rules & Measurement Objectives
Now set your targeting rule to be:
URL matches regex of checkouts (shown below)
You can also choose to target this on desktop devices only if you don’t want to add additional content to the mobile site for this.
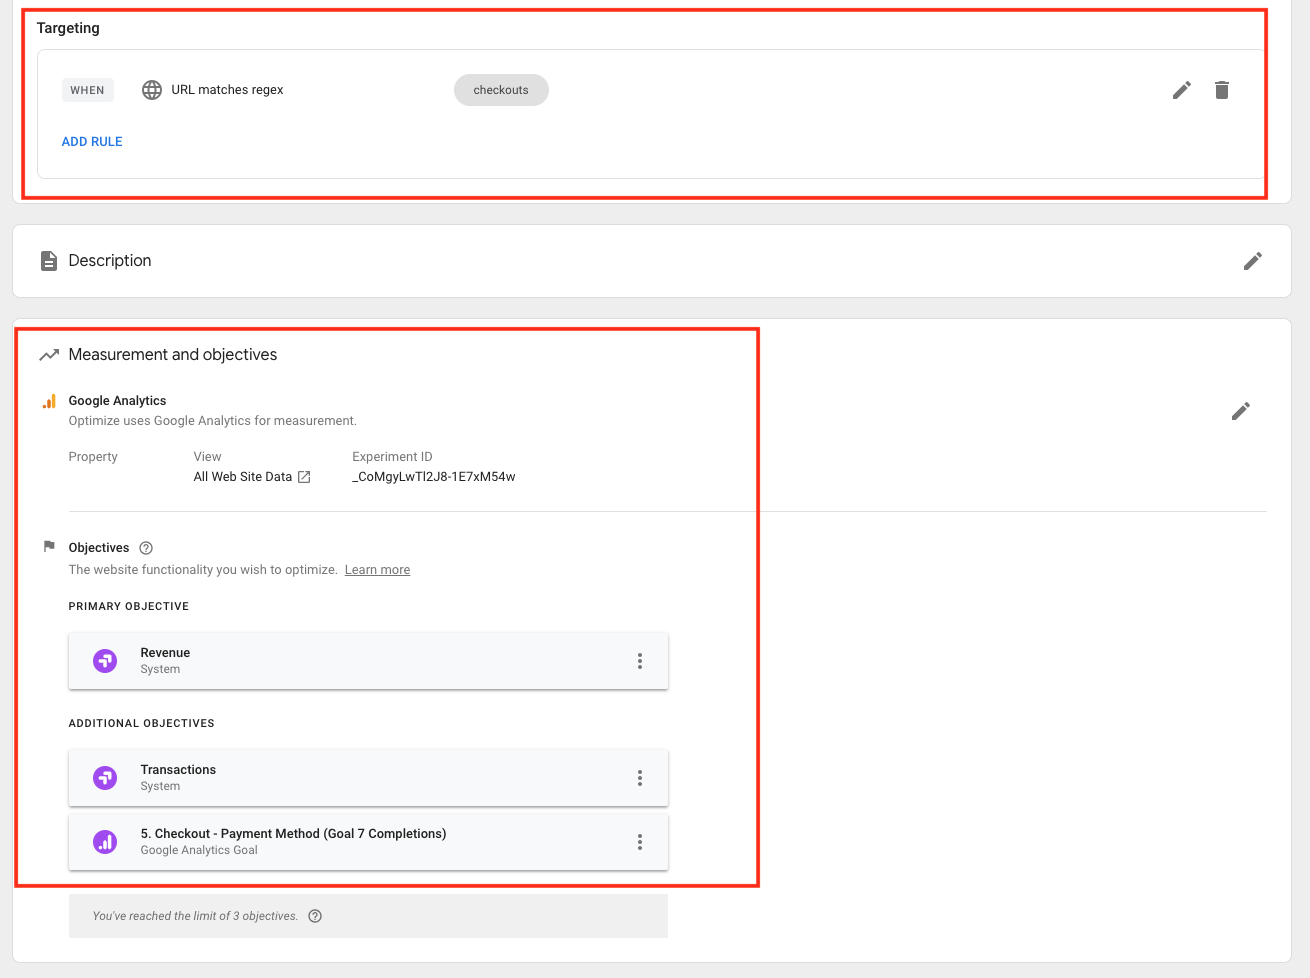
You’ll also need to select your primary Google Analytics view and primary objectives (aka KPIs for this test). Both of these are shown in the image above.
Set your primary objective to be Revenue. You can then add secondary objectives such as transactions or other micro goals (like this example shown of user reaching payment step).
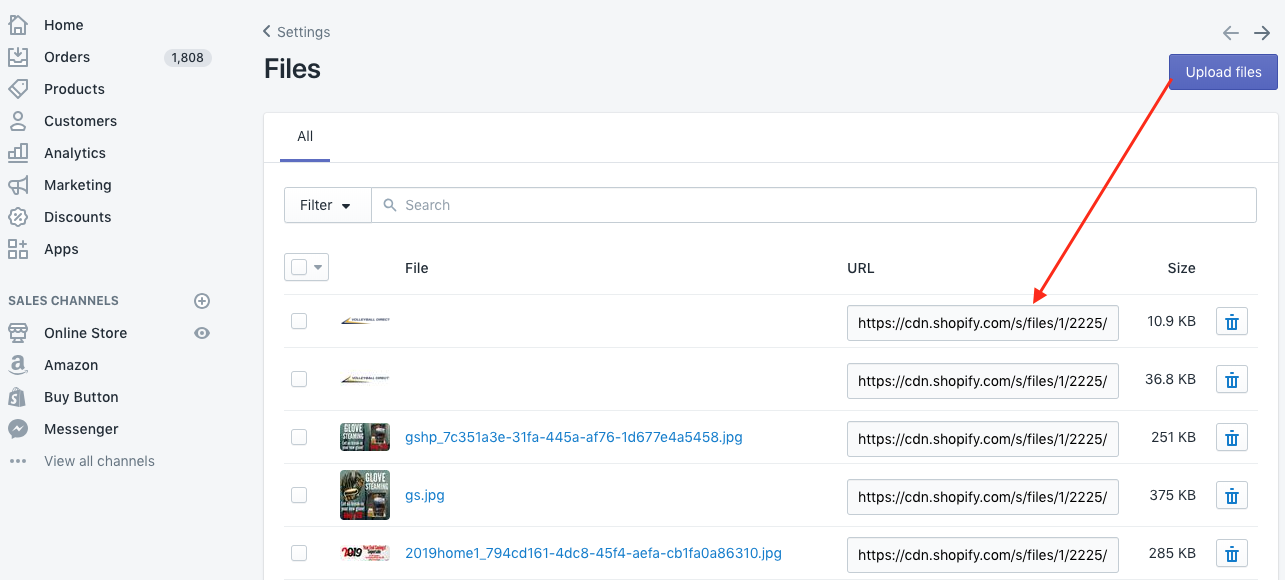
Step 4: Upload Image to Shopify Admin
First we have to upload the confidence builder image to Shopify so we can use an image URL. Head over to Shopify Admin > Settings > Media Files > and upload your file.
Once uploaded then copy the URL of the file:
Step 5: Create Variant
Now it’s time to implement the variation with your confidence builder image.
Inside of Google Optimize, create a new variant and click edit.
This will bring you to the Google Optimize editor screen where your checkout should be the page you see (if you set up step 3 properly).
Navigate your cursor to the totals block in the right column so it’s selected like shown below:
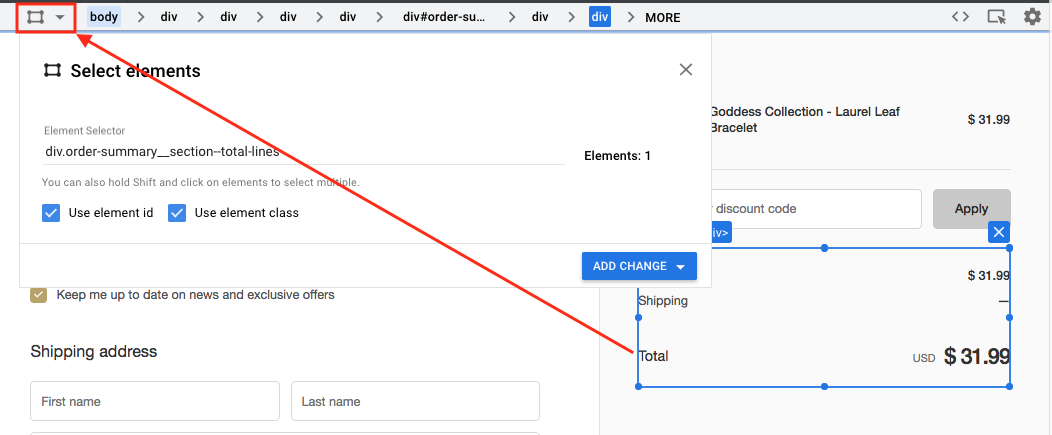
Once you have this selected then click on the editor icon in the top left of the page.
From here you will want to click the HTML option in the dropdown.
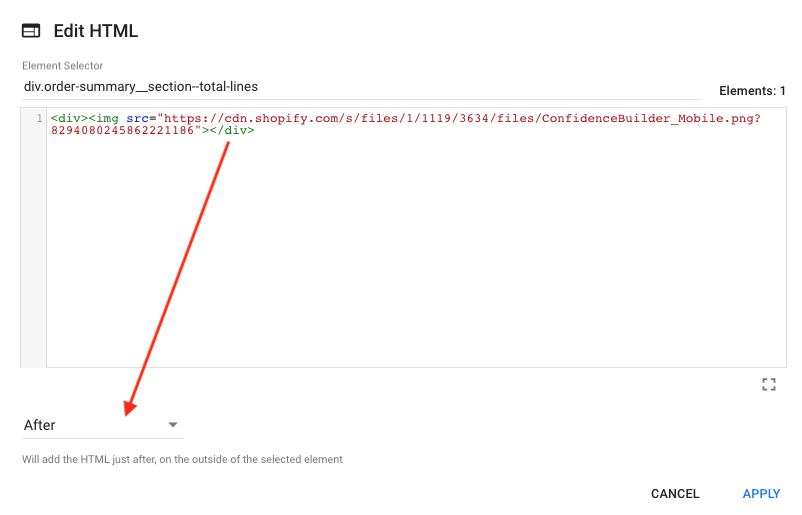
We’re going to add new HTML AFTER the subtotal block.
Here is the code I’m using:
<div><img src="https://cdn.shopify.com/s/files/1/1119/3634/files/ConfidenceBuilder_Mobile.png?11111111111111111”></div>
You can use this and simply change out the image src which is the file name from your Shopify media files (this image URL won’t work ^).
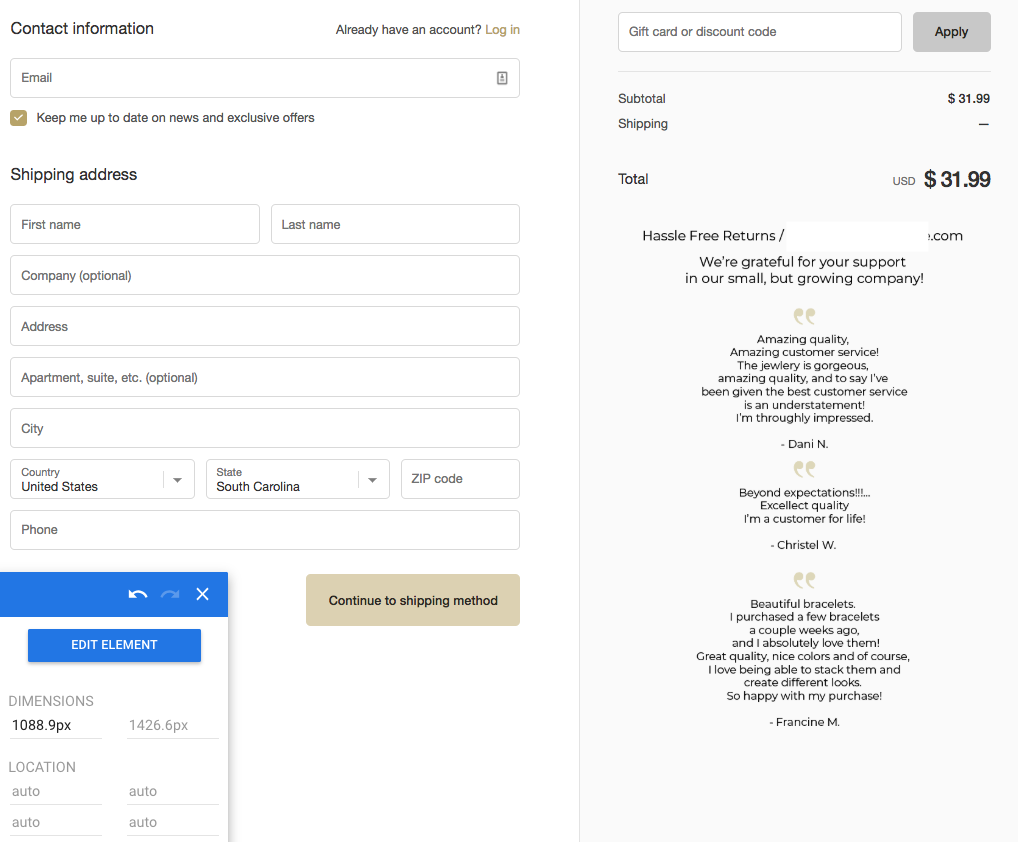
Once you update and click save you should see your confidence builder image shown on the right:
That’s it!
Now save this variant (you should only have one change) and then use the preview options within Google Optimize to confirm everything displays properly.
A few suggestions when testing this variation before publishing:
- Ensure coupon codes work as expected
- Try testing different qty and products added to cart and confirm these are accurate all the way through the checkout process (before payment) when you are within the variation.
Once you feel confident everything is ready to go then double check all of your settings and publish your test!
Thanks for this Brad, I assume this is only available for Shopify Plus customer with access to checkout liquid?
I don’t even know how I ended up here, but I thought this post was great.
I do not know who you are but definitely you’re going to a famous
blogger if you aren’t already 😉 Cheers!