How to Implement the New Scroll Depth Trigger in GTM
Implement scroll depth tracking in less than 10 minutes on your site using the new built in variables and triggers in Google Tag Manager!
Brad Redding
Brad Redding is the Founder & CEO of Elevar. Specializing in analytics, tracking, GTM, and conversion optimization.
I’ll cut to the chase in this how-to for implementing the new Scroll Depth Tracking that is now built into Google Tag Manager (yay!).
I happened to stumble upon this feature today when setting up a new GTM container and was quite excited to see it! If you’re like me you may have already implemented Scroll Depth tracking on your website via great tutorials like Luna Metrics.
If this is the case, it’s probably a 5 minute update for you. If you’re starting from scratch it might be 10 minutes.
The GTM updates:
- Scroll Depth Trigger Type
- Scrolling Data Layer Variables
See how to implement!
Step 1: Enable the Scrolling Data Layer Variables
In GTM > Your Workspace > Variables > Configure new “Built-In Variable” > Check the three boxes below:
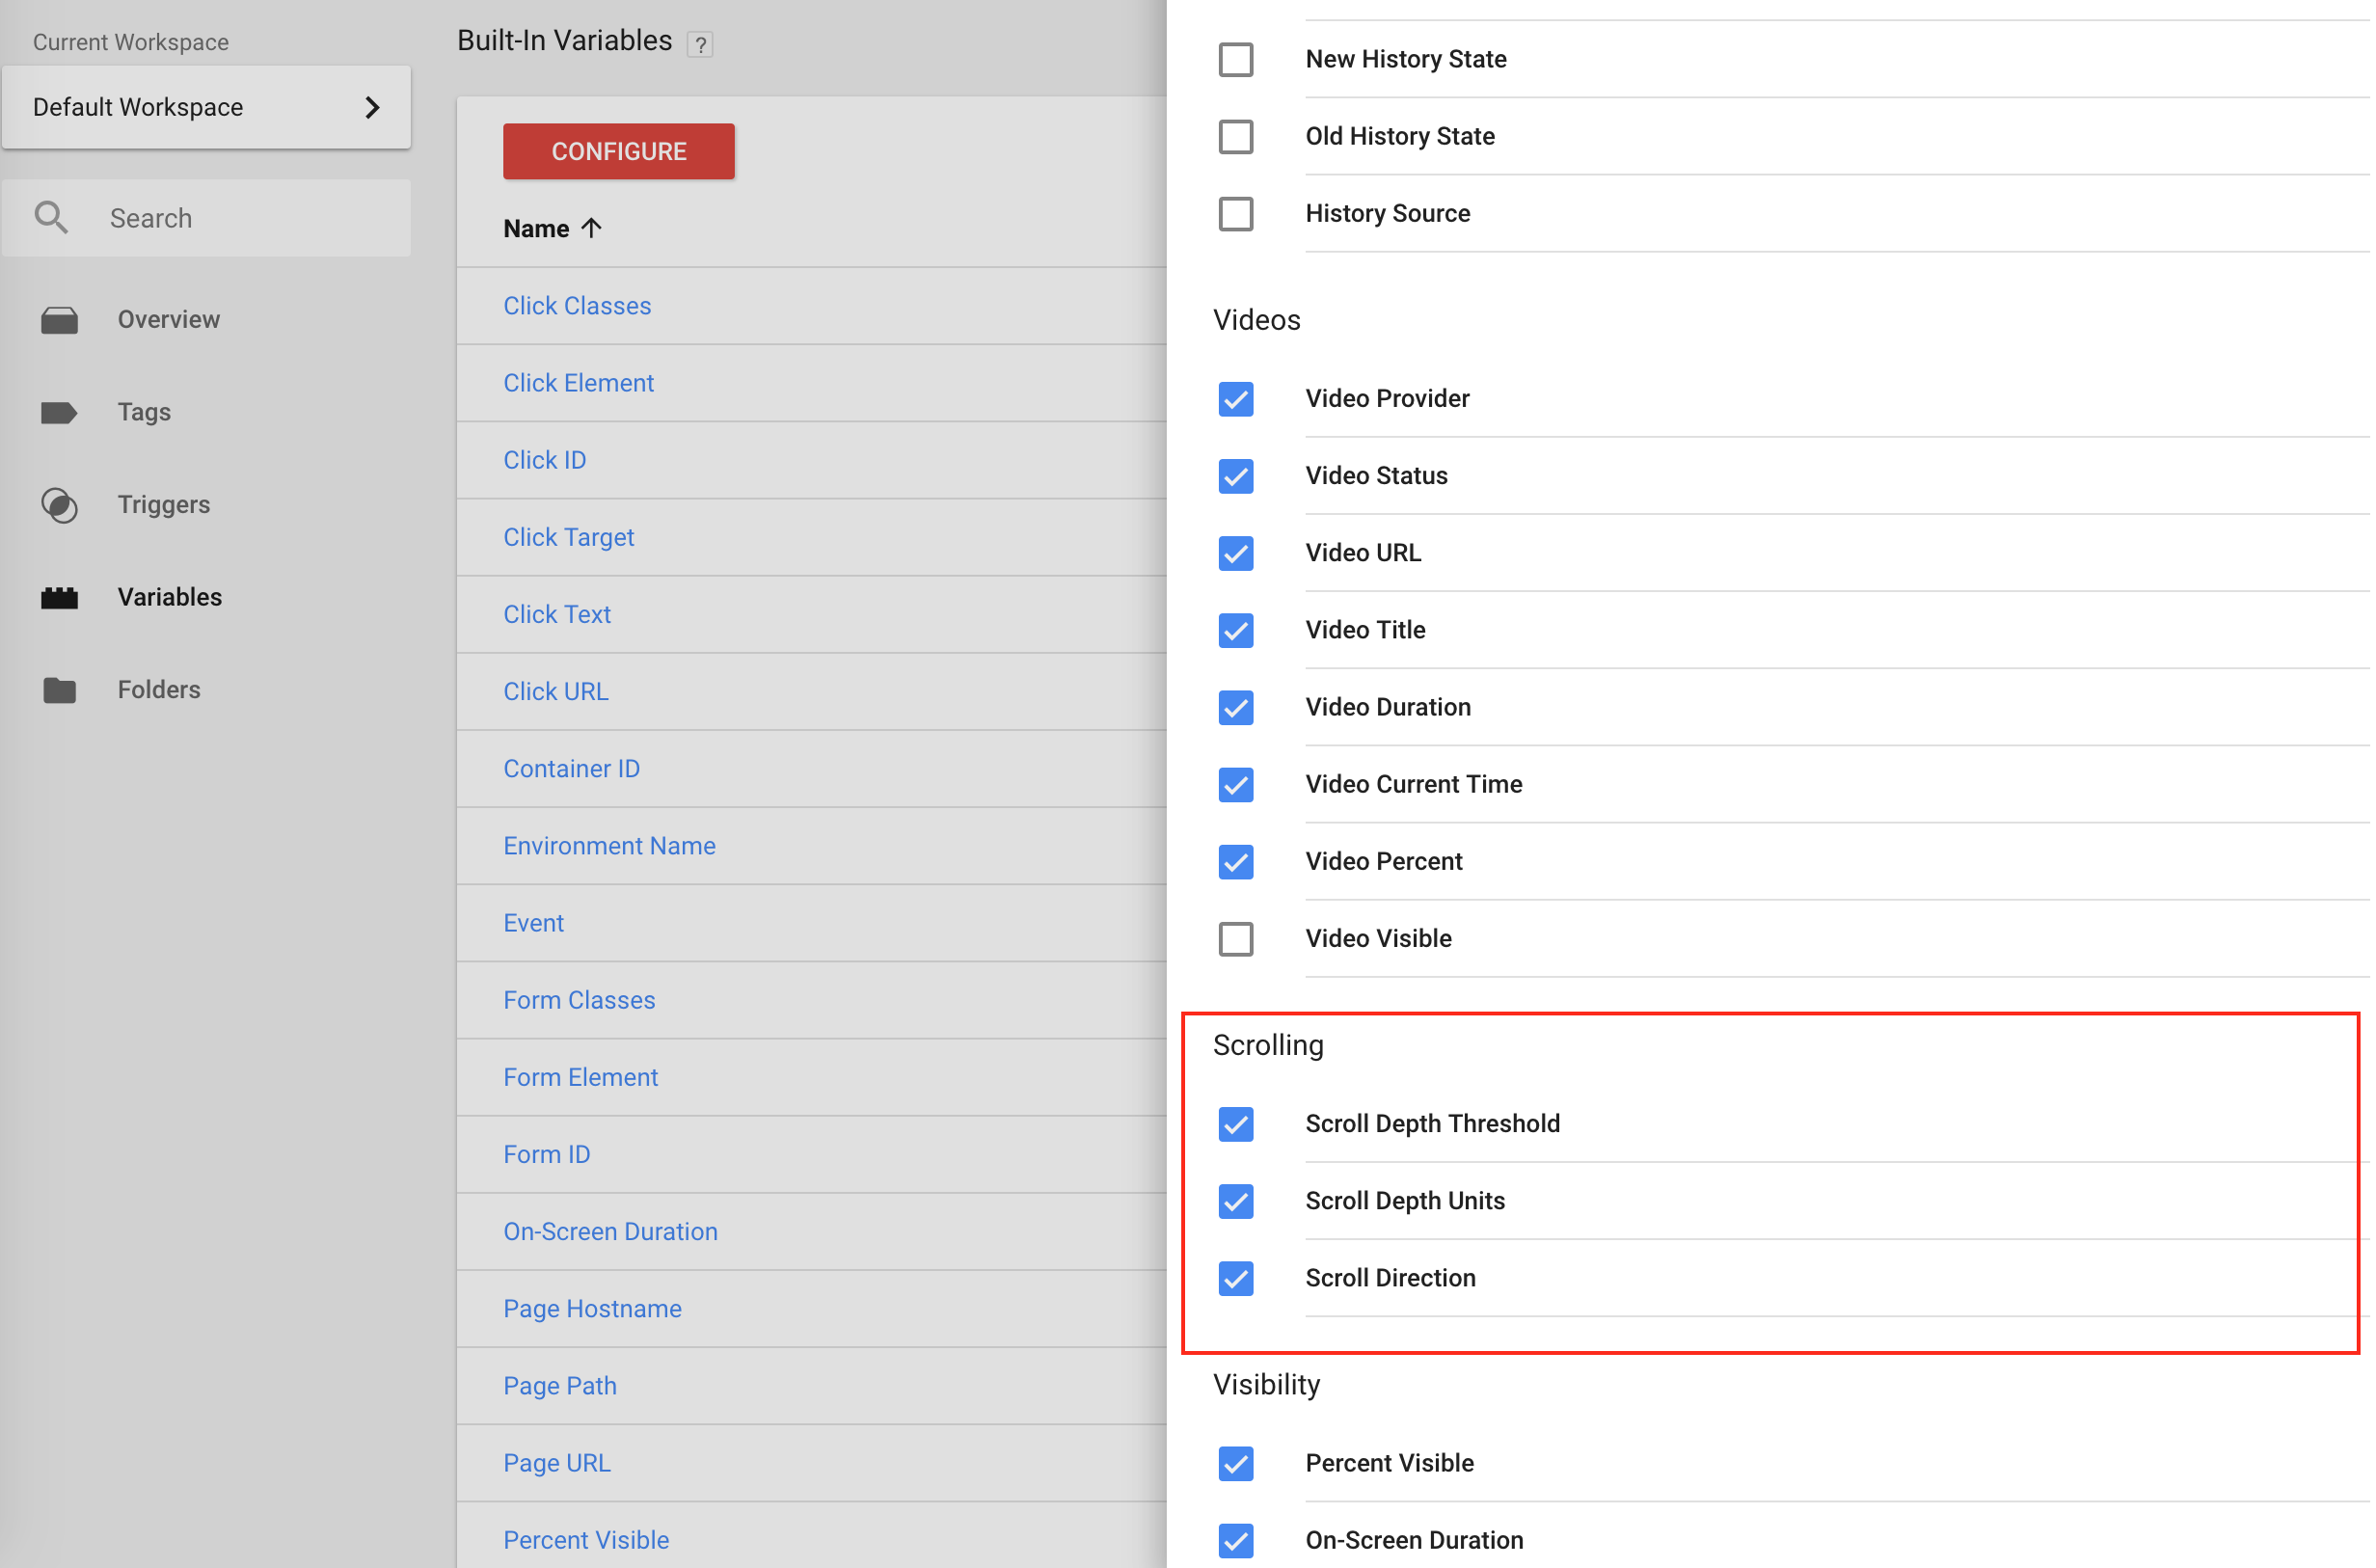
These Data Layer variables are defined as:
- Scroll Depth Threshold: this is the depth of the user scroll (e.g. 25%, 50%, etc).
- Scroll Depth Units: this is the % or pixel setting of the scroll.
- Scroll Direction: this is either vertical or horizontal.
You’ll put these to use in your own customization in Step 2 below.
That’s it for Step 1.
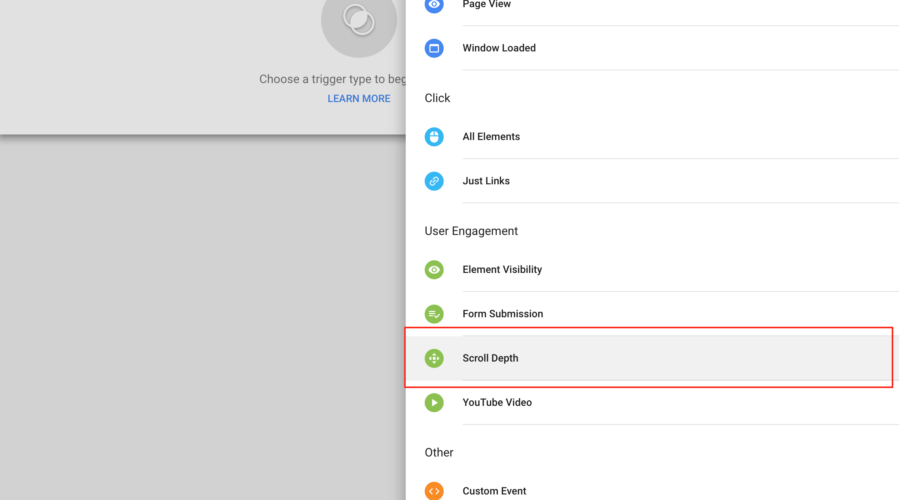
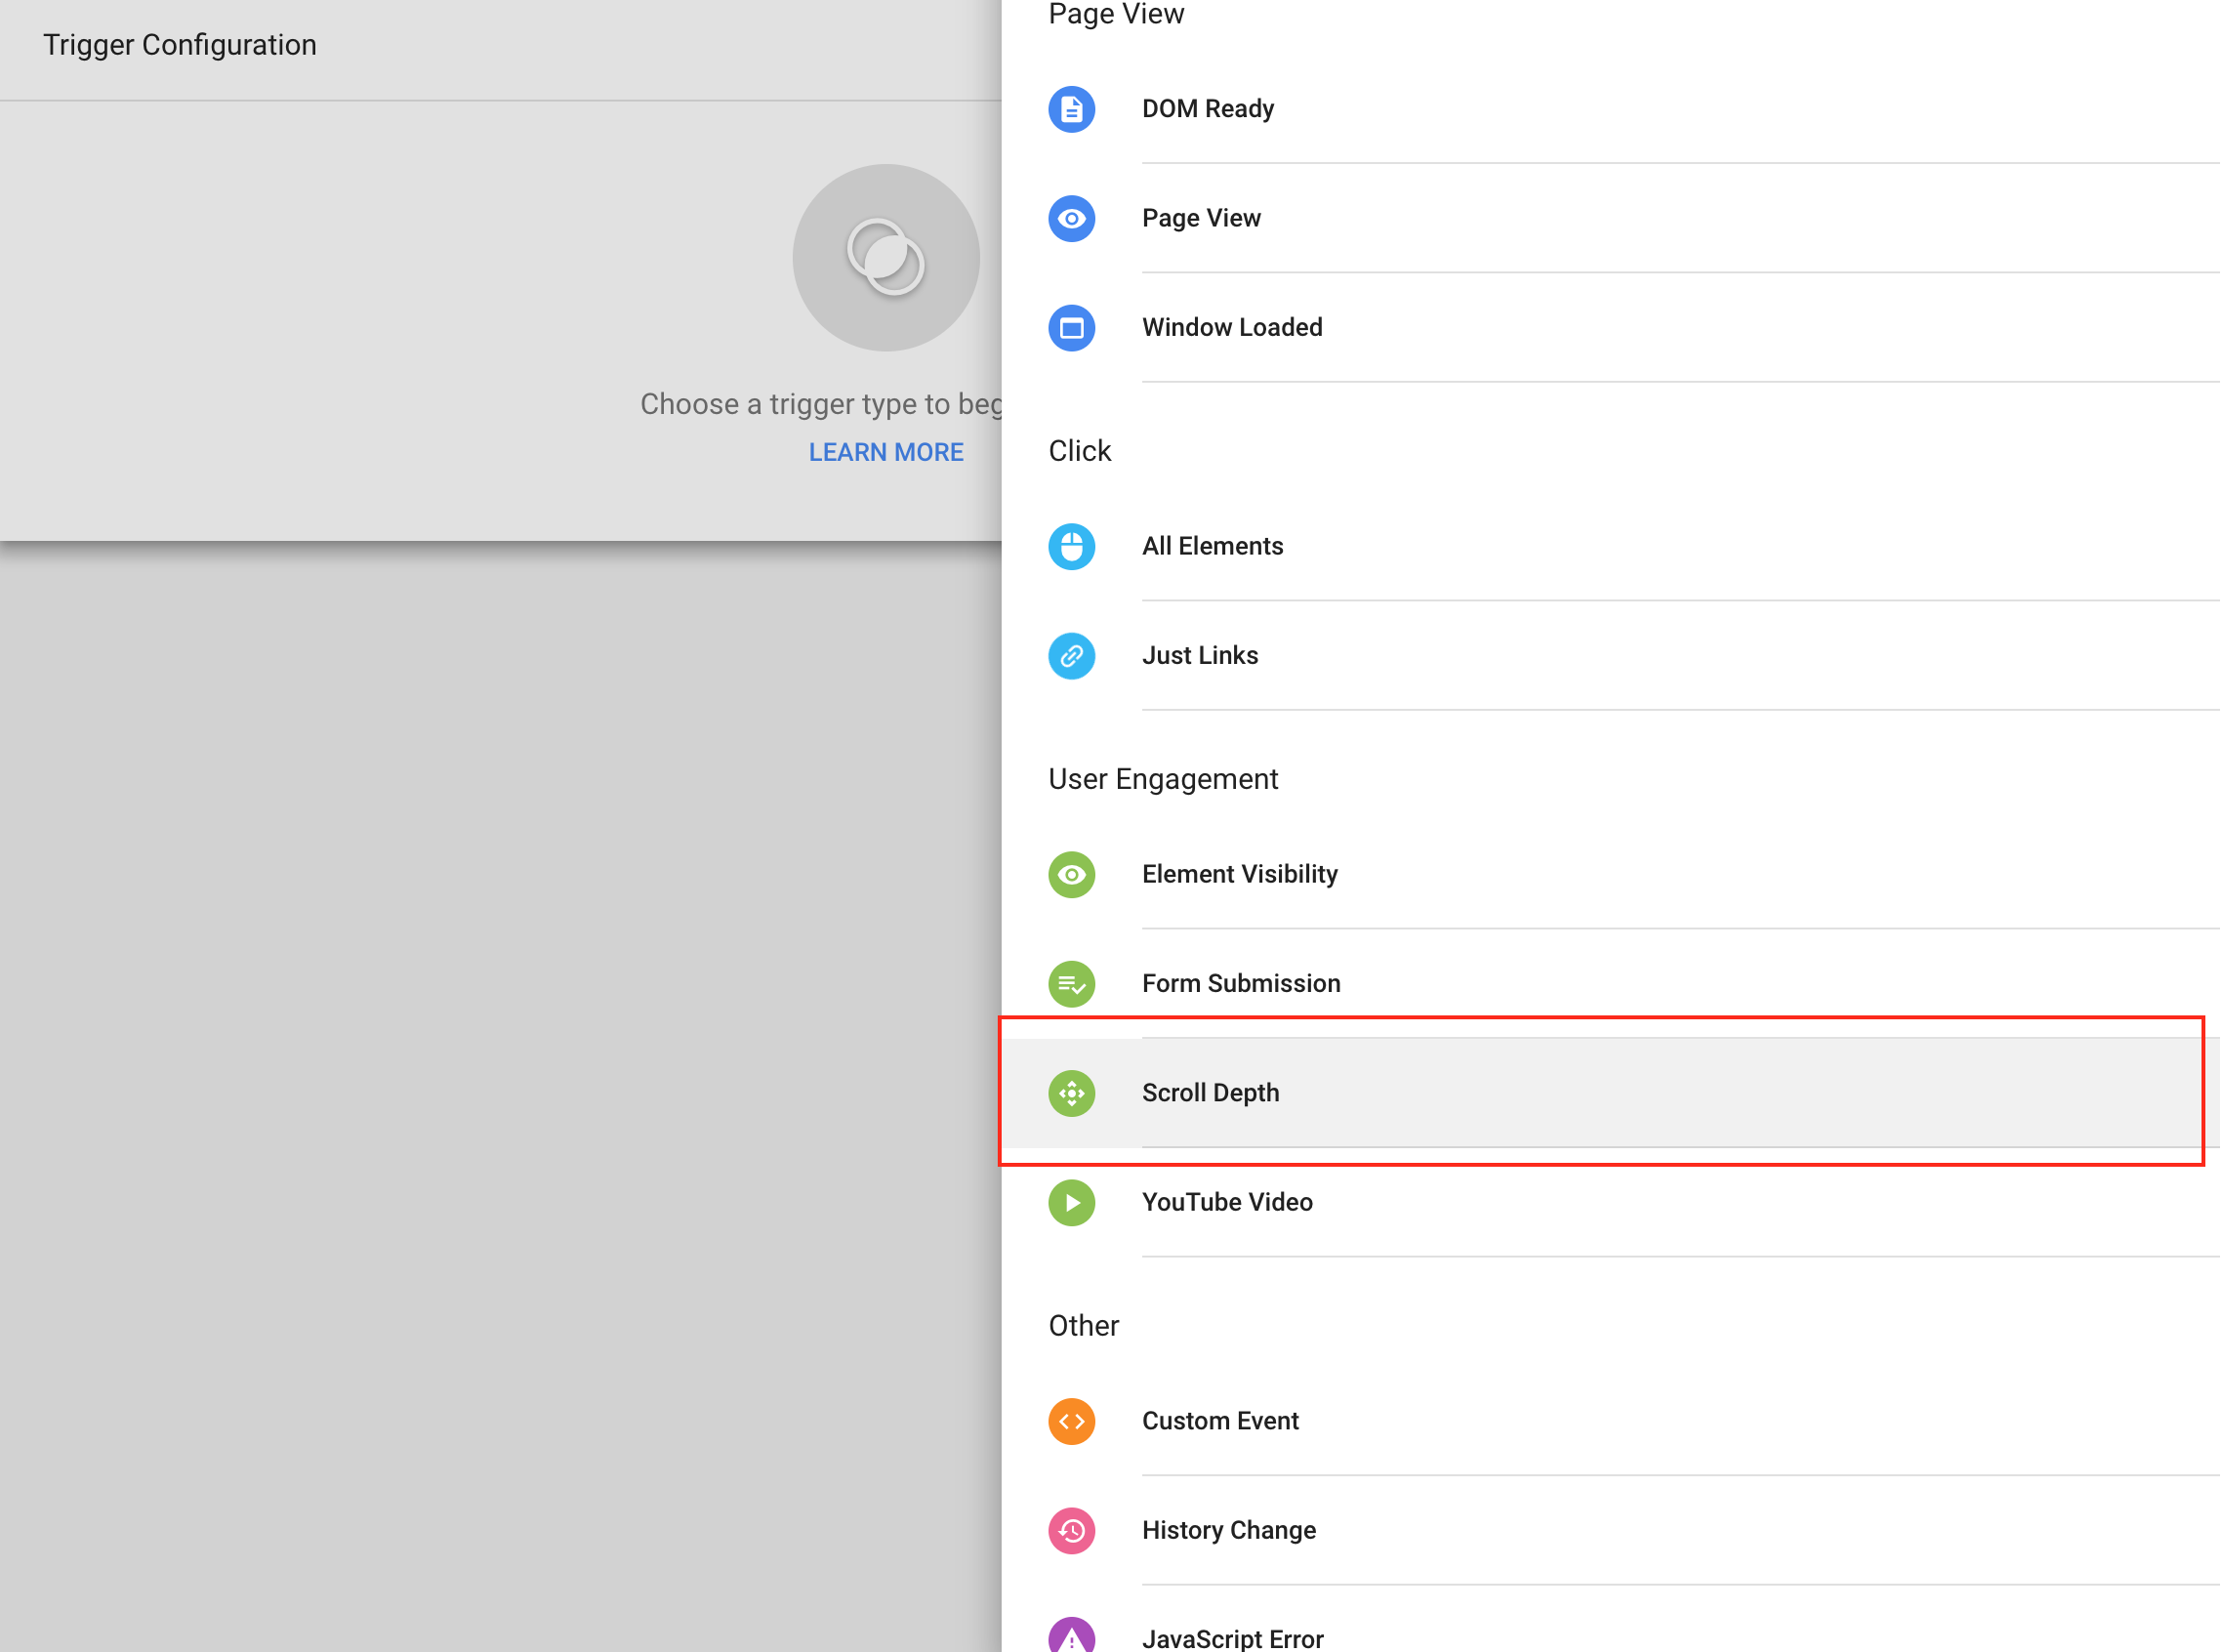
Step 2: Enable the Scroll Depth Trigger
In this step, you’ll enable the built in GTM scroll depth trigger that will help push the Google Analytics custom event data that you’ll configure in step 3 below.
In GTM > Your Workspace > Triggers > Add New Trigger > Select the “Scroll Depth” Trigger Type below:
This is where where the setup becomes subjective to your unique needs:
- Do you want to measure in percentage or pixels? (I use %)
- Based on your % or pixel selection, what thresholds do you want to set up as trigger points (e.g. the point in a user’s scroll on your site where you’d like this trigger to fire).
- Do you want vertical or horizontal scroll depth tracking? (majority of cases this will be vertical)
- What pages do you want this scroll depth trigger to fire on? (I fire on all*)
*In some cases you may want to limit this to content rich/blog pages only, however having this data on eCommerce home, category, or product pages can unlock potential insights like:
- Are paid search visitors engaging with my category pages and viewing a good amount of products before exiting?
- Are users of my product pages scrolling down to view my user generated content that I’m investing a lot of $ into?
- How does user engagement differ between mobile and desktop?
You get the picture…
Here are my settings:
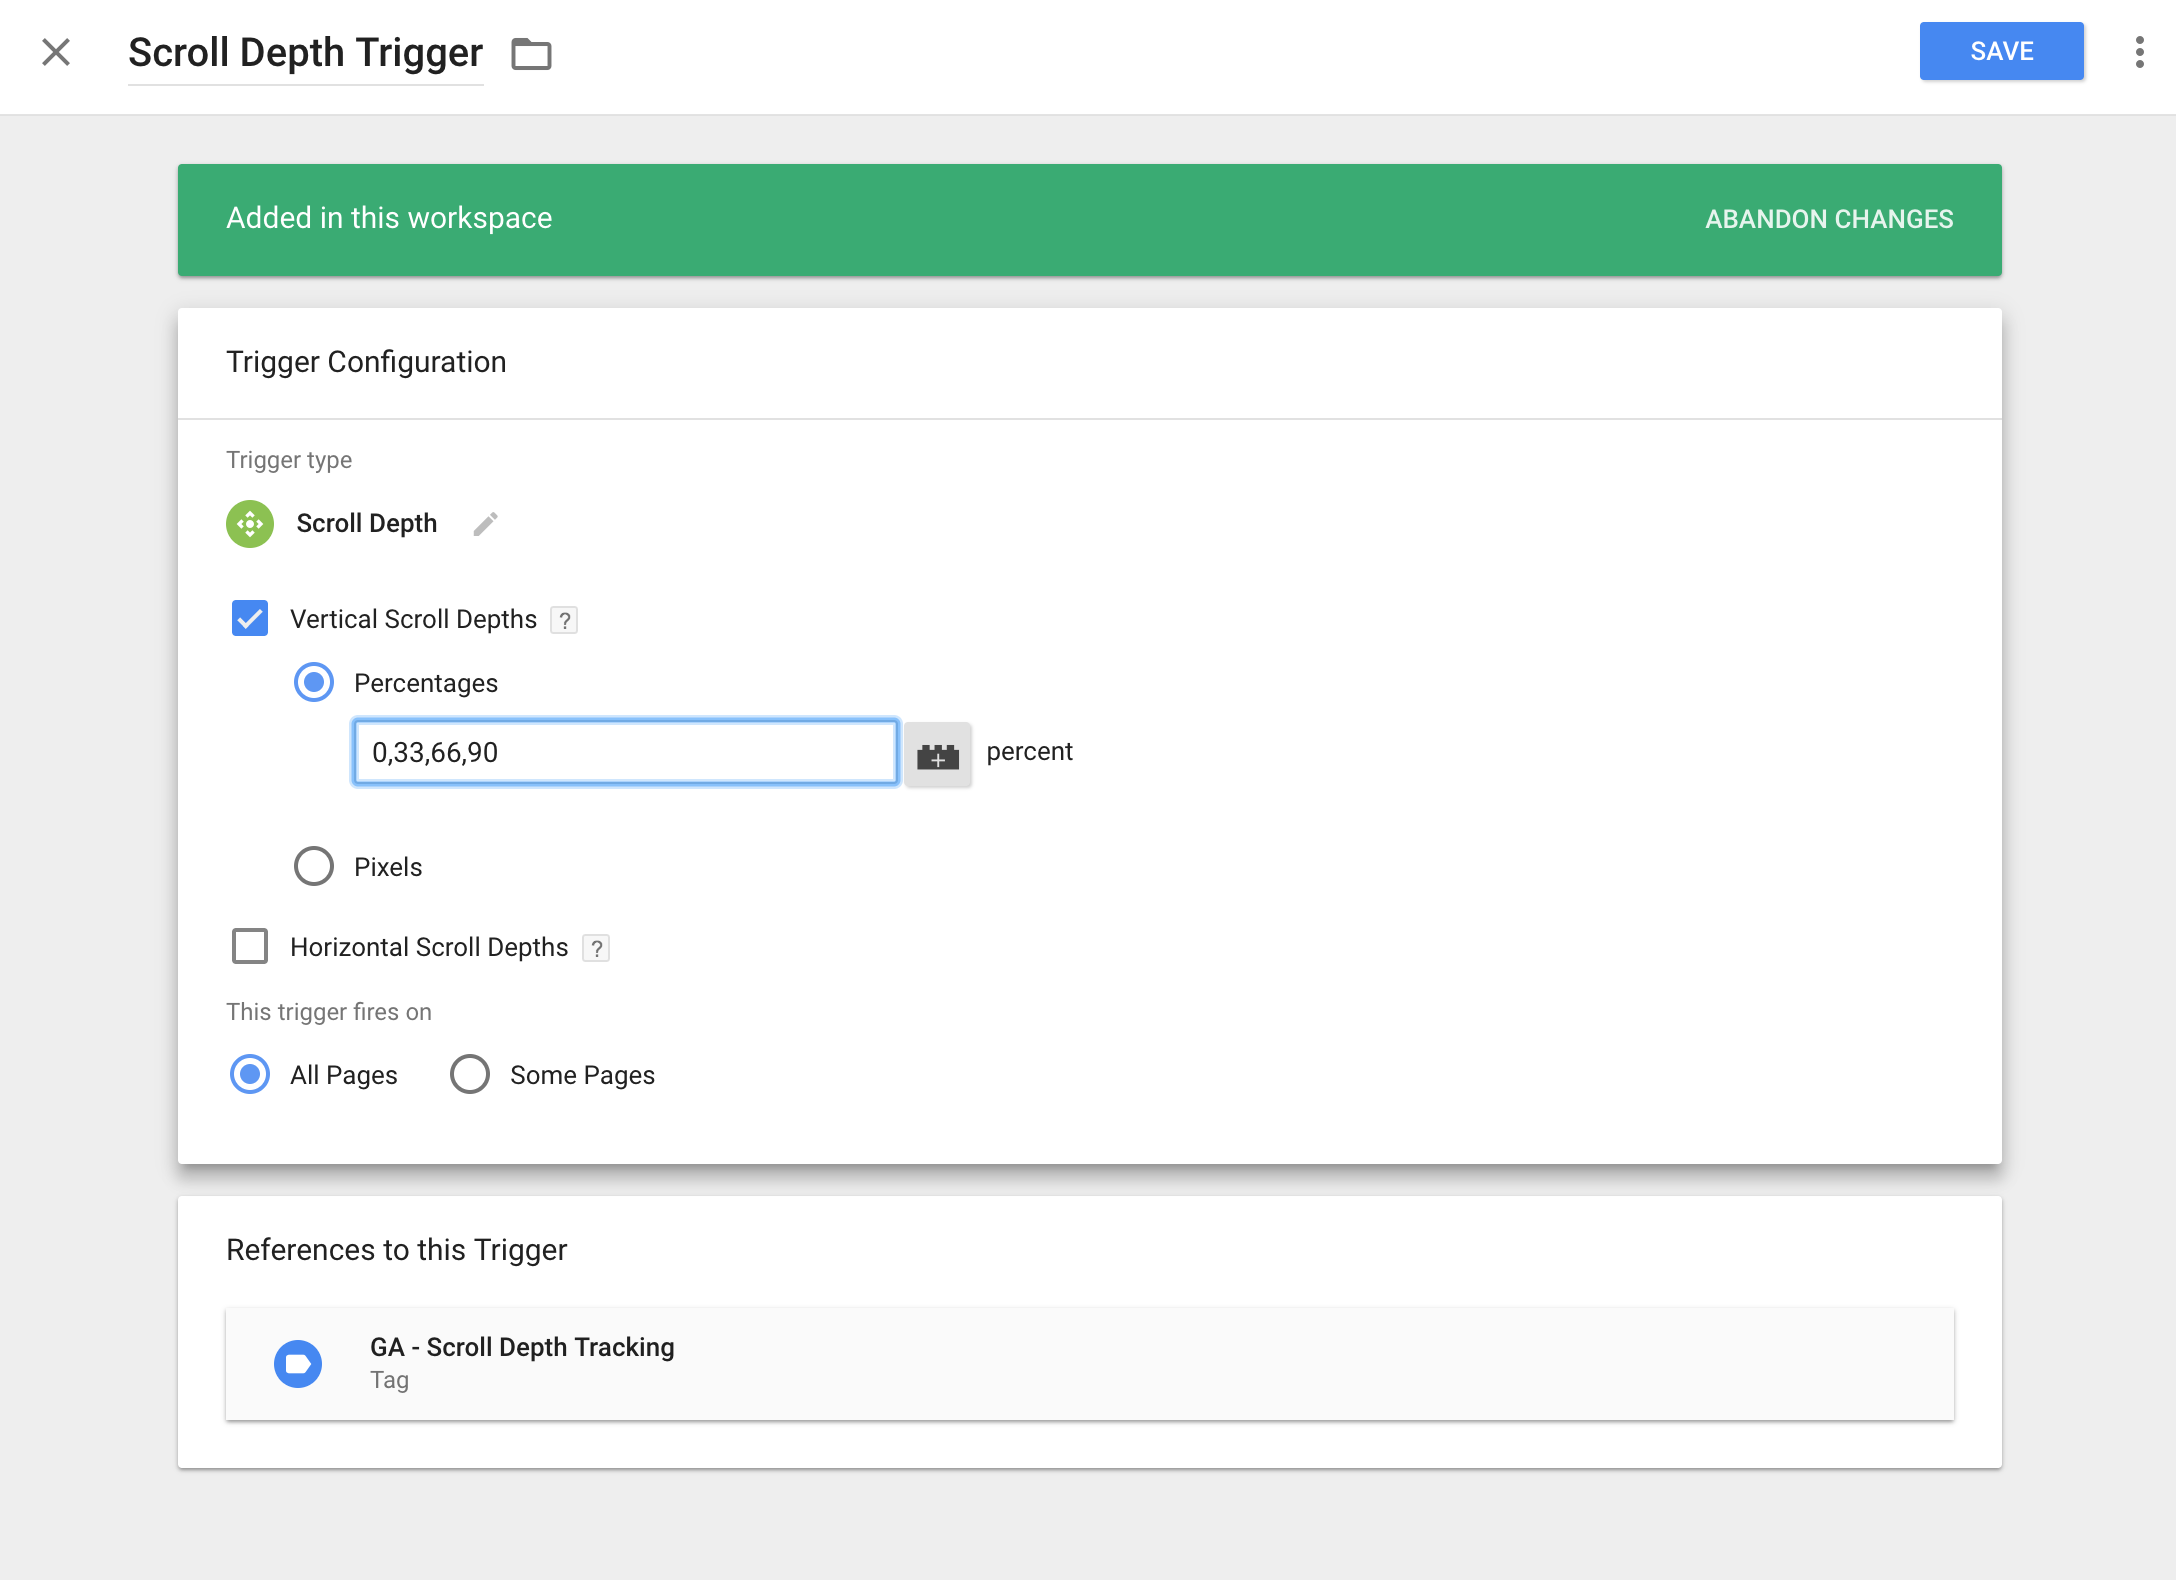
A reason for this example above (0, 33, 66, 90) vs the norm of 0, 25, 50, 75, 100 could be for a site that isn’t extremely long in length. So the difference in a user scrolling between the 25/50/75 scroll depth % is not significant (i.e. in most pages two of these would fire within a minimal user scroll).
Step 3: Setup your Custom Event Tag
Now you have your variables enabled and trigger created so the final step is pushing this new data into Google Analytics!
In GTM > Your Workspace > Tags > Add New Tag > Select a new Universal Analytics tag where we’ll set up the following details:
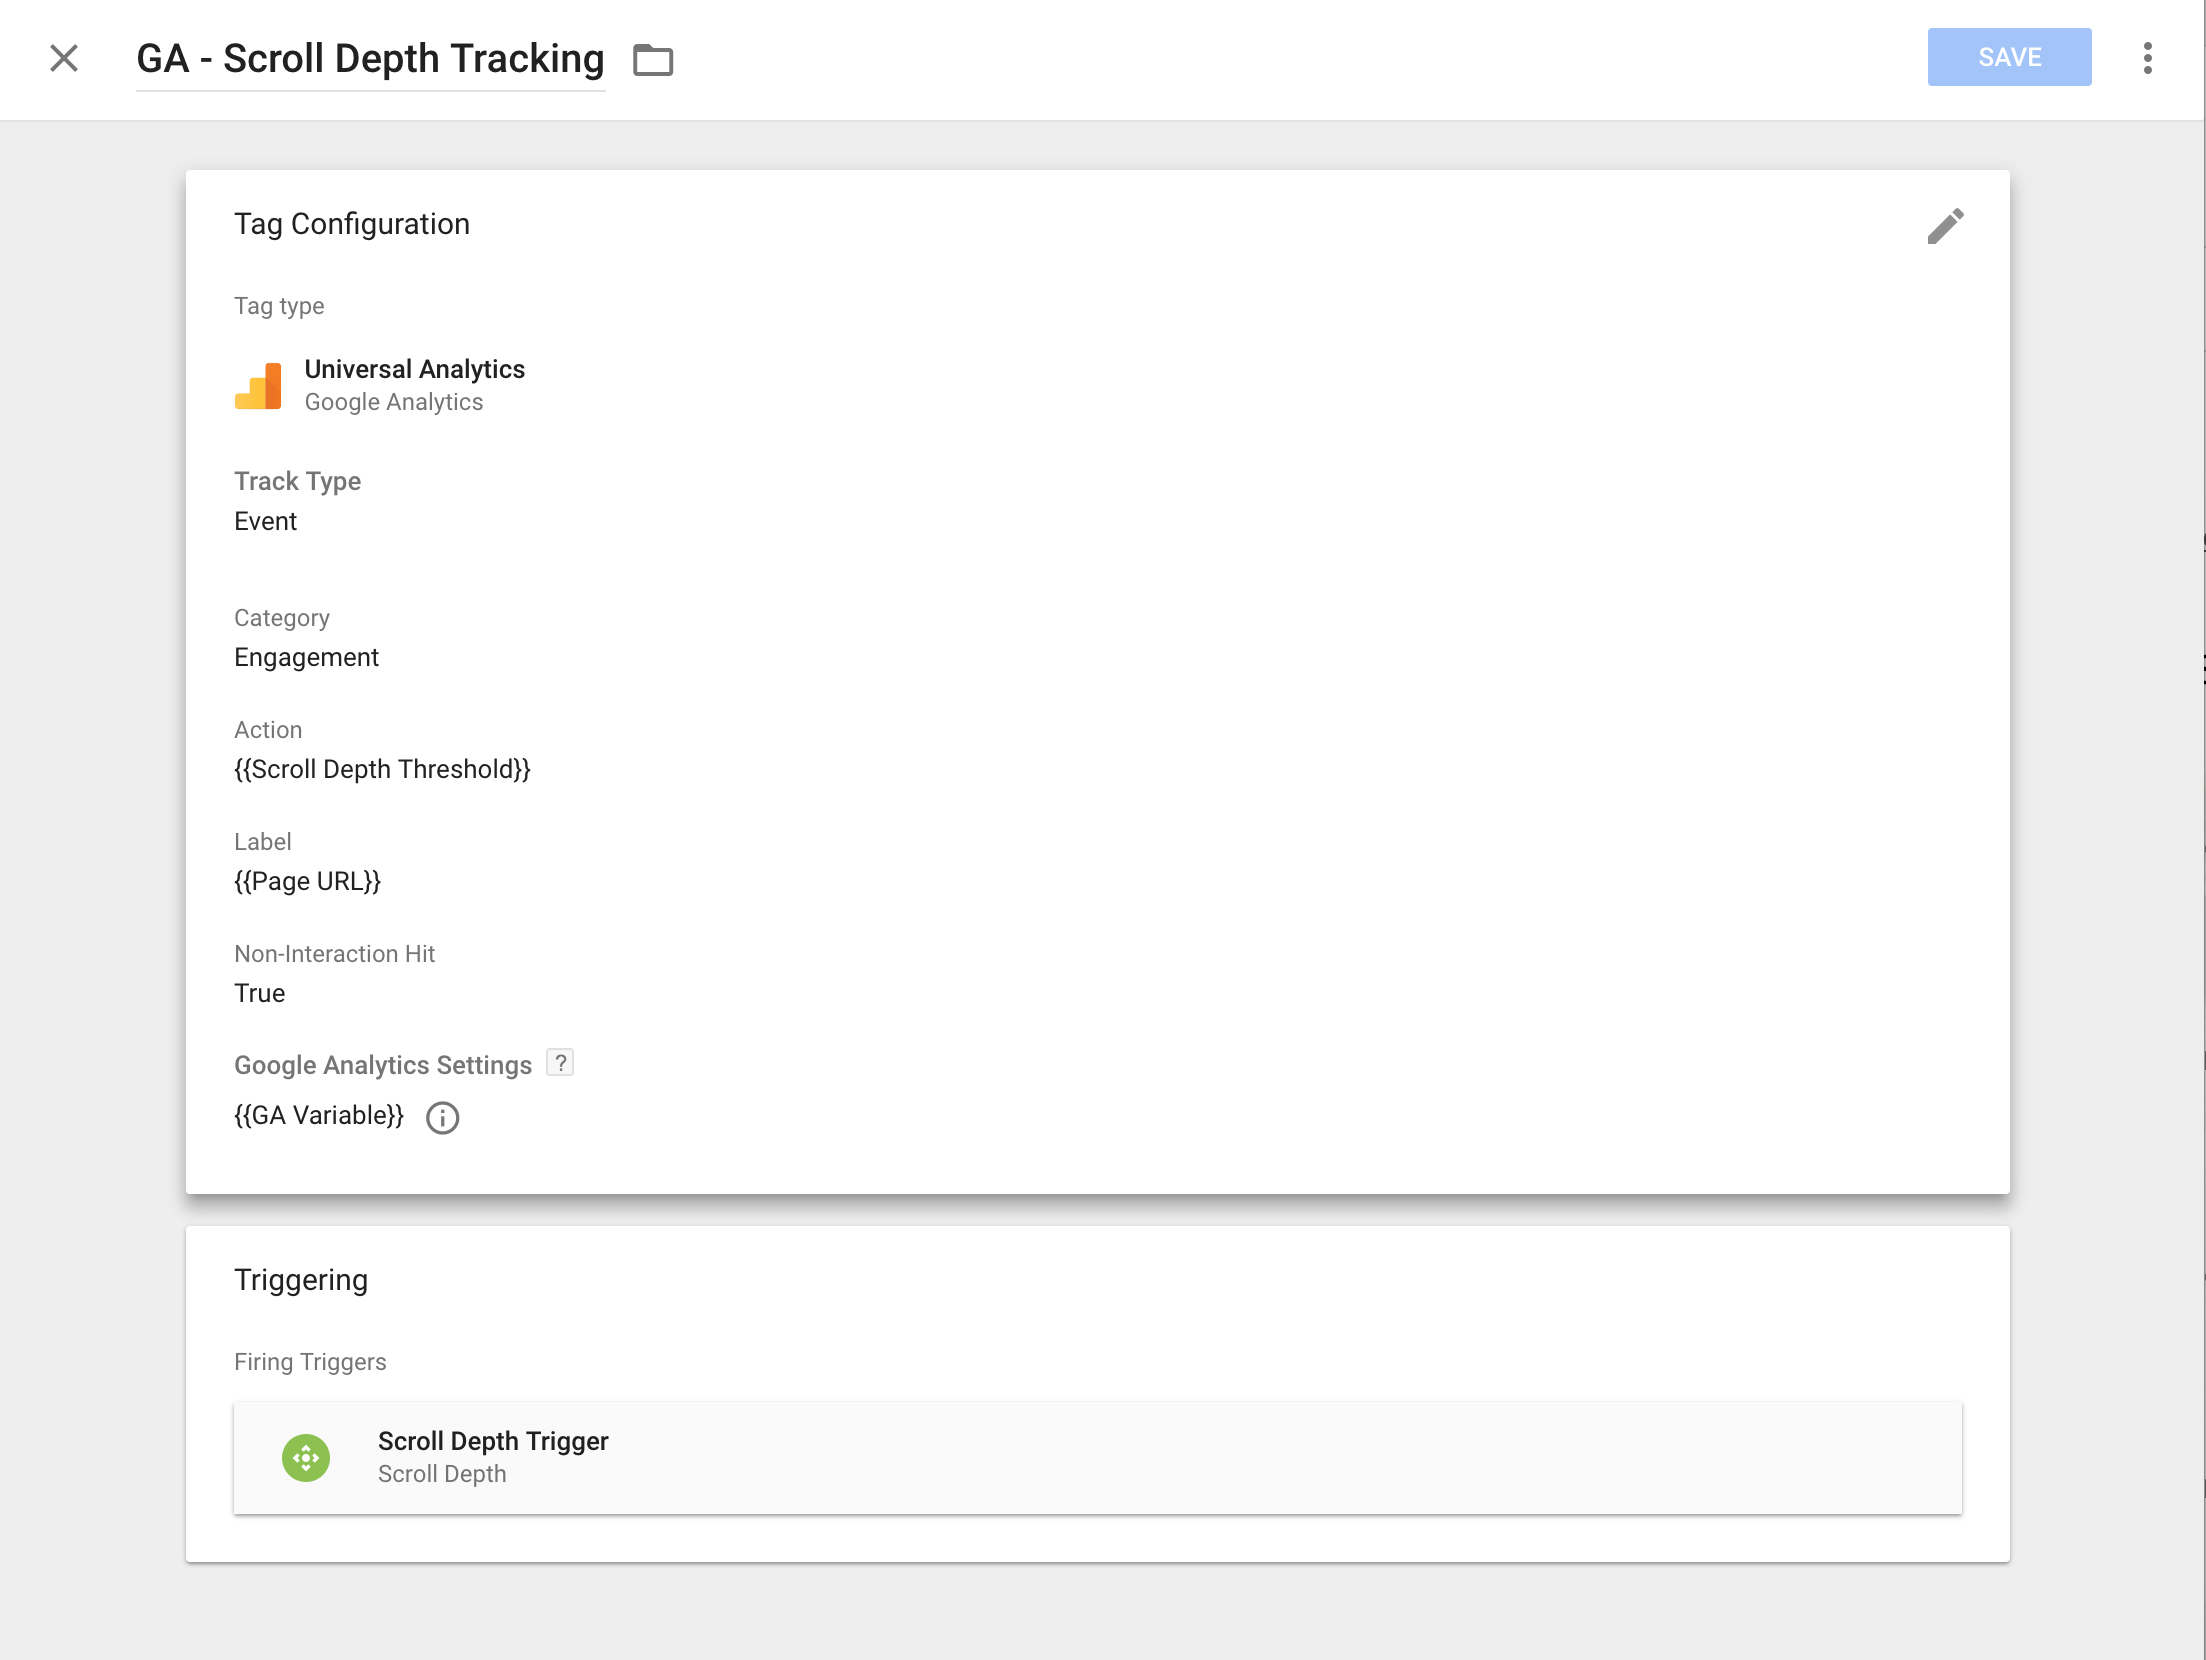
- Track Type: Event
- Category: I’m using Engagement here to help group similar Event Actions across other tags
- Action: I’ve selected one of the new GTM Scrolling dataLayer variables {{ Scroll Depth Threshold }} – which contains the numeric value of % values configured in step 2 above.
- Label: I’ve selected {{ Page URL } which is another native variable in GTM that records the page URL that a user is triggering this tag.
- Non-Interaction Hit: I choose to set this to “True” which means these custom event triggers will not count towards my bounce rate measurement.
Note that these selections above are highly subjective and can be modified to fit your own needs.
The last step is to select the Scroll Depth Trigger and save your tag!
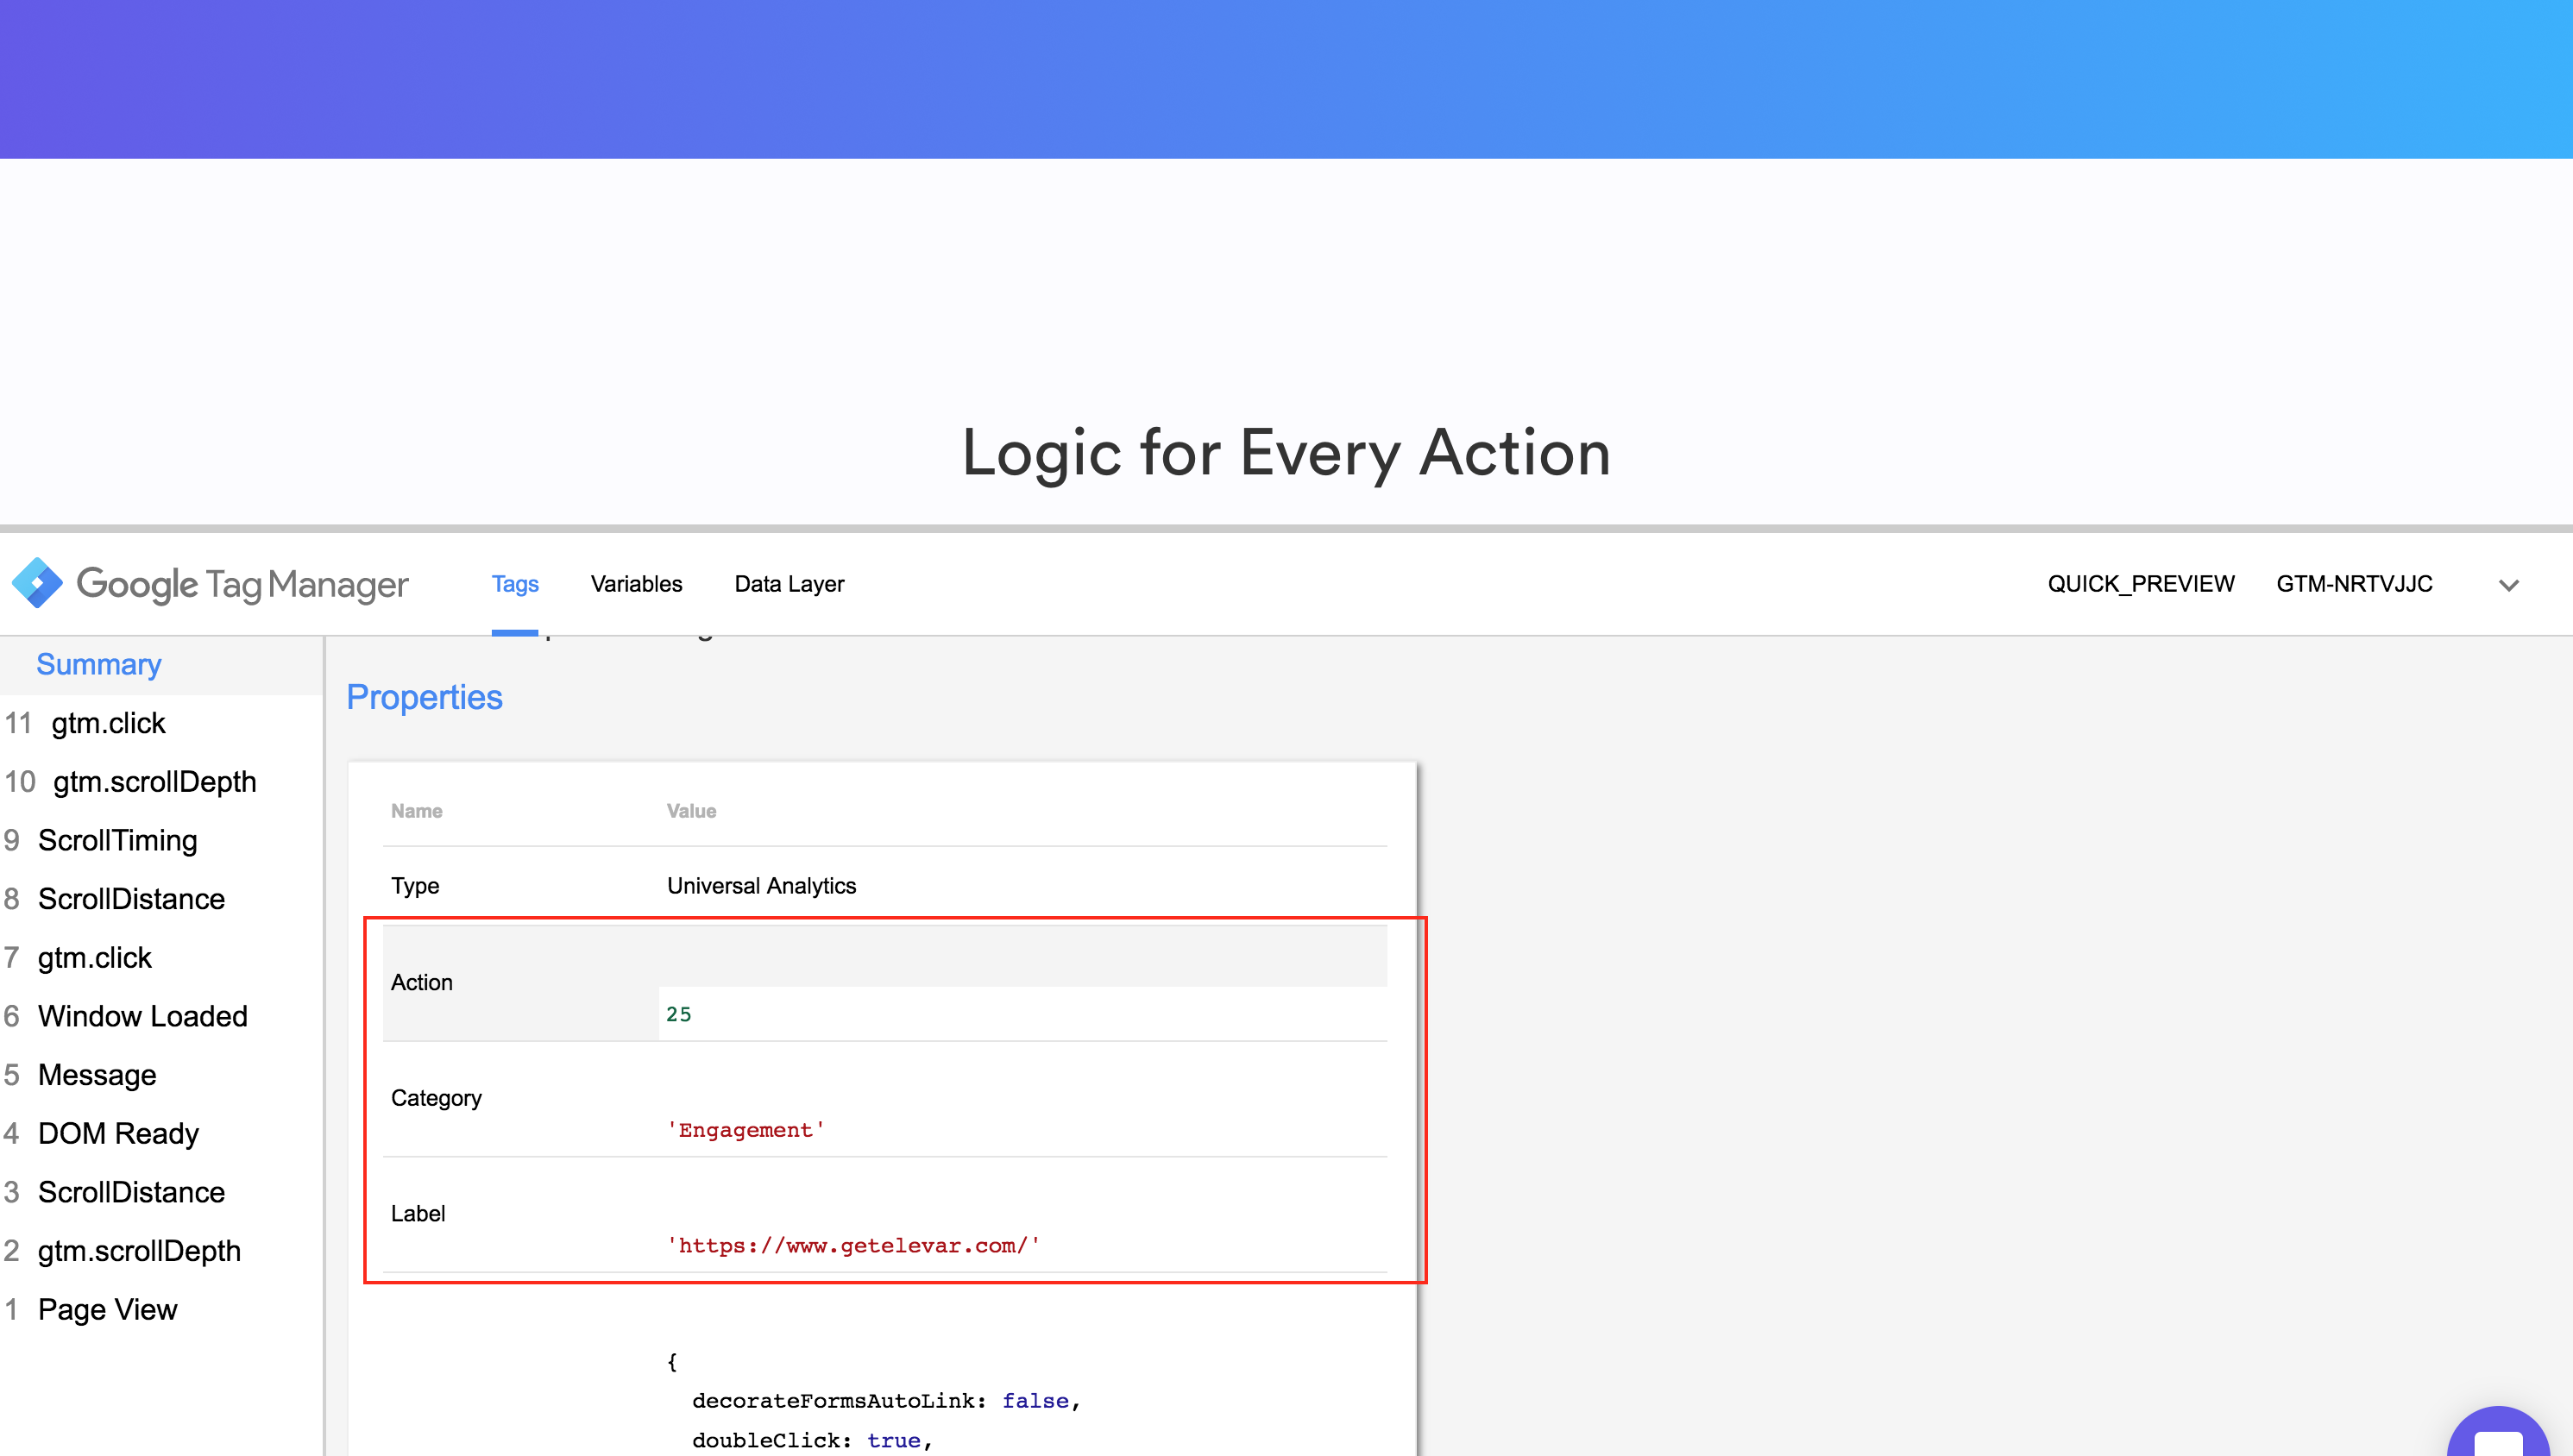
Step 4: Confirm this tag is working!
Configure your Preview mode within GTM, then visit your site, and begin scrolling :).
You should see your new tag from step 3 above firing multiple times if you scroll down your page:
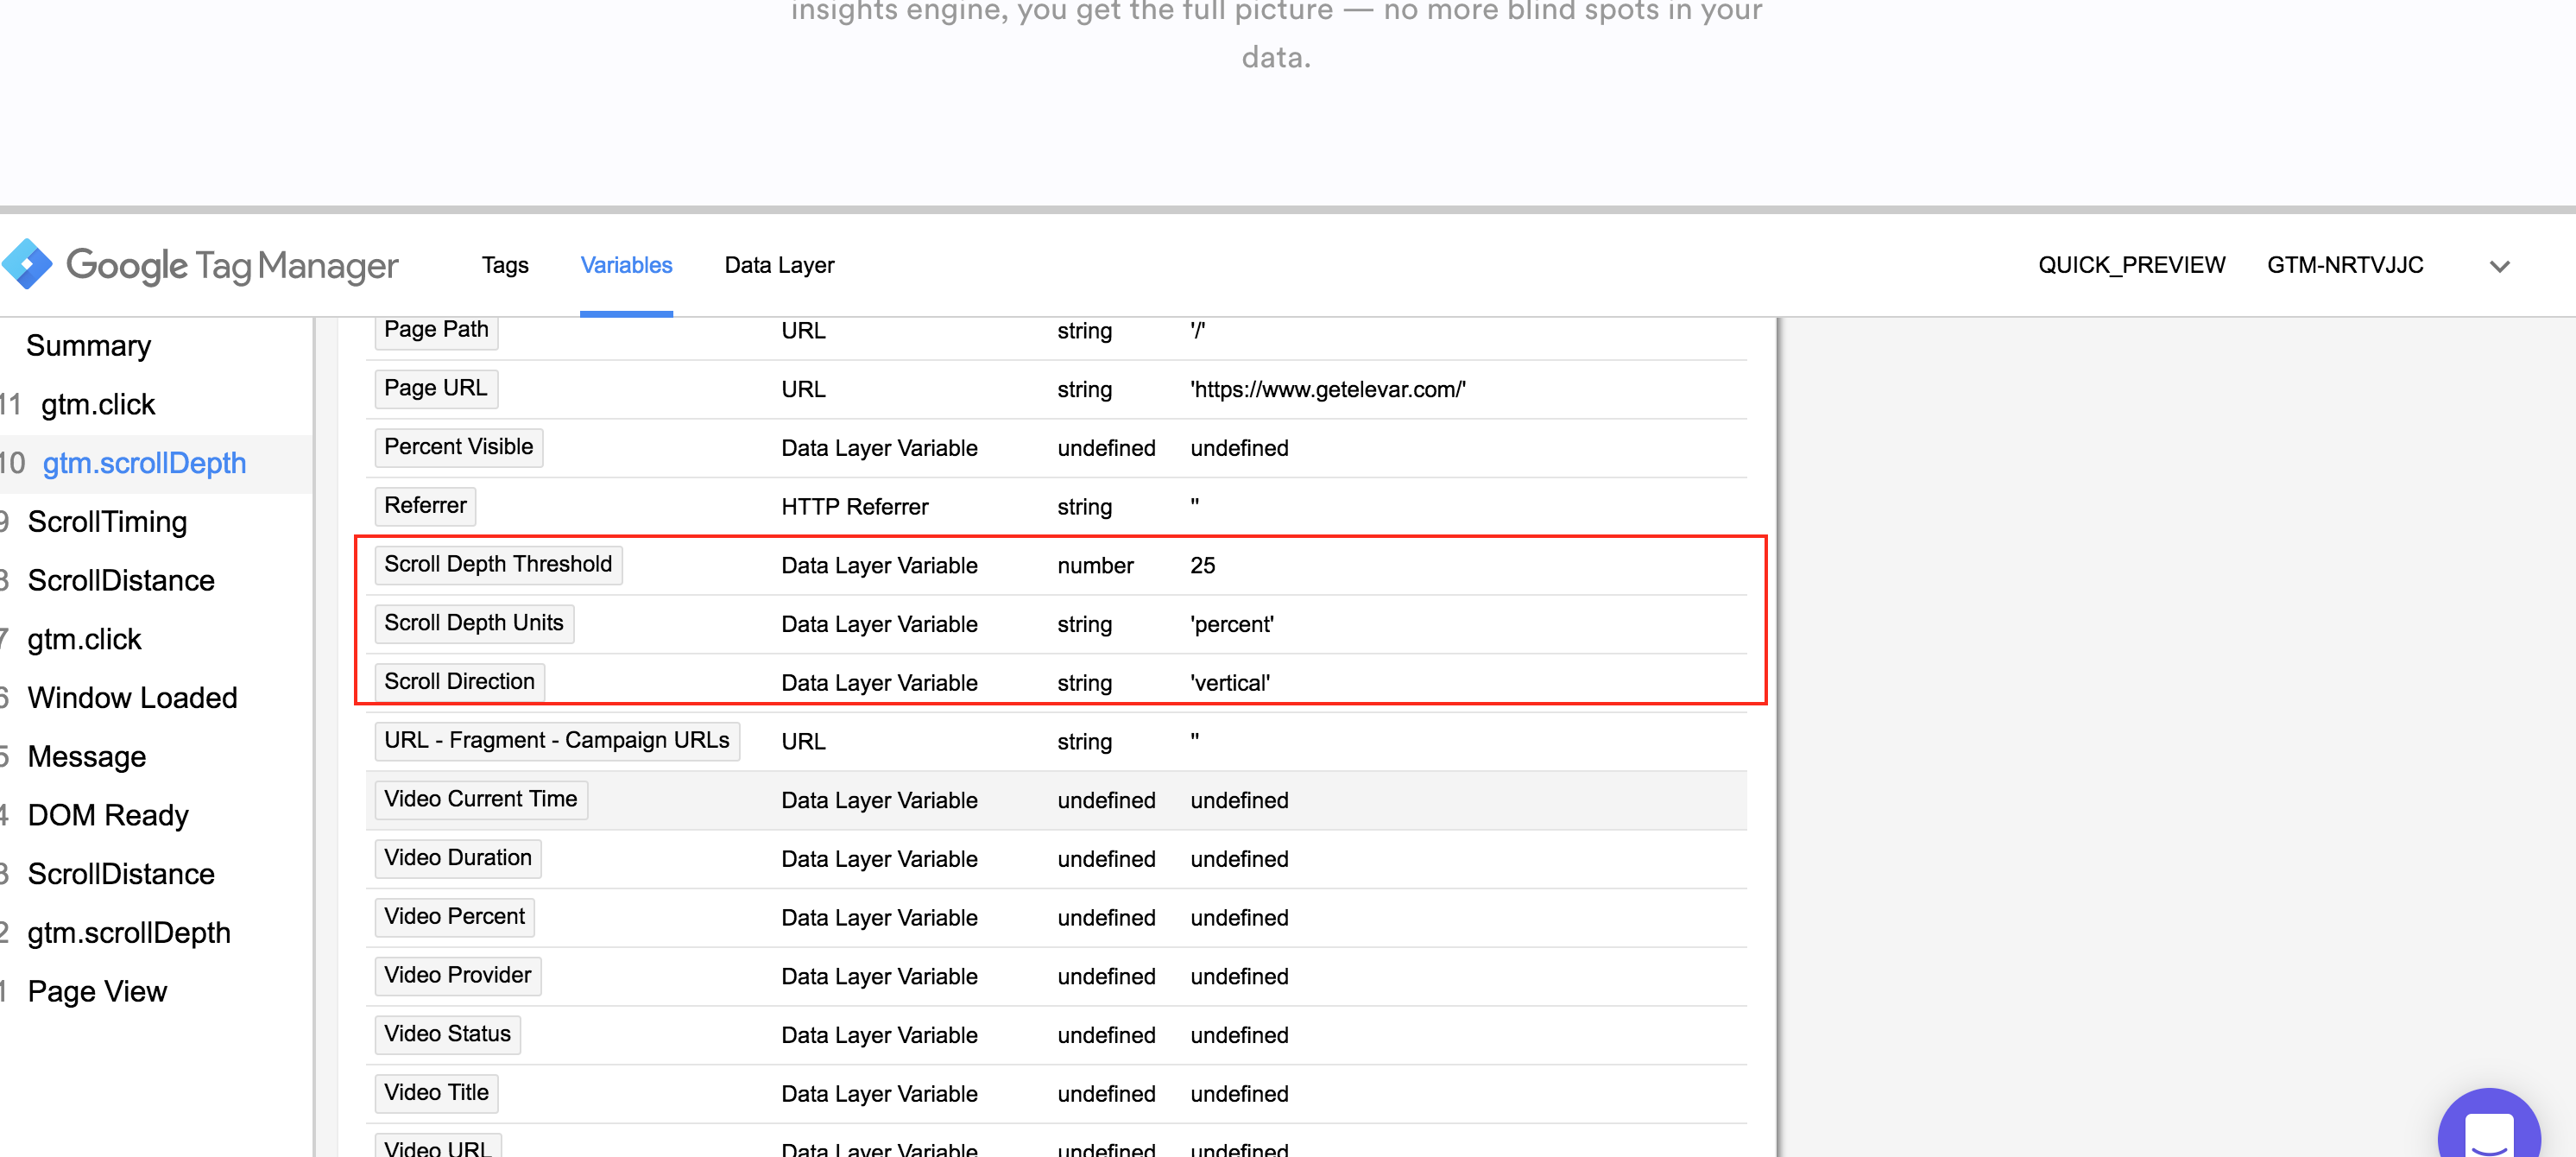
And if you click on the “gtm.scrollDepth” event and then view the variables tab, you’ll see these new fancy variables in action:
That’s it! Happy tagging :).
Here are a few more helpful tips you might like:

Hide UTM Parameters via GTM
See how to make brand friendly URLs loaded with campaign data.

Marketing Friendly Campaign URLs
Learn why tagging inbound URLs is so important for attribution & ROI analysis.