Improve Klaviyo Personalization with Custom Events from GTM
Send custom event and user data to your Klaviyo user properties with the help of GTM.
Brad Redding
Brad Redding is the Founder & CEO of Elevar. Specializing in analytics, tracking, GTM, and conversion optimization.
If you’re in eCommerce then you know the importance of email to your overall revenue.
But are you leveraging the actions that email subscribers are taking on your site to enrich your marketing automation and segmentation (to convert or re-convert them)?
More personalization == higher conversion rates!
This guide shows how to send custom behavior data from your website to Klaviyo (via GTM) in 6 simple steps:
- Implement Google Tag Manager (GTM) on your Shopify store
- Implement the global Klaviyo tracking script on your store
- Build a list of custom events that you want to attach to your customer metrics
- Build a list of custom properties that you want to append to your customer profile
- Create tags & triggers in GTM
- Publish and confirm in Klaviyo
Let’s get started!
Step 1: Implement GTM on Shopify
If you don’t already have GTM installed on your Shopify store then you can choose your own adventure on how to accomplish this!
- Use our free guide on how to implement the basic GTM script across the site, OR
- Install our GTM Suite from the Shopify app store which includes the complete dataLayer, pre-built tags etc
Once you’ve successfully implemented GTM on your site then you’re ready to move on!
Step 2: Implement Global Klaviyo Script
Chances are you have implemented the Klaviyo Shopify app which is the easiest/best way to accomplish this.
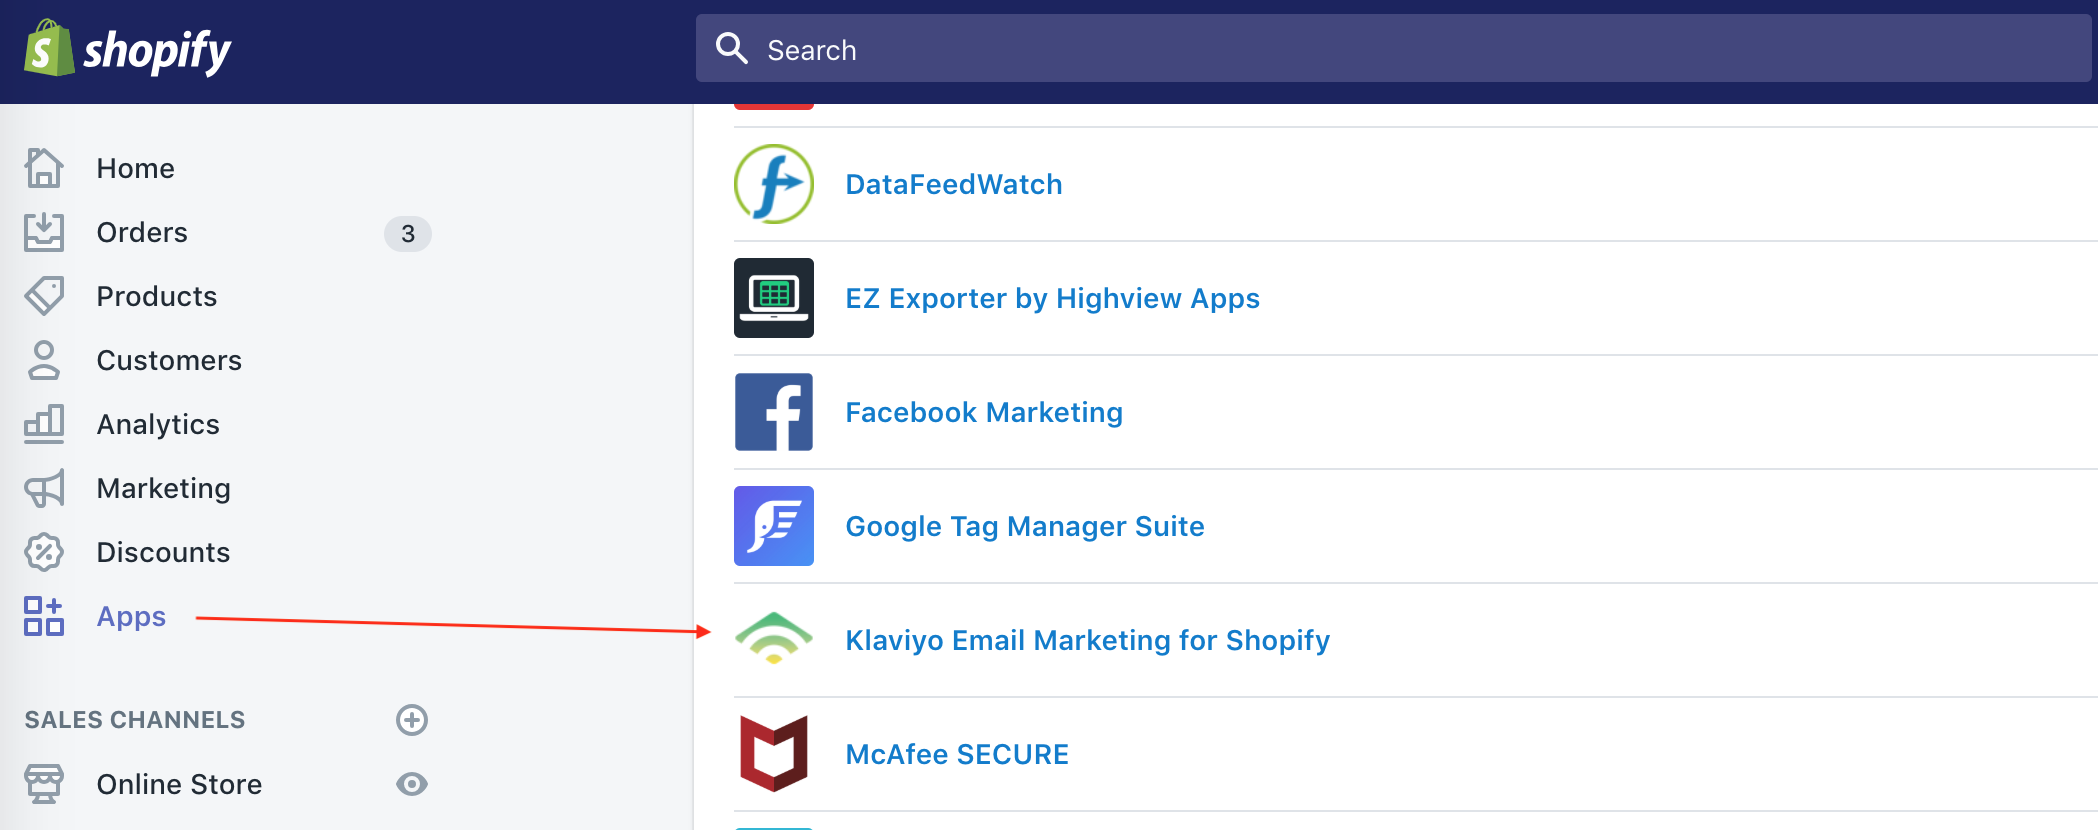
During your Klaviyo onboarding process you’ll be asked to install and connect your store through the Klaviyo setup wizard. Once you’ve completed this step you’re good to go!
Step 3: Build List of Custom Events
Now the fun part begins – you’ll want to come up with a list of key user interactions for your site.
The default events aka metrics that are tracked with the Shopify integration enabled are:
- Cancelled Order
- Checkout Started
- Fulfilled Order
- Ordered Product
- Placed Order
- Refunded Order
- Active on Site
- Viewed Product
- Subscribed to List
This leaves a lot of room for opportunity when building segments to use in your flows or campaigns.
Wouldn’t it be nice to track things like:
- Currency selected
- Heart/wishlist items added
- Category viewed
- Quiz starts/completions
- Videos watched
- Site search initiated
- Viewed blog post
- etc
When these events have been setup then you can begin building segments using one or more combinations of these metrics:
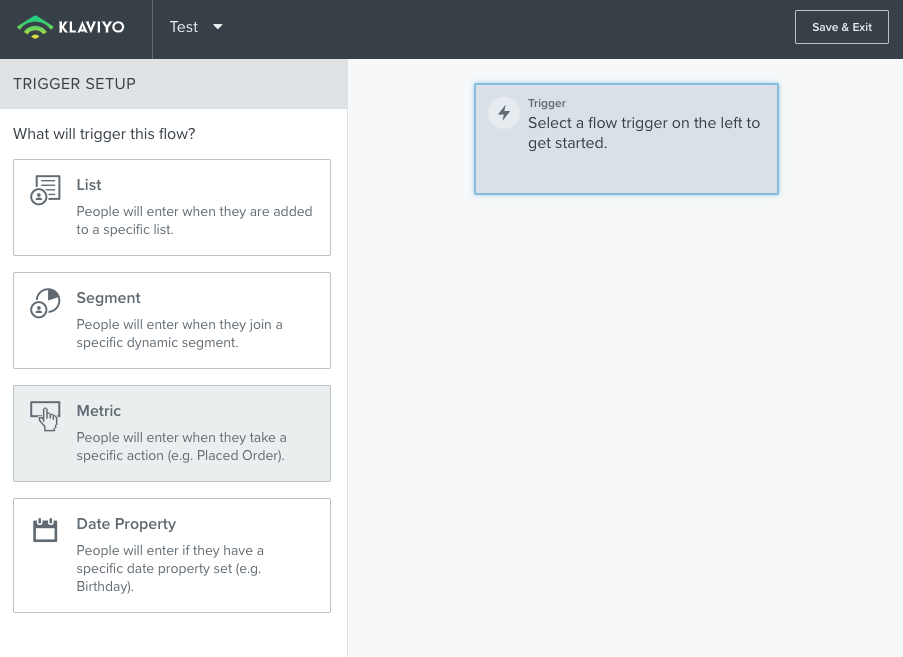
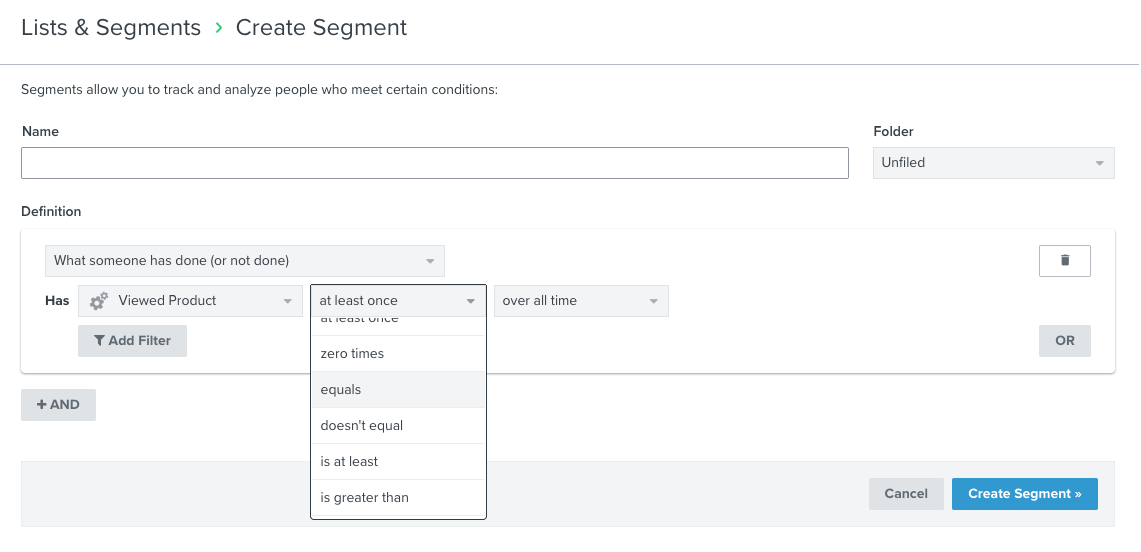 Or you can simply select the metric and assign as a trigger for a specific campaign:
Start with a few events that are important to your user experience.
What are you asking users to do on site to try and get them closer to converting?
These are the events that you want to push to Klaviyo to use in your email flows.
Step 4: Build List of Custom Properties
The close cousin to custom metrics are custom properties. These are similar to events but instead of acting like metrics (i.e. user watched 5 videos) they extend your customer profile.
For example here are my own custom properties for my account on a website:
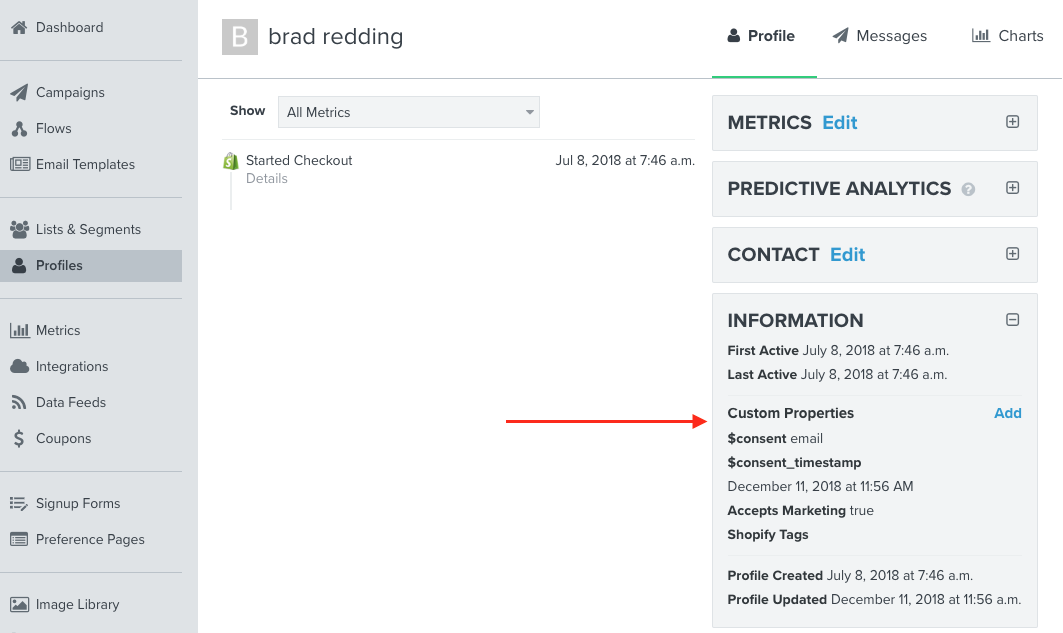
I’d consider these pretty vanilla.
It might be good to see things like:
- Shirt size preference (if you sell apparel)
- Colors purchased
- If you have a quiz or any custom forms on site, answers to these questions
- Sport preference (if you sell gear for multiple sports)
These are all possible by leveraging GTM to send this data from your store to Klaviyo!
Step 5: Create Tags & Triggers in GTM
For the purpose of this guide I’m going to show how to create the following:
Metrics: Watched Video
Let’s assume you want to fire an event when someone starts a brand video/product video so you can move them into the next stage of your pre-purchase nurture funnel.
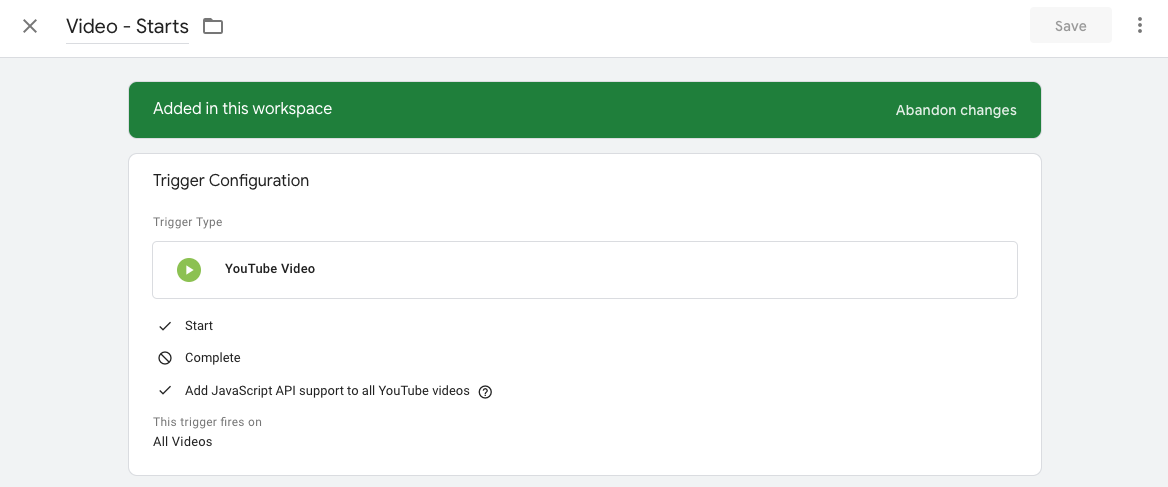
First you need to create a trigger for the video view (or you can import our pre-built GTM container for video tracking here).
Then you have to create the tag that sends the data to Klaviyo.
If you don’t have triggers created yet for video views then create a trigger that looks something like this:
Then create a tag that contains this custom Klaviyo javascript event push:
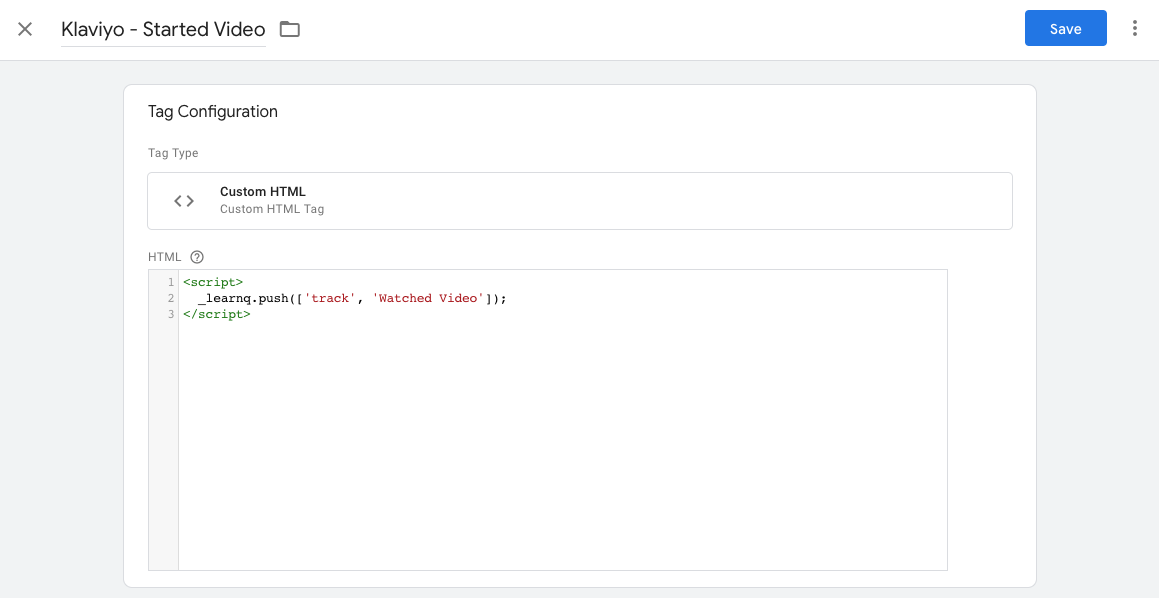
<script>
_learnq.push(['track', 'Watched Video']);
</script>
This ^ is the code snippet that pushes the metric to Klaviyo and attaches it to the user.
Read more about this in Klaviyo’s docs here.
Another alternative to watching videos is sending the name of a collection pageview. You can create a global category event view and dynamically send the collection name to Klaviyo.
You’d have to implement the following:
Create a trigger that includes collections in the URL AND excludes products:

Update the script in the tag to be something like the following:
<script>
var _learnq = _learnq || [];
_learnq.push(['track', 'Category View', {
'CategoryName' : {{Page Path}}
}]);
</script>
The {{Page Path}} is a native variable in GTM but you could also use Category Name if you’re using our GTM App.
Once you’ve built your list of tags and triggers for each custom metric then you’re ready to move on to your properties.
Properties:
Now it’s time to attach property data to the user.
Let’s use an example of a quiz where you want to attach quiz answers to a user.
Klaviyo allows you to identify users and attach custom properties when sending custom event hits from your website to your Klaviyo account (read more here).
You’ll need to do a few things here:
- Ensure you have the proper data layer variables in place that contain the quiz question and answers. This can be done through your theme or by creating custom DOM element variables
- Create a trigger when the user clicks “enter” on one of the quiz steps
- Create a tag with this property and event data that gets sent to Klaviyo
Here is what the tag looks like:
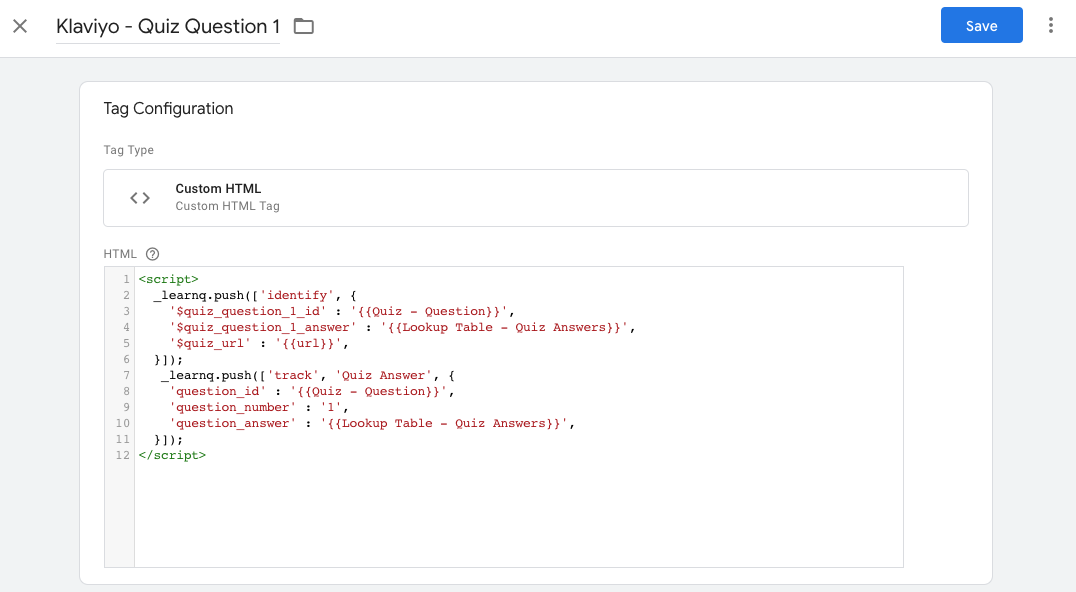
And here is the code:
<script>
_learnq.push(['identify', {
'$quiz_question_1_id' : '{{Quiz - Question}}',
'$quiz_question_1_answer' : '{{Lookup Table - Quiz Answers}}',
'$quiz_url' : '{{url}}',
}]);
_learnq.push(['track', 'Quiz Answer', {
'question_id' : '{{Quiz - Question}}',
'question_number' : '1',
'question_answer' : '{{Lookup Table - Quiz Answers}}',
}]);
</script>
Keep in mind that the {{ }} variables shown above are specific to this GTM implementation. These will need to be replaced with your own variables.
Once this is deployed/published then the user property data is sent to Klaviyo through the ‘identify’ bolded section.
You can add one or more properties in a single GTM tag hit which is helpful if you want send multiple data points in the same event hit.
If these change at any time in the future for a user then they will update on the user’s property:
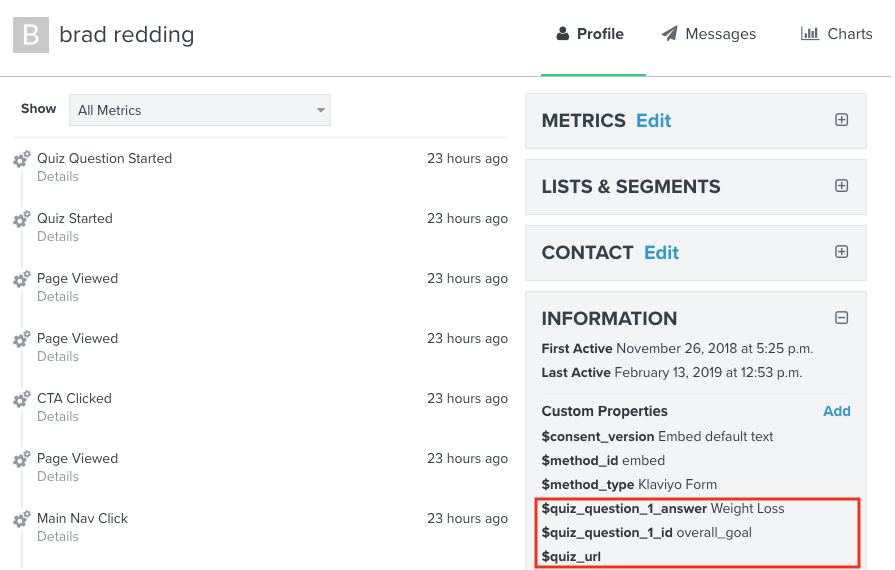
As you can see in the image above I have “Weight Loss” as the answer to my quiz question of my overall health goal.
Pretty cool!
Step 6: Confirm in Klaviyo => Publish GTM
Before publishing your new container updates, you can put your GTM into preview mode and test that everything is working properly.
You’ll want to trigger a few of your events on your site by watching a video (if this is one of your metrics), starting a quiz, etc.
The Activity Feed in Klaviyo updates pretty much in real time so you should see these events firing:
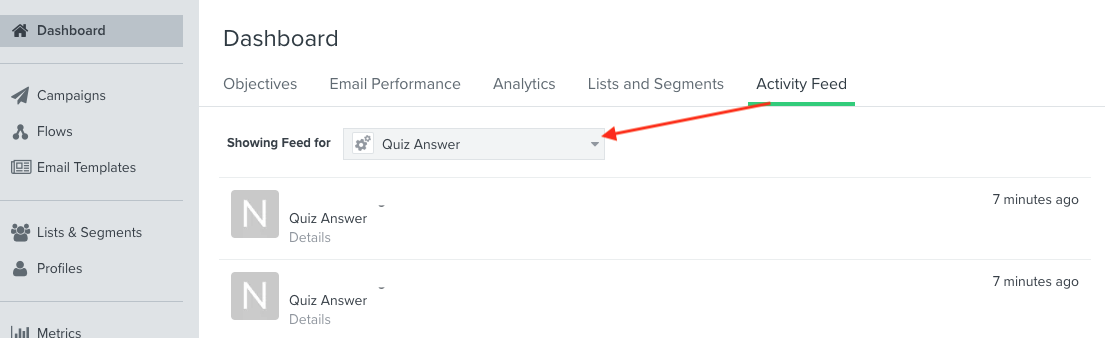
If all is good then publish away and start building your segments!
What ideas do you have on custom events or properties? Leave them in the comments below!

Leave a Reply