How To Implement Elevar’s Fully Managed Server-Side Tracking

20 minutes
Difficulty

Get your hands dirty with this lesson! You’ll learn the step-by-step process of how to implement server-side tracking on your […]

Brad Redding

Brad Redding is the Founder & CEO of Elevar. Specializing in analytics, tracking, GTM, and conversion optimization.

Get your hands dirty with this lesson! You’ll learn the step-by-step process of how to implement server-side tracking on your Shopify store utilizing Elevar’s fully managed server-side solution.

The setup only takes a few minutes and everything can be configured directly from your Elevar dashboard.

Server-Side Tracking Lessons:

Overview

In this lesson, you will learn how to get Elevar’s Fully Managed server-side tracking up and running for your store.

This will include:

  • Connecting Data Sources
  • Connecting Destinations
  • Going Live

Follow along in this complete video installation walk-through each step below.

Sources

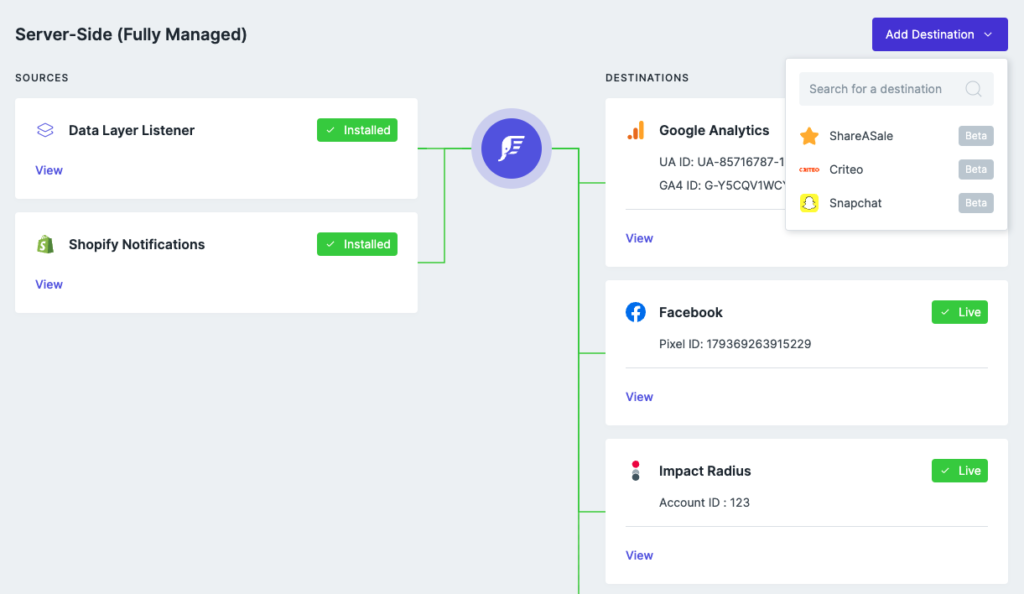
Sources provide the data that your server-side destinations require (e.g. Facebook Conversion API) .

Currently, we support the following sources of data:

Data Layer Listener

Once you have Elevar’s Data Layer live on your website then this translates shopper behavior (i.e. product views, add to cart actions) into a data structure that tags in GTM can utilize.

Elevar’s Data Layer Listener also leverages these events to route data in a 1st party context from your primary Shopify domain (i.e. yourdomain.com/elevar/*) to Elevar. This is a powerful way to capture data that is not available via webhooks.

Your steps here are:

  1. Install data layer listener on checkout for non-Plus stores (Plus stores this is automated)
  2. Install data layer listener on your theme.

install dll


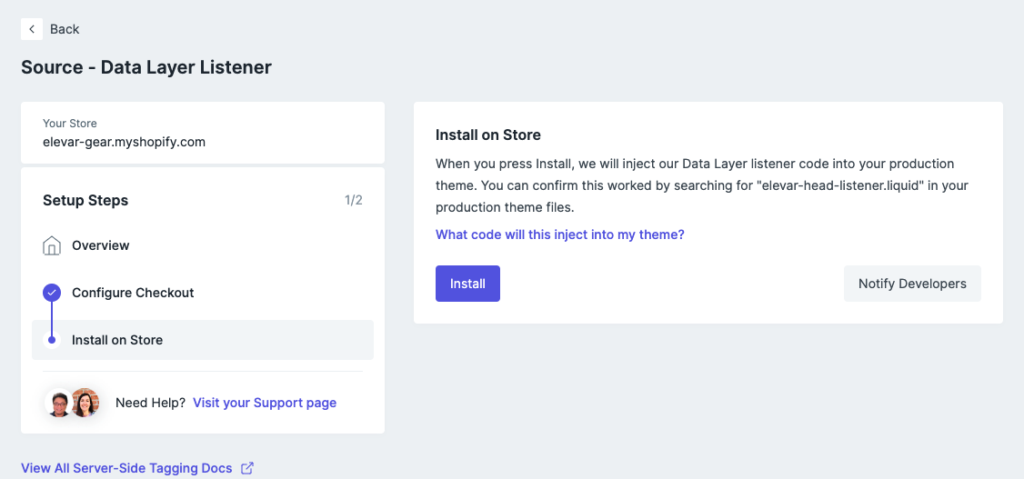
This will create the snippet shown below and inject into theme.liquid and checkout.liquid (for Plus stores).


Screen Shot 2021-12-01 at 1.29.12 PM


If you have development team that uses Github please be sure this change is checked into version control.

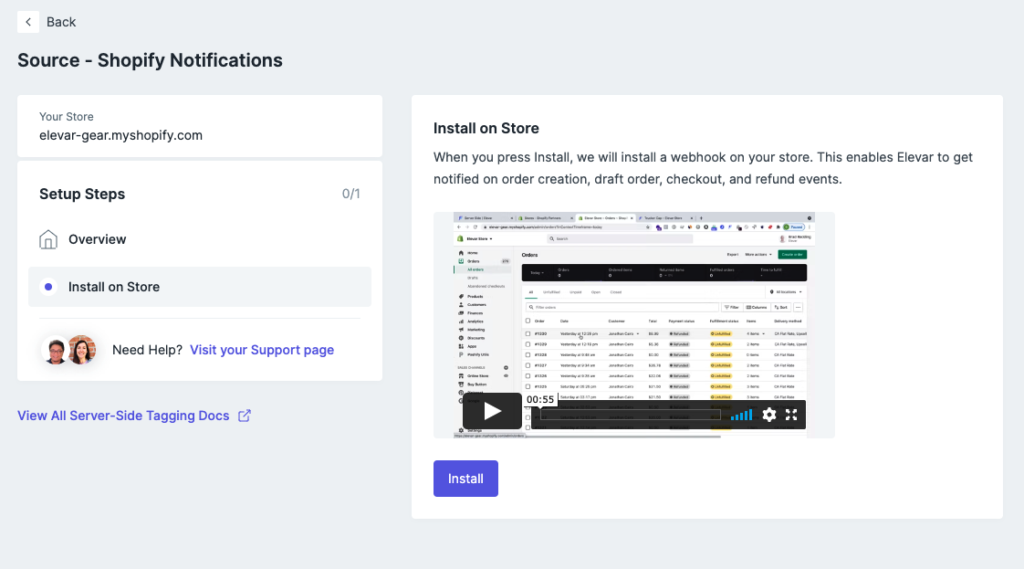
Shopify Notifications (aka Webhook)

When configuring this data source, Elevar installs a webhook on your store that listens for specific events like order creation, checkout creation, etc.


install webhook


For example, when an order is placed, Shopify will essentially say “Hey Elevar, I have a new order for this store” and Elevar fetches the order parameters needed for your integrations.

This moves all order processing out of the browser to maximize accuracy.

One big benefit to Shopify Notifications data sources is that it allows access to all of your orders not just “Online Store” orders so you can send orders from any channel to your chosen destinations.

This helps replace conversions that happen with subscriptions, TikTok/Facebook Shop, Shop Pay, international (Global-E, etc), among others.

There is one dependency to maximize the value of webhooks.

Our data layer has a feature called “Order Notes” that does the dirty work of storing various attribution data (like UTMs, fbclid, gclid, etc) on the order that improves the accuracy of your server-side destinations.


Screen Shot 2021-11-04 at 6.04.07 AM


You’ll want to leave this enabled in your Data Layer event settings, otherwise your destinations may be missing critical data used in attribution.

Destinations

Server-Side Destinations are where you want to send your data. These are typically synonymous with your marketing pixel integrations you’re used to like Facebook, Google Ads, Google Analytics, TikTok, etc.

Our current server-side destinations supported include channels like Facebook, TikTok, Snapchat, Criteo, Google Analytics, and more.

You can add new destinations right from your dashboard:


add new destination


And here’s an example of Facebook CAPI options:


facebook capi setup


You have the ability to customize:

  • Events included
  • Consent mode settings
  • Product and transaction identifiers
  • Channels you want to send or block to each destination
  • Subscription settings
  • And more advanced settings

Interesting in digging into channel specific guides?

Find the channel you’re looking for in our Tracking Integrations catalog.

Channel Accuracy Monitoring

One problem that has existed for years in the world of tracking:

How to ensure you know when tracking might be broken within minutes vs waiting for days/weeks after which point could have costed thousands of dollars.

Elevar’s Real Time Conversion Reporting & Channel Accuracy monitoring does this for you.

Once you’ve configured and gone live with your Server-Side destinations, we will begin monitoring:

  • The success % of conversions received by each destination (i.e. were there any errors when sending the event data to the destination?)
  • The % of conversions sent to each destination compared to your source of truth – Shopify orders

You can see also the exact data sent to each destination via Real-Time Conversion reporting:


real time reporting


And channel accuracy which alerts you any time conversions drop below your target threshold:


channel accuracy


By default we set this target % to 95%.

If you fall below 95% for any destination then it will trigger an error alert like this:


channel-alert