Pebble Post
How to Implement Pebble Post Pixel/Web Tracking via Google Tag Manager
Step 1: Overview
Without a single line of code and done in minutes, Elevar helps you implement your Pebblepost sitewide conversion tracking for Shopify stores through Google Tag Manager using the most up-to-date requirements from each platform.
Connect online intent with postal addresses to reach consumers at home with relevant mail via Pebblepost.
Learn more about Pebblepost here.
Step 2: Install Data Layer to Your Store
Install our dataLayer & Shopify Source through your Elevar App. Follow our guide on How to Implement the Shopify Source.
Step 3: Download Container for GTM
Inside of your Elevar account, go to Pre Built Tags > Pebblepost.
Update your pixel ID in the tag settings shown below.
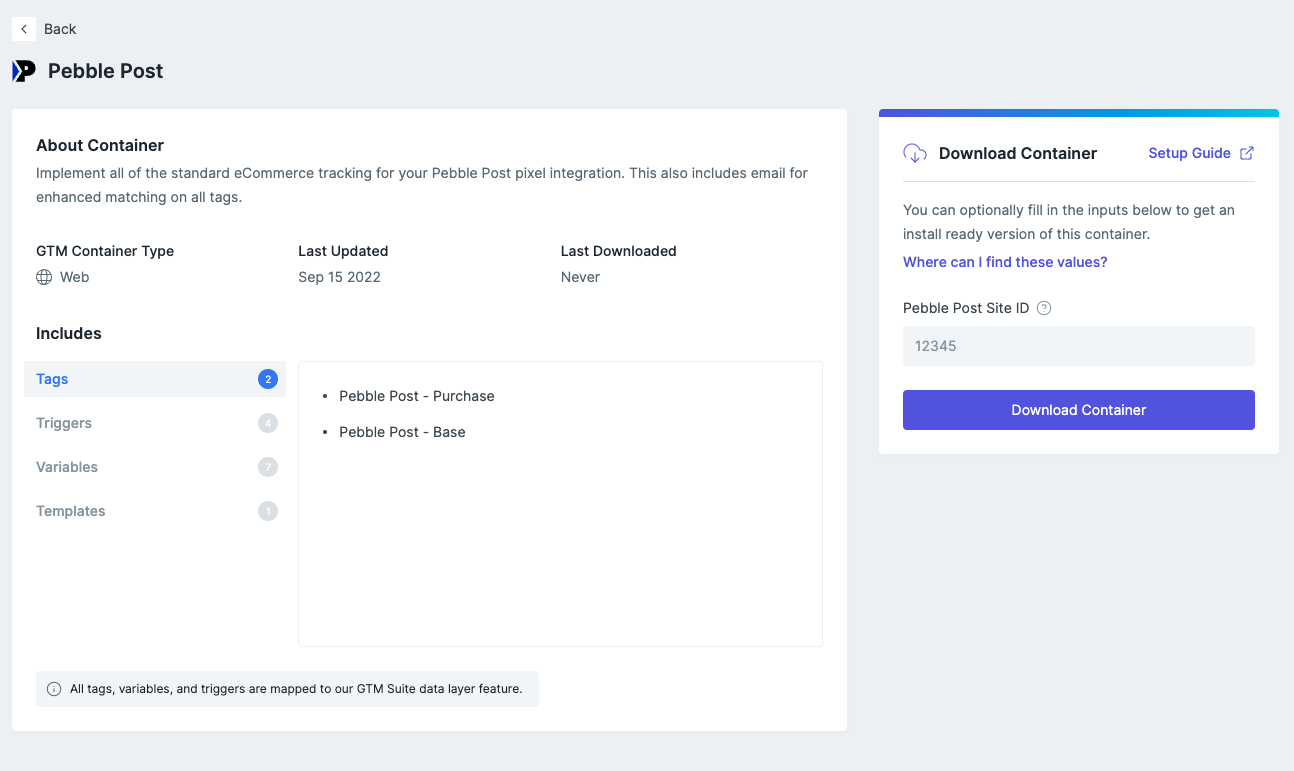
Download the container and save to your computer.
Step 4: Import Container to GTM
Next up, go to your Google Tag Manager container > Admin > Import.
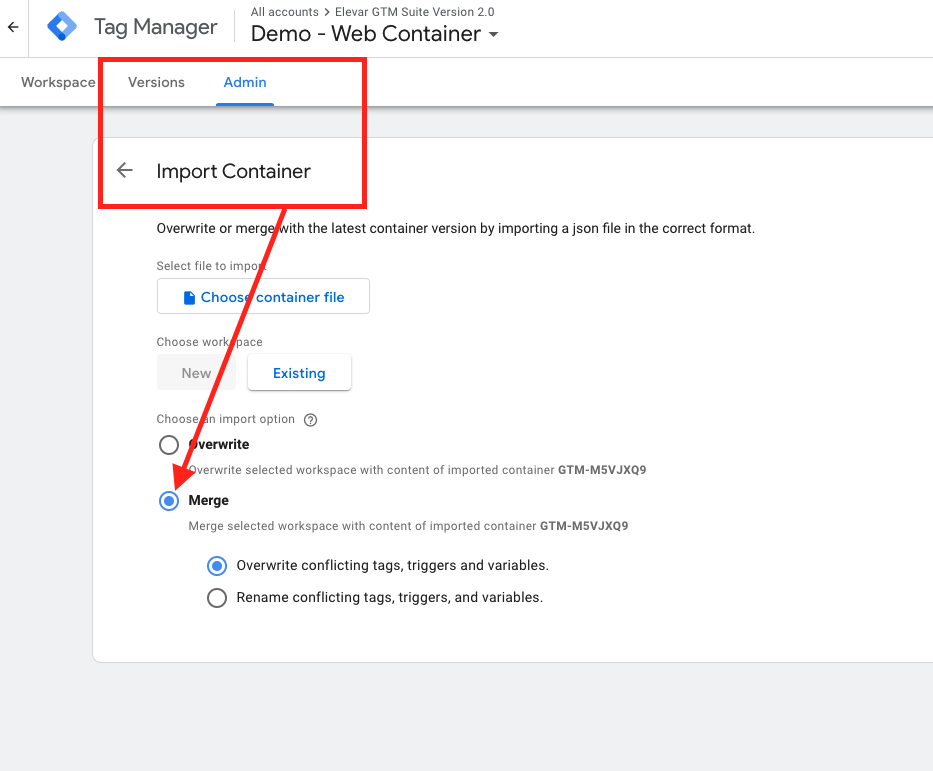
Be sure to select Merge container, not overwrite.
Once you’ve imported, verify your site ID variable is accurate.
Step 5: QA & Publish
Once you’re ready to go live then put GTM into preview mode to QA and then publish to go live!
Updated 5 months ago