How To Set Up Elevar Tracking with ReCharge Legacy Checkout
Learn how to set up tracking with the legacy ReCharge checkout
Note: For Legacy ReCharge Checkouts only!
If your ReCharge integration goes through the native Shopify checkout then you do not need to follow this guide, your first subscription orders will process as purchases and your recurring order will be set in each server-side destination you set-up.
This guide will walk through all of the steps you can take to get your ReCharge integration up and running on the latest server-side tracking and analytics integrations with Elevar. You will have complete control over what orders you send to each server-side channel destination.
So if you want to:
- Send first time & recurring orders to GA4
- Send first time, but not recurring orders, to Facebook CAPI or other destinations.
Then you can do this.
Follow the steps below to get up and running in no time.
Prerequisites
You've installed the Shopify source, if not, follow our guide, How to Implement the Shopify Source on Your Shopify Store.
Step 1: Install Data Layer on ReCharge Checkout
If you are still using ReCharge checkout (instead of unified checkout) you'll need to manually add our data layer to the checkout thank you page settings.
Copy the script below and:
- Update the currency code (if needed)
- Paste into your thank you page script configuration in ReCharge checkout settings
{% if first_time_load %}
<script>
window.dataLayer = window.dataLayer || [];
</script>
<script>
window.dataLayer.push({
'event': 'dl_subscription_purchase',
"event_id": '{{ id }}',
"user_properties":{
"customer_id": "{{ customer.shopify_customer_id }}",
"customer_email": "{{ email }}",
"customer_first_name": "{{ first_name }}",
"customer_phone": "{{ shipping_address.phone }}",
"customer_last_name": "{{ last_name }}",
"customer_city": "{{ shipping_address.city }}",
"customer_zip": "{{ shipping_address.zip }}",
"customer_address_1": "{{ shipping_address.address1 }}",
"customer_address_2": "{{ shipping_address.address2 }}",
"customer_country": "{{ shipping_address.country }}",
"customer_province": "{{ shipping_address.province }}"
},
'ecommerce': {
'currencyCode':'USD',
'purchase': {
'actionField': {
'id': '{{ id }}',
'order_name': '{{ order_name }}',
'affiliation': 'ReCharge',
'revenue': {{ total_price }},
'discount_amount': {{ total_discounts }},
'tax': {{ total_tax }},
'shipping': {{ total_shipping }},
'sub_total': {{subtotal_price}},
'coupon': '{{ discount_code }}'
},
'products': [
{% for item in line_items %}
{
'name': '{{ item.name }}',
'product_id': '{{ item.product_id }}',
'id': '{{ item.sku }}',
'variant_id': '{{ item.variant_id }}',
'price': {{ item.price }},
'brand': '',
'category': '',
'variant': '{{ item.variant_title }}',
'quantity': {{ item.quantity }}
},
{% endfor %}
]
}
}
});
</script>
{% endif %}
- Enable Google Tag Manager in the ReCharge checkout if your plan allows (Pro Plan only).
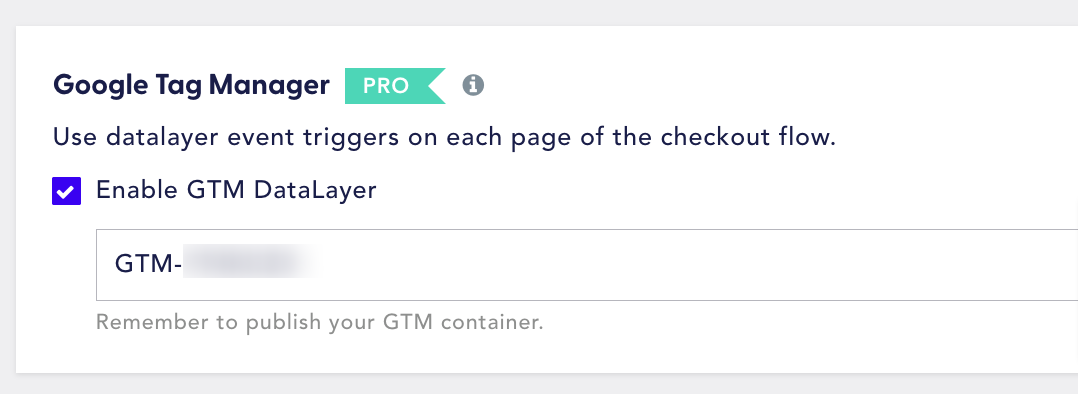
- If you are not able to to check the box and enter your GTM ID, copy and paste the following code in your thank you page script configuration in ReCharge checkout settings, just below the previous code from above.
Input your GTM web container ID to replace the GTM-11111 placeholder
<!-- Google Tag Manager -->
<script>(function(w,d,s,l,i){w[l]=w[l]||[];w[l].push({'gtm.start':
new Date().getTime(),event:'gtm.js'});var f=d.getElementsByTagName(s)[0],
j=d.createElement(s),dl=l!='dataLayer'?'&l='+l:'';j.async=true;j.src=
'https://www.googletagmanager.com/gtm.js?id='+i+dl;f.parentNode.insertBefore(j,f);
})(window,document,'script','dataLayer','GTM-1111111');</script>
<!-- End Google Tag Manager -->
Your data layer is now installed on your ReCharge checkout!
Step 2: Configure Server-Side Sources in Elevar
Go to My Tracking within the Elevar App.

Each destination will have a Subscriptions Setup Step.
- Select 'Yes, using separate checkout' in the Do you sell subscription products? section
- Select 'ReCharge / OrderGrove" in the What Shopify subscription app do you use? section
- In addition to sending your Subscription First Order, you can choose to also send (or block) Subscription Recurring Orders. If you want to send recurring transactions. Select 'Yes, send all' or 'No, block' in the Would you like to send recurring transactions? section
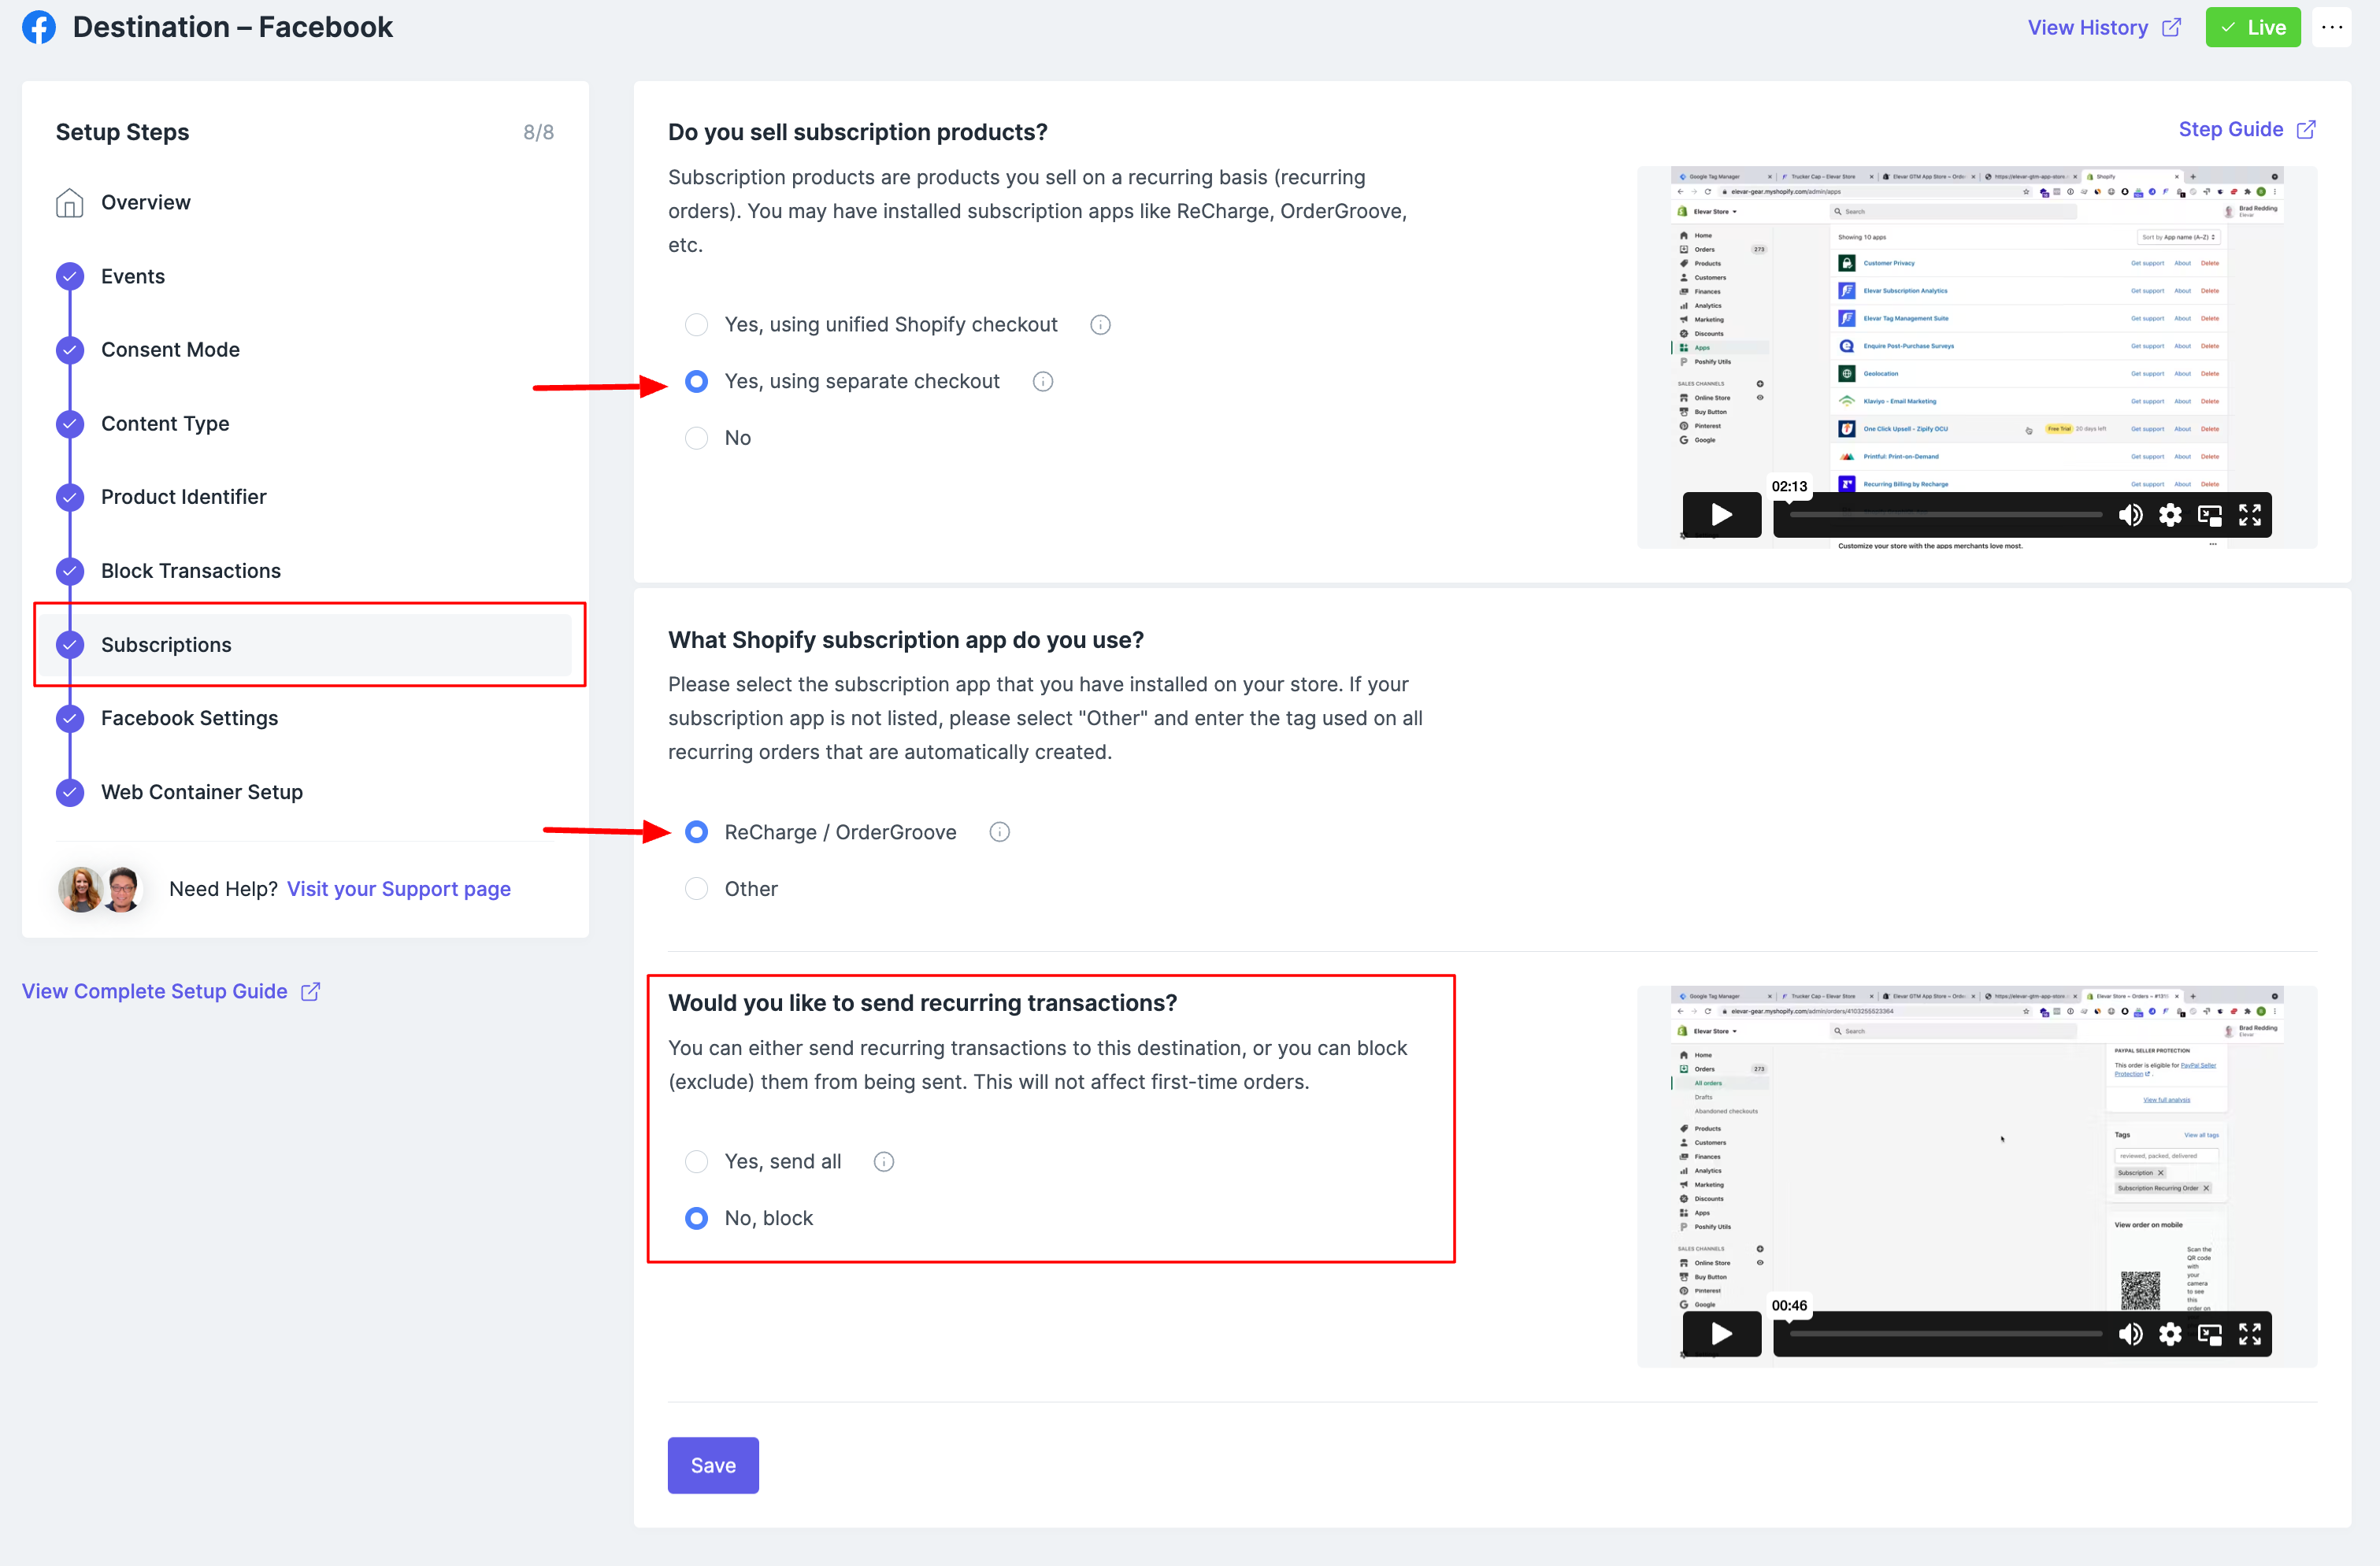
Make these updates for all your destinations.
Step 3: Subscription Purchase Events Specific to Facebook & TikTok
In the Facebook and TikTok destination you can choose to send additional events for your first subscription purchases. These are optional custom events, follow the steps below to enable.
Go to My Tracking within the Elevar App.
Click the destination cards for Facebook or Tiktok.
Go to the Events setup step.
Click I want to customize events manually
Click the checkboxes to enable these events.
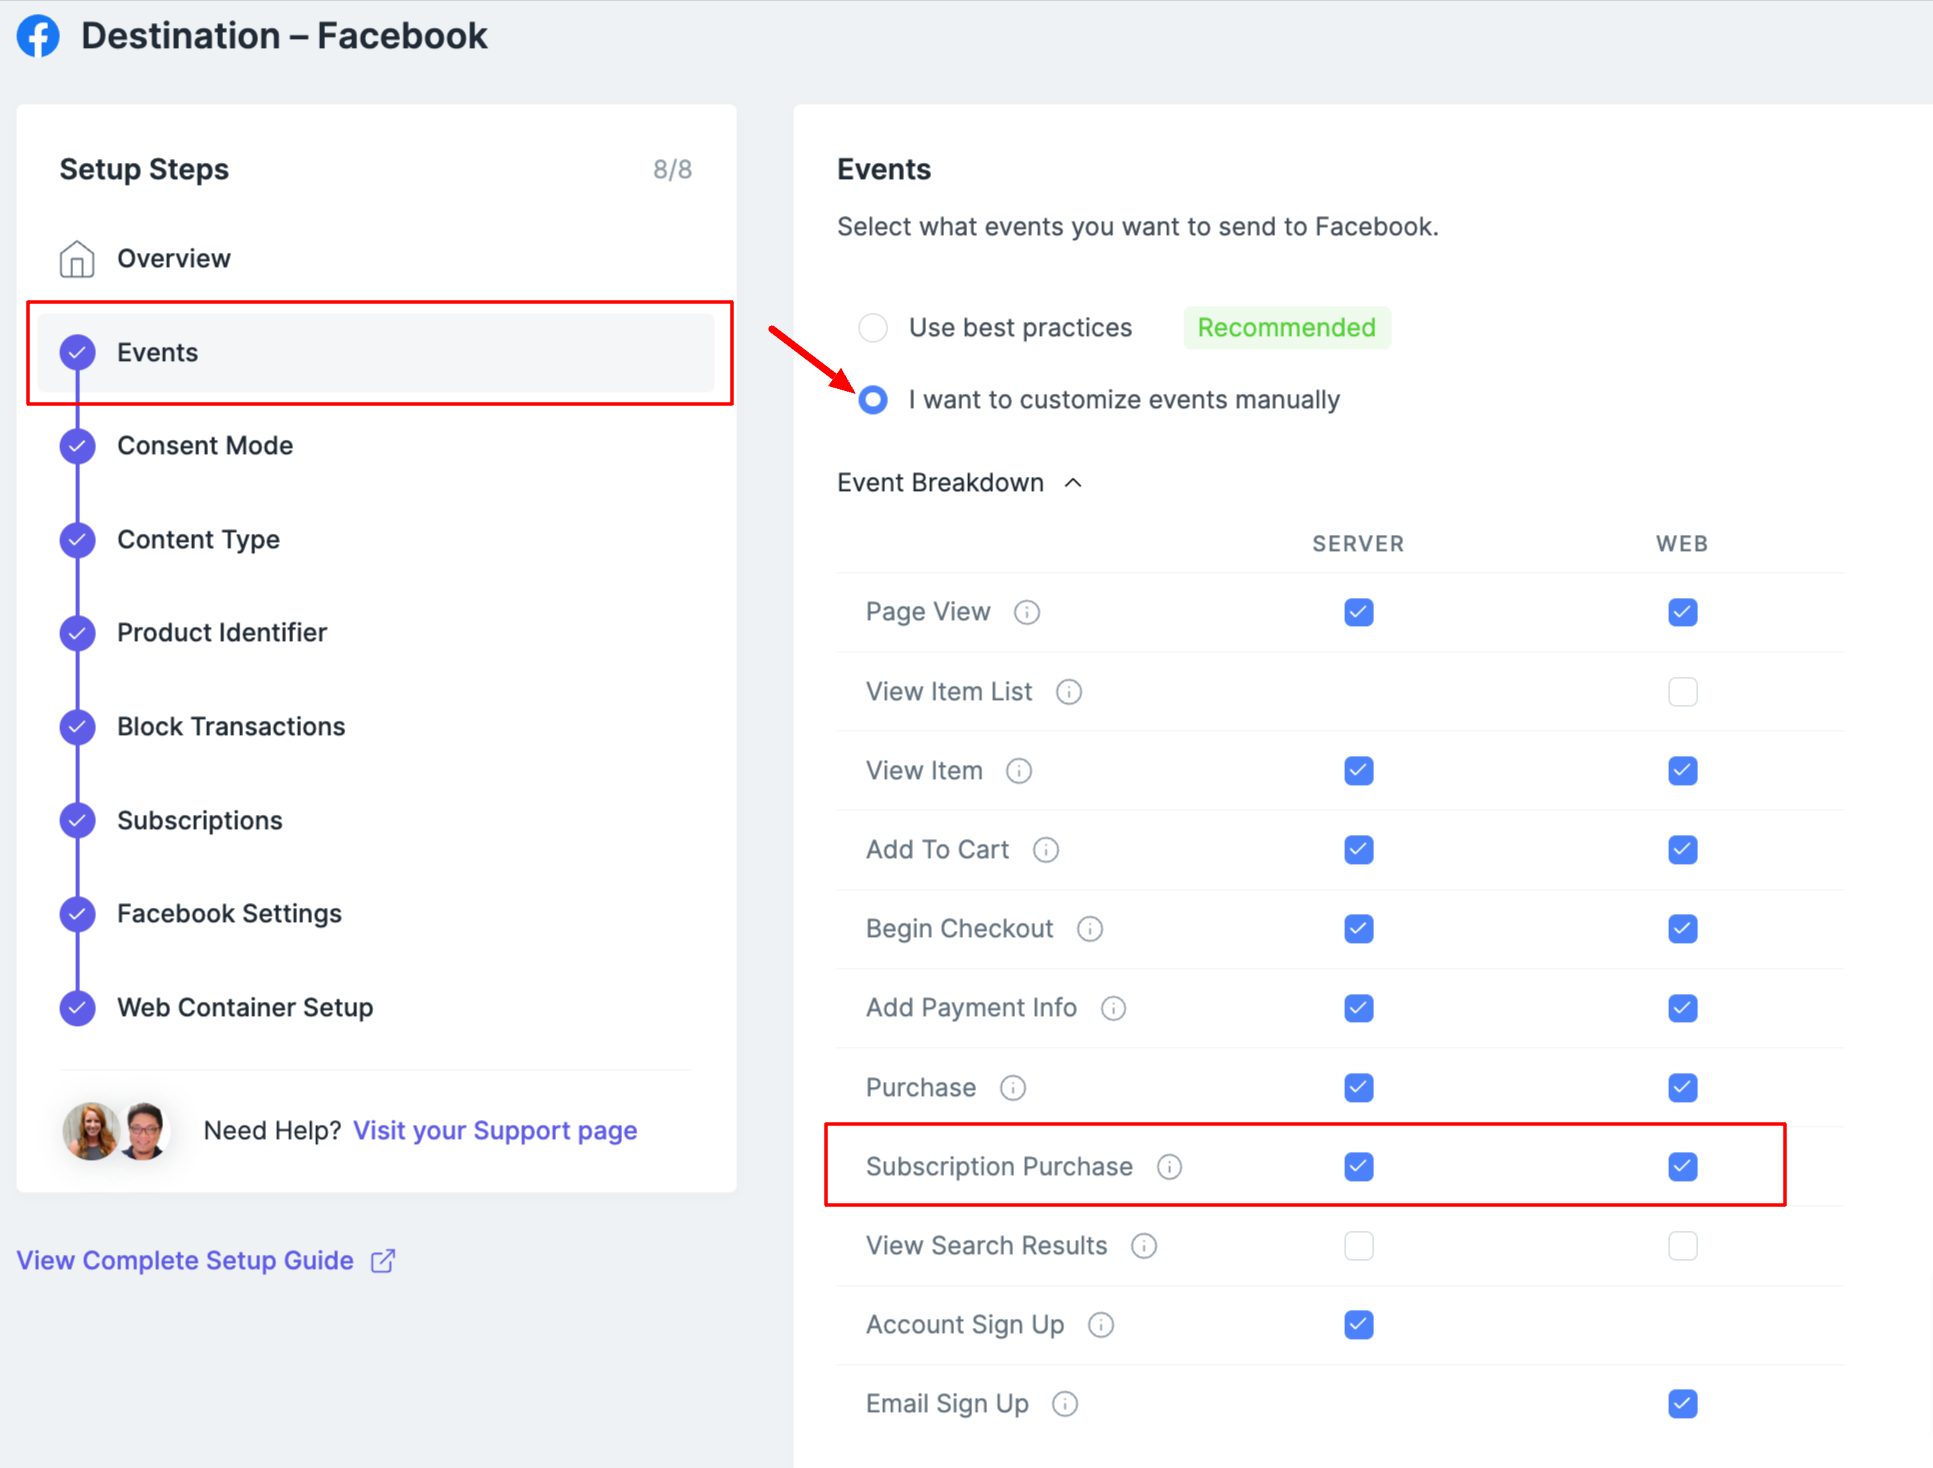
Save your changes.
Go to the Web Container Setup step & Download the Pre-Built Web Tags.
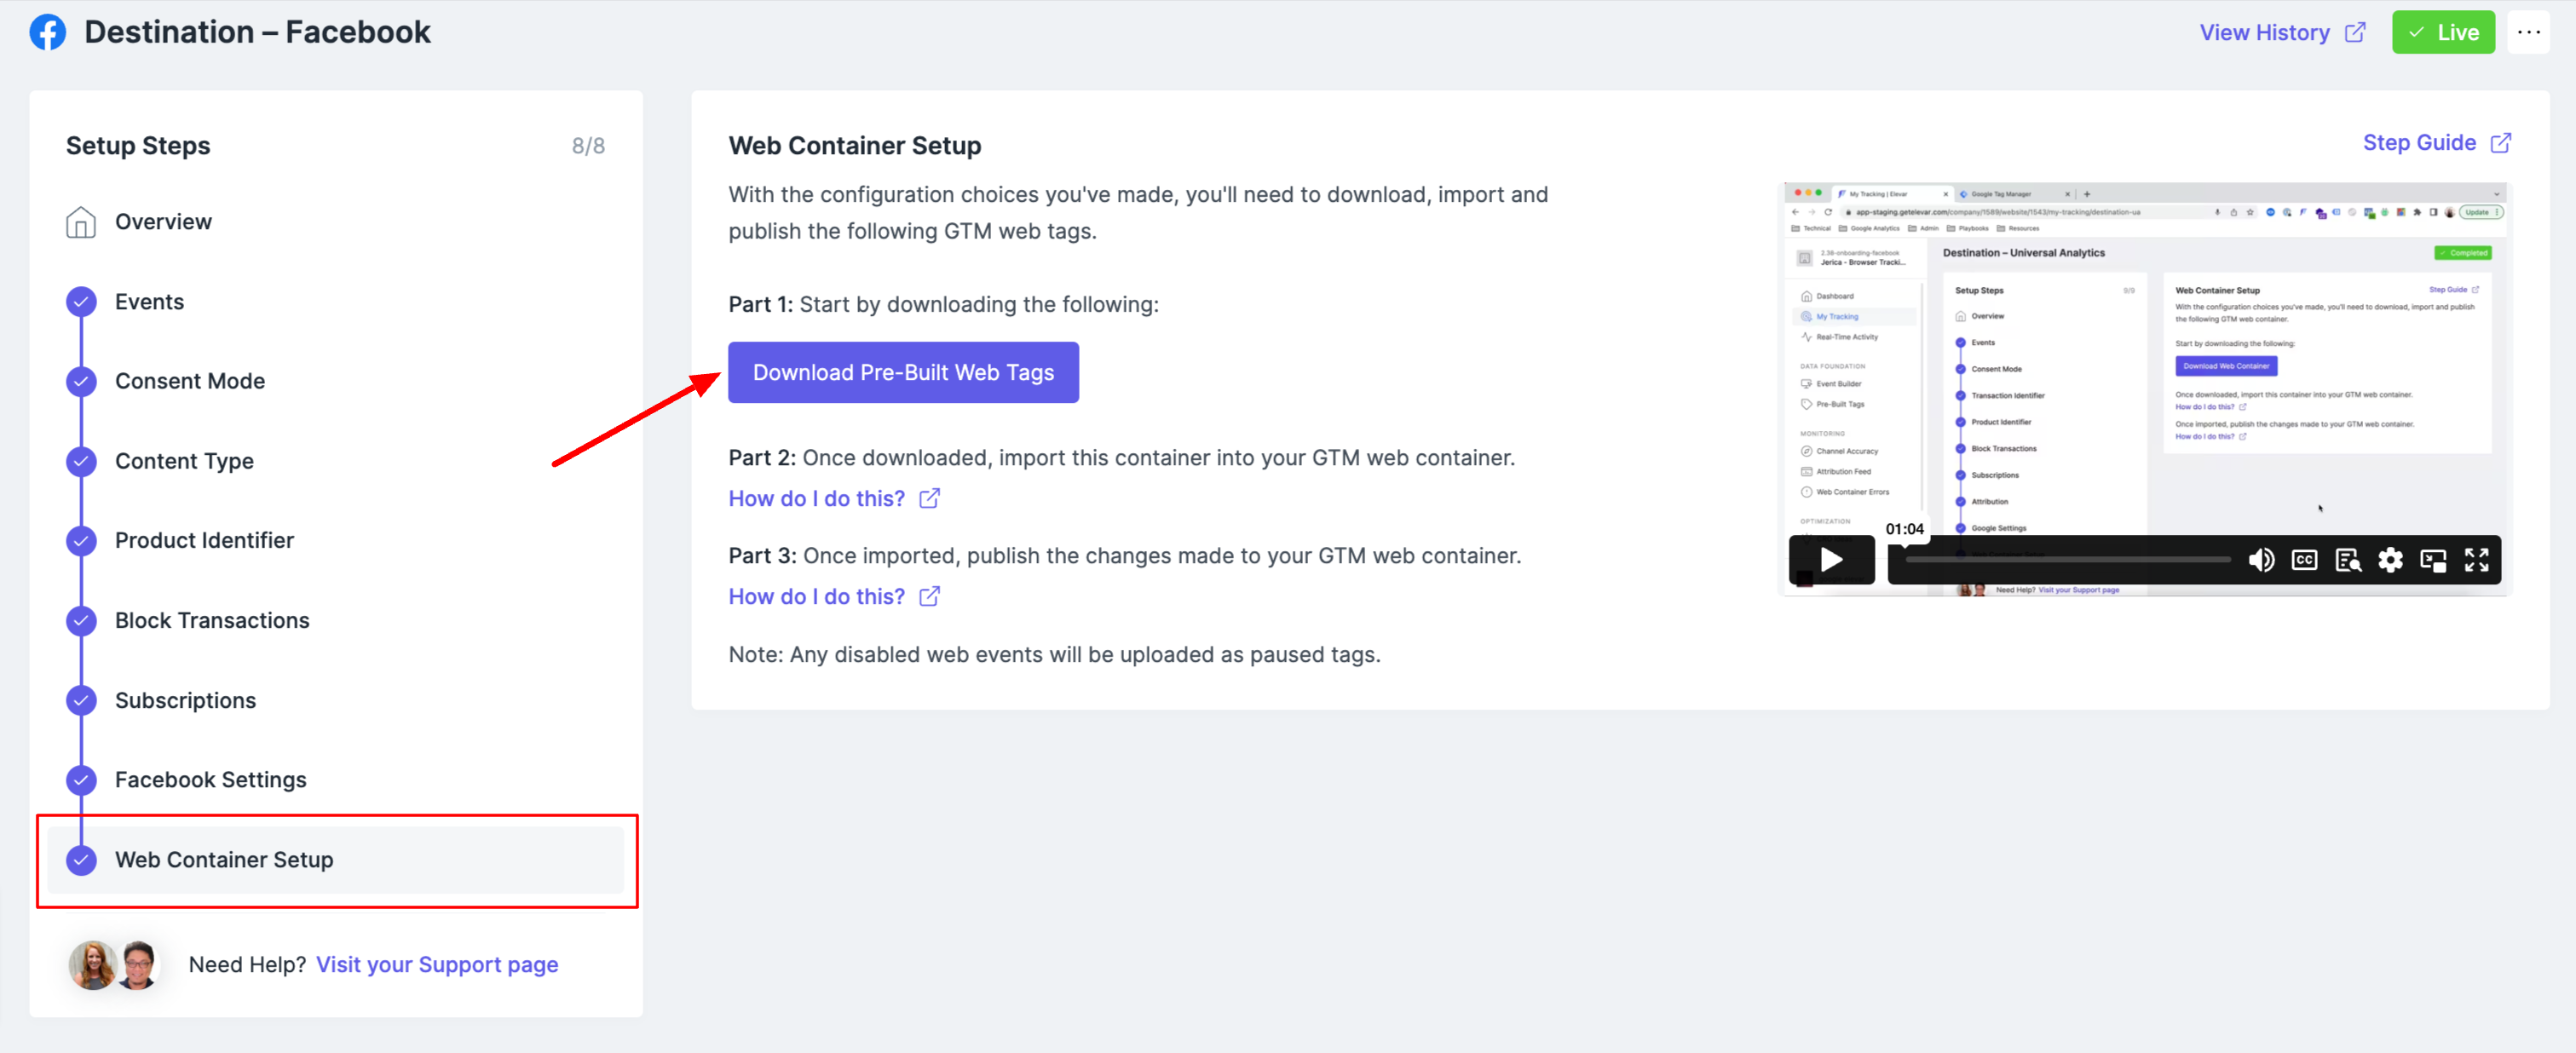
Import the tags into your Google Tag Manager Account. Not sure how, follow this guide.
Step 4: Update GTM Purchase Events
For your web tracking purchase tags you'll want to the add an additional trigger to also fire these on the first subscription orders.
In your Google Tag Manager Account go to your tags and filter by "Event - Purchase"
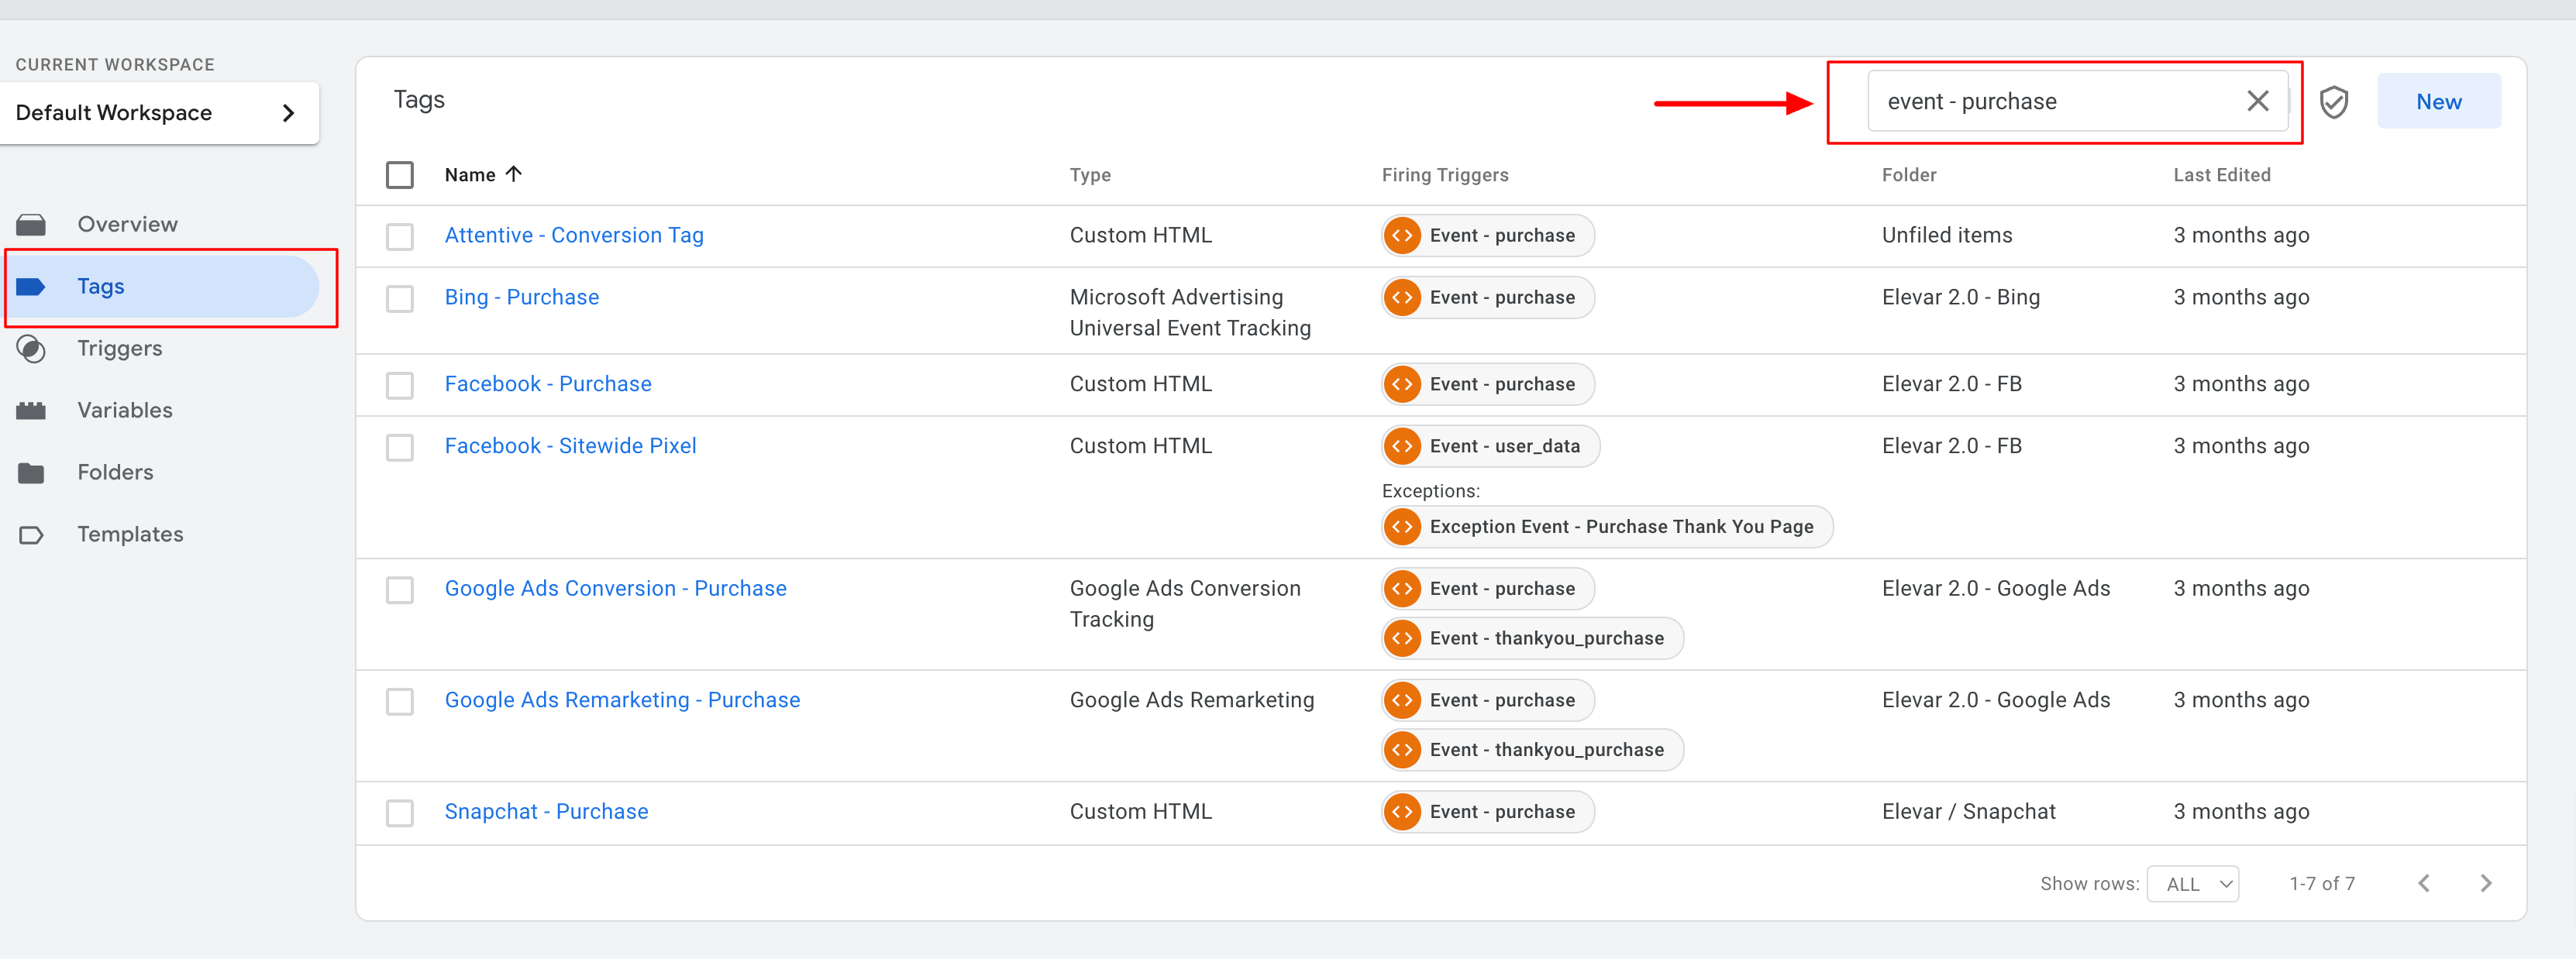
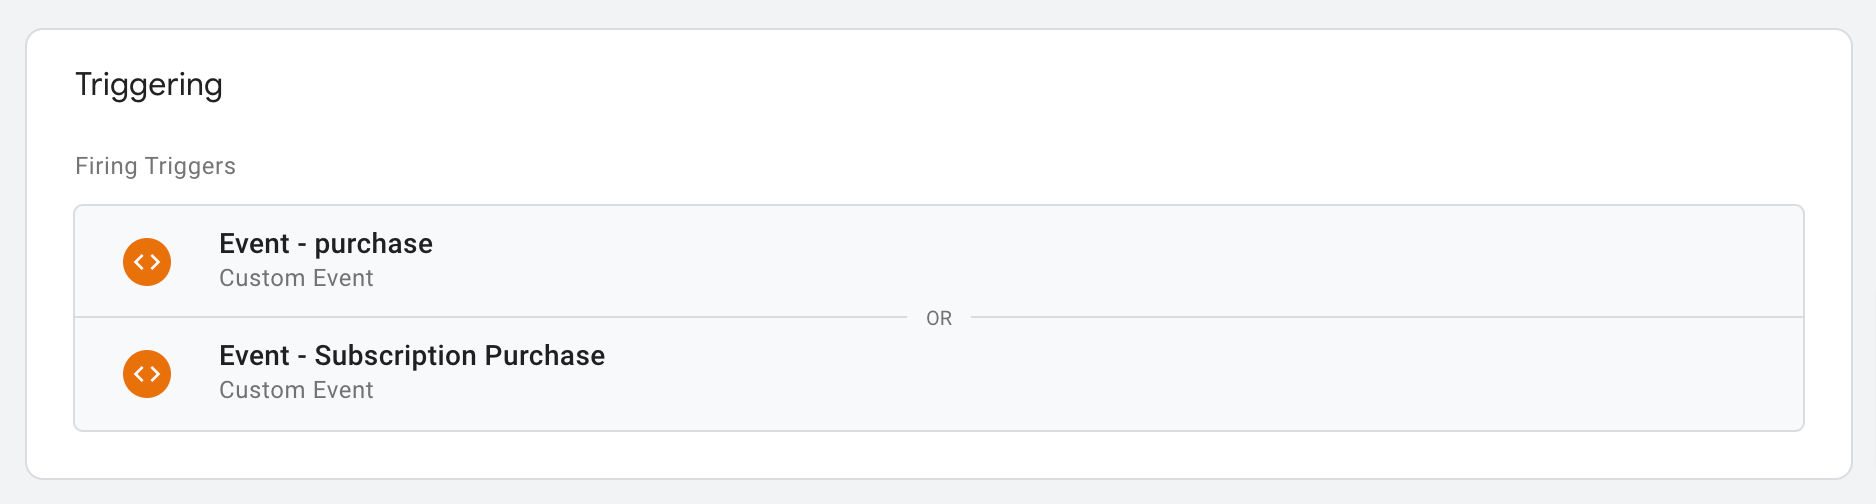
Open each tag and edit the trigger section to add the event named "Event - Subscription Purchase"
Bonus: Tracking for Initiate Checkout [Recharge Pro Plans]
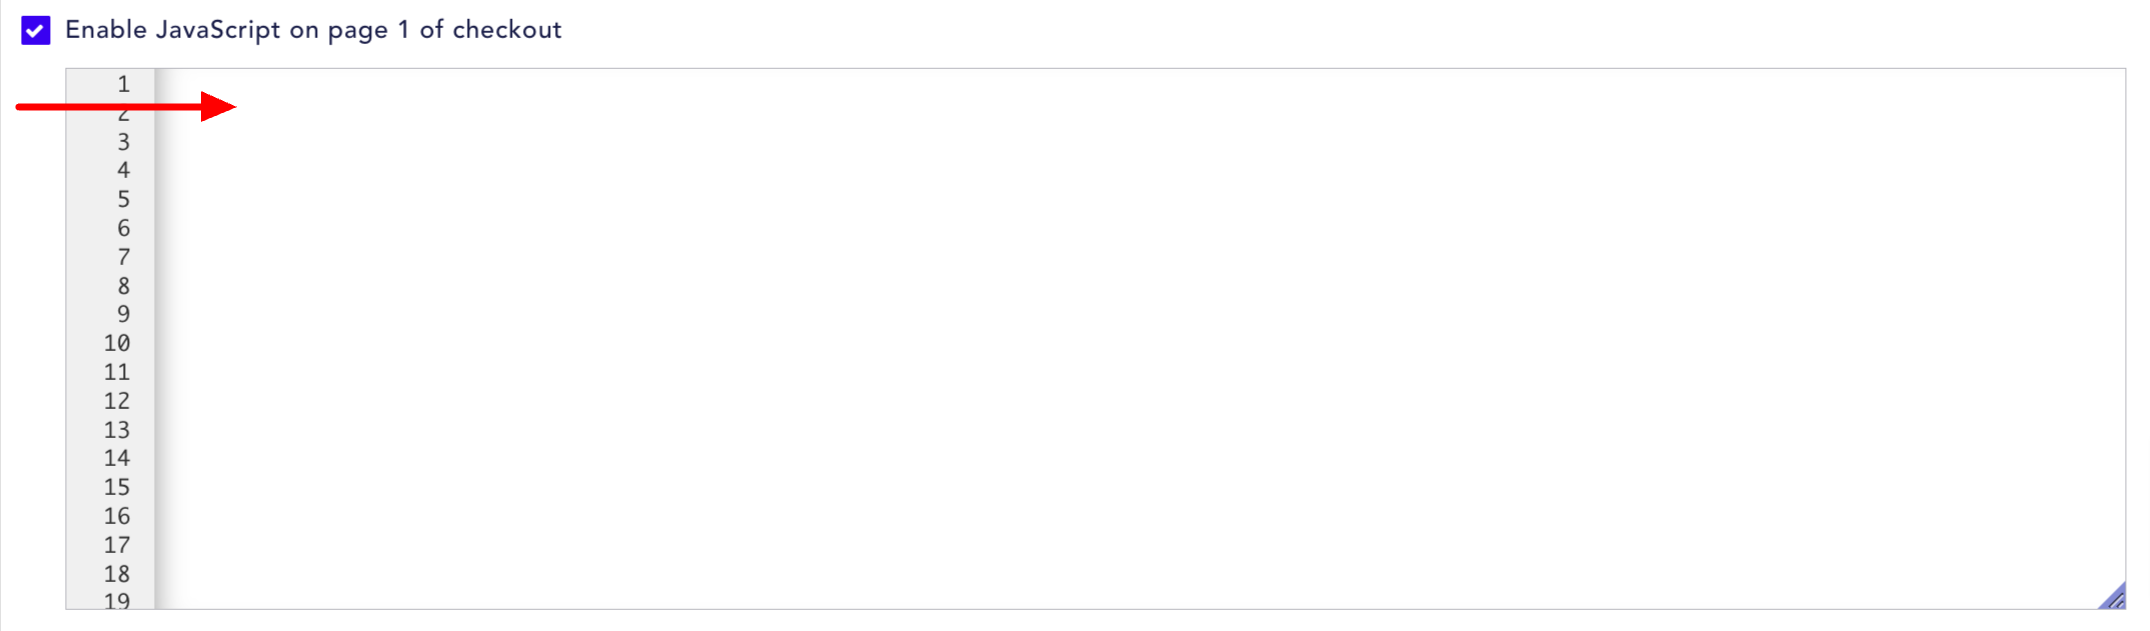
This feature is only available for ReCharge Pro plans and requires enabling this feature requires JavaScript to the first page of the Recharge checkout. Contact Recharge support to get JavaScript in checkout activated for your store.
Once you have access to add JavaScript to the first page of checkout paste the code below into the JavaScript block
var cartItems = cart_json.line_items;
window.dataLayer = window.dataLayer || [];
var cartProducts = [];
for (var i = 0; i < cartItems.length; i++) {
  var item = cartItems[i];
  cartProducts.push({
    'id': item.sku,
    'name': item.title,
    'price': item.price,
    'quantity': item.quantity,
    'product_id':item.product_id,
    'variant_id':item.variant_id,
    'variant': item.variant_title,
    'category': item.product_type,
    'brand': item.vendor
   });
}
window.dataLayer.push({
"event": "dl_begin_checkout",
"event_id": getEventId(),
"cart_total": cart_json.subtotal_price,
"ecommerce": {
  "currencyCode": cart_json.currency,
  "checkout": {
    "actionField": {"step":1},
    "products": cartProducts
  }
}
});
function getEventId(){
var ga = "";
var name = "_ga" + "=";
var decodedCookie = decodeURIComponent(document.cookie);
var ca = decodedCookie.split(';');
for(var i = 0; i <ca.length; i++) {
  var c = ca[i];
  while (c.charAt(0) == ' ') {
    c = c.substring(1);
  }
  if (c.indexOf(name) == 0) {
    var ga = c.substring(name.length, c.length);
  }
}
return ga + Date.now();
}
Enable Google Tag Manager in the ReCharge checkout if your plan allows (Pro Plan only).
If you are not able to to check the box and enter your GTM ID, copy and paste the following code 'Enable JavaScript on page 1 of checkout' block, just below the previous code from above. Input your GTM web container ID to replace the GTM-11111 placeholder
<!-- Google Tag Manager -->
<script>(function(w,d,s,l,i){w[l]=w[l]||[];w[l].push({'gtm.start':
new Date().getTime(),event:'gtm.js'});var f=d.getElementsByTagName(s)[0],
j=d.createElement(s),dl=l!='dataLayer'?'&l='+l:'';j.async=true;j.src=
'https://www.googletagmanager.com/gtm.js?id='+i+dl;f.parentNode.insertBefore(j,f);
})(window,document,'script','dataLayer','GTM-1111111');</script>
<!-- End Google Tag Manager -->
Advanced Use Cases
Split Google Ads conversions from one-time vs ReCharge**
Inside your Google Tag Manager Web Container, you can create a 2nd Google Ads conversion and just assign the subscription purchase trigger only:
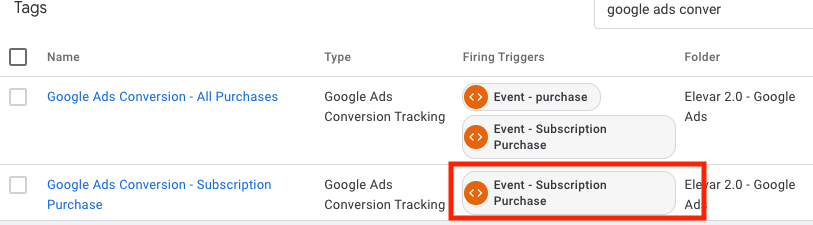
Just be sure you have unique conversion labels between the two purchase events.
Bonus: Additional Checkout Events for Facebook
To add these additional checkout events for Facebook you must be on on a ReCharge Pro plan have your GTM loading via the Google Tag Manger section as shown below. If you are not able to check the box to enable you will not benefit from this feature.
Step 1: Download the Pre-Built ReChargeTags
In your Elevar App, navigate to Pre-Built Tags
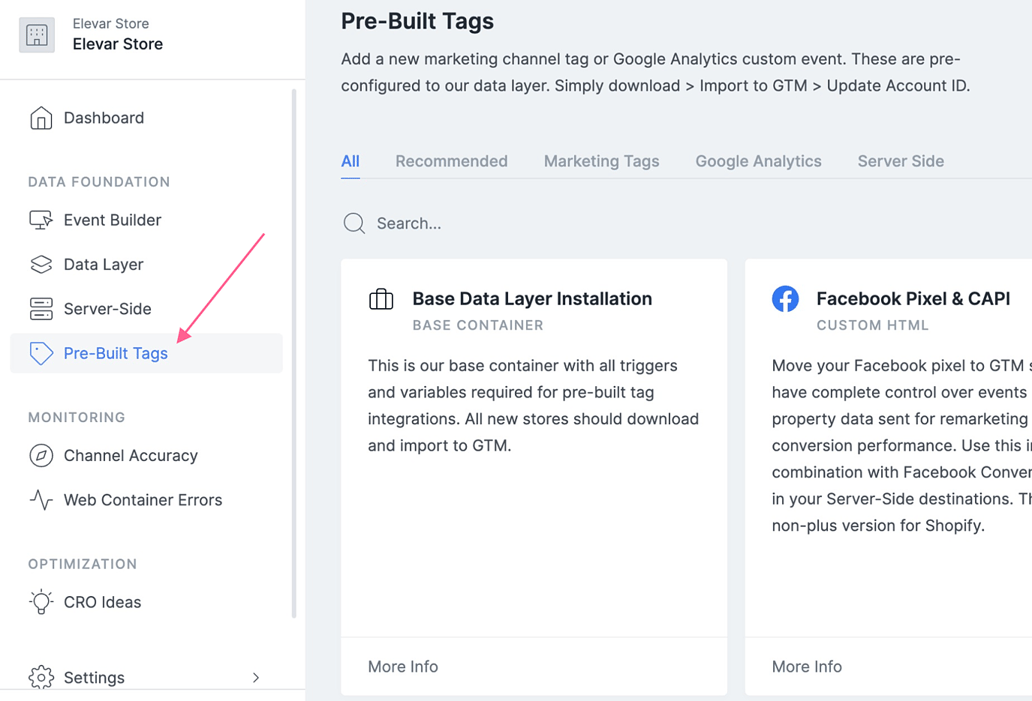
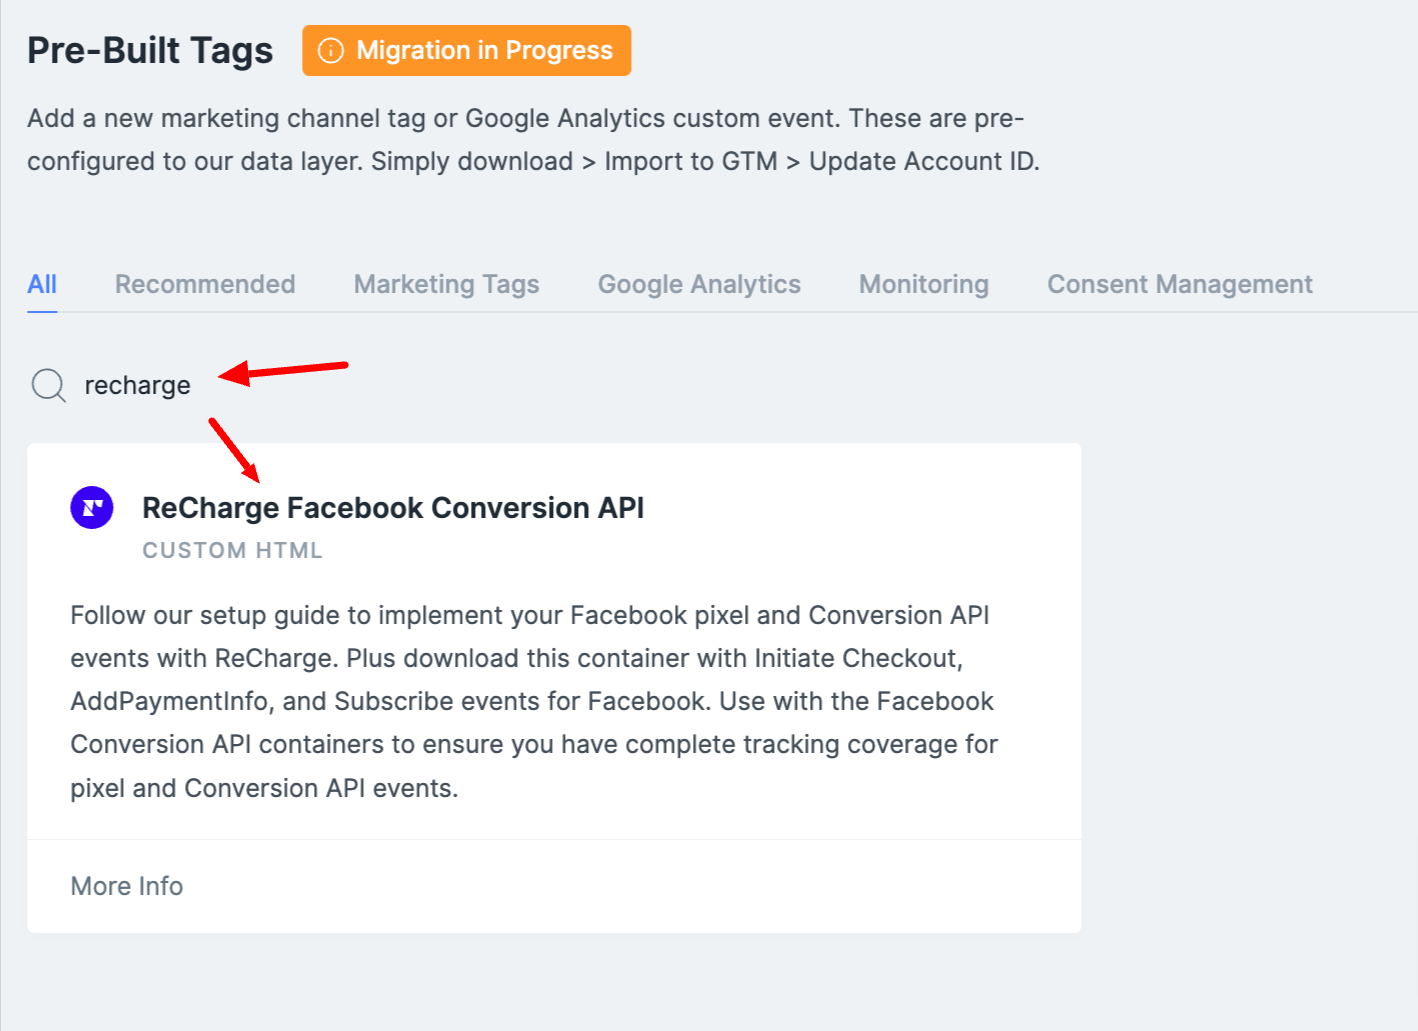
Search for ReCharge > Click into the ReCharge Facebook Conversion API Container
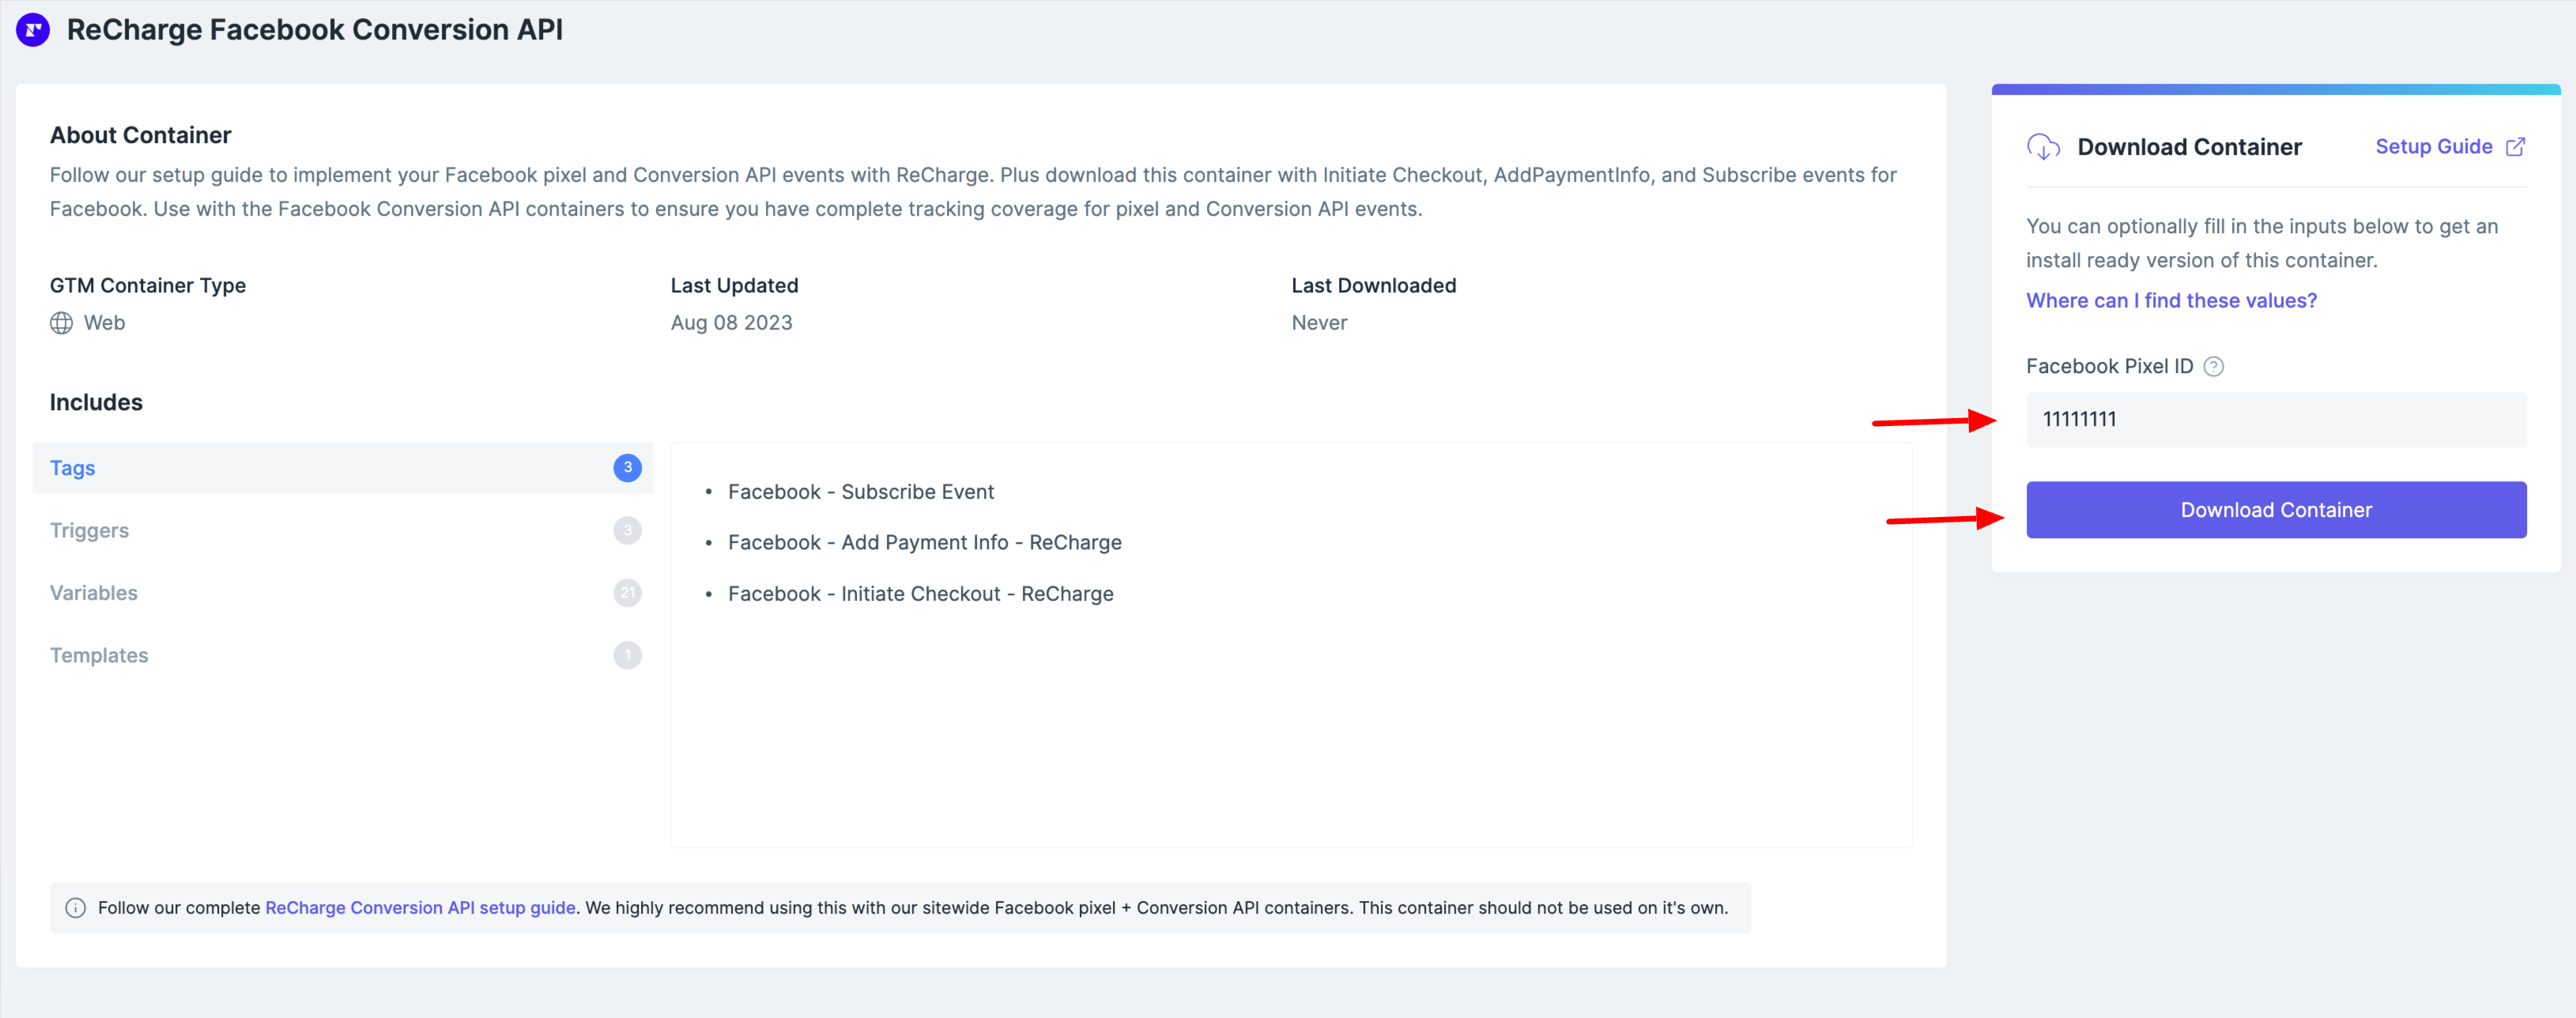
Enter your Facebook Pixel ID and Download the pre-built container.
Step 2: Import the Pre-Built Tags into GTM Web
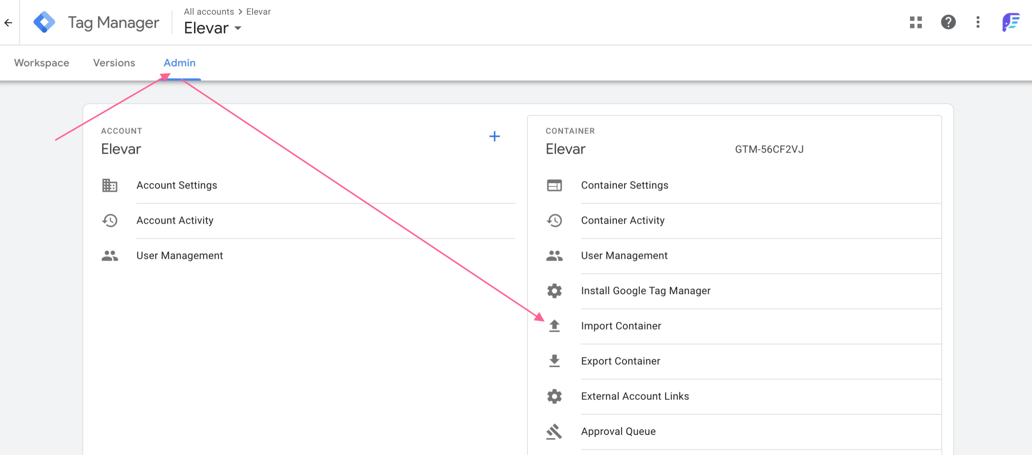
Log in to your Google Tag Manager Account > Select your GTM Web Container
Select Admin > Import Container
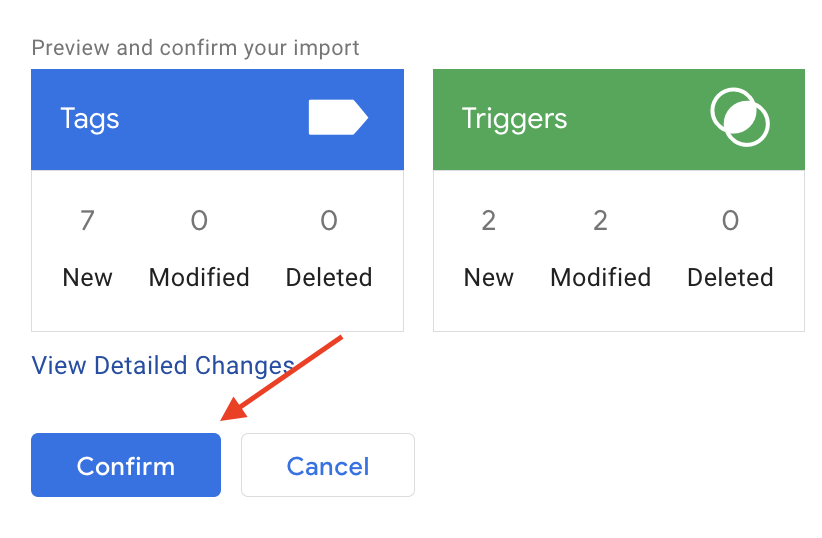
Select to import the file that you just downloaded in Step 1. Choose a New Workspace and title it ReCharge Facebook Tracking. Then choose Merge > Overwrite. Your import will look similar to the below:
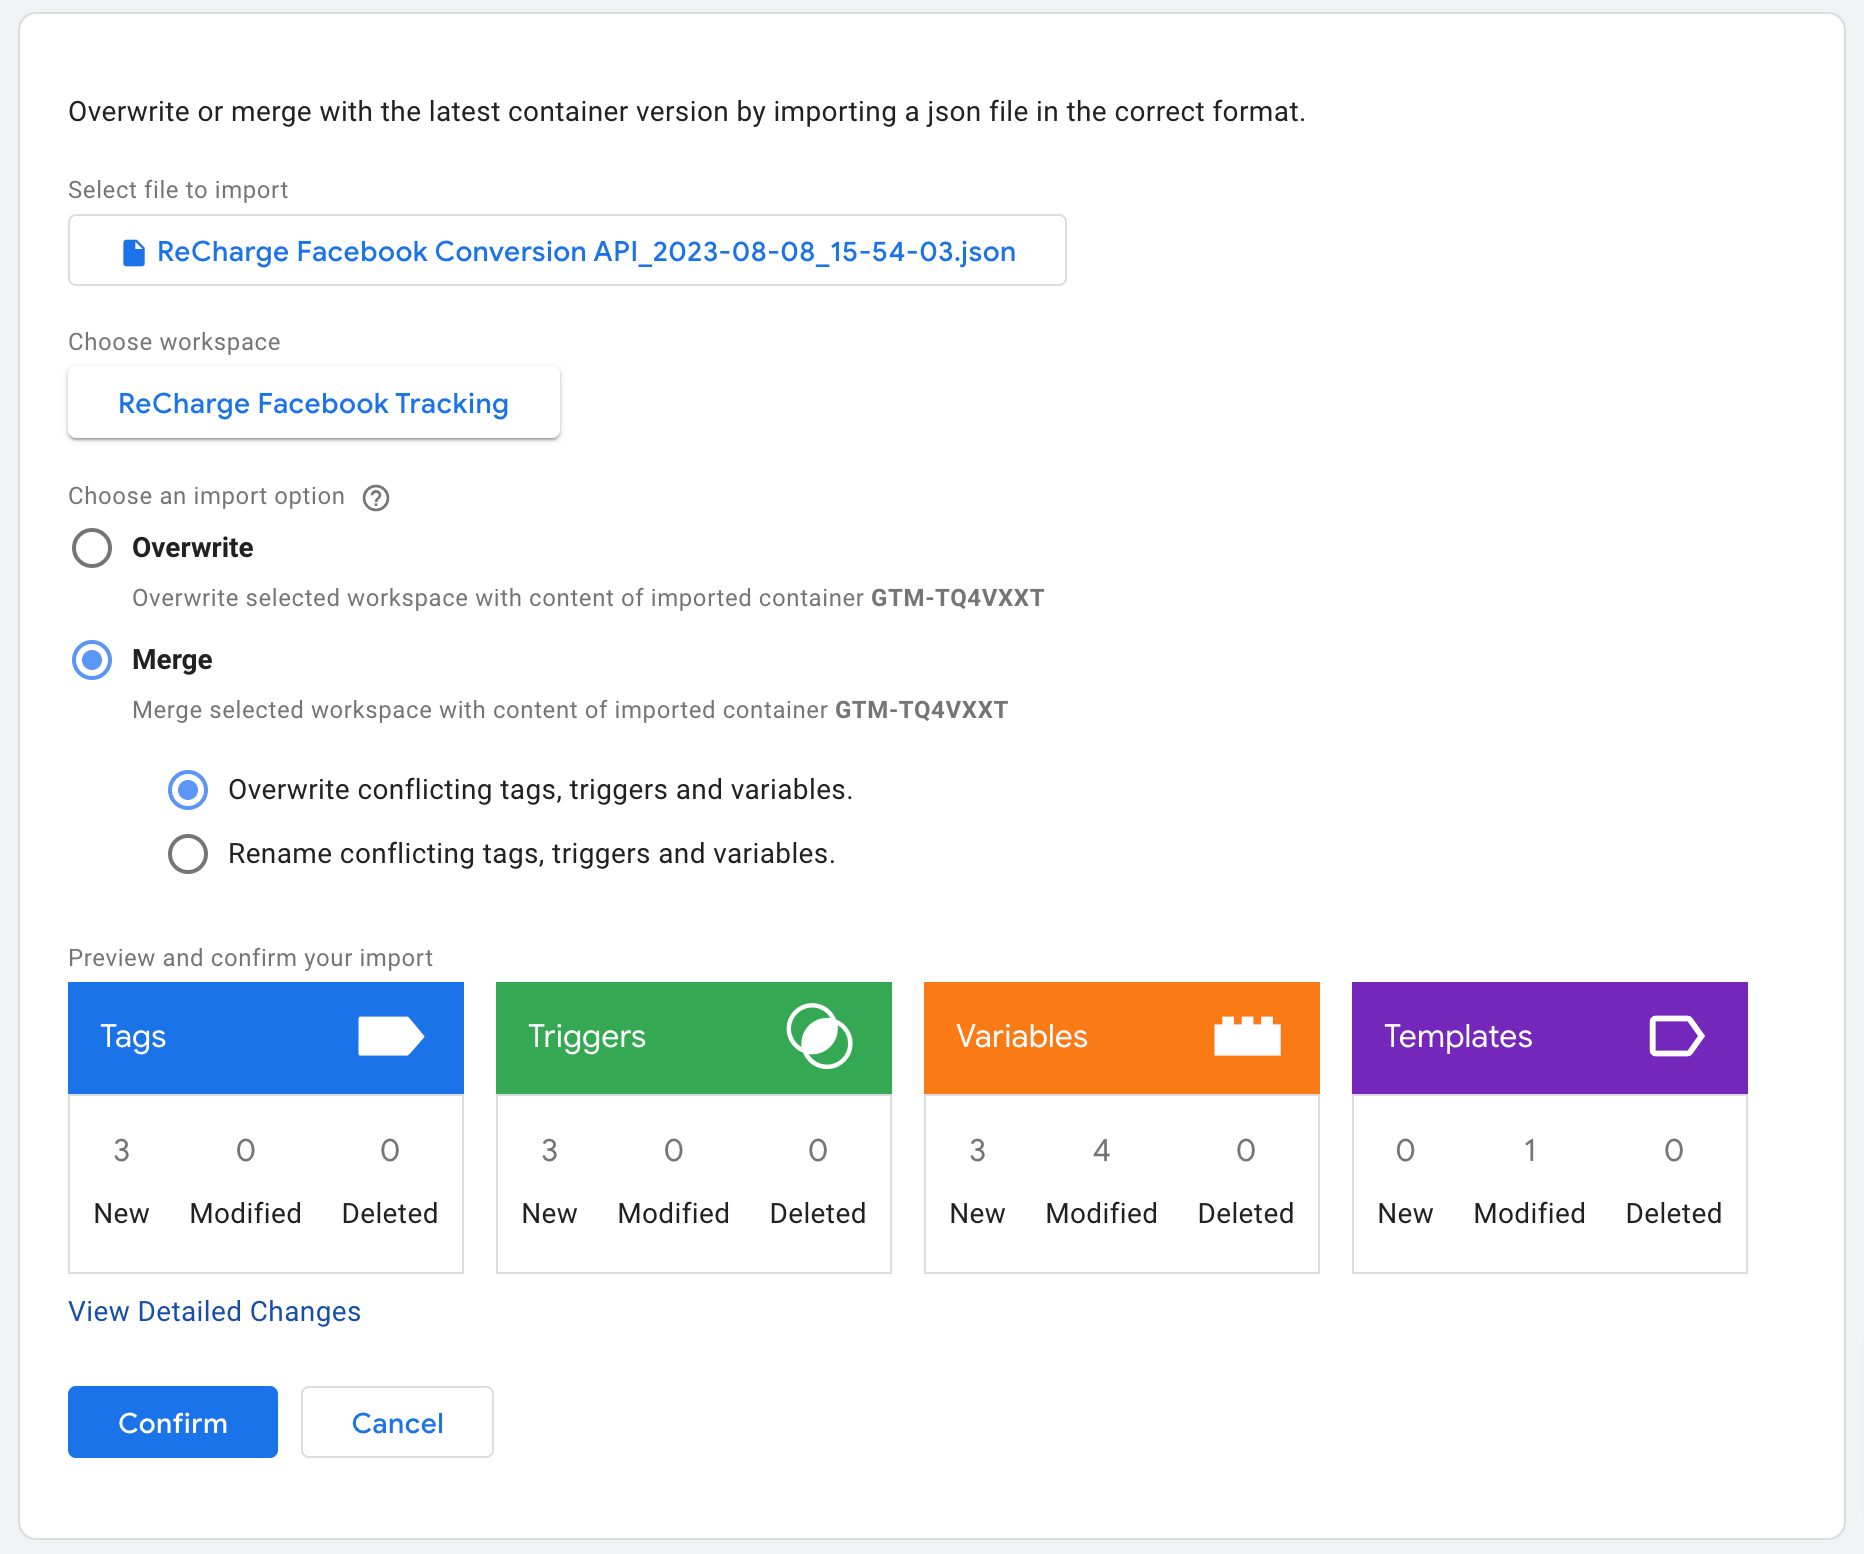
Select _Confirm _to import the tags
Step 3: Publish
Publish your GTM container and you'll begin seeing these additional events tracking in Facebook from your legacy ReCharge checkout.
Updated 4 months ago