How to Setup CJ Affiliate Web Tracking via Google Tag Manager
Steps to implement (Client Side Tracking)
Step 1: Overview
Without a single line of code and done in minutes, Elevar helps you implement your Commission Junction tracking pixel and conversion event to Shopify through Google Tag Manager using the most up-to-date requirements from each platform.
Plus – these templates come with built-in monitoring so you’re the first to know when a tag breaks and risks impacting your campaigns.
This integration supports the complete tracking implementation required by Commission Junction affiliate tracking.
Commission Junction is one of the largest affiliate marketing platforms for brands and retailers. Learn more about Commission Junction affiliate marketing here.
Step 2: Install our Shopify Source
In order to deploy CJ Affiliate's conversion tracking via Google Tag Manager tags, you'll need to install our Shopify Source. Follow our guide on How to Implement the Shopify Source
Step 3: Update Variables & Download Container for GTM
There are three variables that need to be updated to match your CJ account details.
These 3 variables are the constants that CJ provides in their onboarding documentation:
- Company ID
- Action Tracker ID
- Tag ID
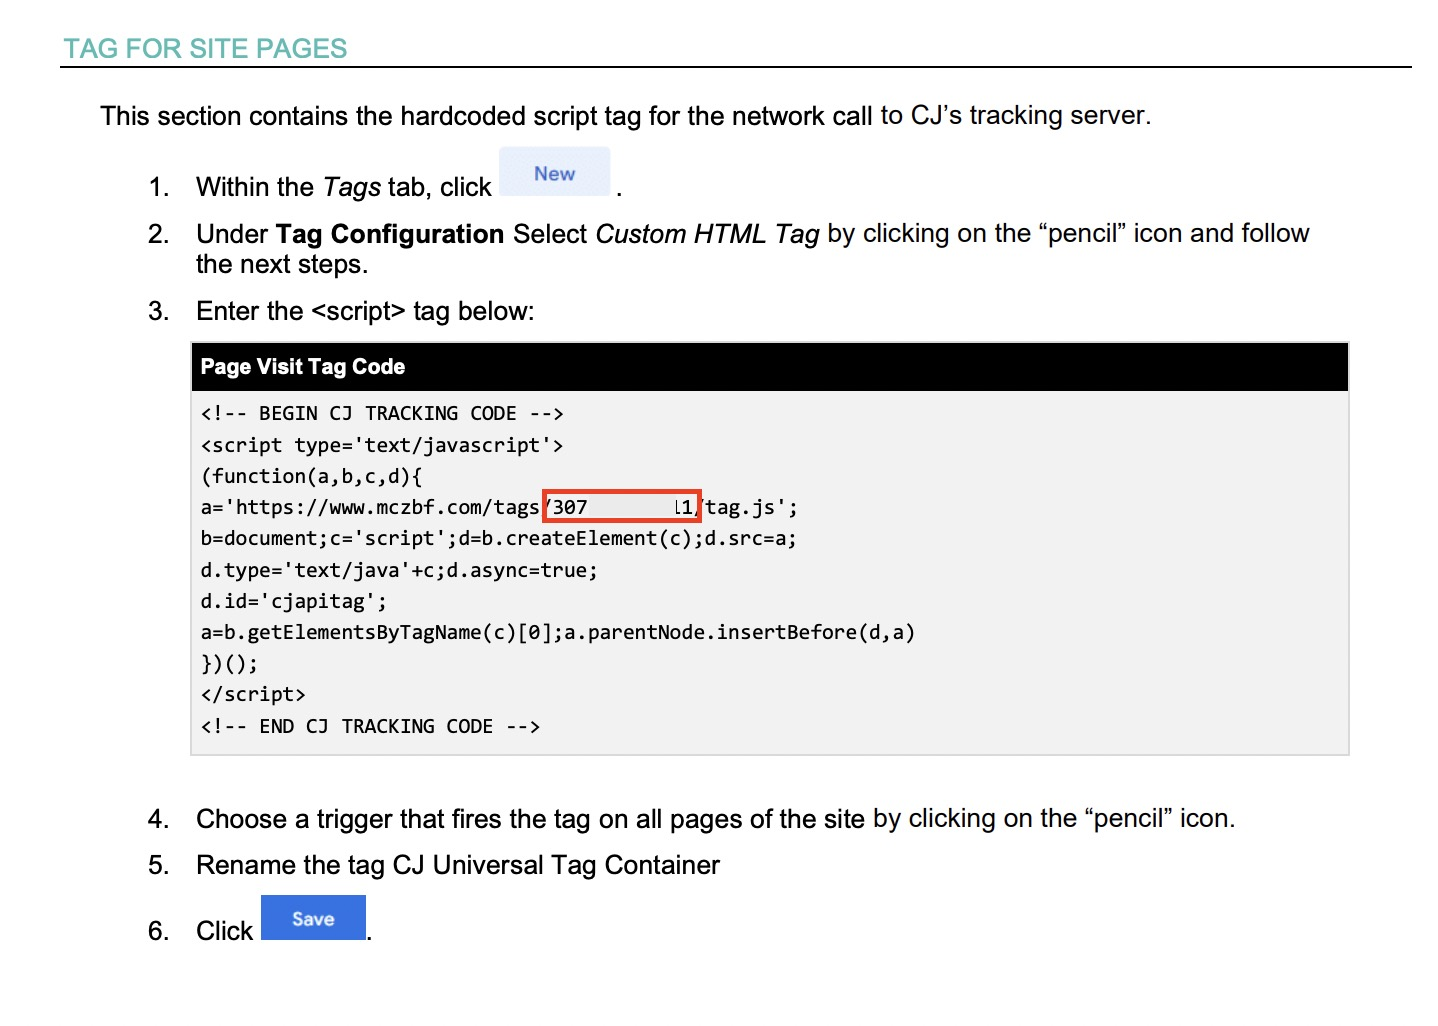
For example, here would be your Tag ID:
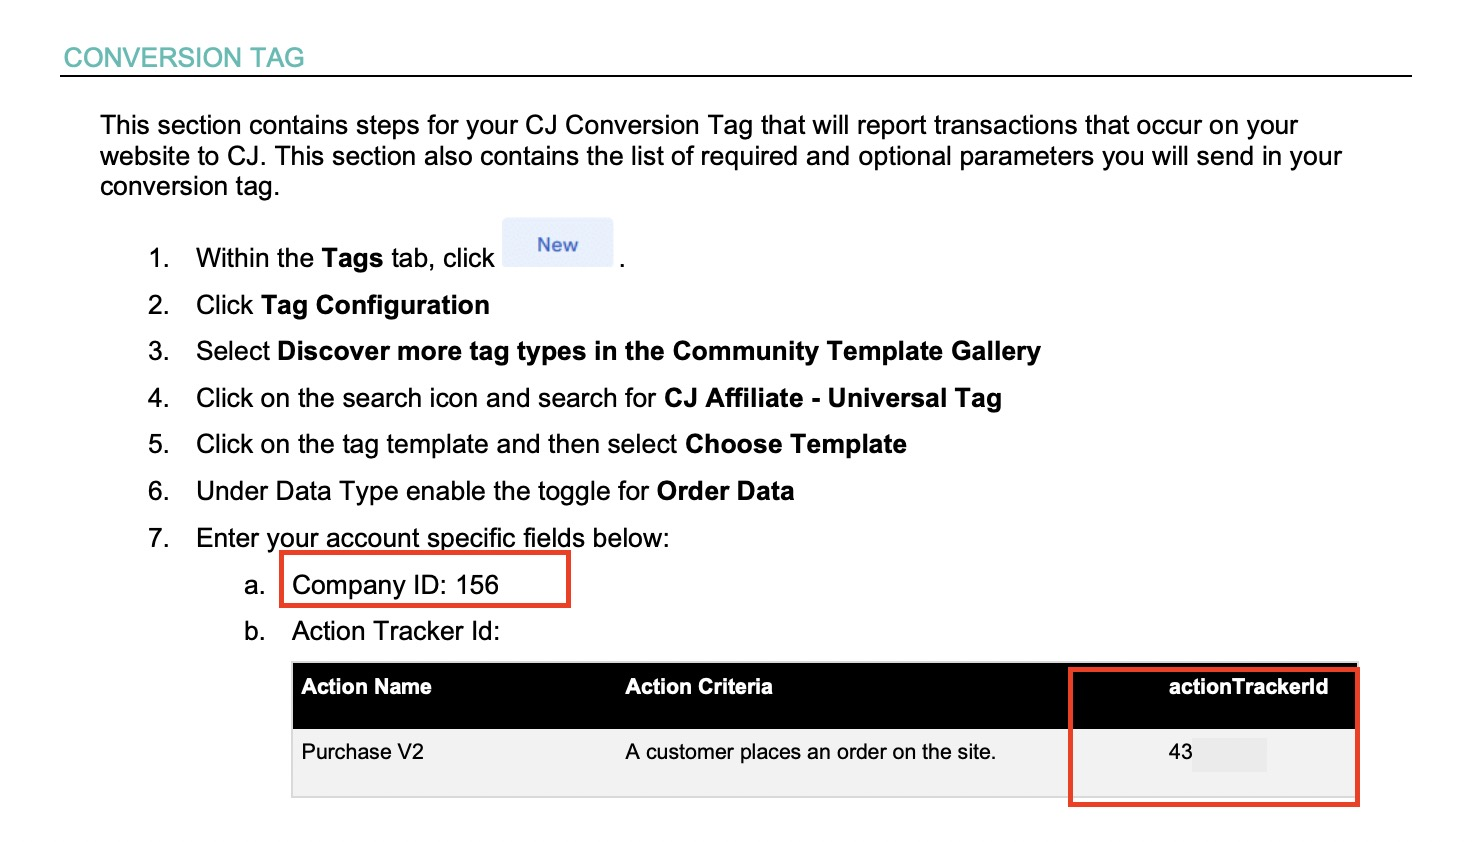
And here is your Company ID and Action Tracker ID:
Inside of your Elevar account, go to Pre Built Tags > Commission Junction.
Update your 3 unique CJ variables in the tag settings shown below.
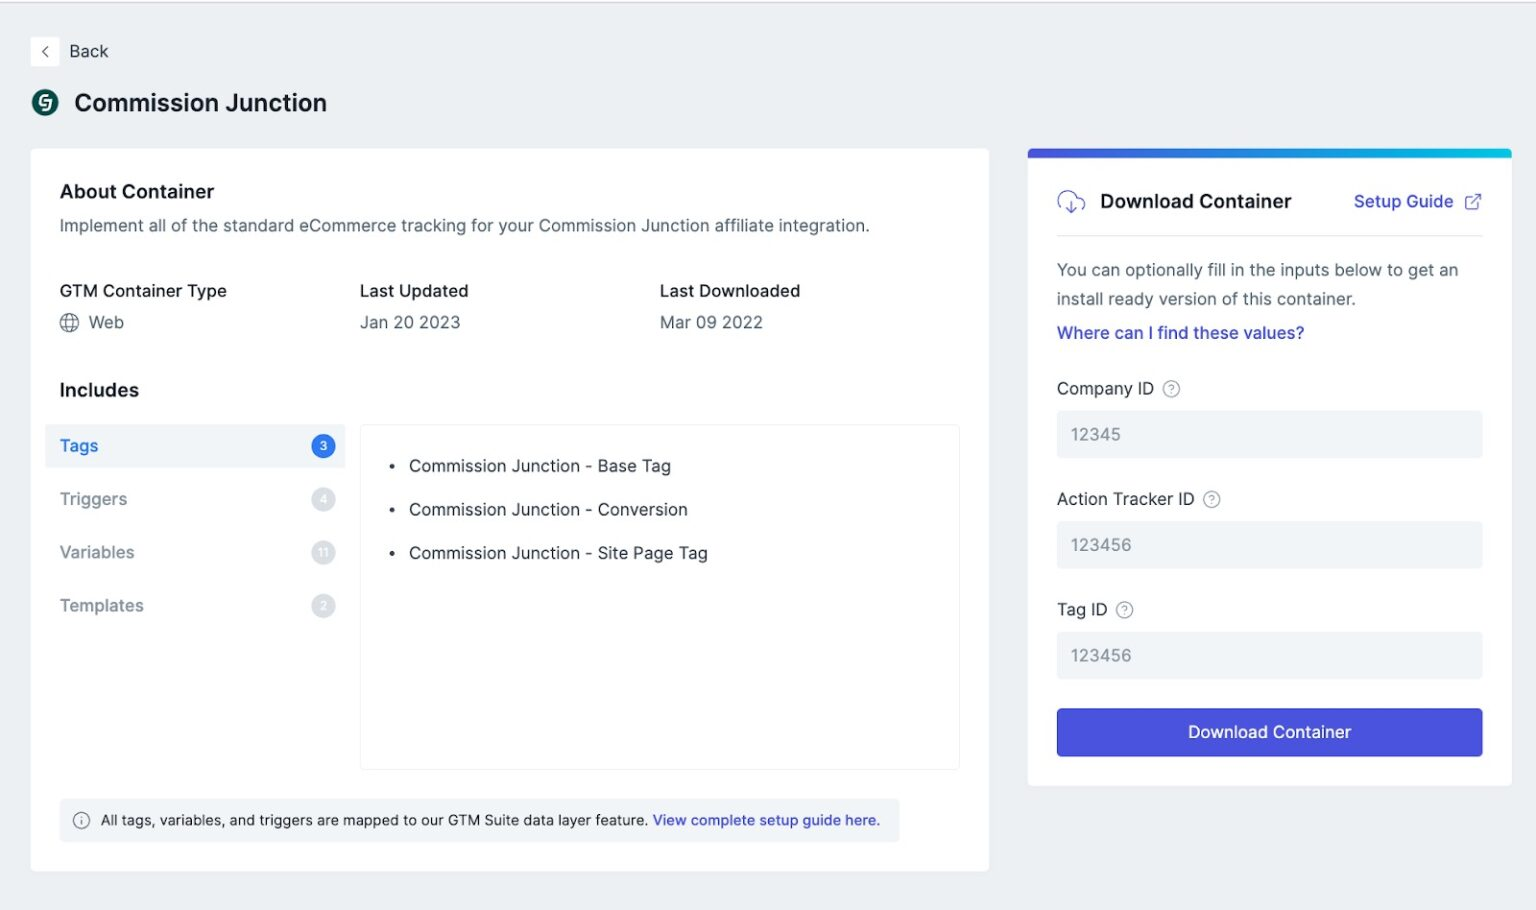
Download the container and save to your computer.
Step 4: Import Container to GTM
Next up, go to your Google Tag Manager container > Admin > Import.
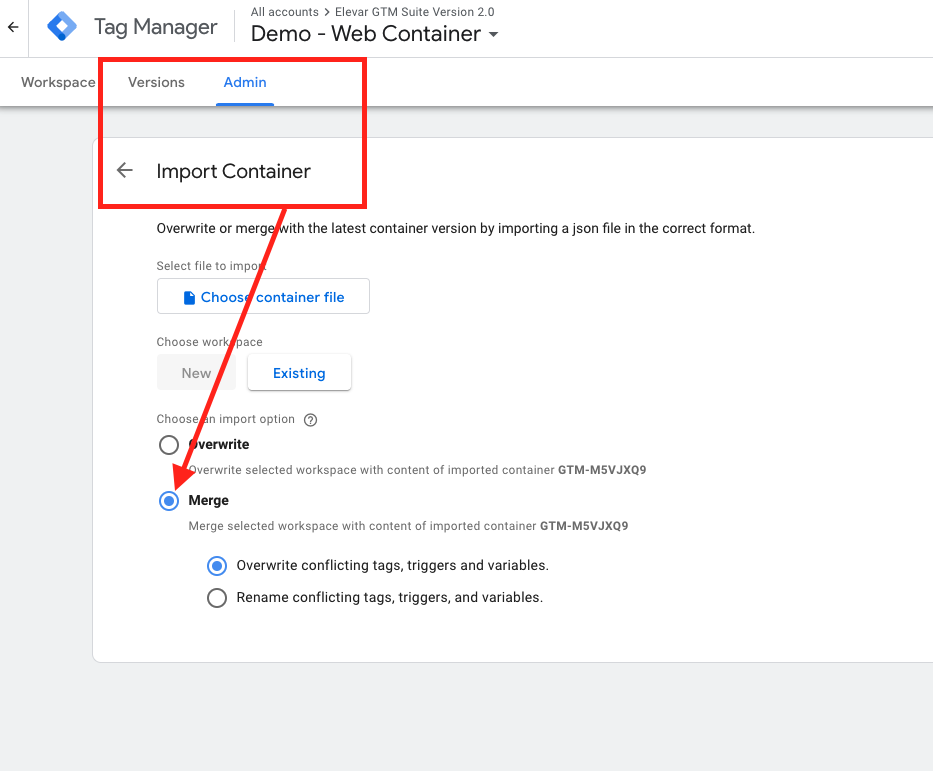
Be sure to select Merge container, not overwrite.
Once you’ve imported, verify the 3 variables are accurate.
Step 5: [Optional] QA the new tags with Google Tag Manager's Preview Mode
Follow our guide to QA your tags in Google Tag Manager (GTM) preview mode.
Once you’re ready to go live then publish your container in GTM.
It’s likely that your CJ rep has provided 4 unique scenarios to test:
- Order without coupon code and 1 item
- Order without coupon code and 2 items
- Order with coupon code and 1 item
- Order with coupon code and 2 items
They will give you unique click URLs to test each scenario.
Once you’ve completed each test order then email your CJ rep to confirm.
Updated 5 months ago