How to Set Up Impact Radius in Elevar Server-Side Destination
Follow this step-by-step guide to launching your Impact Radius Conversion API integration!
Prerequisites
Before you can enable your Impact Radius Conversion API Destination, you will need to:
Install the Shopify source. If you haven't yet, follow our guide, How to Implement the Shopify Source on Your Shopify Store.
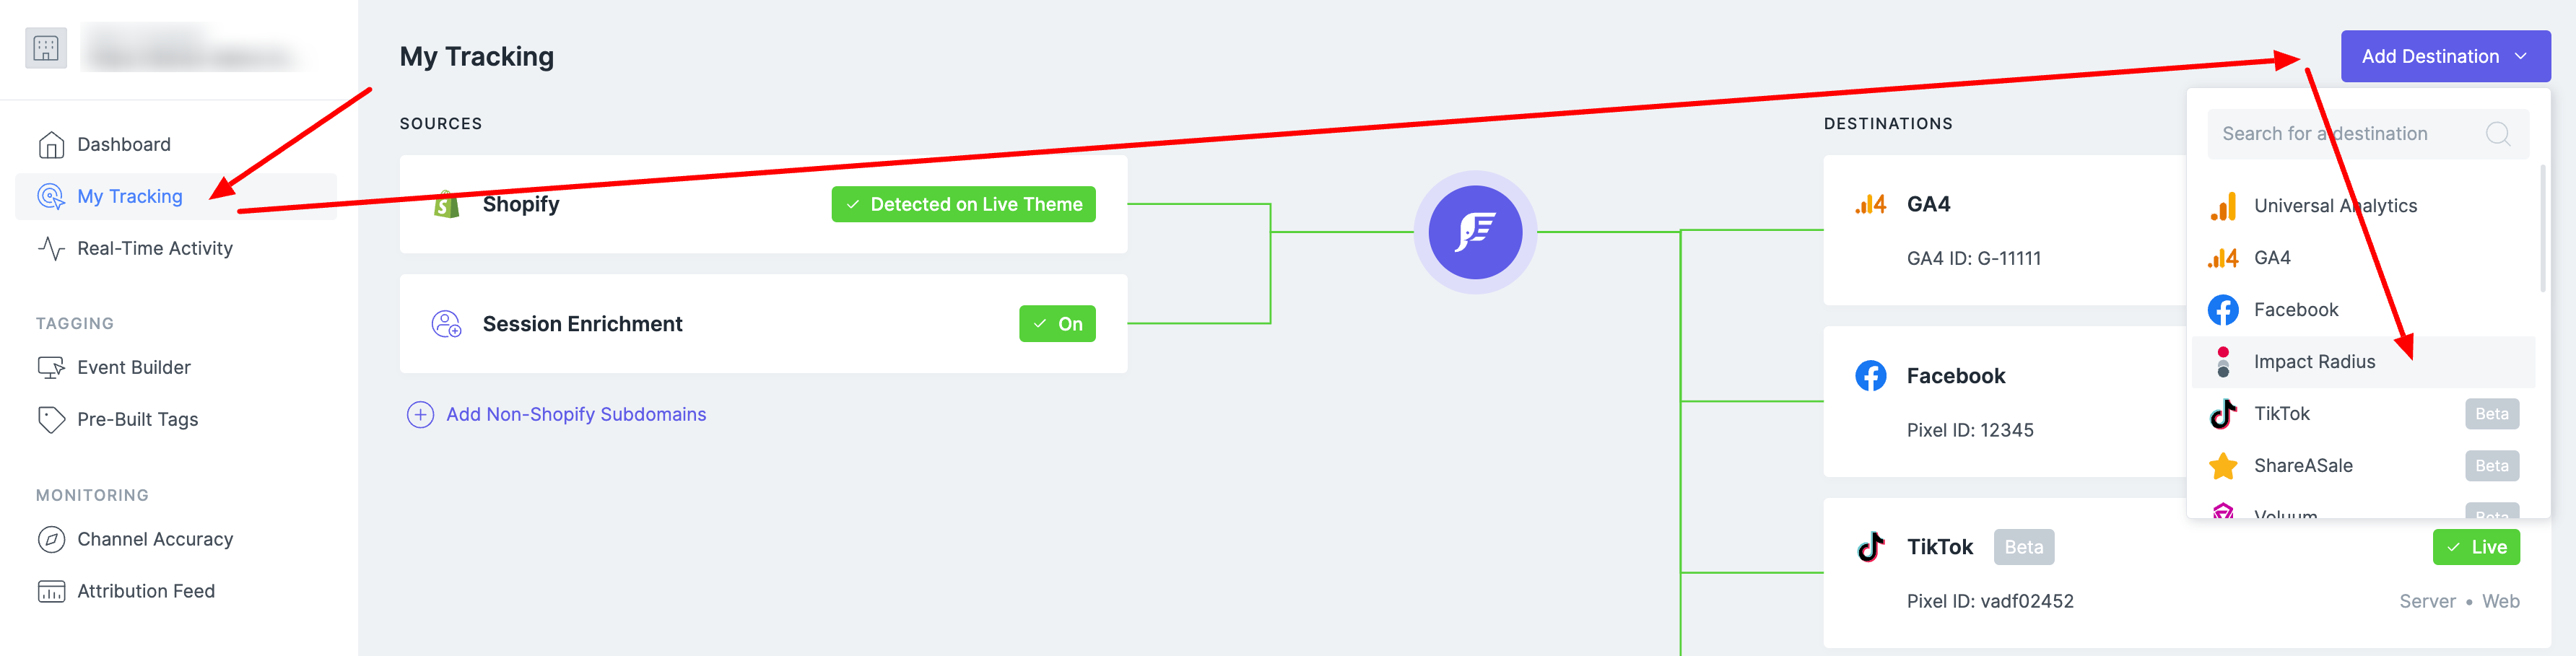
Step 1: Navigate to the Impact Radius Server-Side Install Wizard in your Elevar App
-
In your Elevar App, navigate to Server-Side > Select Add Destination > Find and select Impact Radius.
-
-
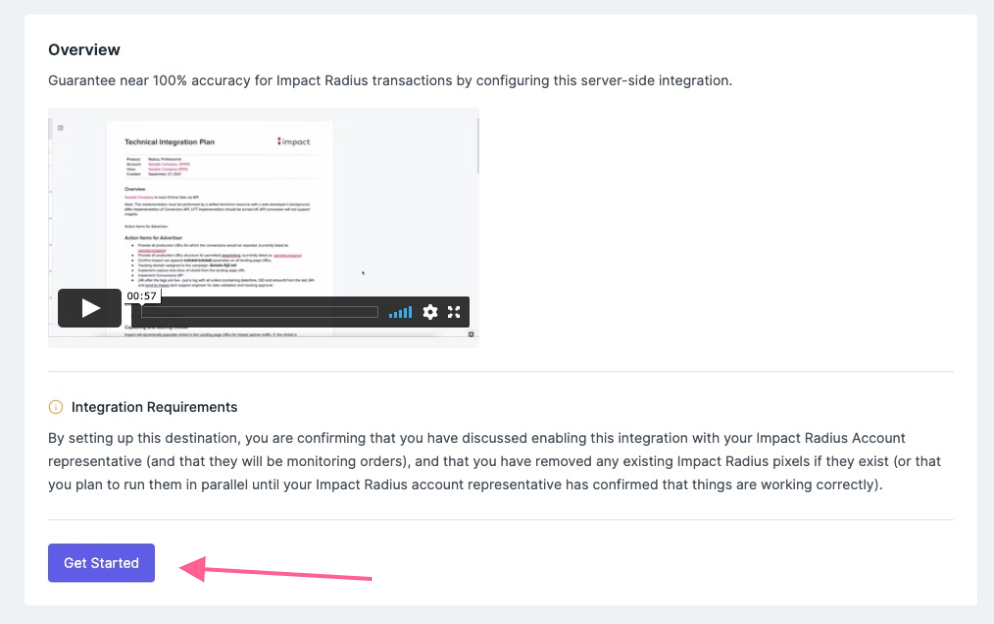
You'll be taken to an Overview Page > select Get Started
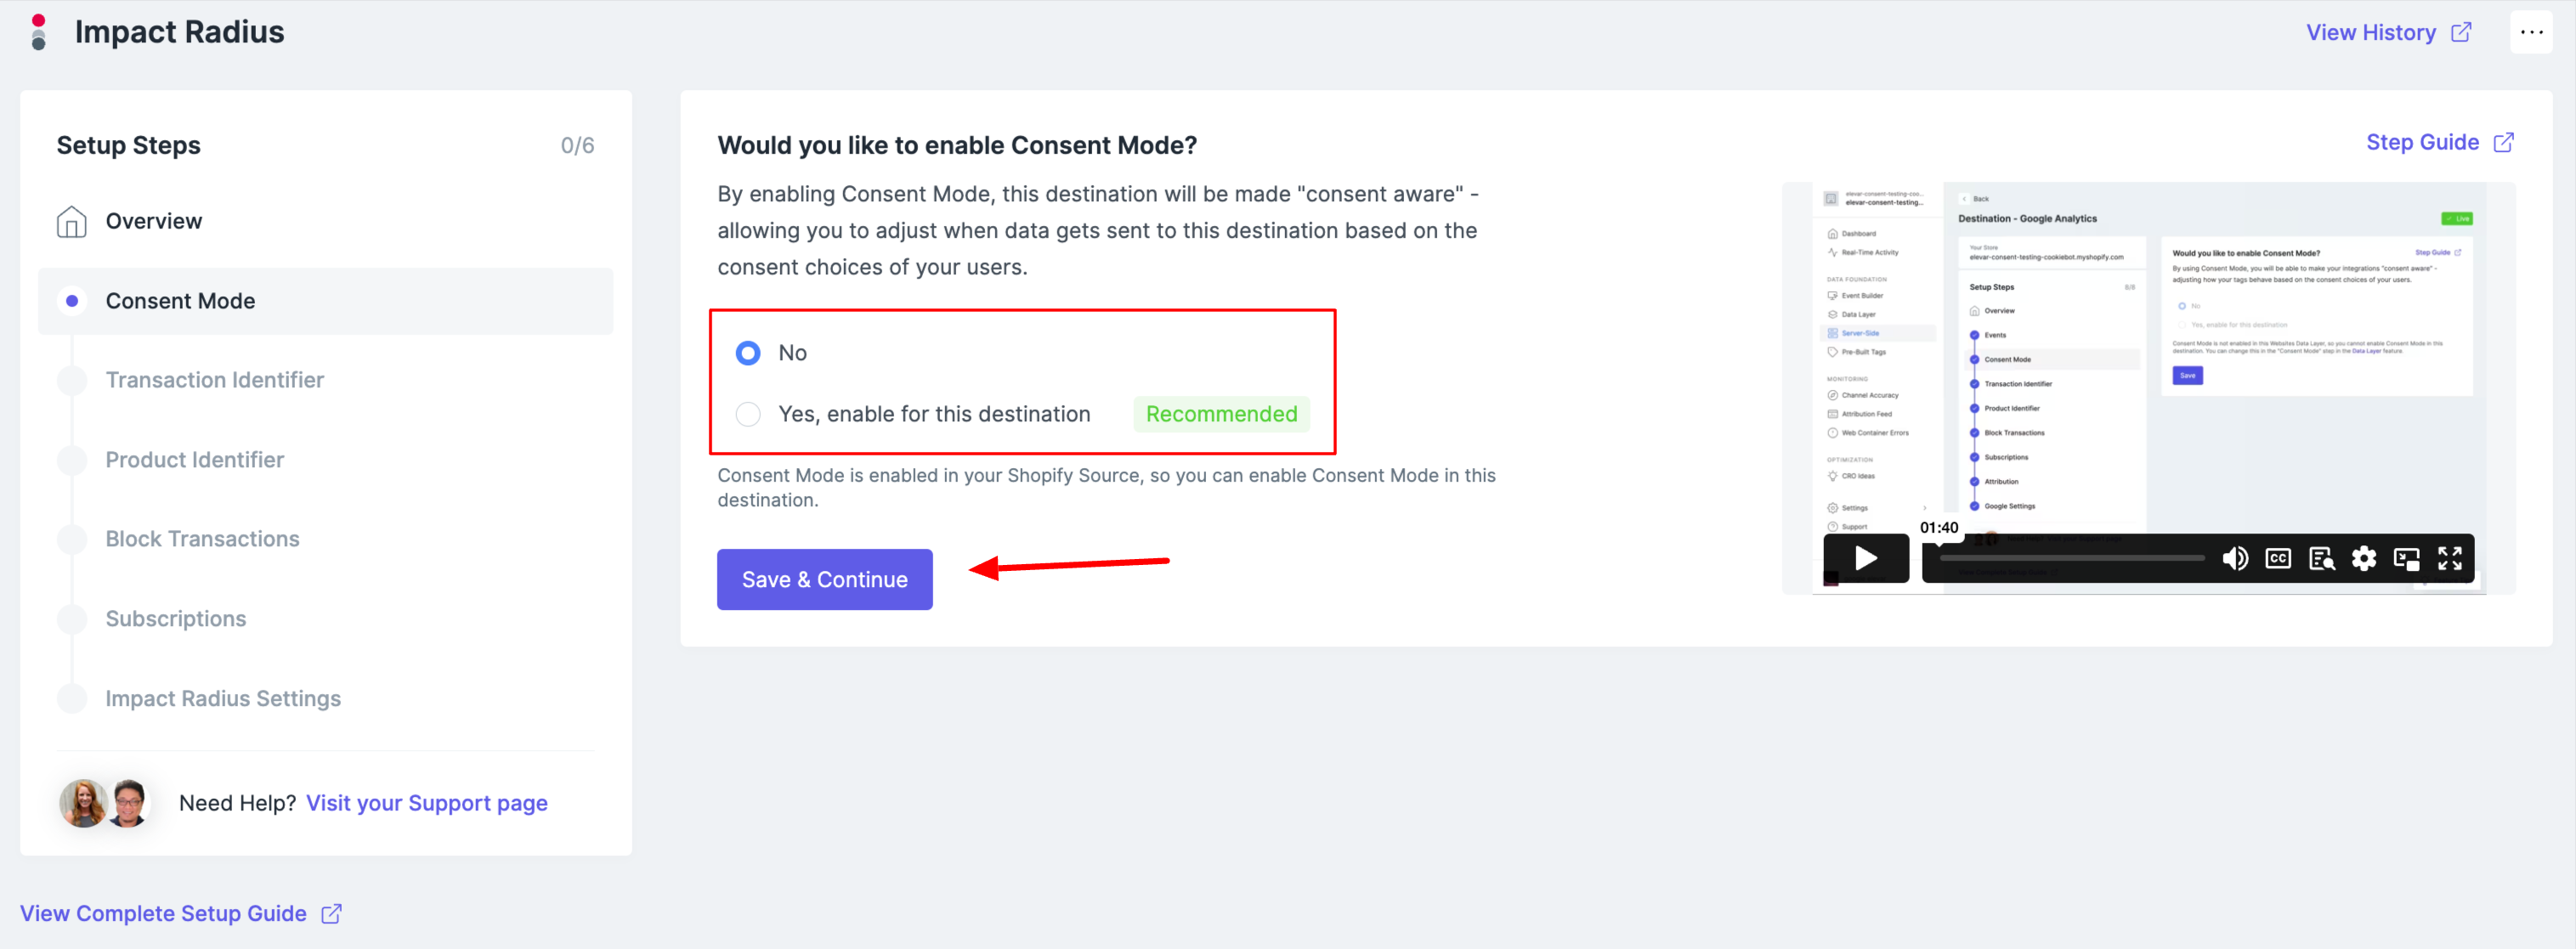
Step 2: Consent Mode
If you are using consent mode and would like to enable for this destination, select yes and select your desired consent types. If you are not using consent mode, select No and click Save & Continue
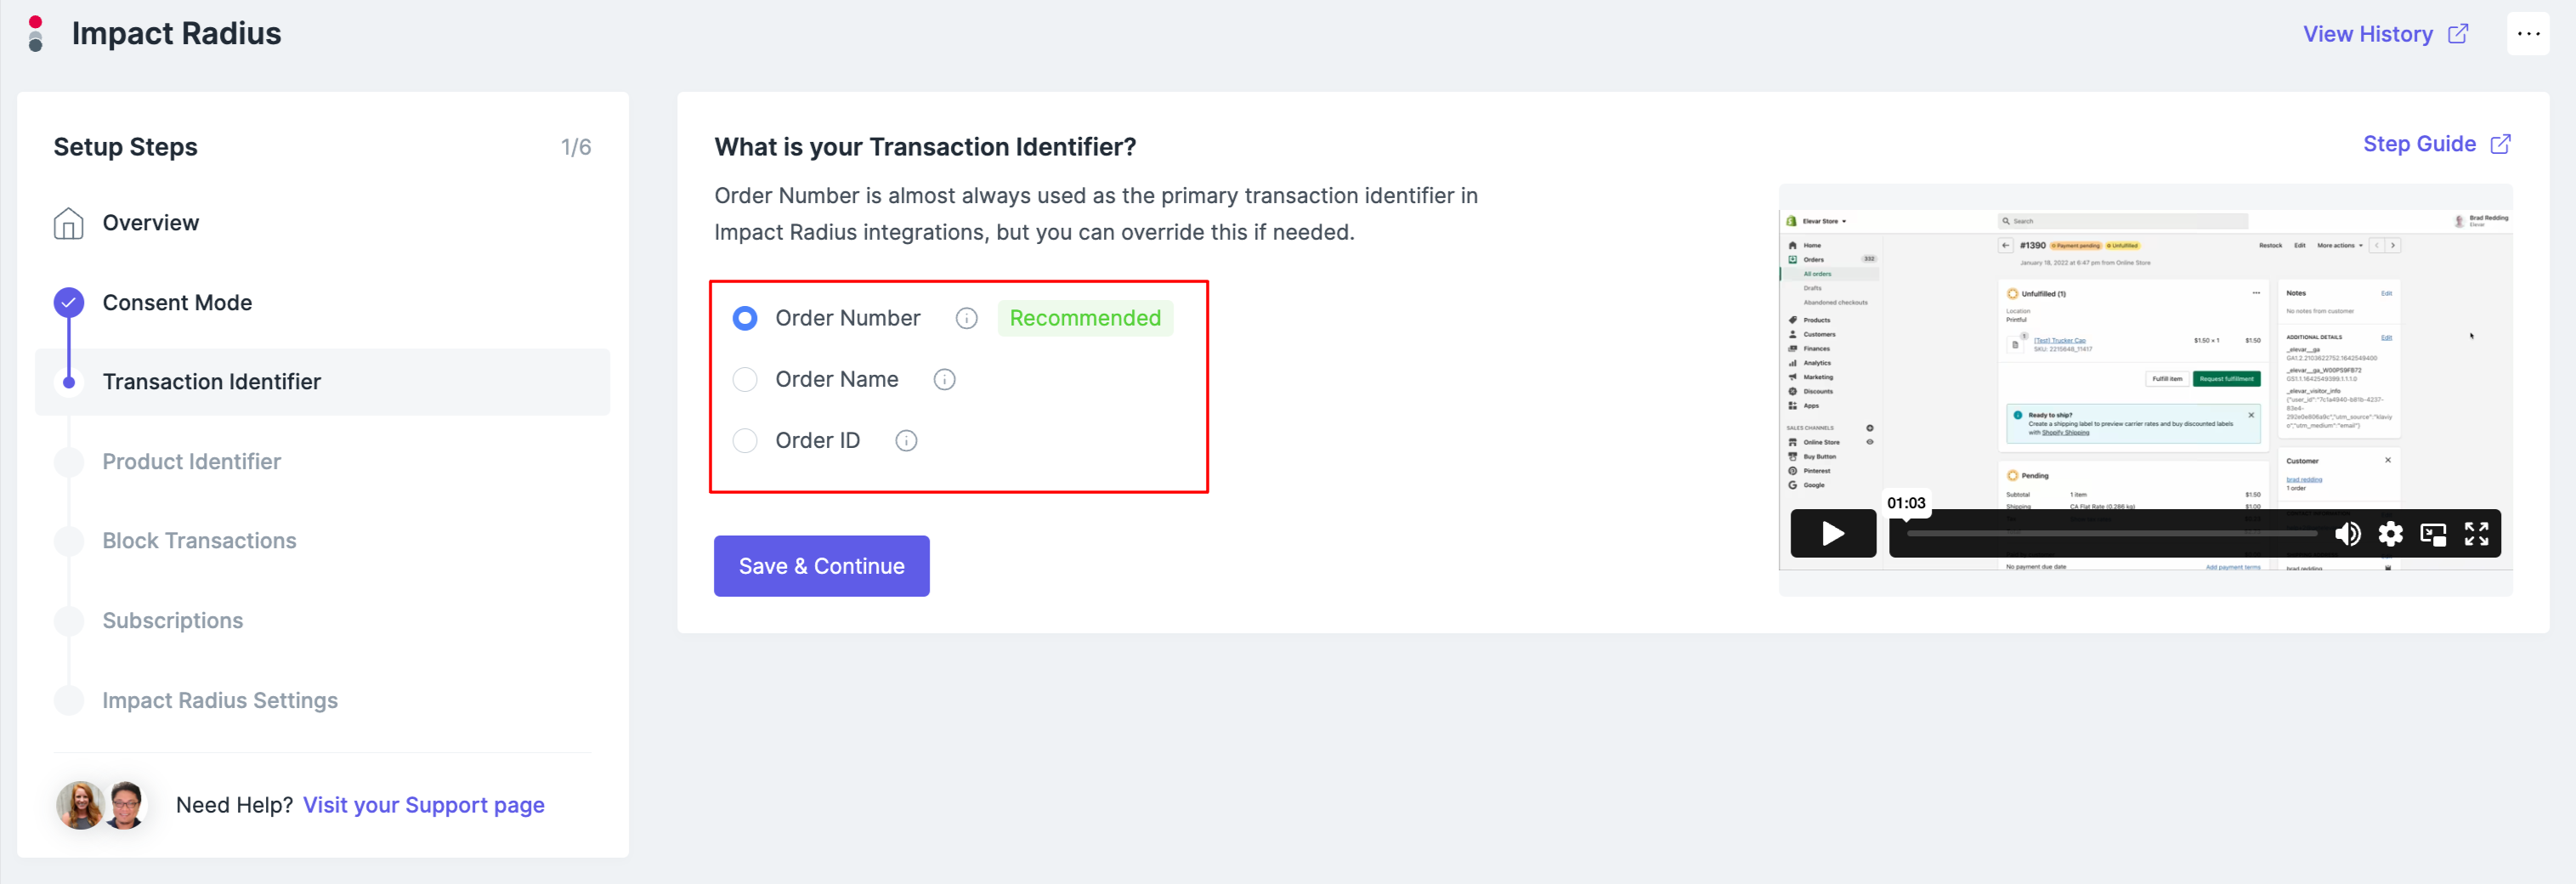
Step 3: Select Your Transaction Identifier
In most cases, Impact wants to receive the Order Number with your conversion API integration. You'll likely keep the default selection; however, you have the option to change this if needed.
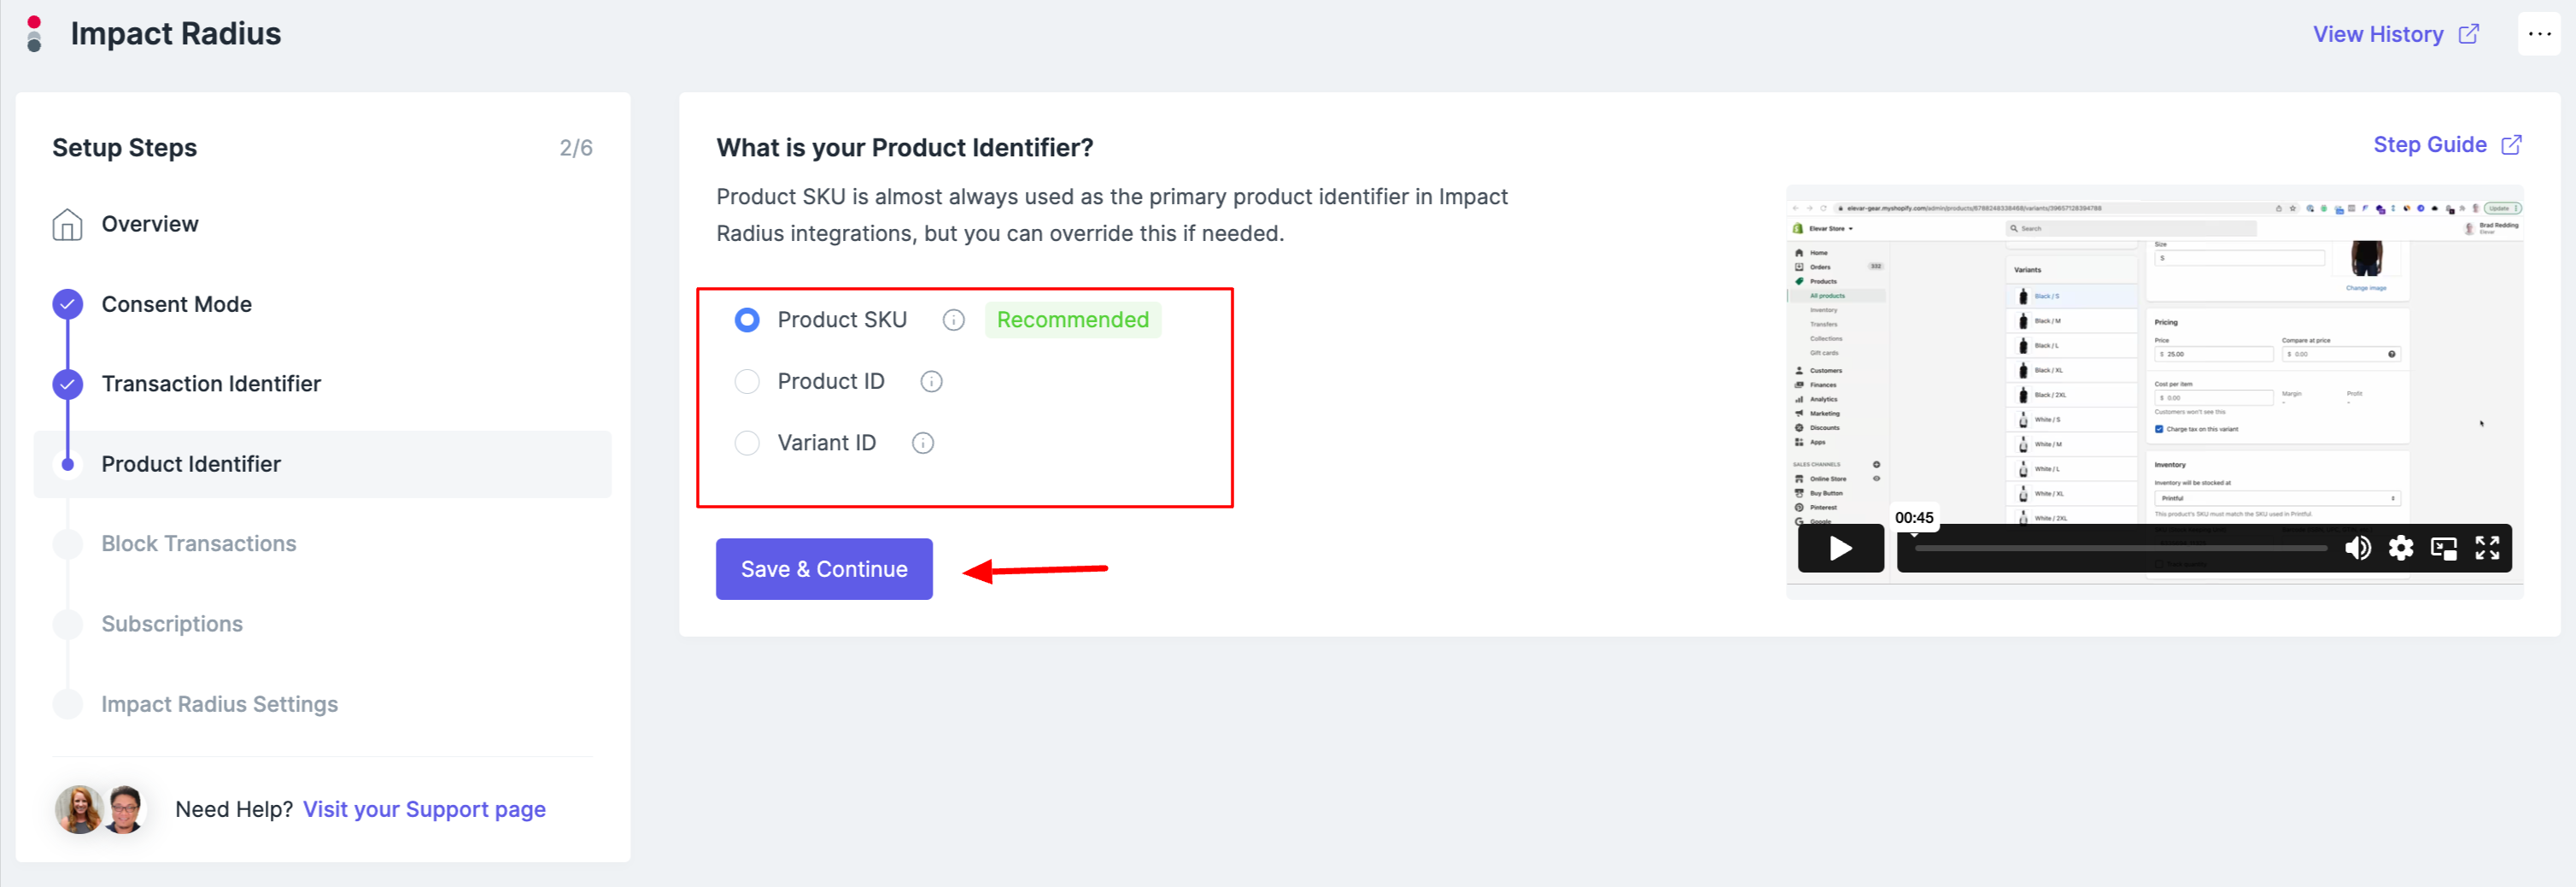
Step 4: Select Your Product Identifier
Again, Product SKU is almost always the primary product ID in Impact Radius integrations, so you likely won't need change anything here.
However, you do have the option to change this from SKU to product ID or variant ID.
Step 5: Block Transactions
This step allows you to control exactly what purchase events are sent to Impact's API. You can block orders based on Source Channel Names, Order Tags or Order Gateways. By default we recommend blocking exchange orders and have pre-selected the most common exchange channels for you.
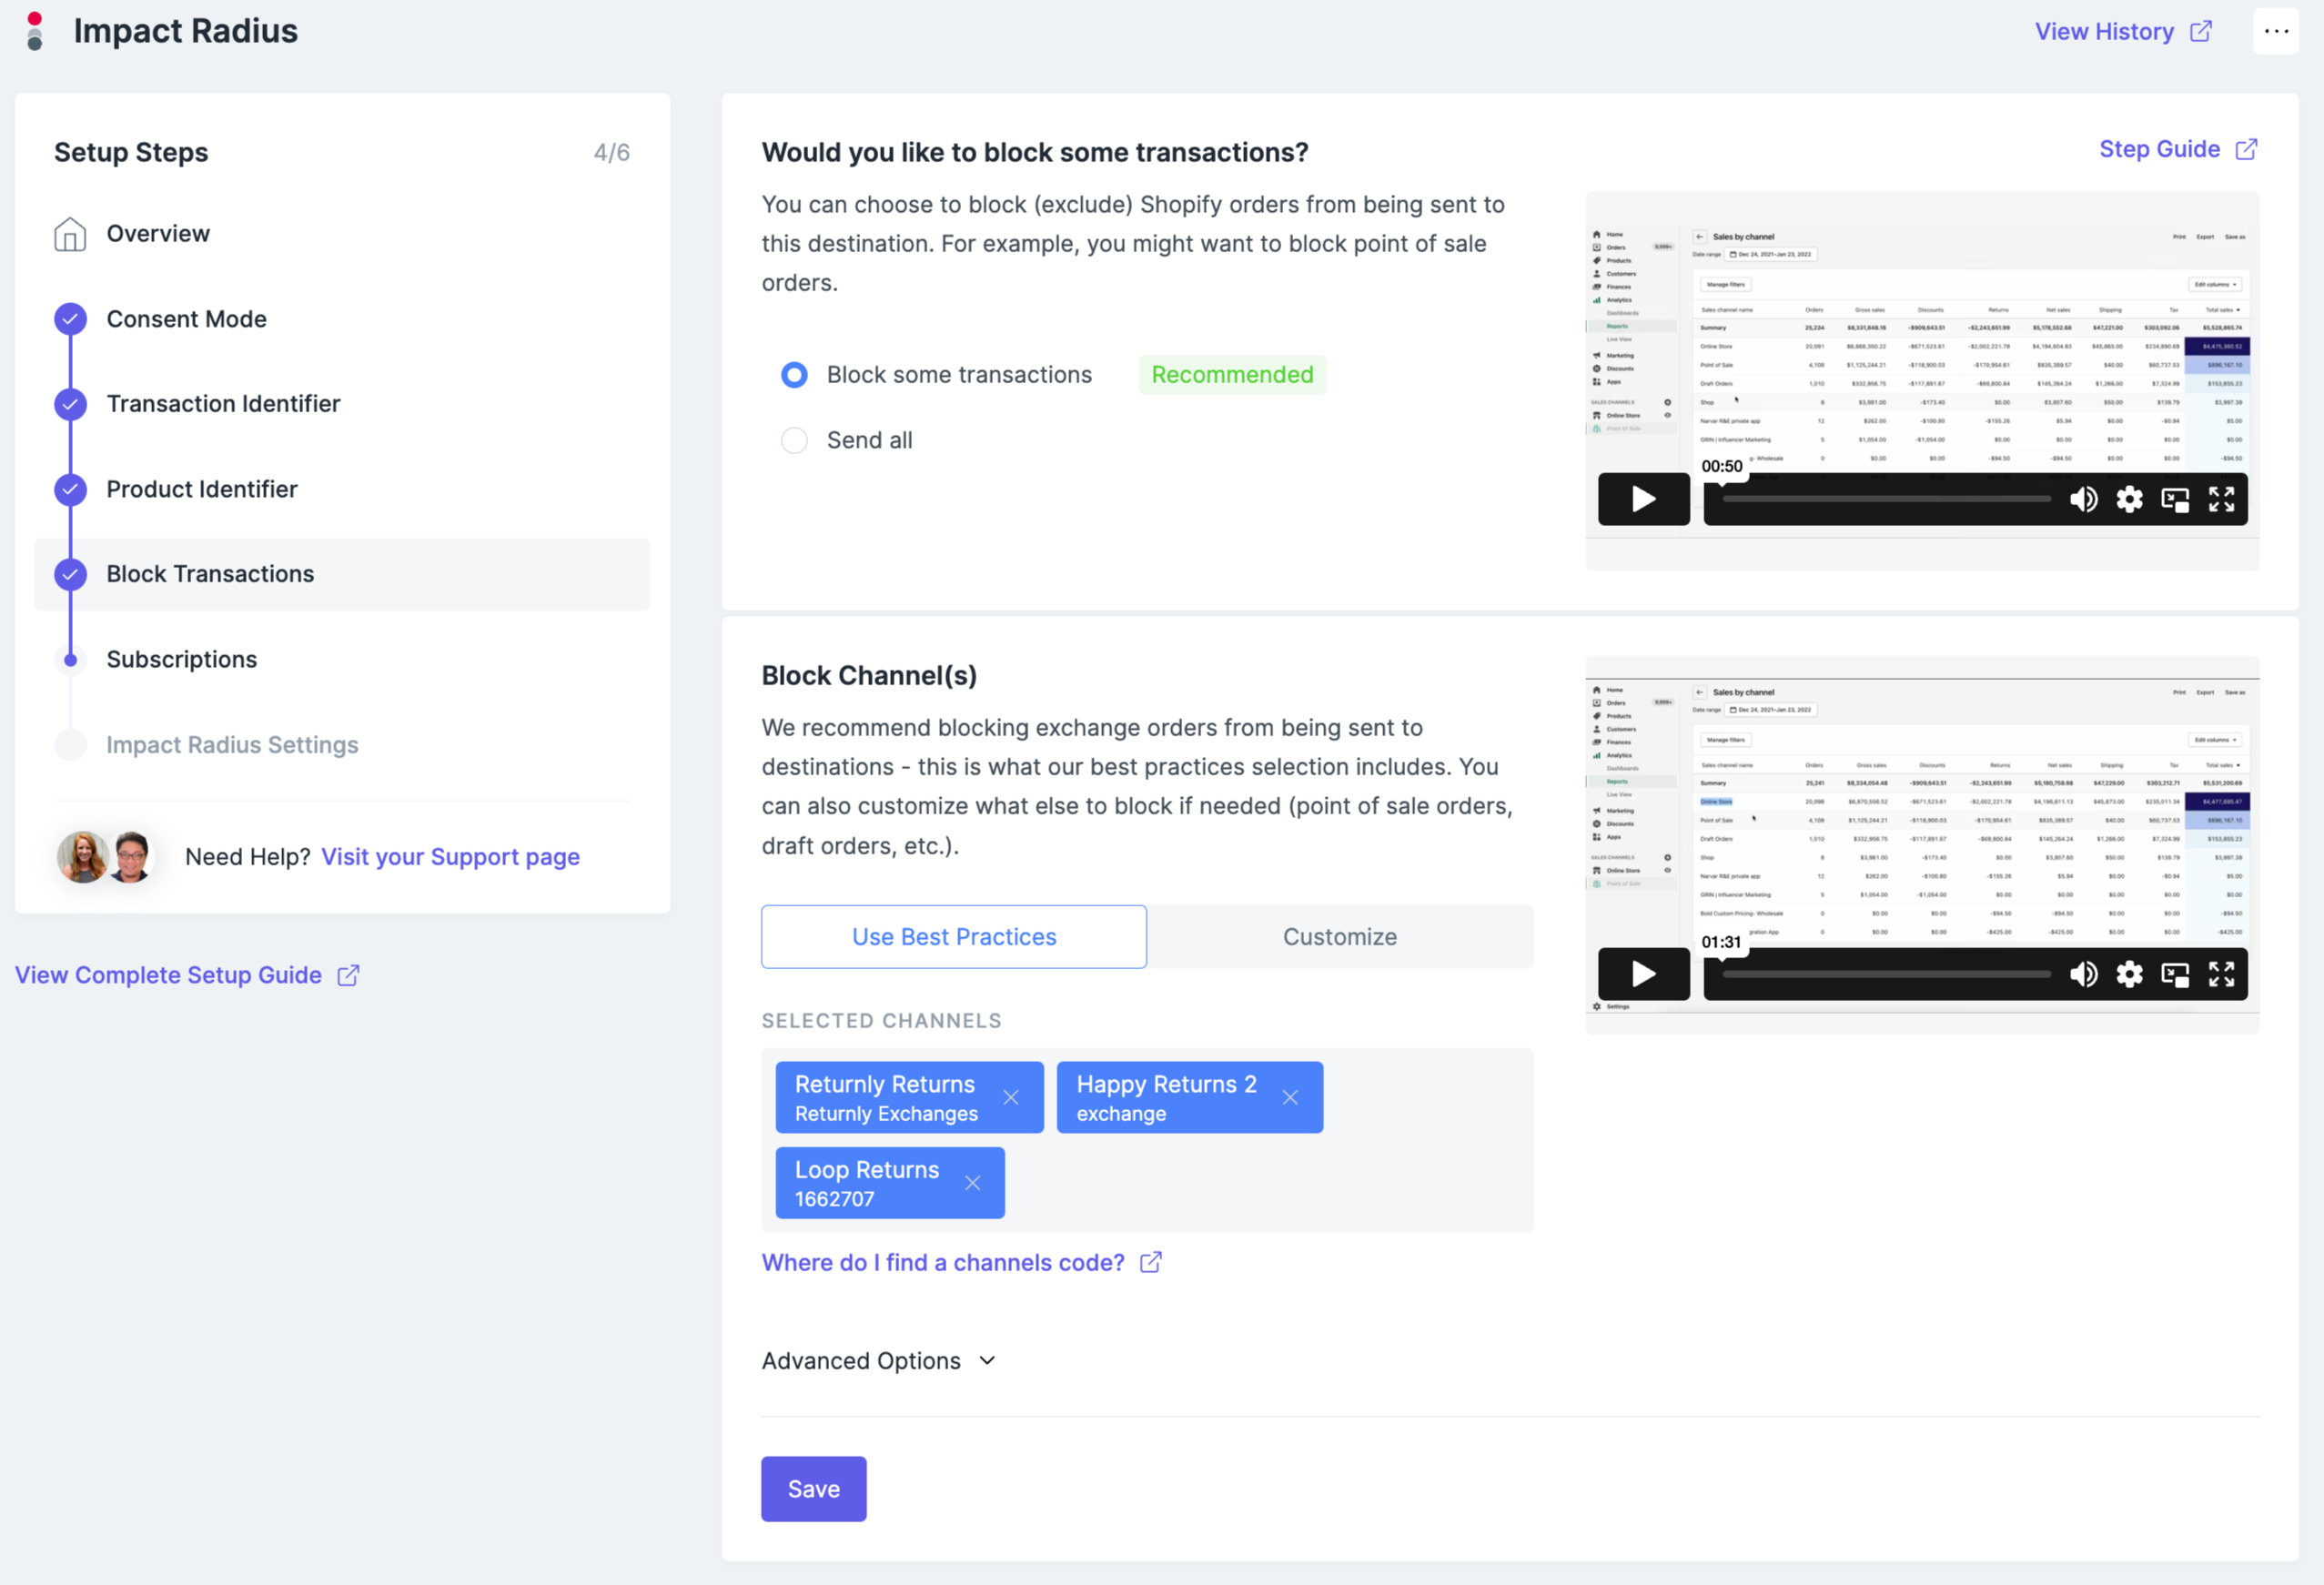
Two common scenarios where you may want to block orders are: recurring orders & offline orders. Learn how to block these orders in this guide.
Not sure if you need to block orders? Look at what Sales Channels you have in Shopify!
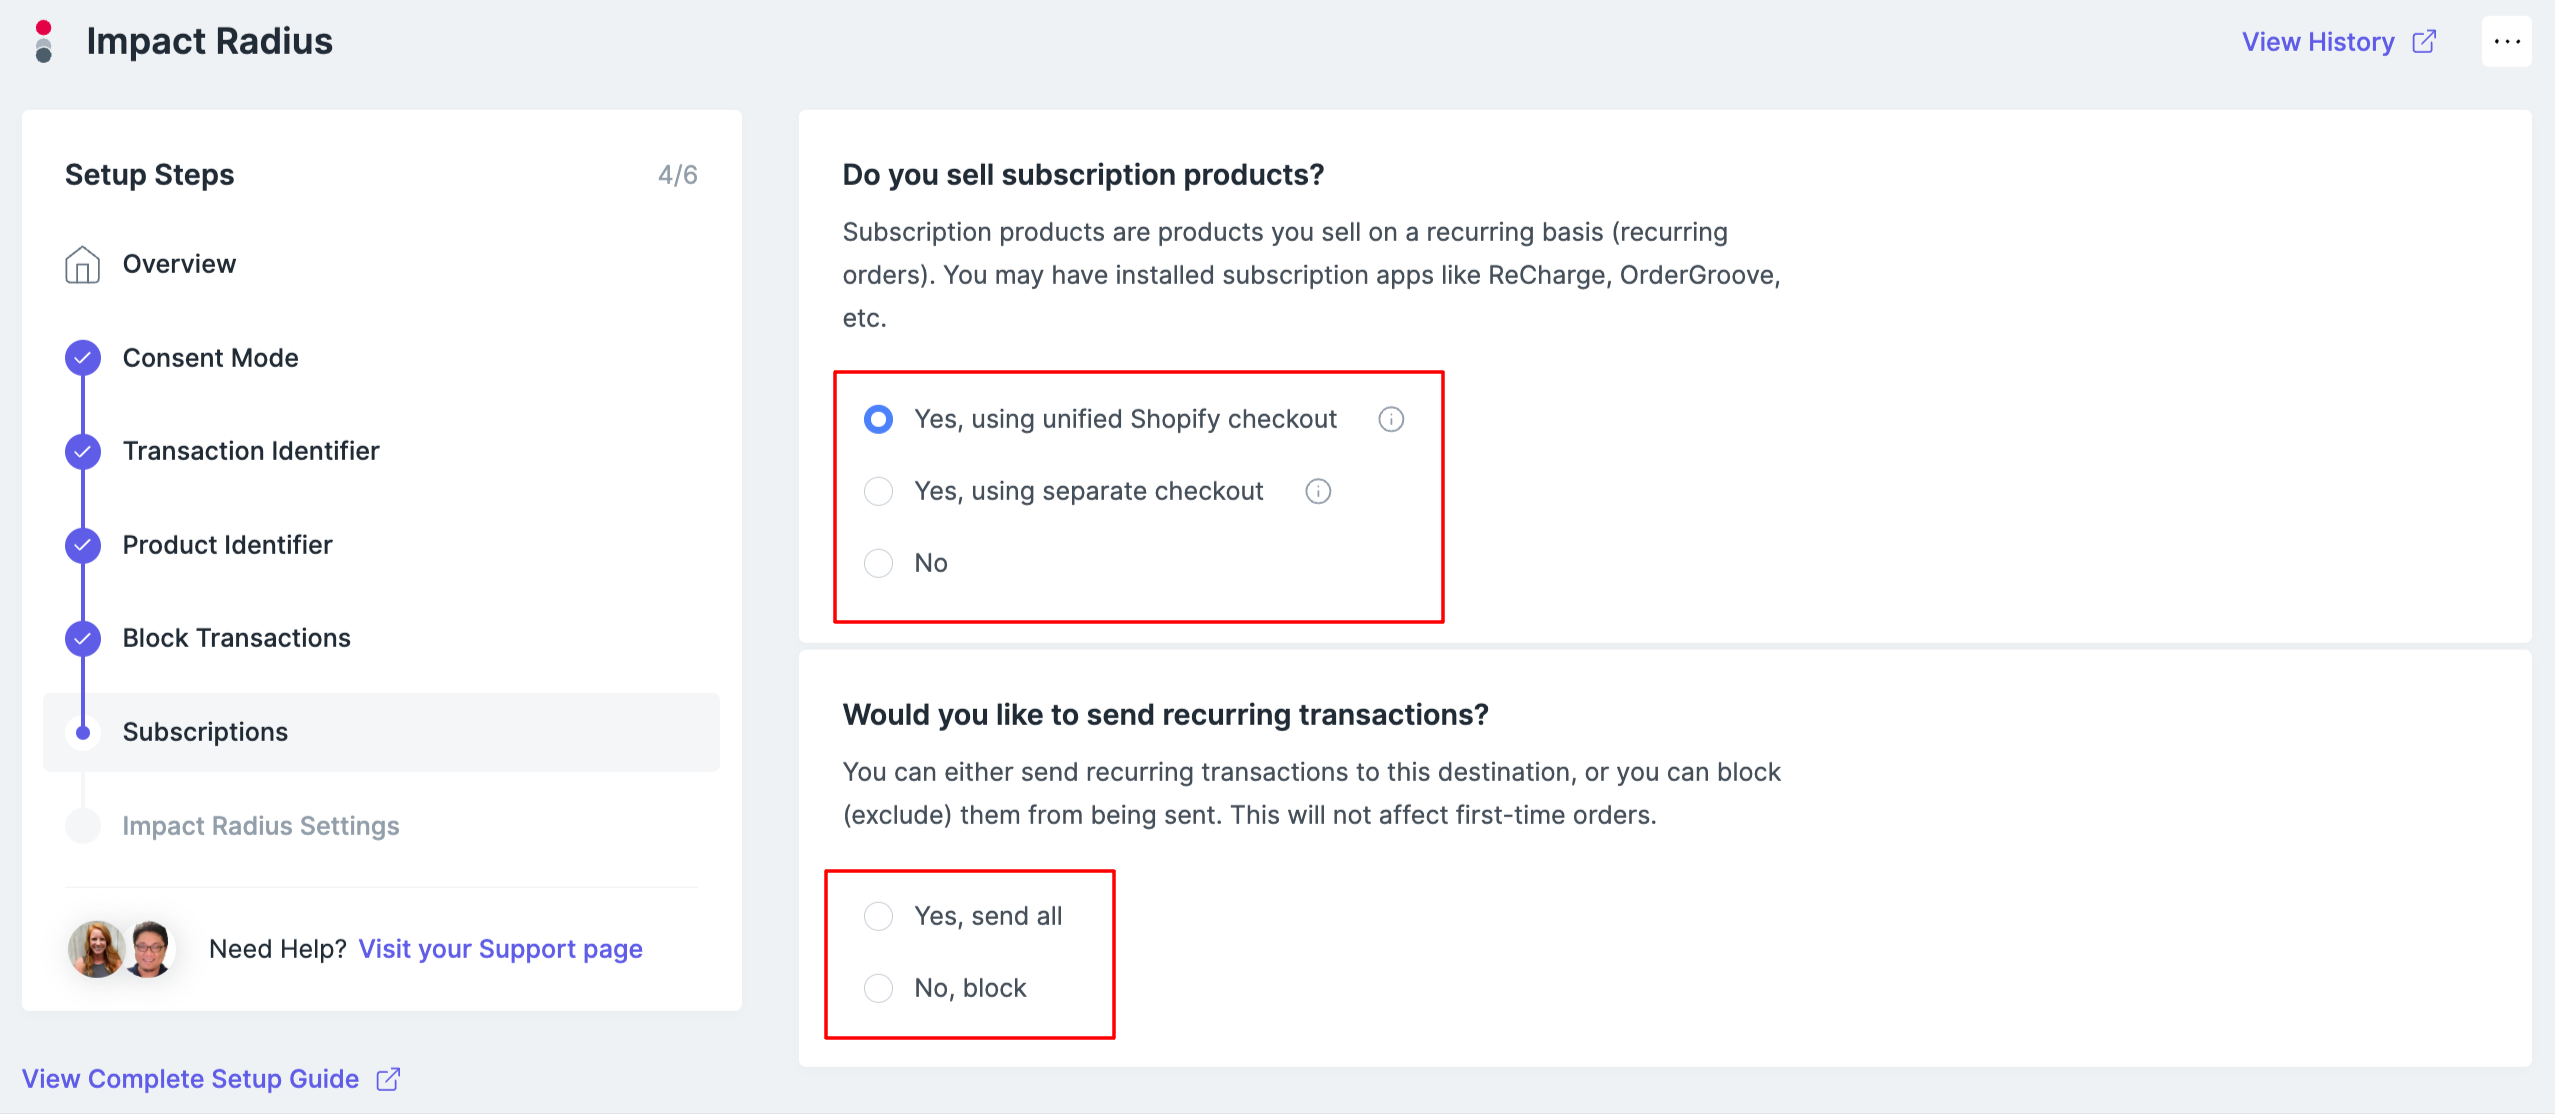
Step 6: Configure your Subscription Settings
Do you sell subscription products? If you do, you can choose to send first-time orders only or first-time + recurring orders to your marketing destination.
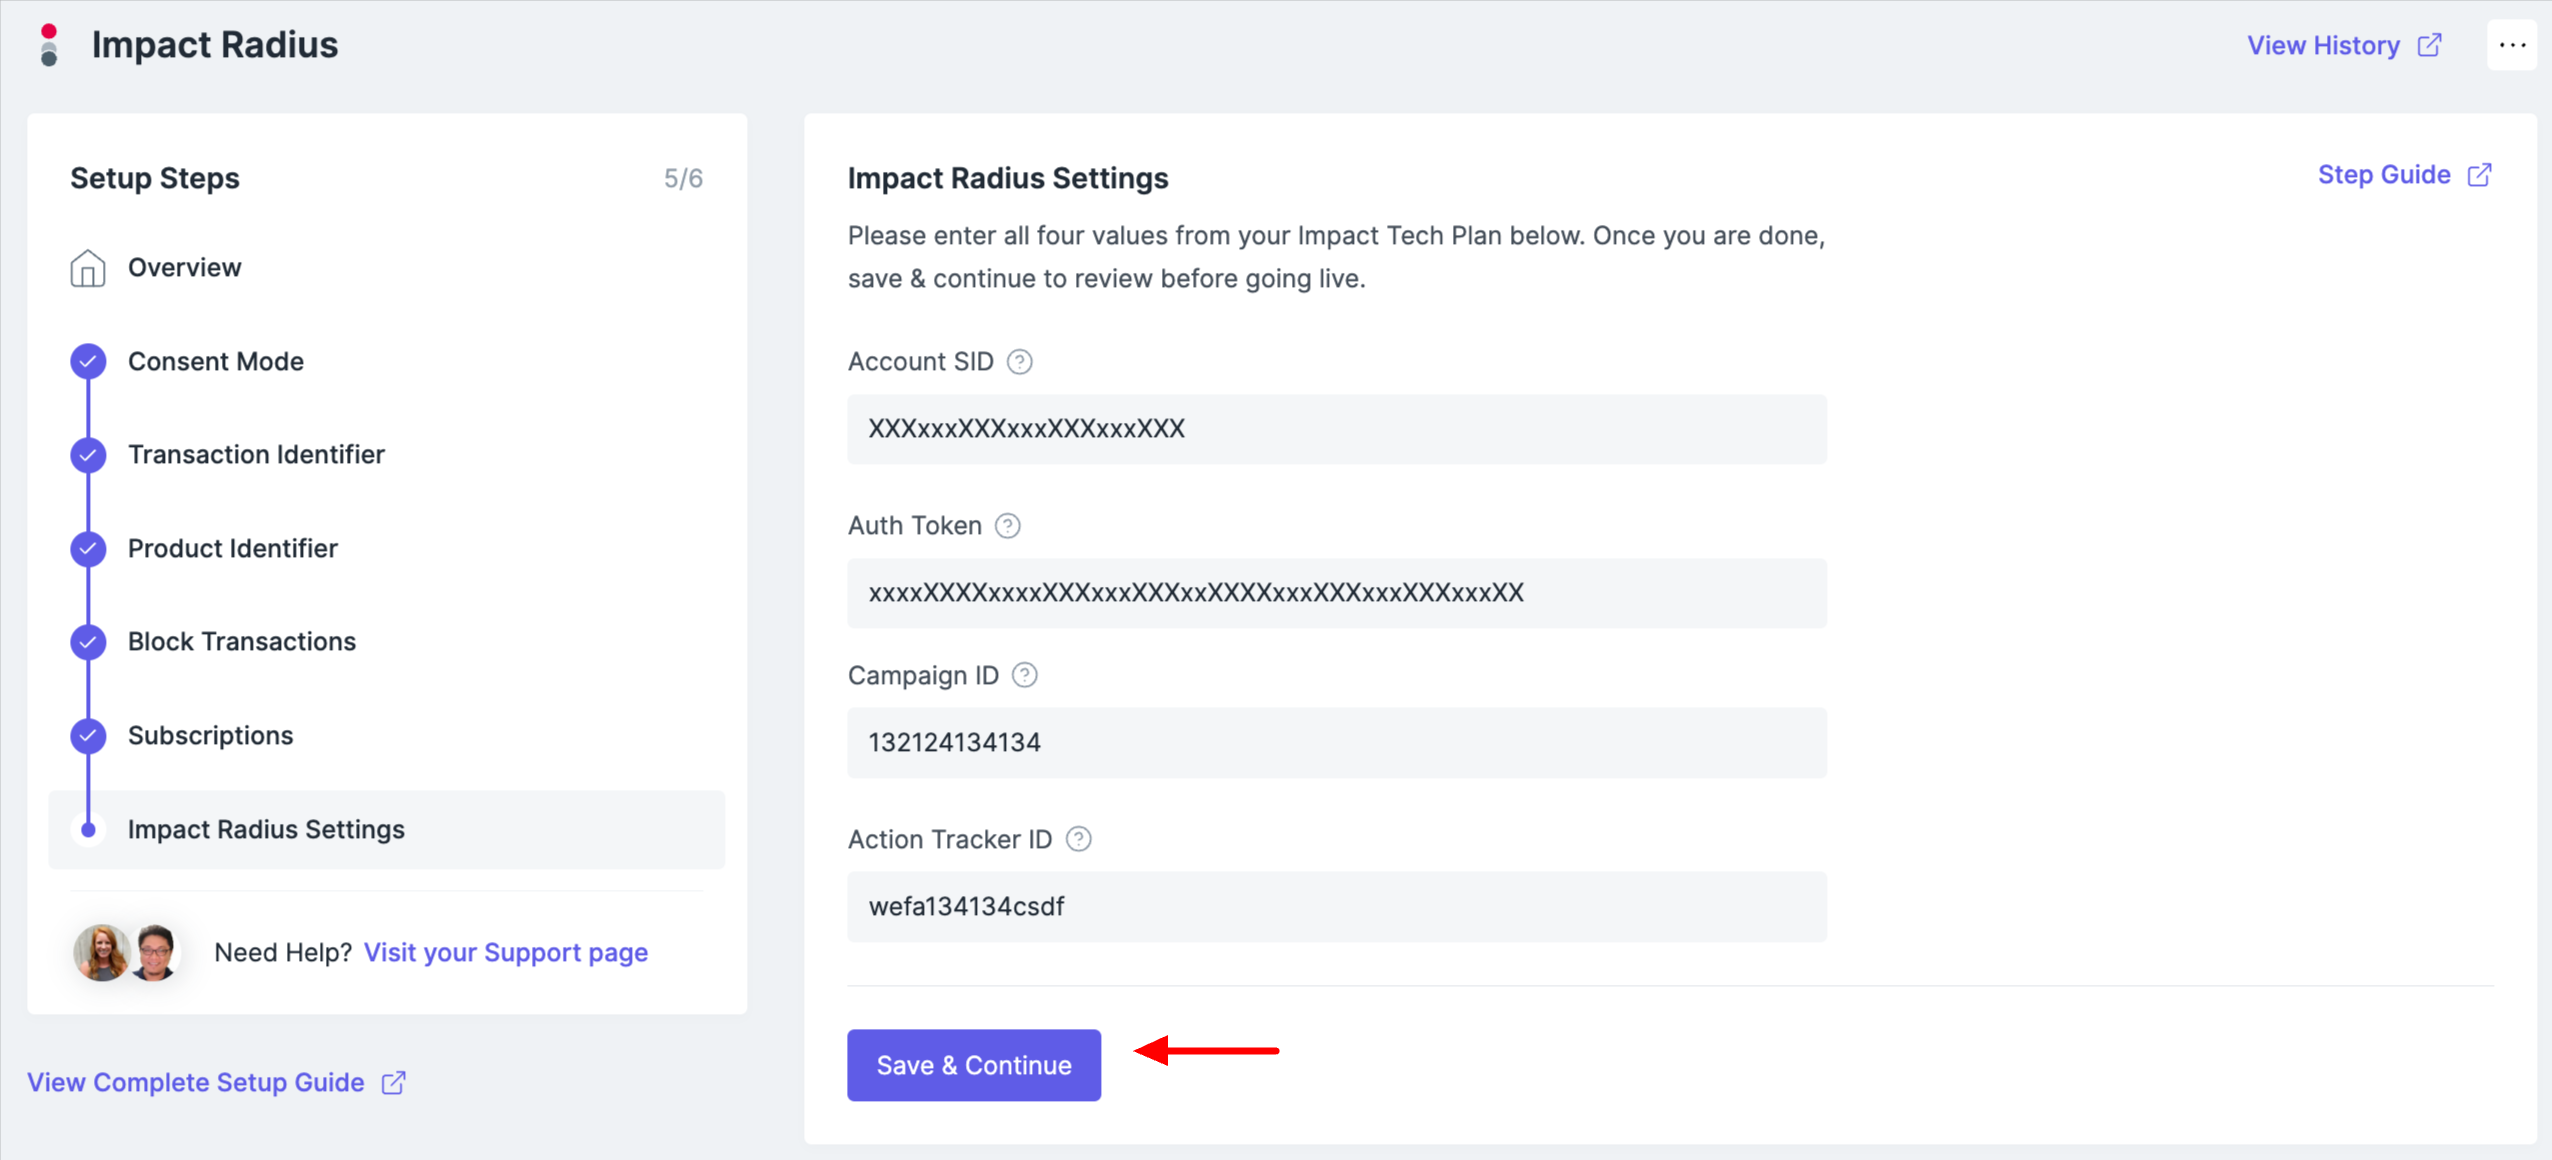
Step 7: Add in Your Impact ID's & Tokens
- Add in your Account SID. Your Account SID value will be included in your Impact Radius Conversion API Tech Plan.
- Add in your Auth Token. Your Auth Token will be included in your Impact Radius Conversion API Tech Plan.
- Add in your Campaign ID. API Tech Plan.
- Add in your Action Tracker ID. Your Action Tracker ID will be included in your Impact Radius Conversion API Tech Plan.
- Select Save & Continue
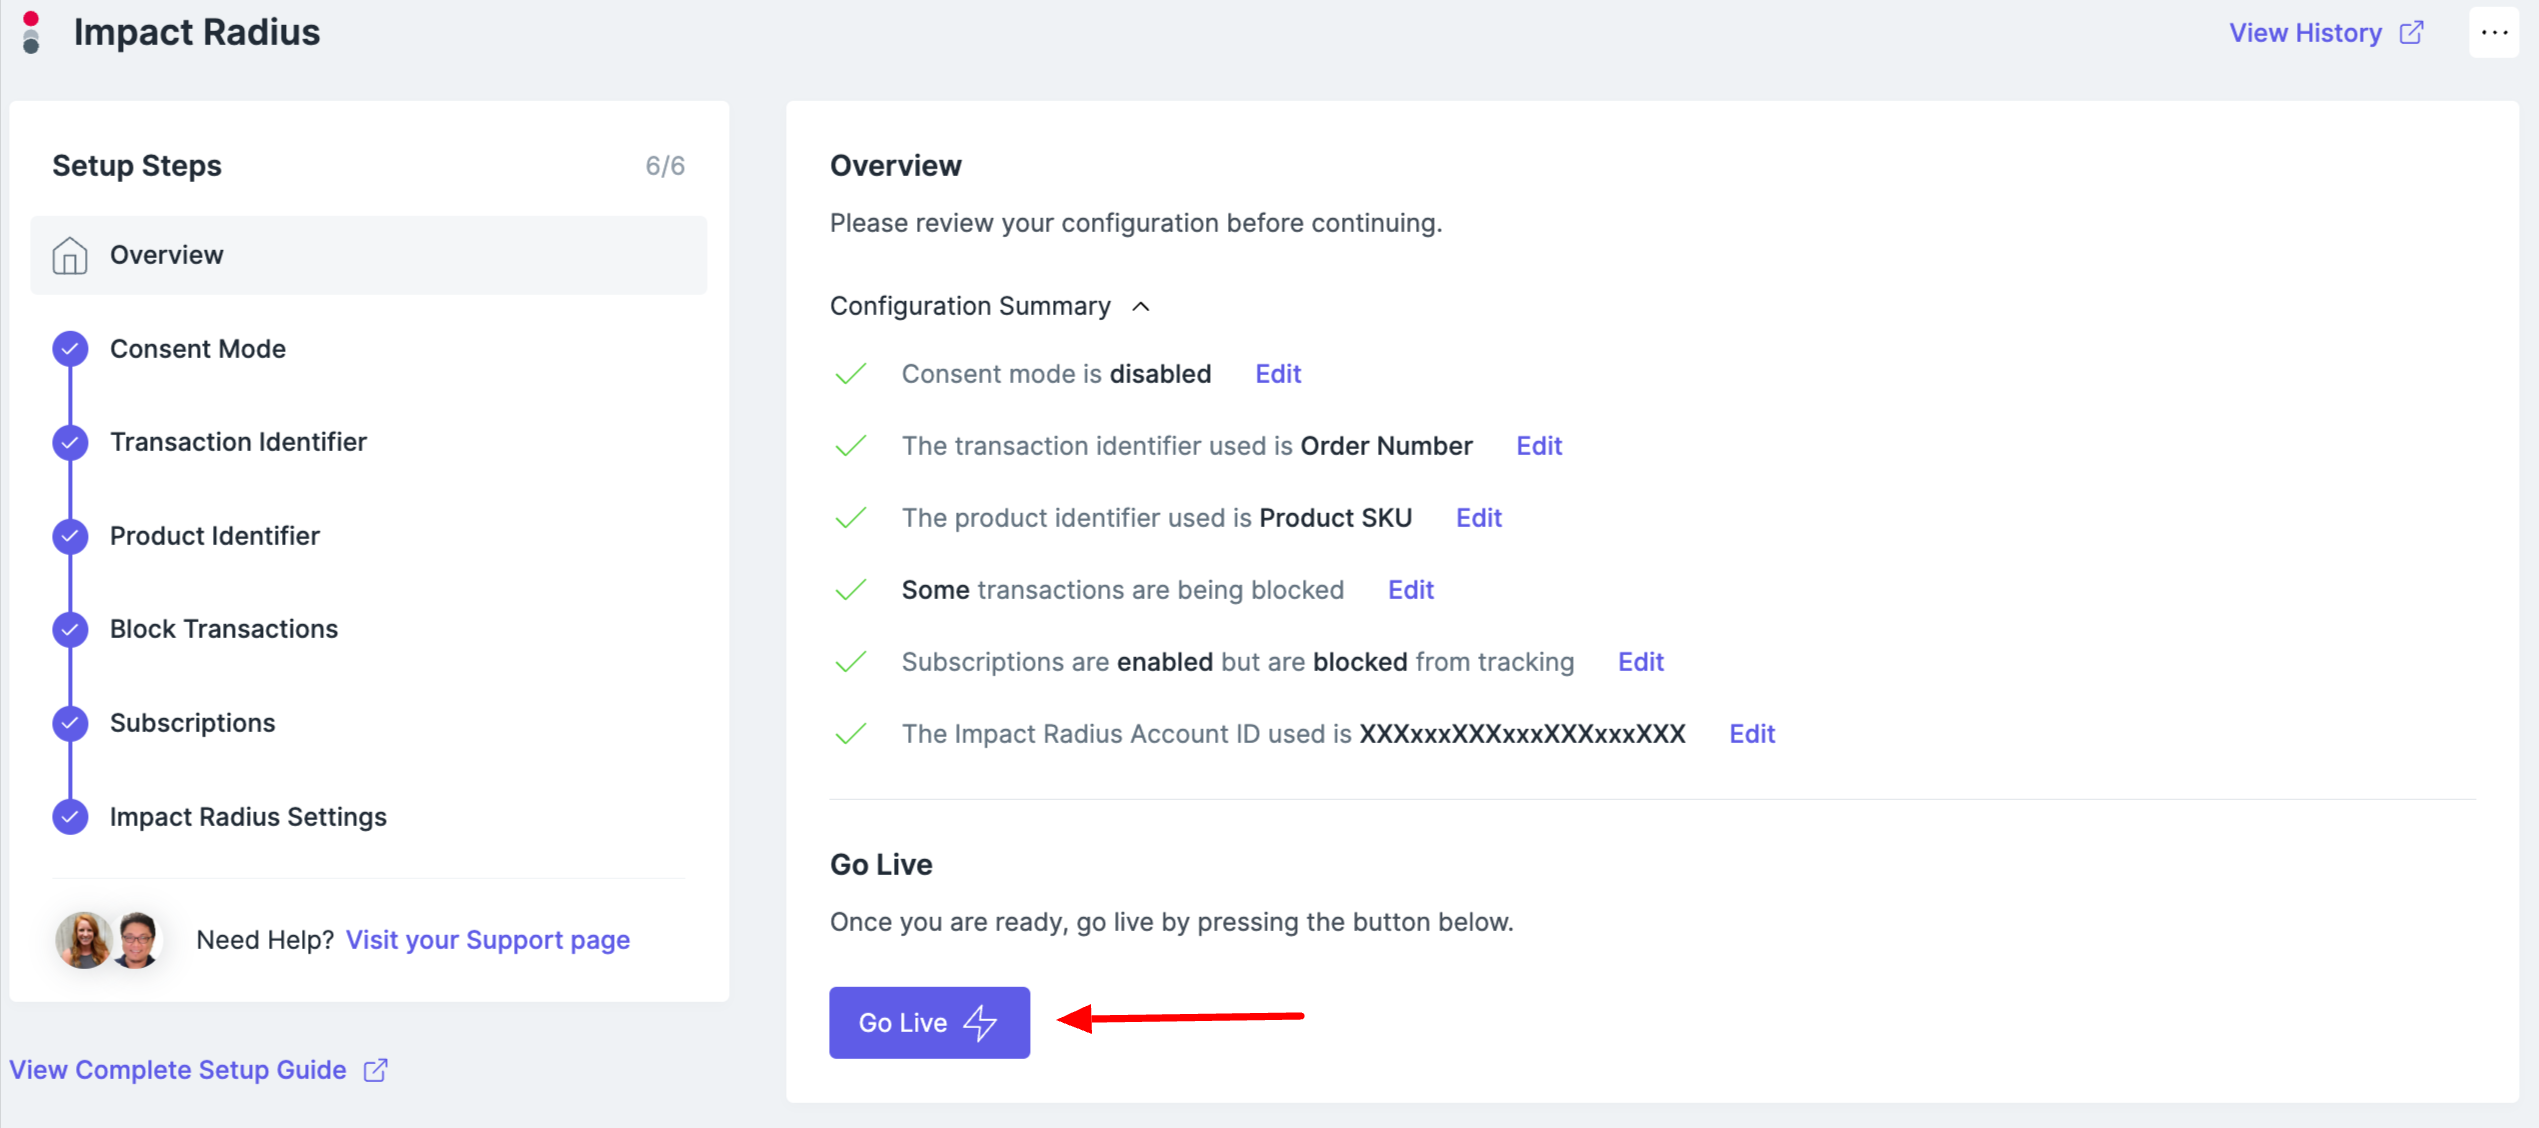
Step 8: Push the Tracking Live
Select Go Live on the Overview Page to launch your new Impact Radius tracking.
Once you do go live then your Impact team will have you place a test order => send them details on the order => they will validate the order was successfully received.
Once they approve the integration then you'll need to remove your pre-existing Impact client-side tracking. These could be in your GTM web container, your Shopify theme, or in the Admin settings.
Updated 5 months ago