How to Set Up Pinterest Pixel Tracking via Google Tag Manager
The Pinterest Sales Channel does not allow you to separate use of the Catalog vs the Pixel in the app. You can either use another software for your Pinterest Feed Management like GoDataFeed or continue to use the native app for your Pinterest Pixel tracking.
Prerequisites
- If you haven't installed our Shopify Source in your Elevar App, follow our guide on How to Implement the Shopify Source.
Step 1: Download Container for GTM
Inside of your Elevar account, go to Pre Built Tags > Pinterest.
Update your Pinterest pixel ID in the tag settings shown below.
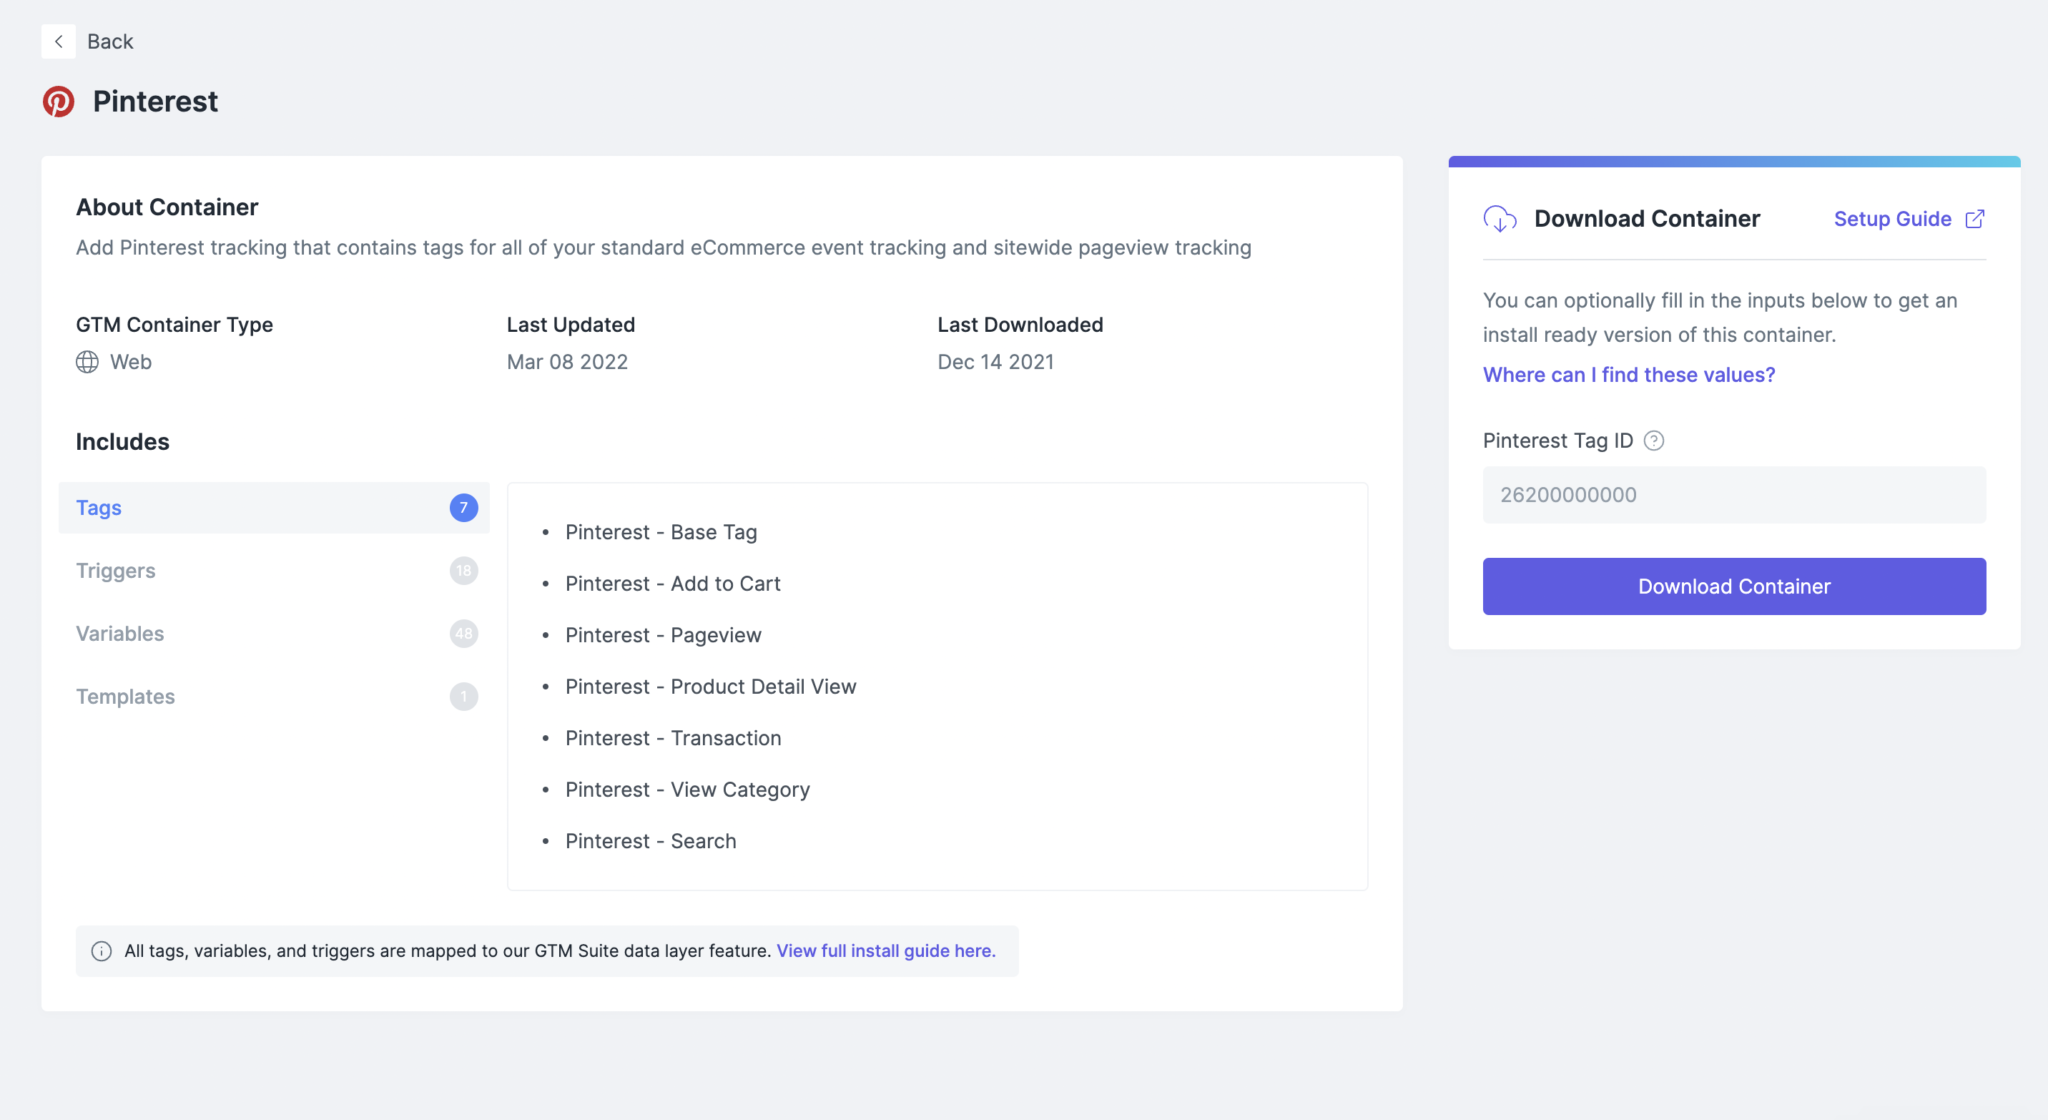
Download the container and save to your computer.
Step 2: Import Container to GTM
Next up, go to your Google Tag Manager Account container > Admin > Import.
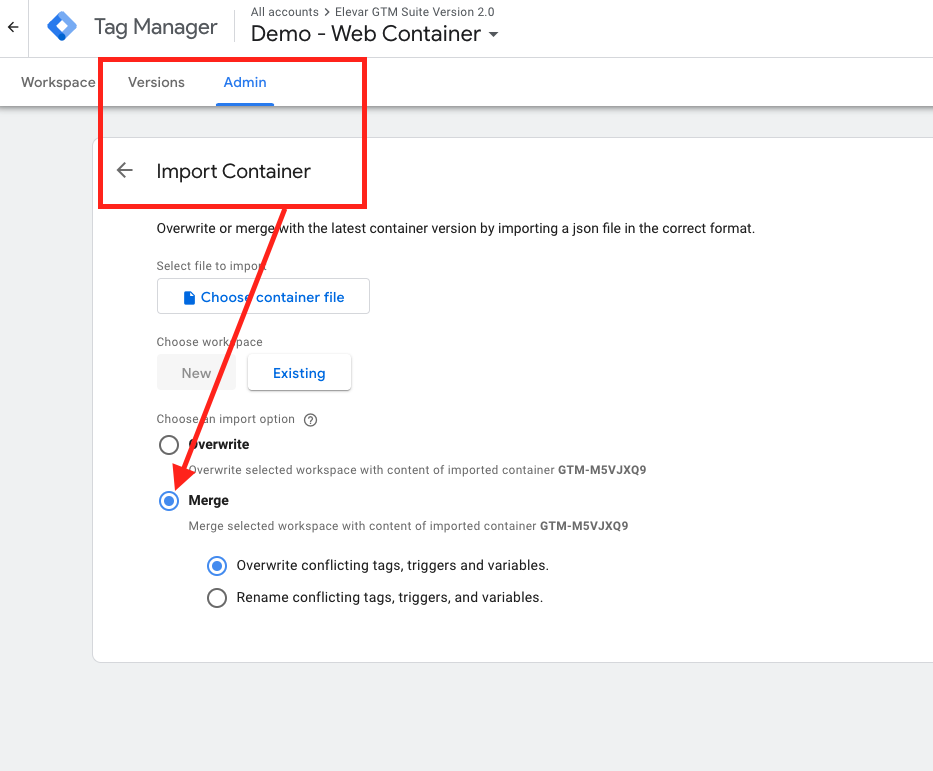
Be sure to select Merge container, not overwrite.
Once you’ve imported, verify your Pixel ID variable is accurate.
Step 3: [Optional] QA the new tags with Google Tag Manager's Preview Mode
Follow our guide to QA your tags in Google Tag Manager (GTM) preview mode.
Updated 5 months ago