How to Set Up TikTok Events API via Elevar Server-Side Destination
Follow this step by step guide to launching your TikTok Events API integration!
Prerequisites
Before you can enable your TikTok Events API Destination, you will need to:
- Install Elevar's Data Layer & Shopify Source on your store. Follow our guide on How to Implement the Shopify Source.
- Confirm your existing TikTok Pixel is not created via Shopify Method. [ How do I do this? ]
Step 1: Add UTM & ttclid Query Parameters to your TikTok Links
- Start by adding UTM parameters to your TikTok Ad URLs. [ How do I do this? ]
So if your old links were something like this:
https://yourdomain.com
They will now be similar to this:
https://yourdomain.com?utm_source=tiktok&utm_medium=paidsocial
Add "ttclid" as a query parameter at the end of your URLs
&ttclid=__CLICKID__
Your links that you just configured to mirror the below:
https://yourdomain.com?utm_source=tiktok&utm_medium=paidsocial
Will now have the ttclid added similar to this:
https://yourdomain.com?utm_source=tiktok&utm_medium=paidsocial&ttclid=__CLICKID__
Note: the CLICKID is TikToks "macro" and should be left exactly as it's shown above.
More info here - https://ads.tiktok.com/marketing_api/docs?rid=959icq5stjr&id=1701890980108353
Step 3: Navigate to the TikTok Events API Install Wizard in your Elevar App
- In your Elevar App, navigate to My Tracking > Select Add Destination > Find and select TikTok.
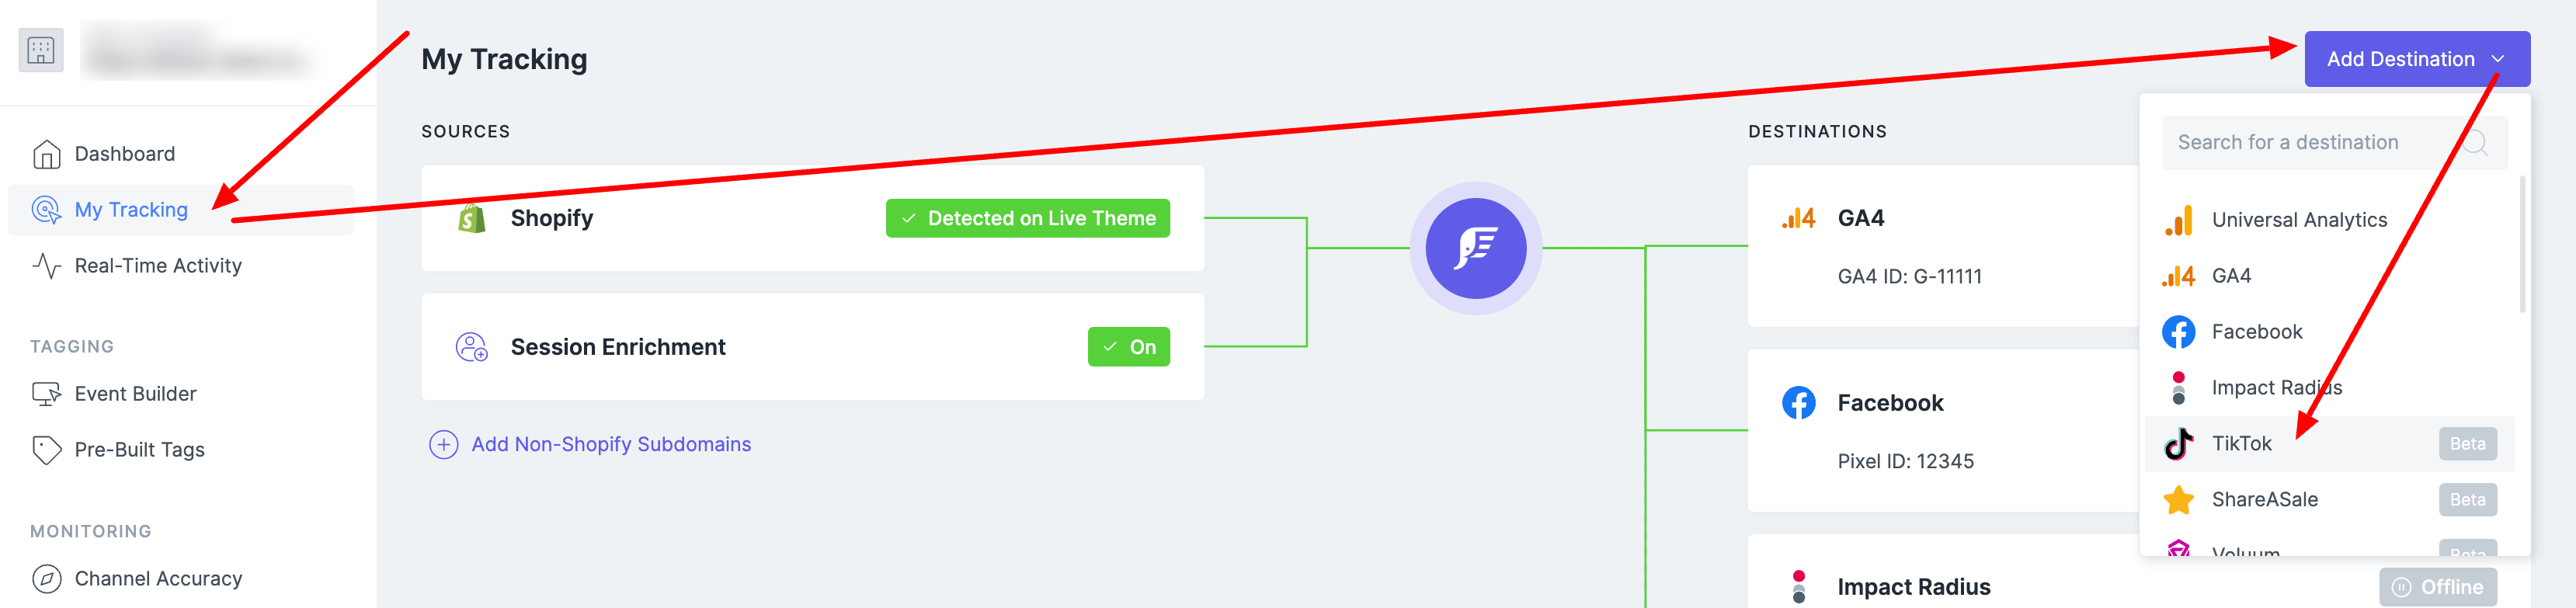
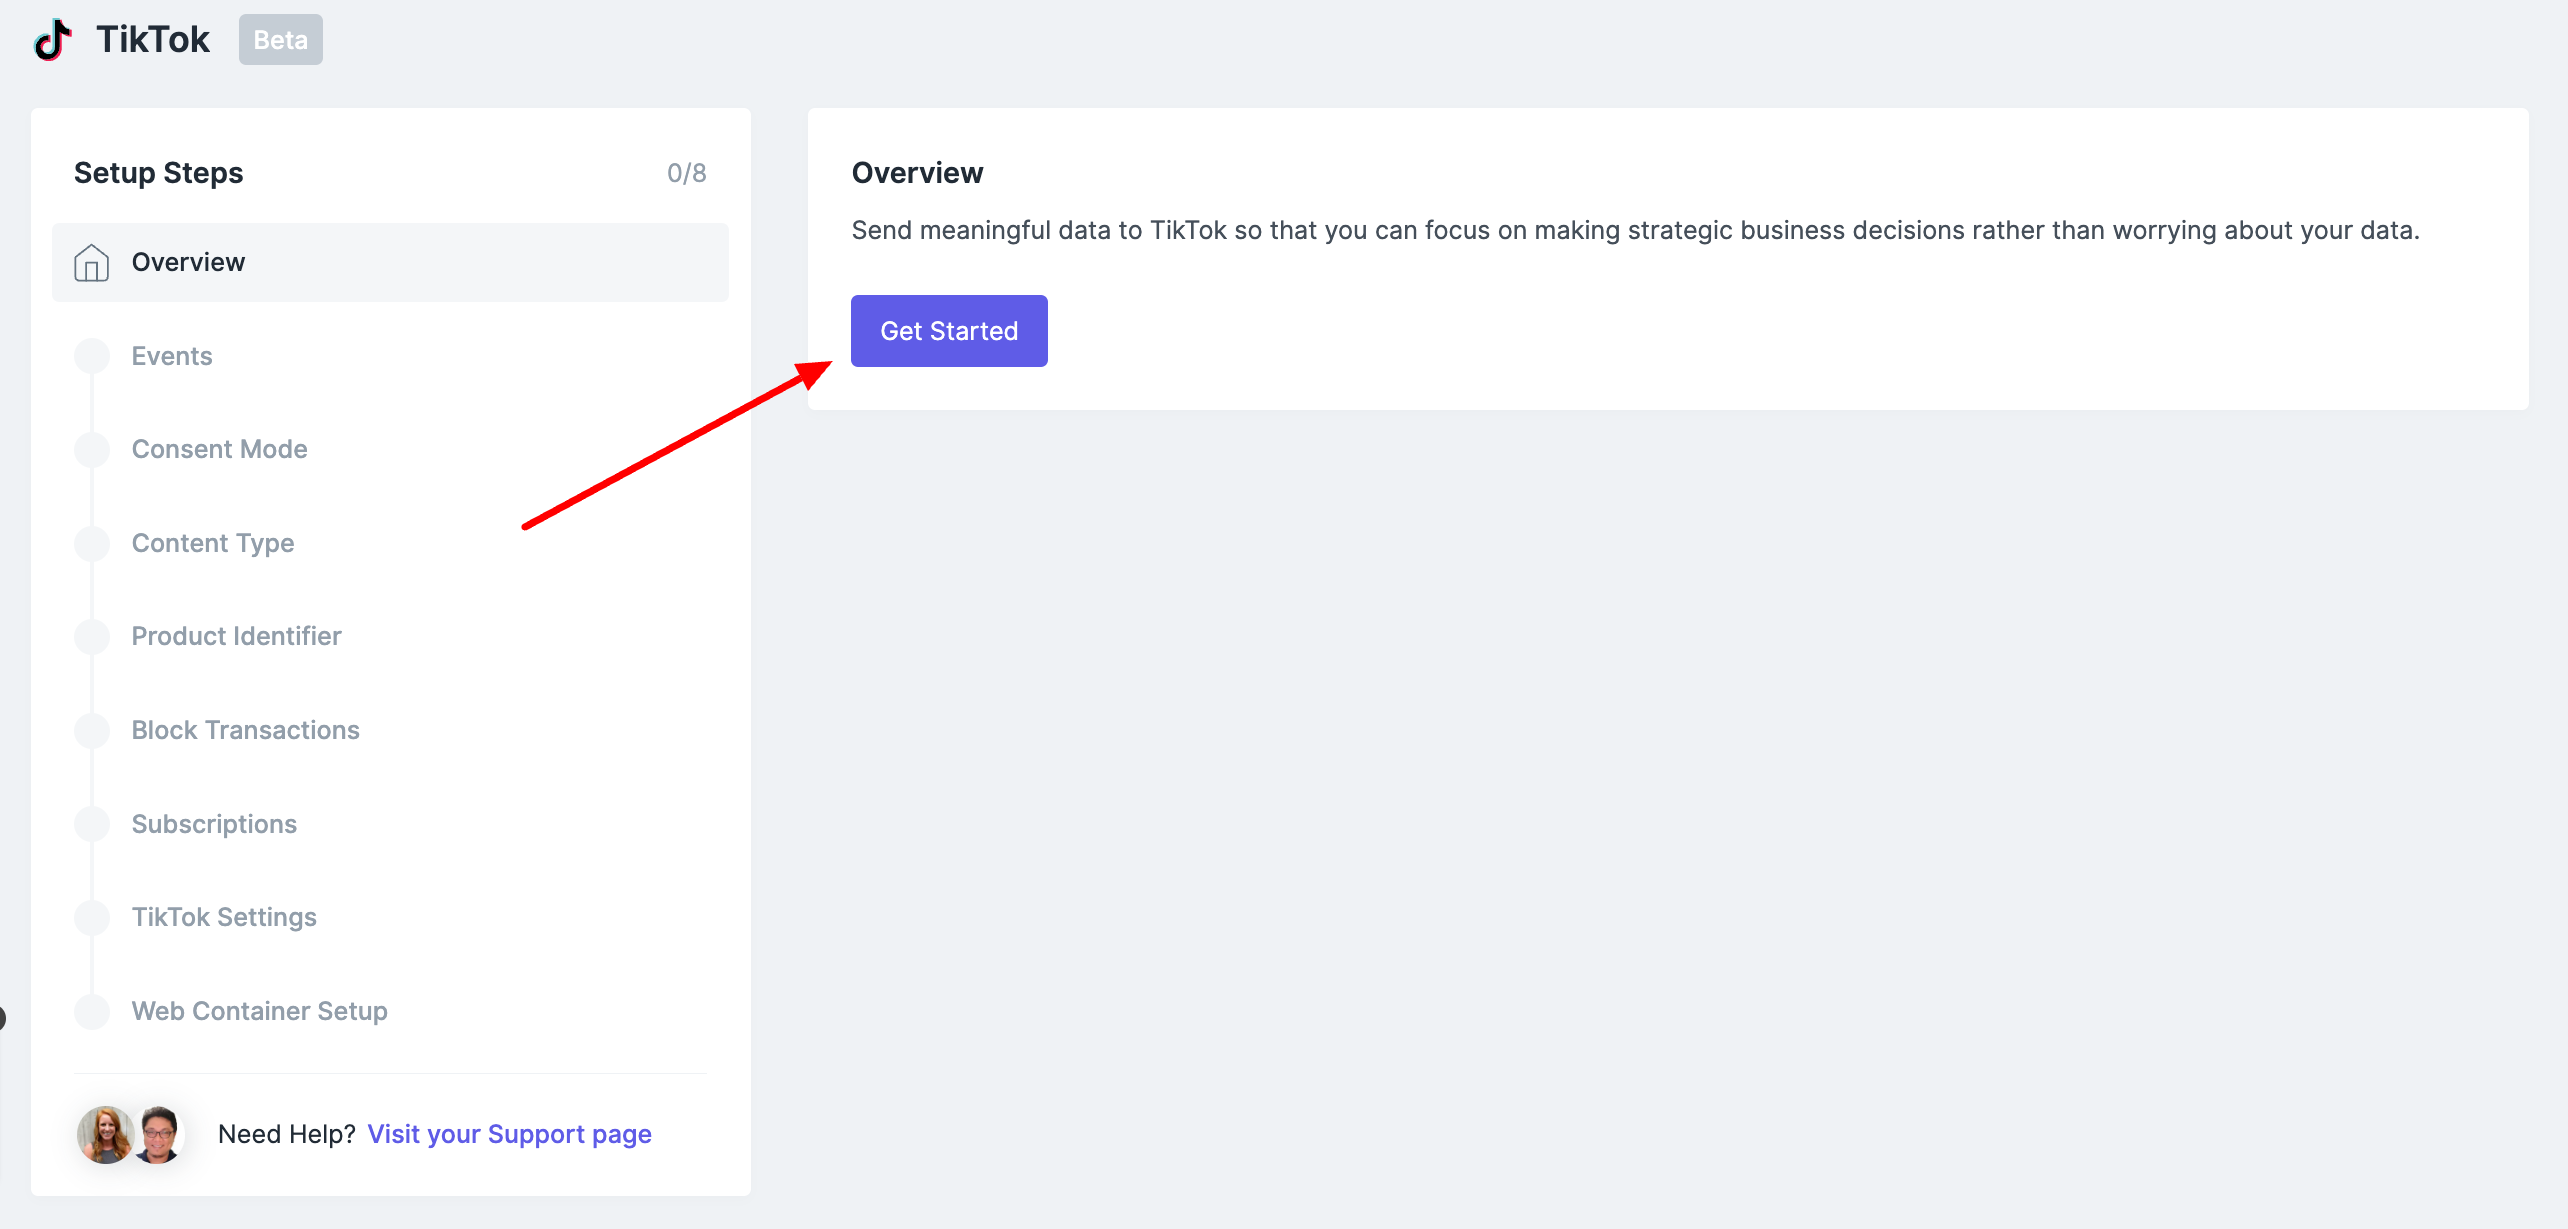
- You'll be taken to an Overview Page, select Get Started
Step 4: Select your Events
By default, we've already selected the standard recommended events for you! Most likely, you won't need to adjust anything and can just select Save to continue to the next step. If you'd like to customize your events choose I want to customize events manually
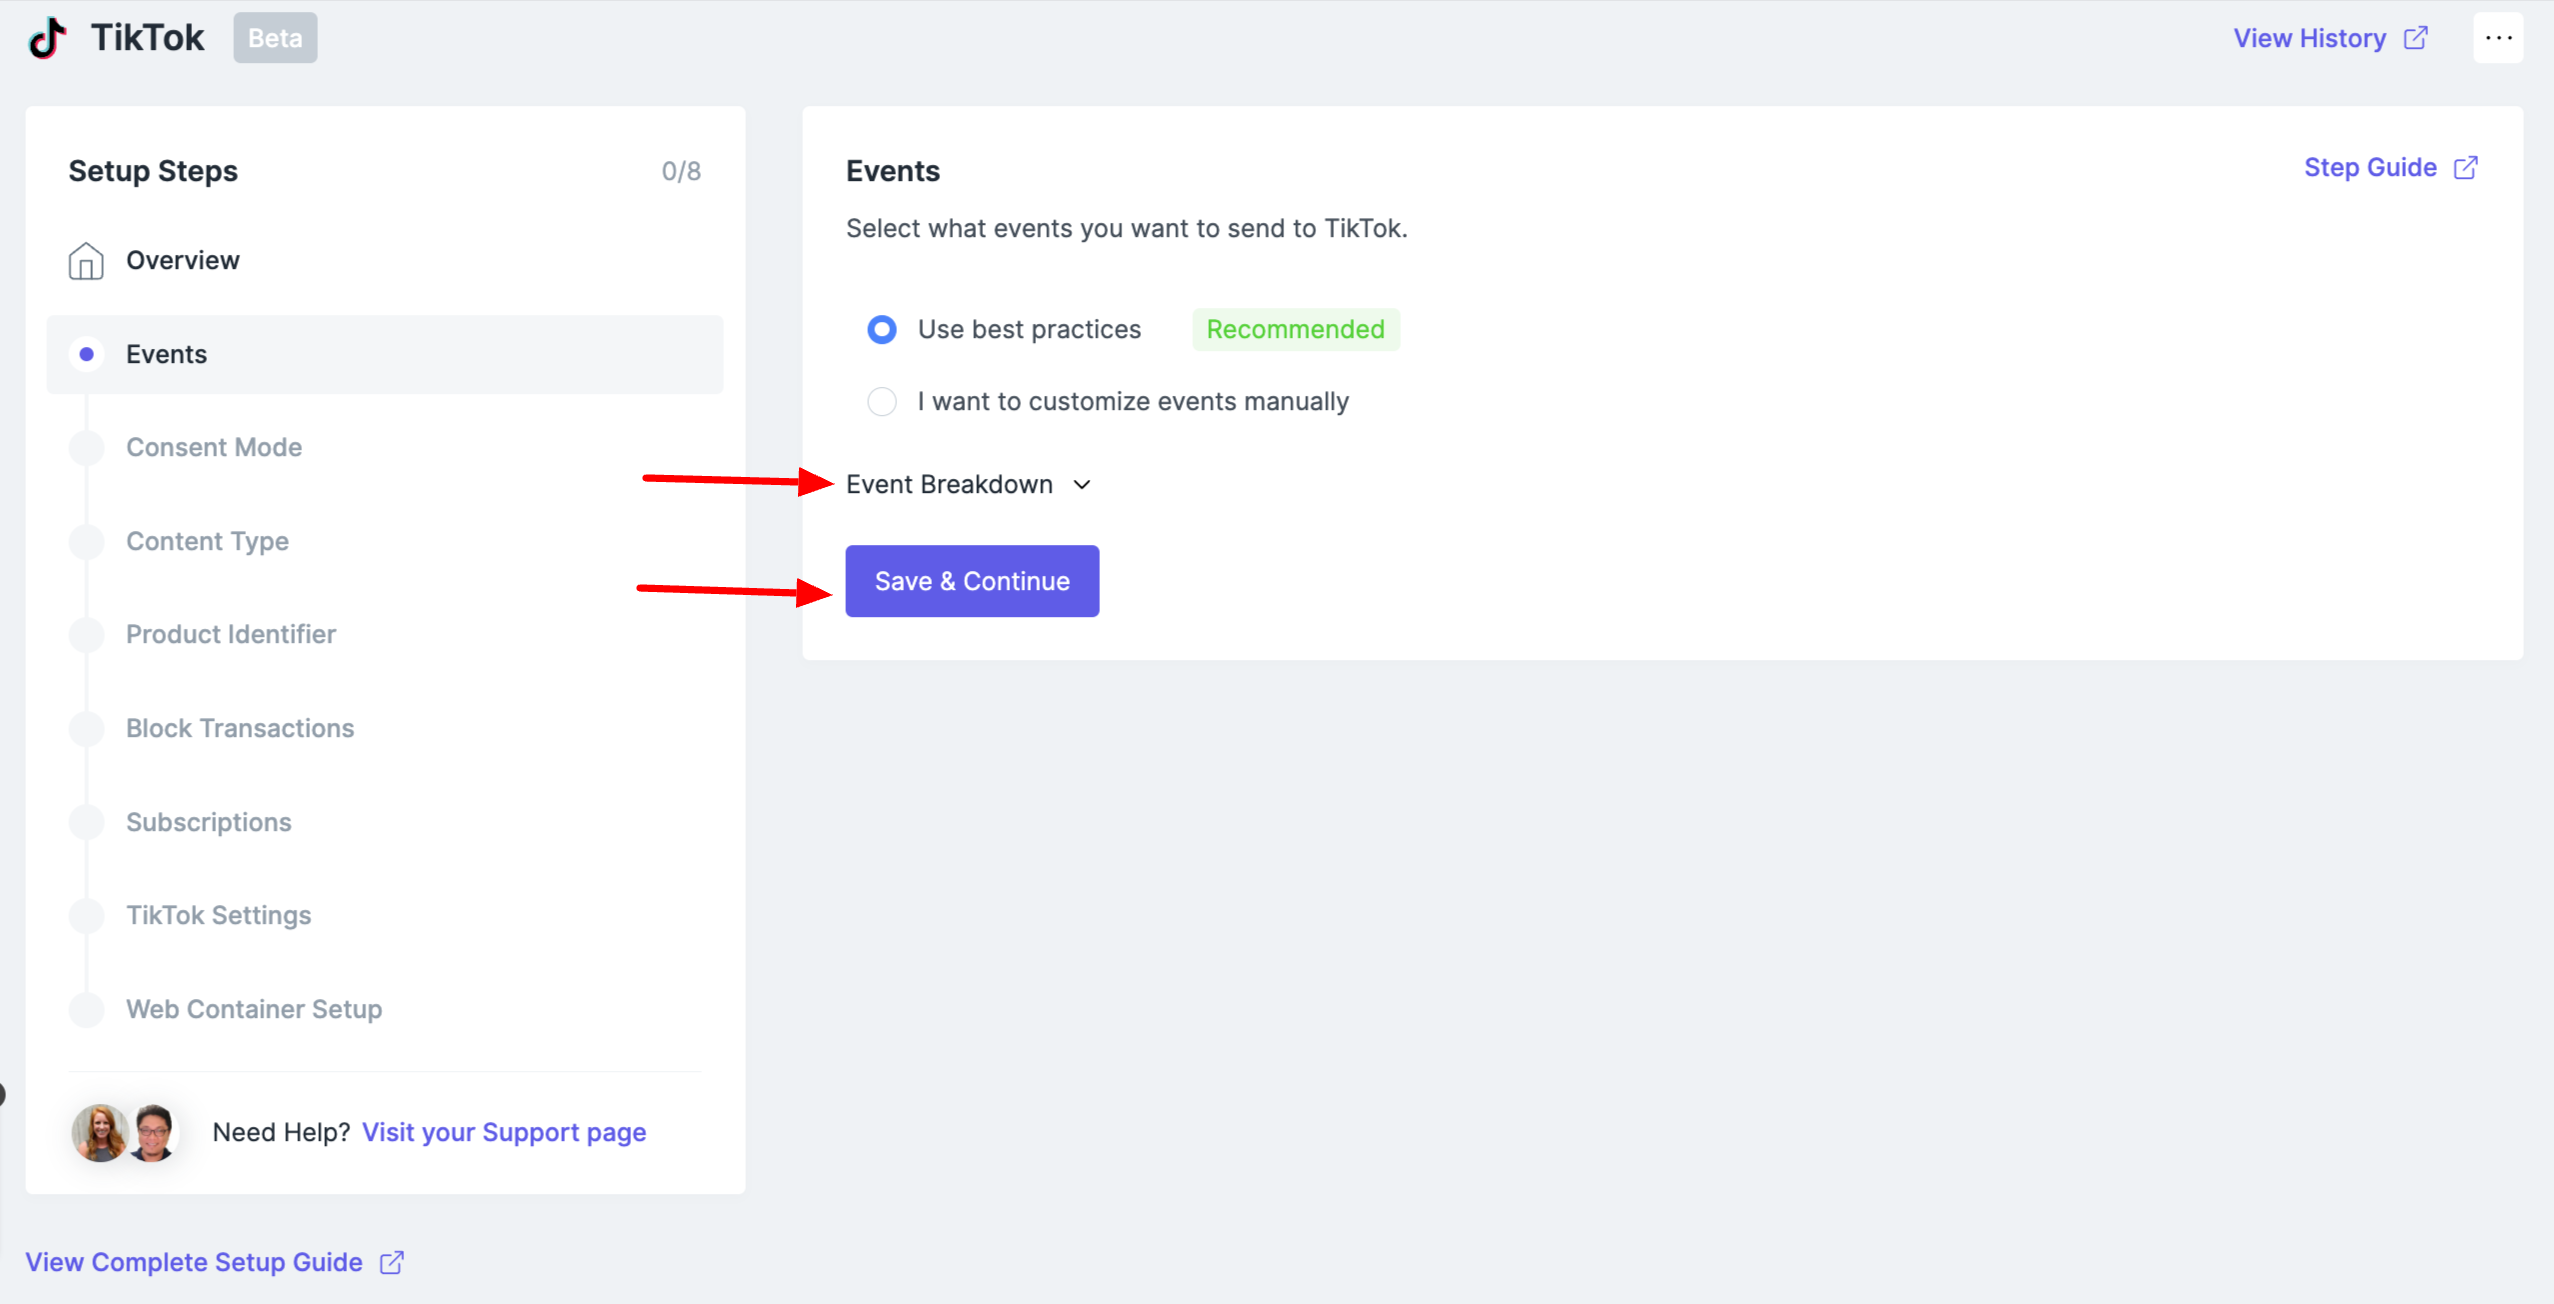
If you are a subscription business then you have the option to also enable the "Subscribe" event. Selecting this option will trigger a "Subscribe" event to fire anytime your customers purchase a subscription (e.g. Subscription First Order). If you also sell one-time products via native Shopify checkout then this event can help you distinguish between first-time and subscription purchases inside of TikTok.
Note: recurring orders are handled separately in the Subscription settings below.

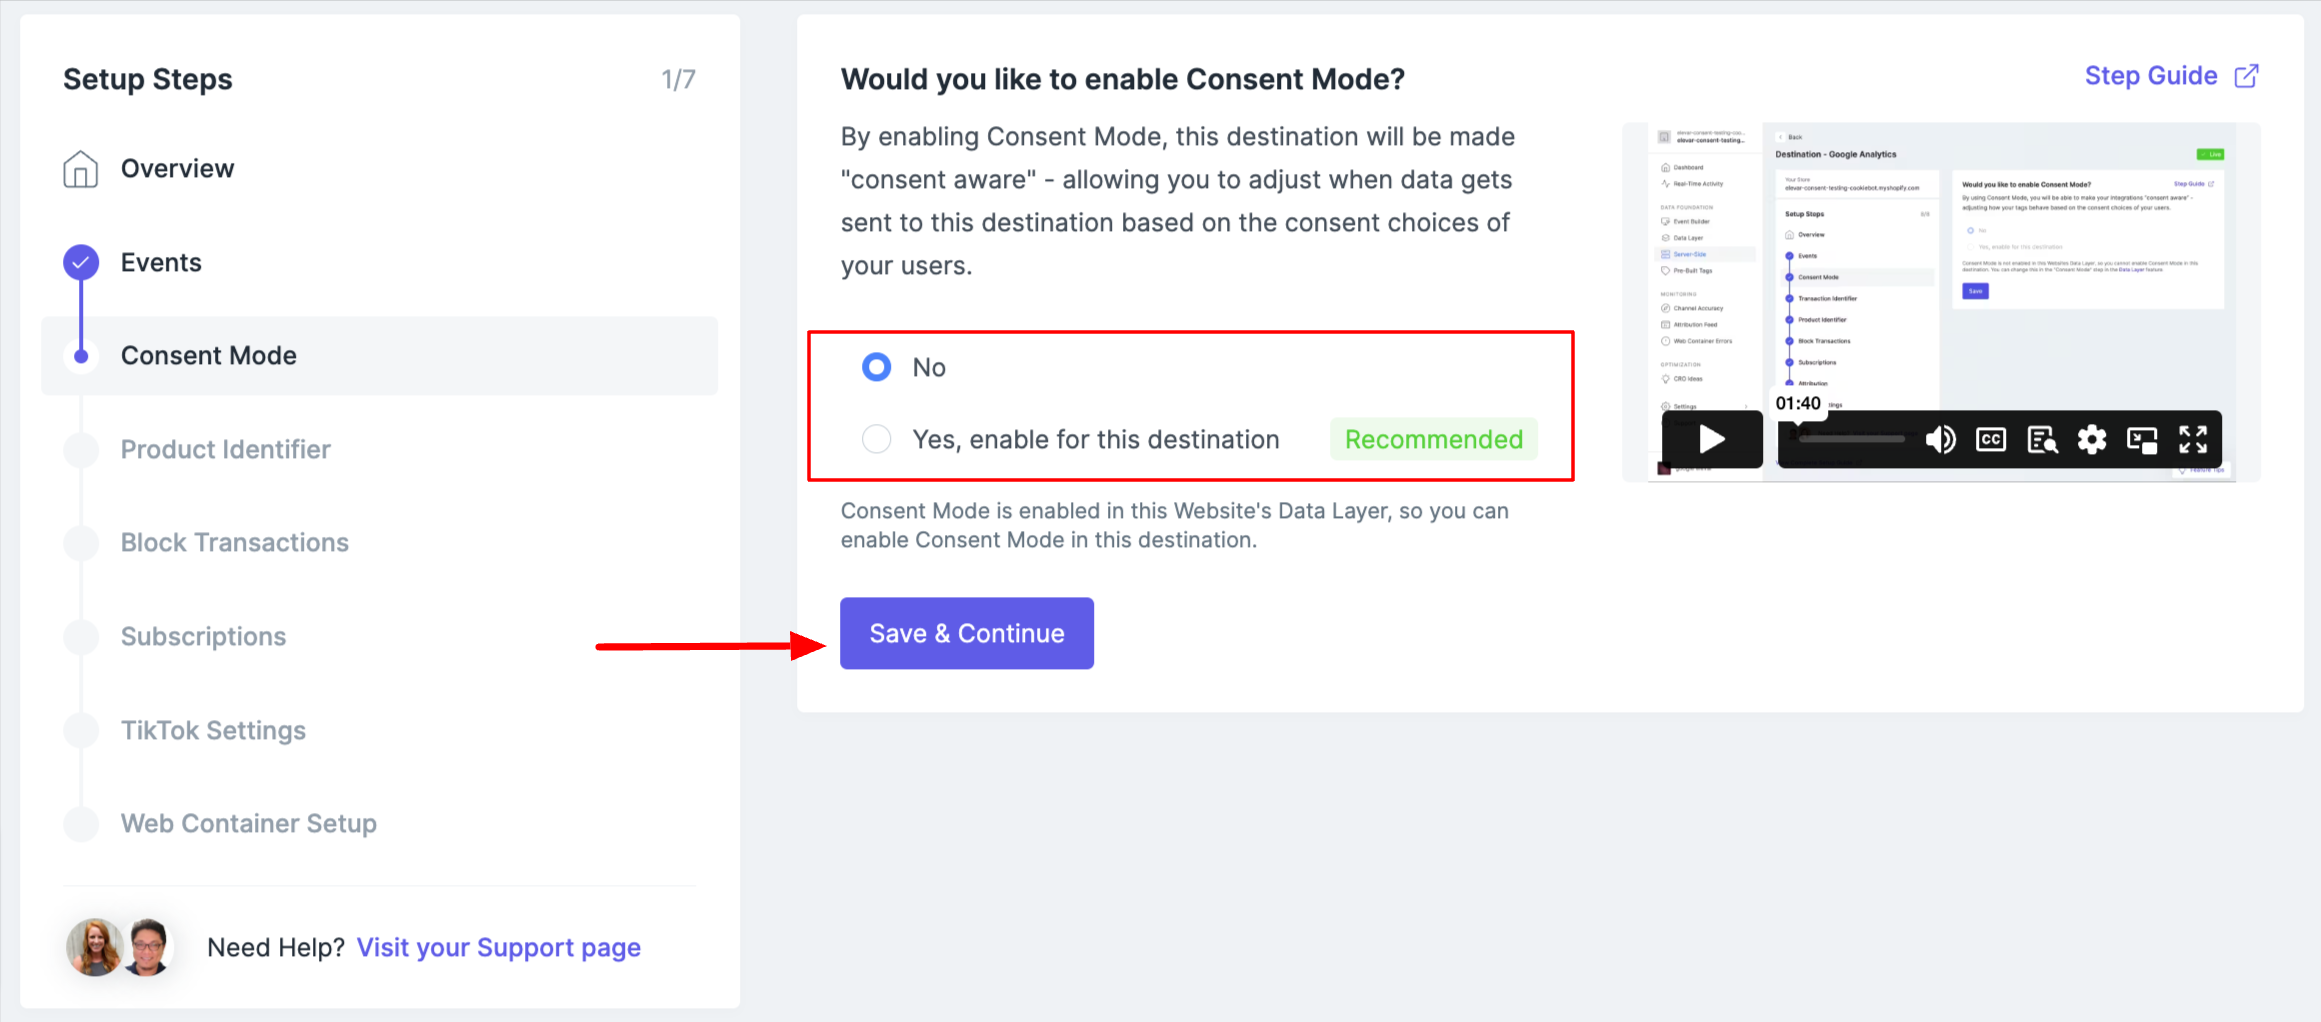
Step 5: If applicable, Enable Consent Mode
If consent is required, follow these steps to enable consent mode & select your consent categories.
If consent is not required, select Save & Continue.
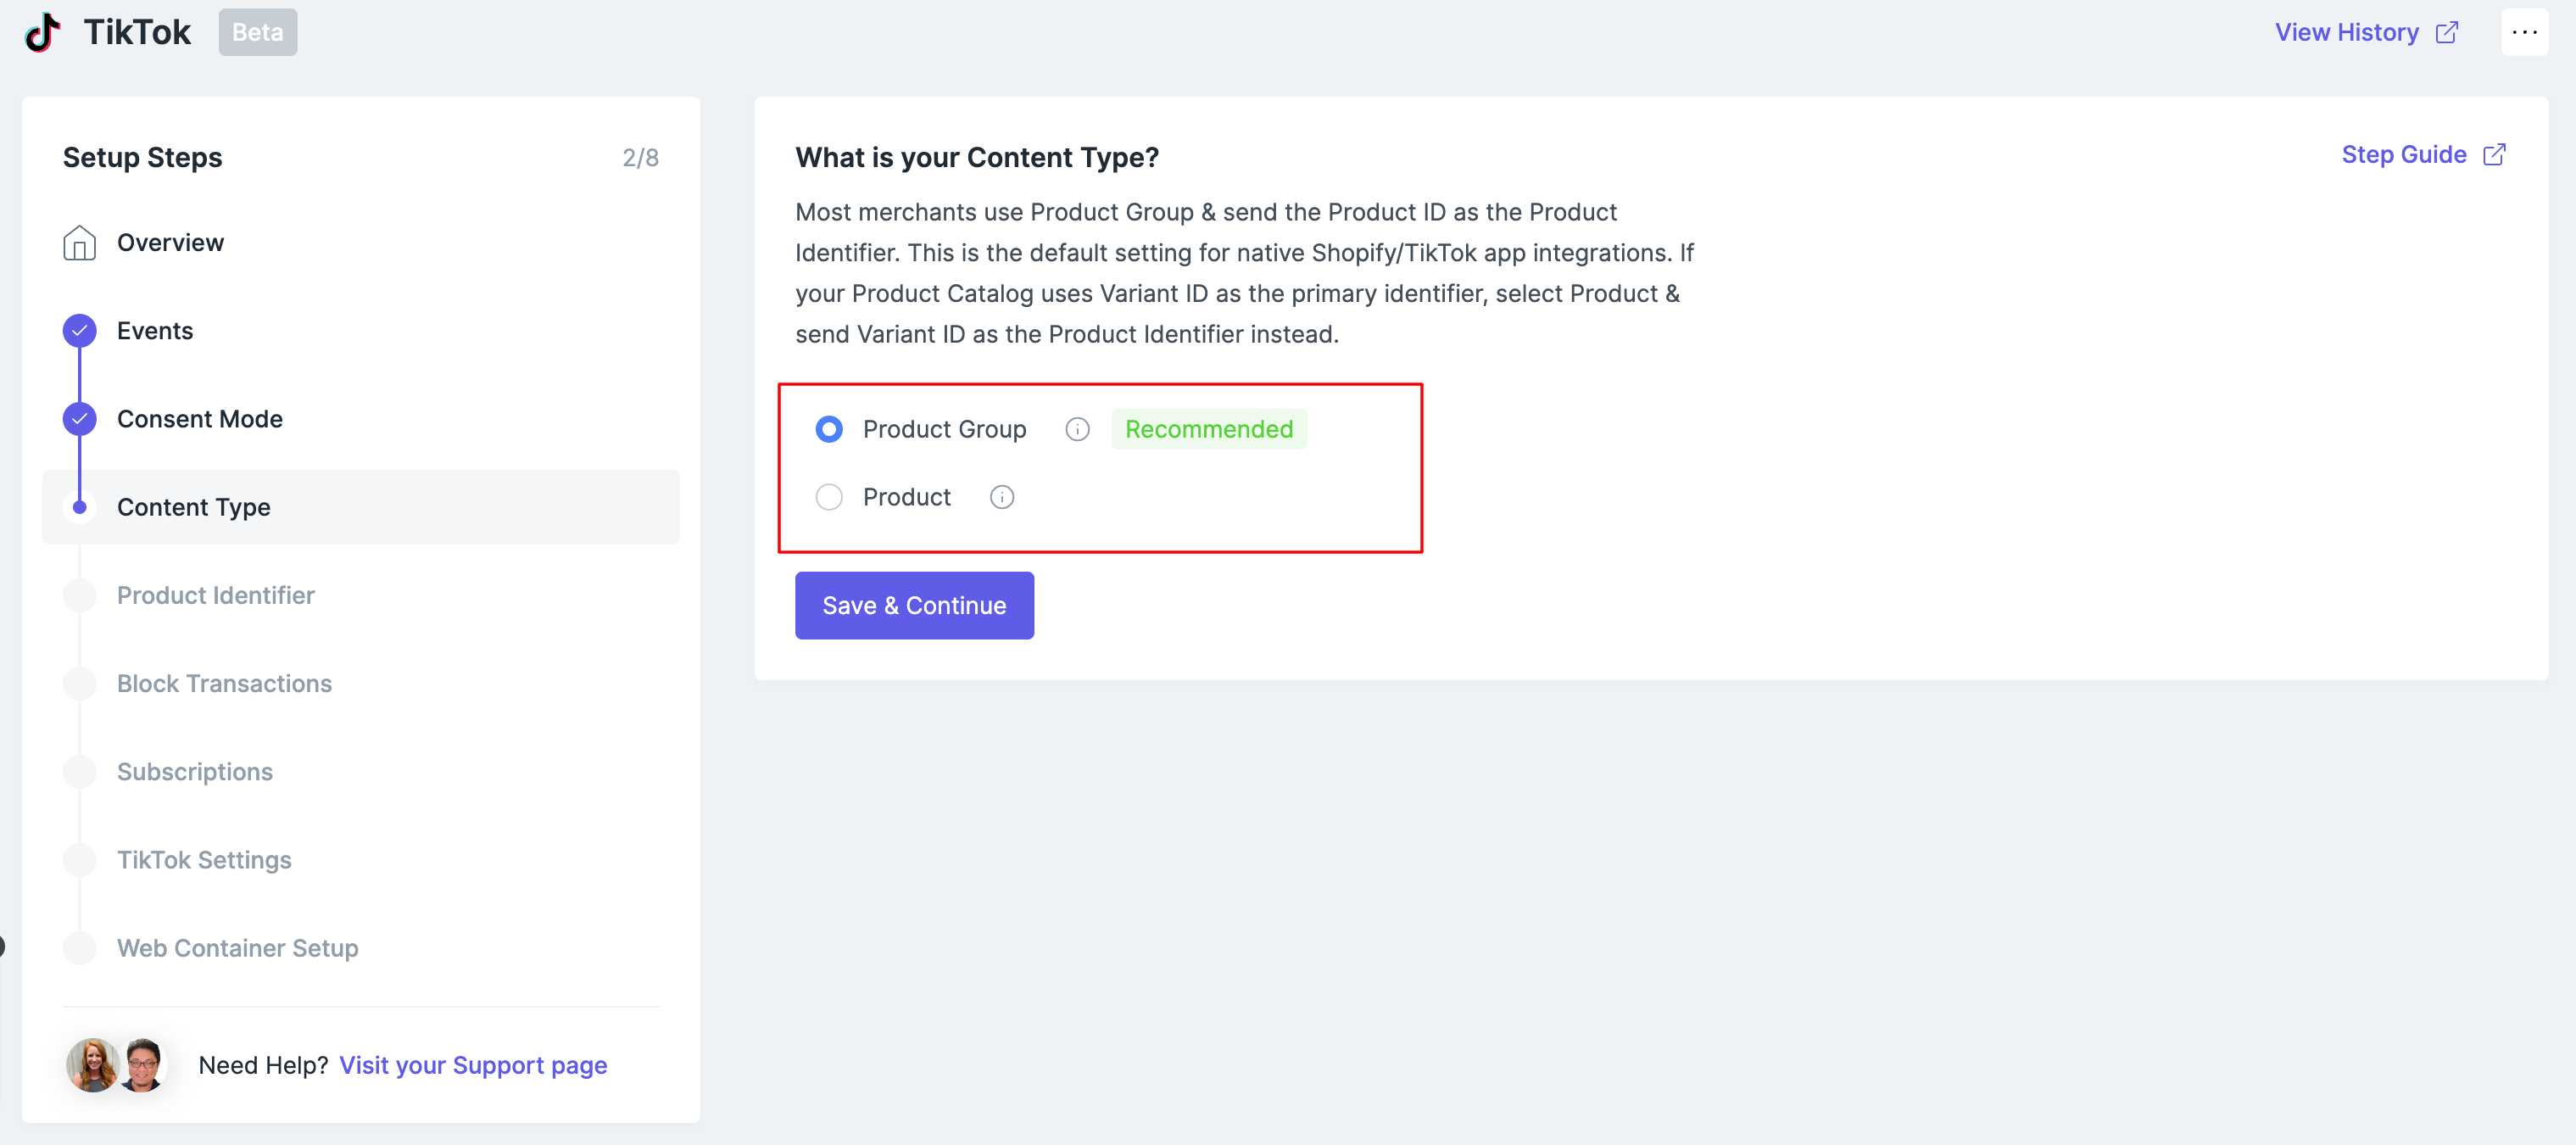
Step 6: Select Content Type
Select your Content Type. Product Group is the most common and TikTok is expecting a value of Product Group or Product. What you select here depends on what value you pass in your catalog. If you are sending product ID select Product Group. If you are sending Variant ID, select Product.
Step 7: Select your Product Identifier
Product ID is the most common primary "content_id" in TikTok catalog integrations. You'll want to match the product identifier used in your Pixel/Events API tracking to the product identifier you use in your Product Catalog in TikTok.
If you are migrating from the native Shopify <> TikTok Channel, then you will likely leave this as Product ID. The Shopify <> TikTok Channel uses the Product ID by default, so this will map over as you currently have it.
Our pre-built tags also use Product ID by default. So if you select Product ID in this step, nothing further needs to be done. You can save & continue to the next step.

If you choose a different Product Identifier for your TikTok Events API, be sure to change your TikTok tags in Google Tag manager to match! This will need to be updated for your Product View, Add to Cart, Initiate Checkout, and Purchase TikTok Tags in Google Tag Manager.
Step 8: Block Transactions
This step allows you to control exactly what purchase events are sent to TikTok's Event API. You can block orders based on Source Channel Names, Order Tags or Order Gateways.

We recommend blocking some transactions. When you select this option we will automatically block return and exchange orders from the channels show in the selected channels block. Choose Customize to add additional channels.
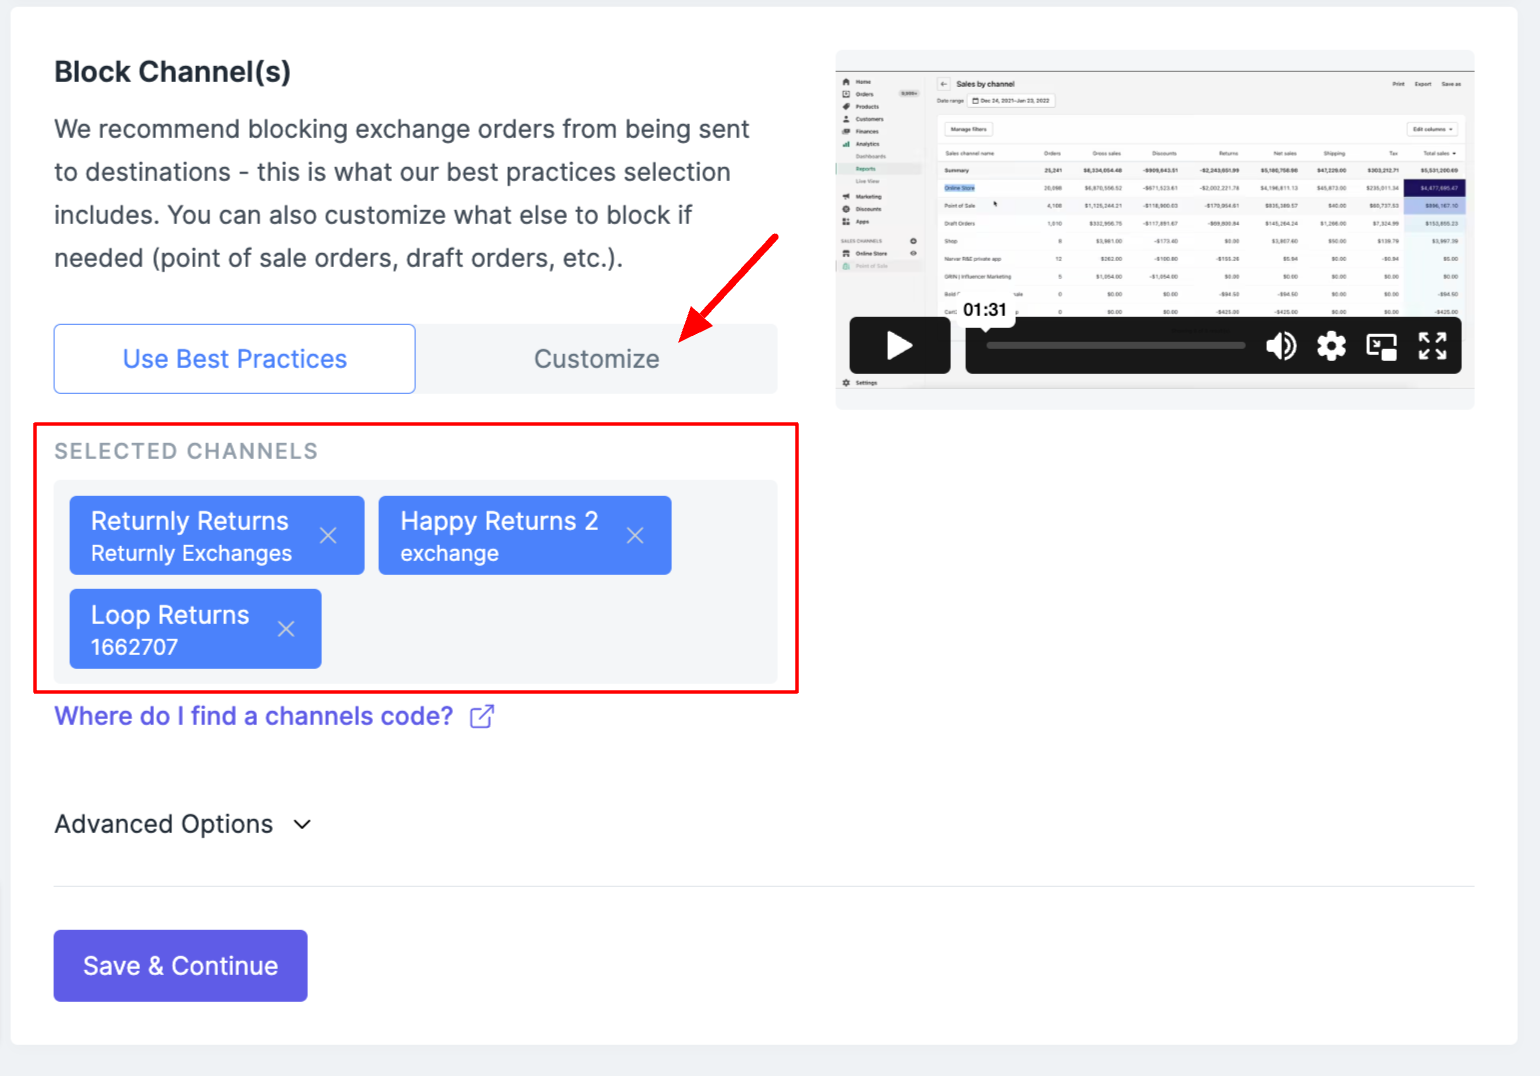
Two common scenarios where you may want to block orders are: recurring orders & offline orders. Learn how to block these orders in this guide
Not sure if you need to block orders? Look at what Sales Channels you have in Shopify!
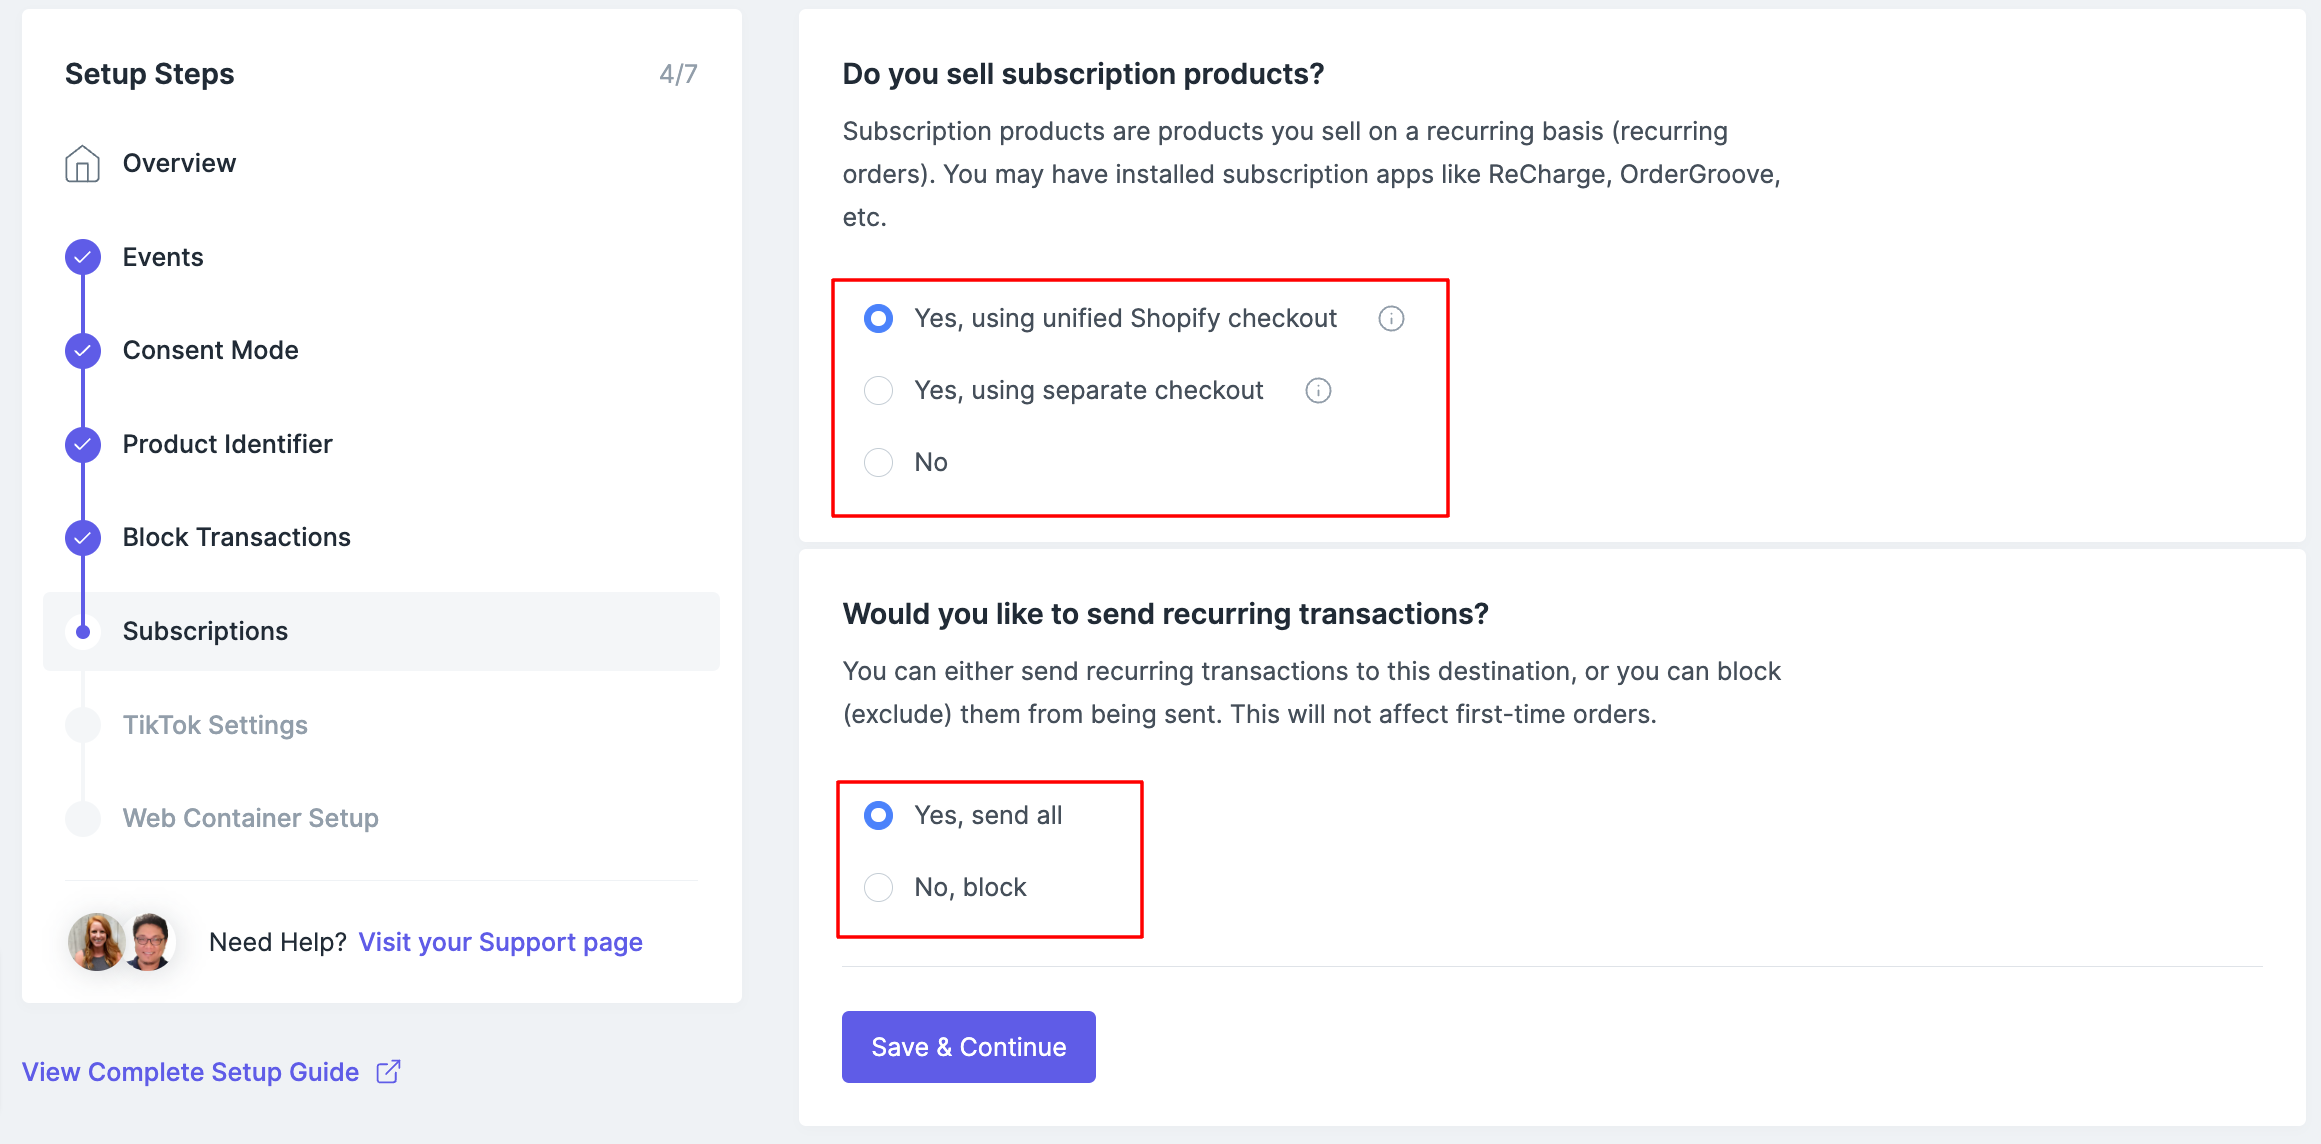
Step 9: Configure Subscription Settings
Do you sell subscription products? If you do, you can choose to send first-time orders only or first-time + recurring orders to your marketing destination.
Step 10: Add in Your TikTok Pixel & Access Token
Add in you TikTok Pixel ID
Add in your TikTok Access Token
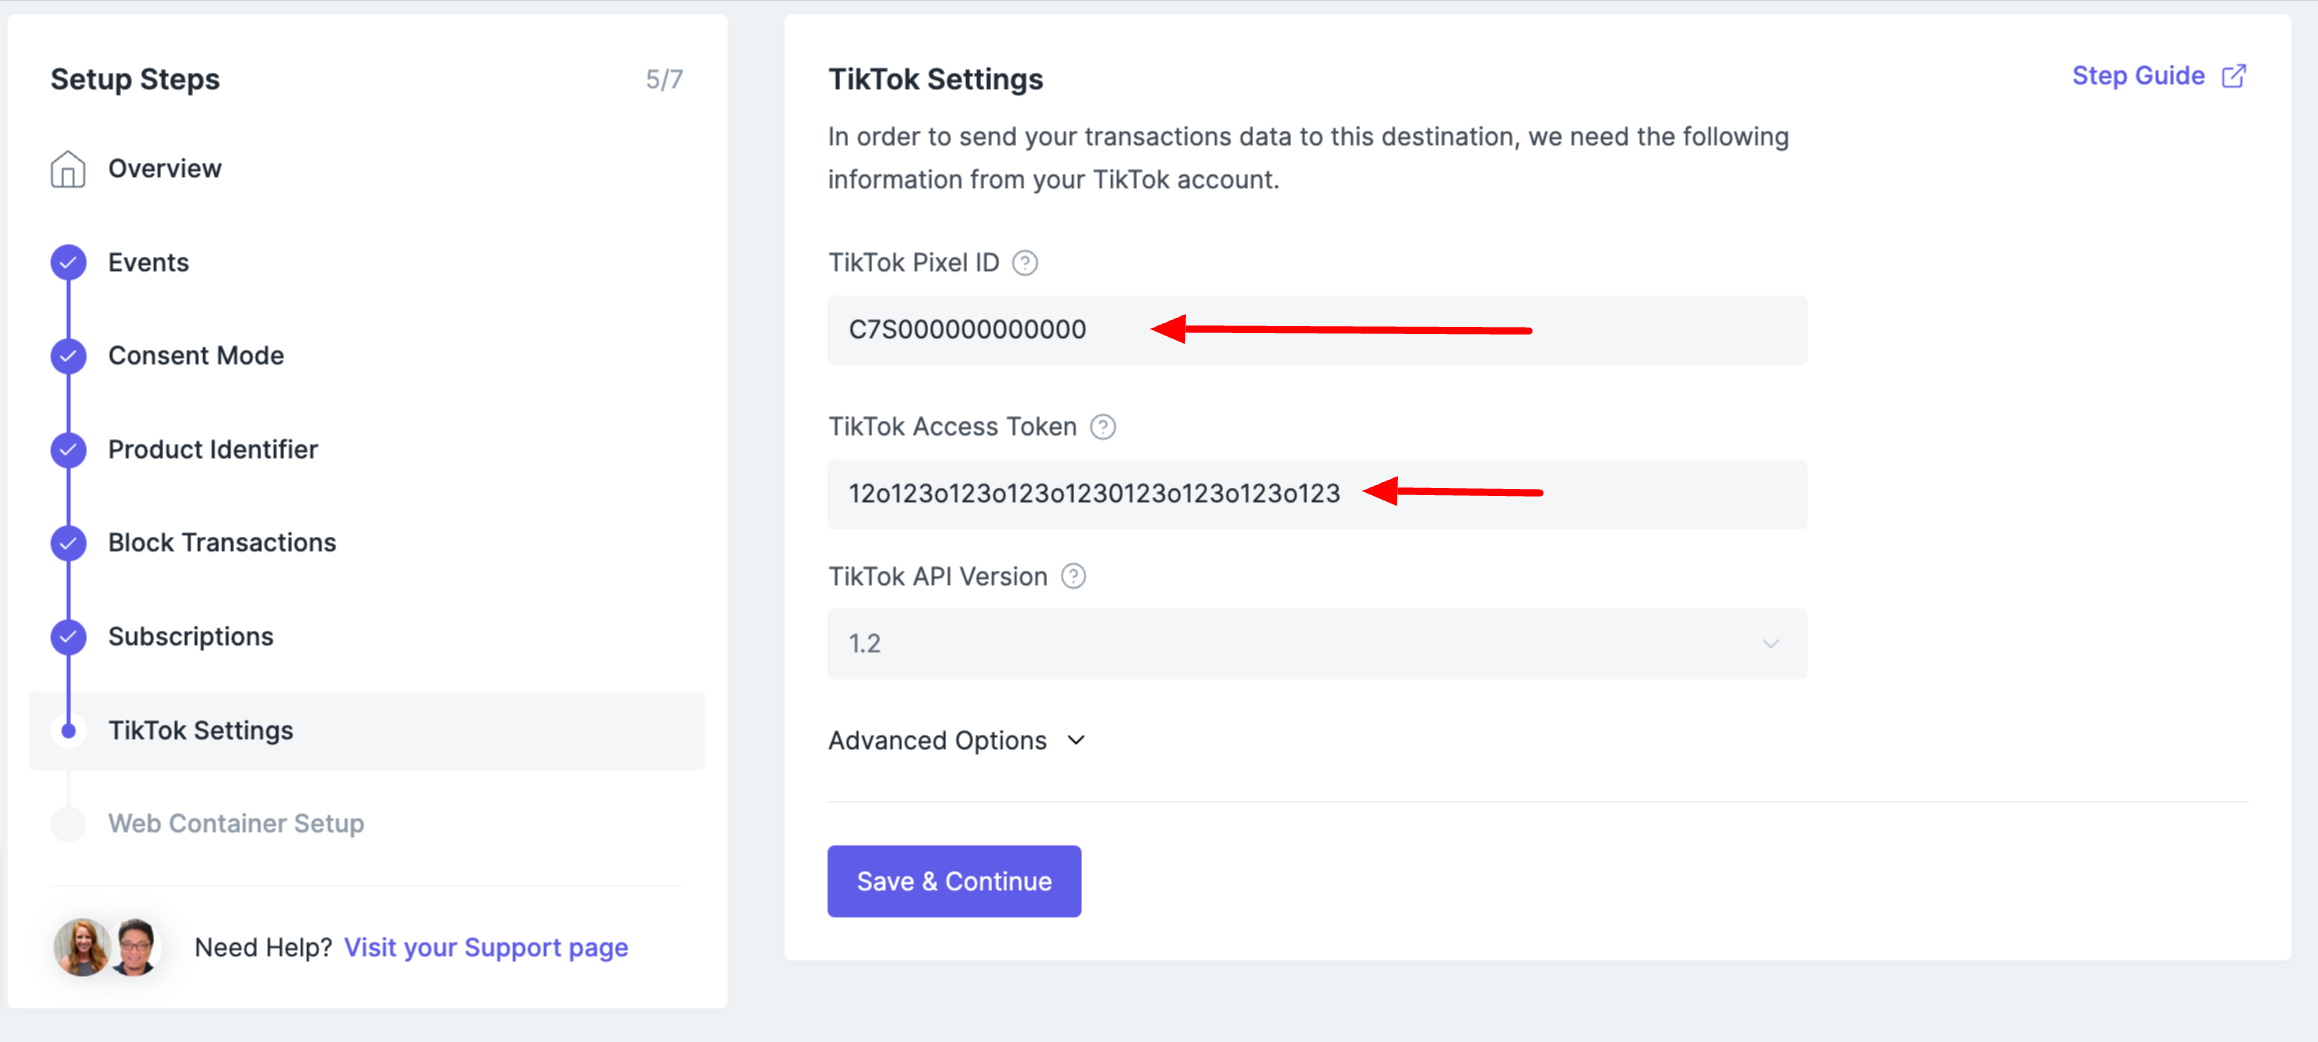
Select Save & Continue
Step 11: Web Container Setup
Select Download Pre-Built Web Tags. Then import & publish these tags in Google Tag Manager. How do I do that?
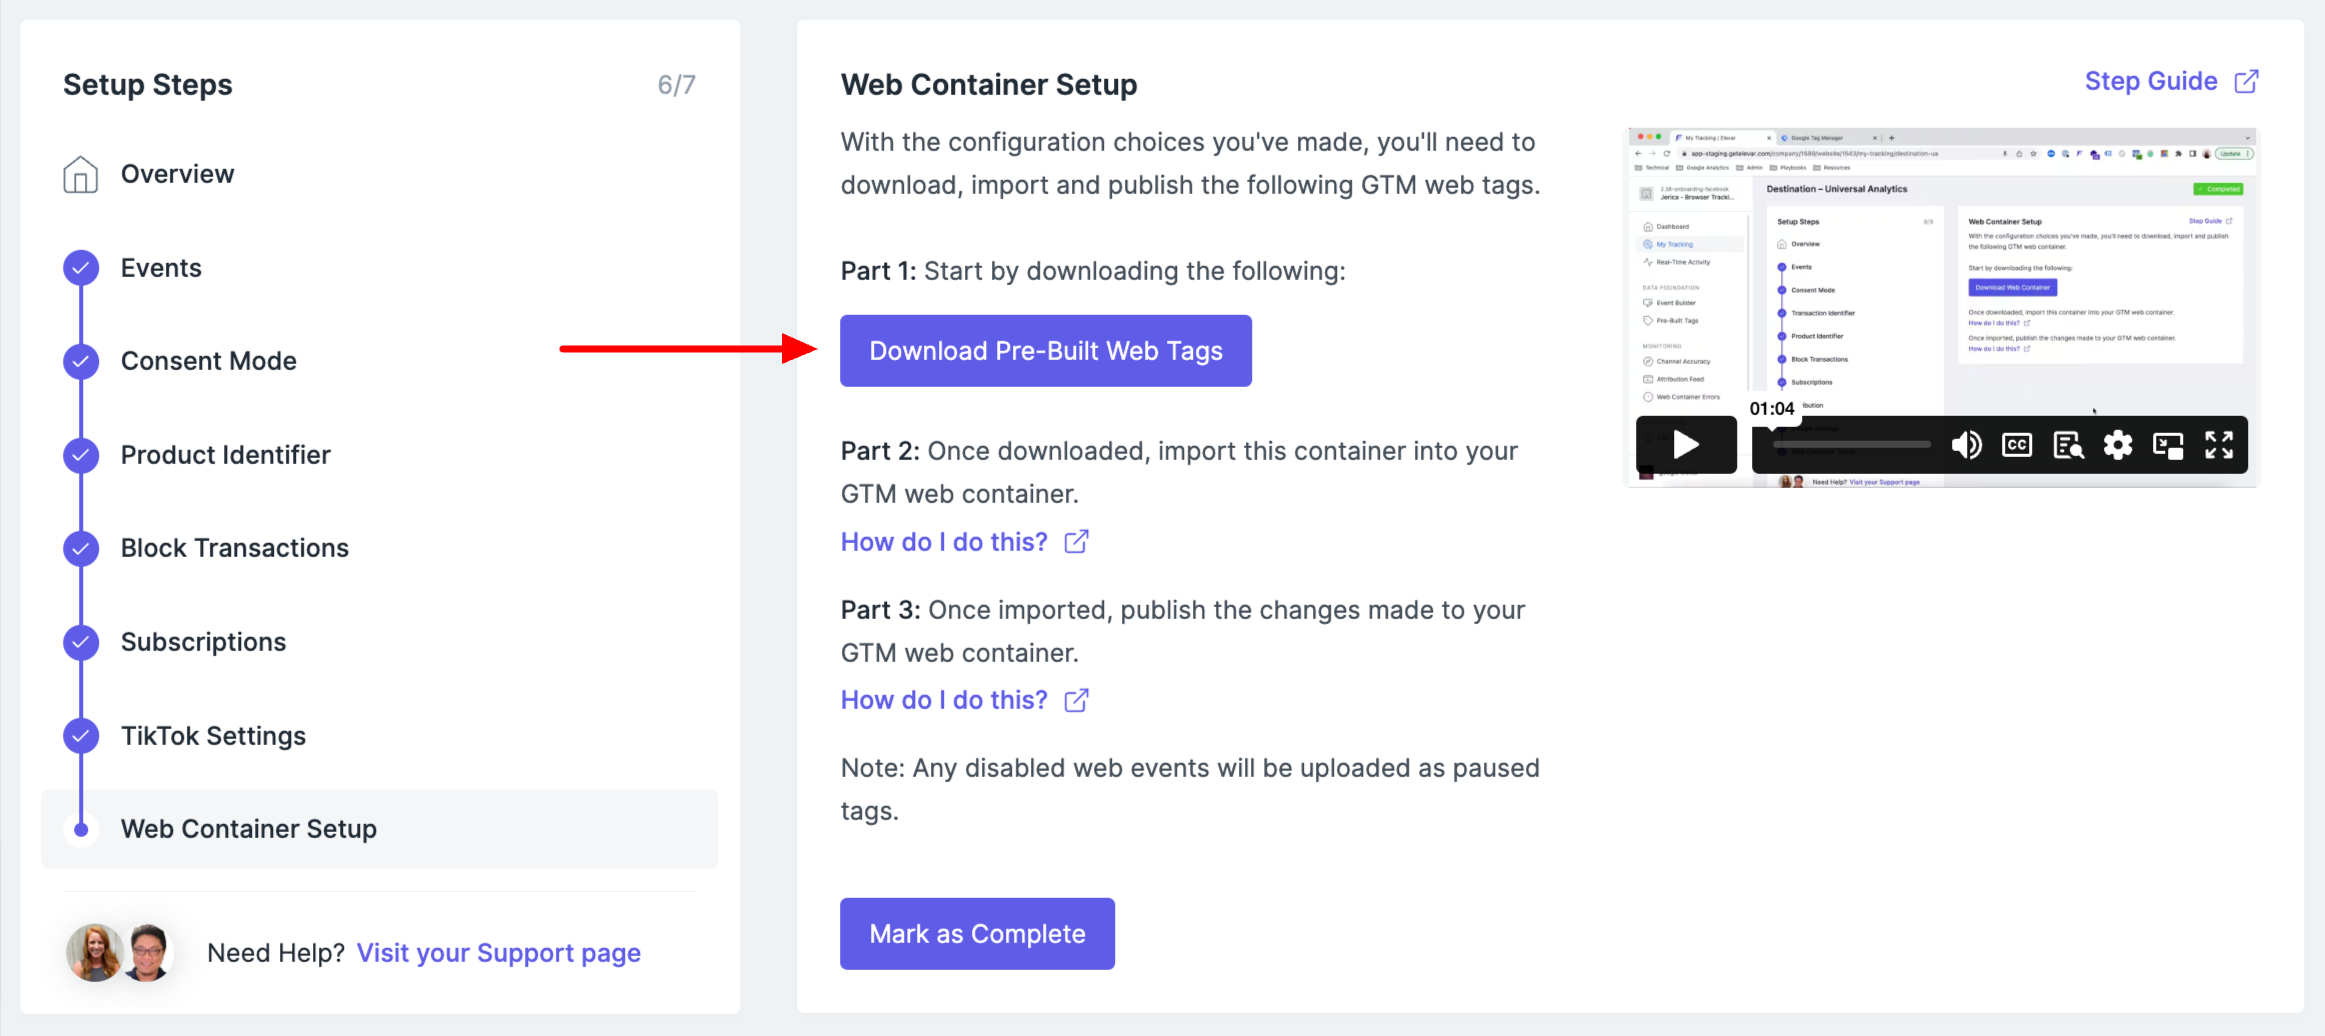
Select Mark as Complete
Step 12: [Optional] Test the TikTok Events API Integration
Follow this guide on how to test the TikTok Events API.
Step 13: Go Live
Select Go Live on the Overview Page to launch your new TikTok tracking.

Be sure to remove any pre-existing TikTok setup if you haven't already done so! (if you're using native Shopify follow this guide
Updated 3 months ago