How to Customize Promotional Banners by Campaign via Optimize
Learn how to hack Shopify’s first-party marketing cookie to use campaign data to personalize your onsite marketing via Google Optimize in 3 easy steps!
Have you ever wanted to a/b test (or just display) a unique promo banner onsite (like your top promo bar or main hero image) based on a special campaign you were running on Facebook, Google, or other places?
But you wanted this promotion to ONLY be visible to those users and not any random visitor to your site?
This use case happens all the time and is a great way to personalize your website for users!
Here’s an example: One of our Elevar clients was running a 40% off sale that they wanted to promote and a/b test the messaging in their global header promo bar. But they wanted this to display for a very specific campaign and audience only and otherwise leave the top promo bar “as is”.
Since part of our onboarding includes setting up Google Optimize on Shopify they were in a position to implement this in 3 easy steps.
I’m going to show you how to customize your own Shopify (or other) store via Google Optimize but the concept will work with almost any platform.
DIY eCommerce UX Audit
Download our FREE 117 point UX audit that you can apply to your own website.
How Shopify Sets Marketing Source Cookies
You might notice analytics reports in your Shopify store that show you performance based on source (i.e. “facebook”), medium (i.e. “social), and campaign (i.e. “labor day sale”). Shopify is grabbing this by pulling from the infamous utm parameters that we all love to hate (and love).
I love them because they push valuable traffic data to Google Analytics but we hate them because they’re so darn hard to keep up with!
Shopify does this by setting a “cookie” that stores this data during a user session.
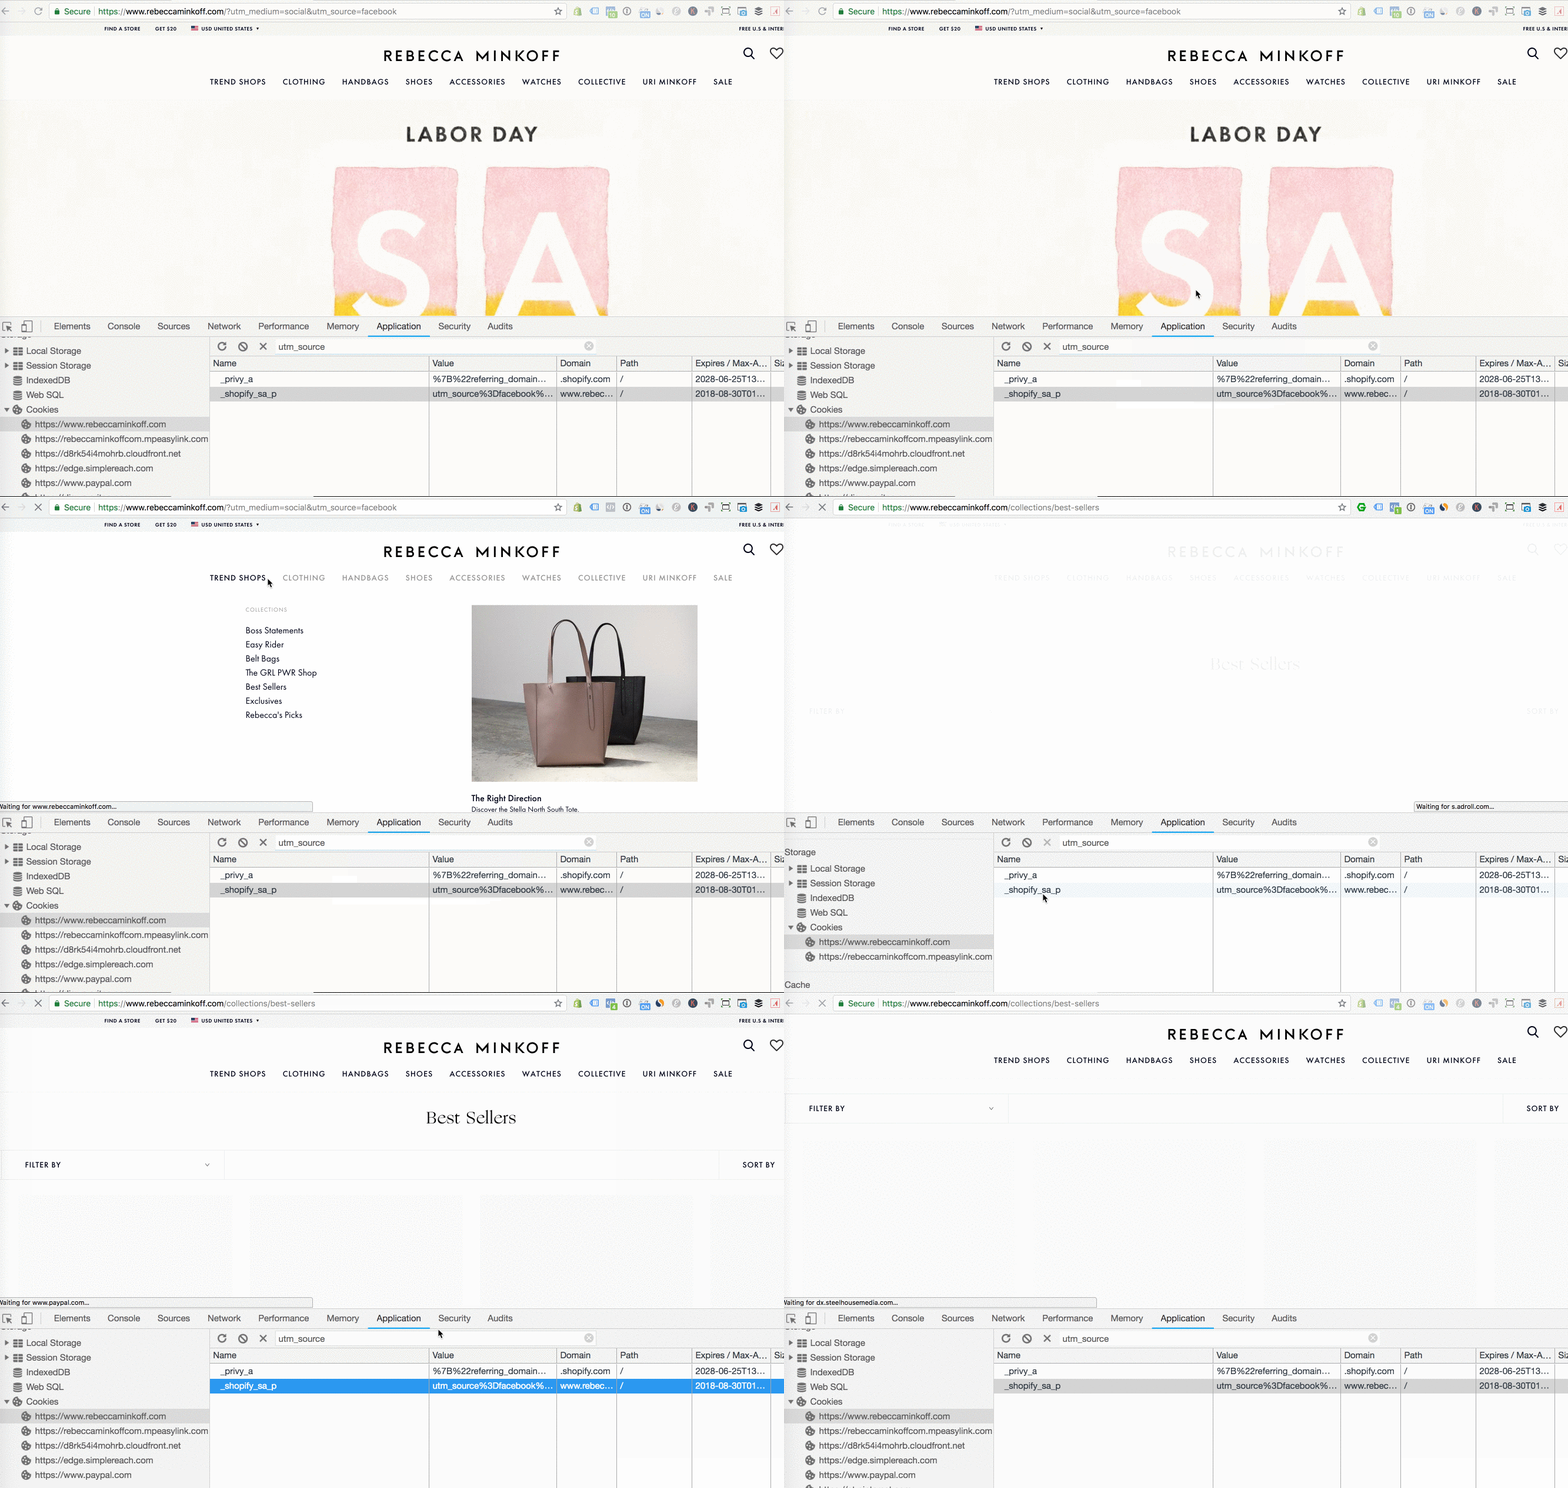
In the image below, you’ll see:
- My initial URL has utm_source=facebook in it (landing page)
- My browser developer panel is open showing cookies on the site
- The shopify cookie for marketing sources that has utm_source=facebook as part of value.
- I click to a 2nd page that no longer has UTM parameters but my Shopify cookie still has the utm_source=facebook
Take a look:
Let’s see how to put this into practice!
Step 1: Create First Party Cookie Target in Google Optimize
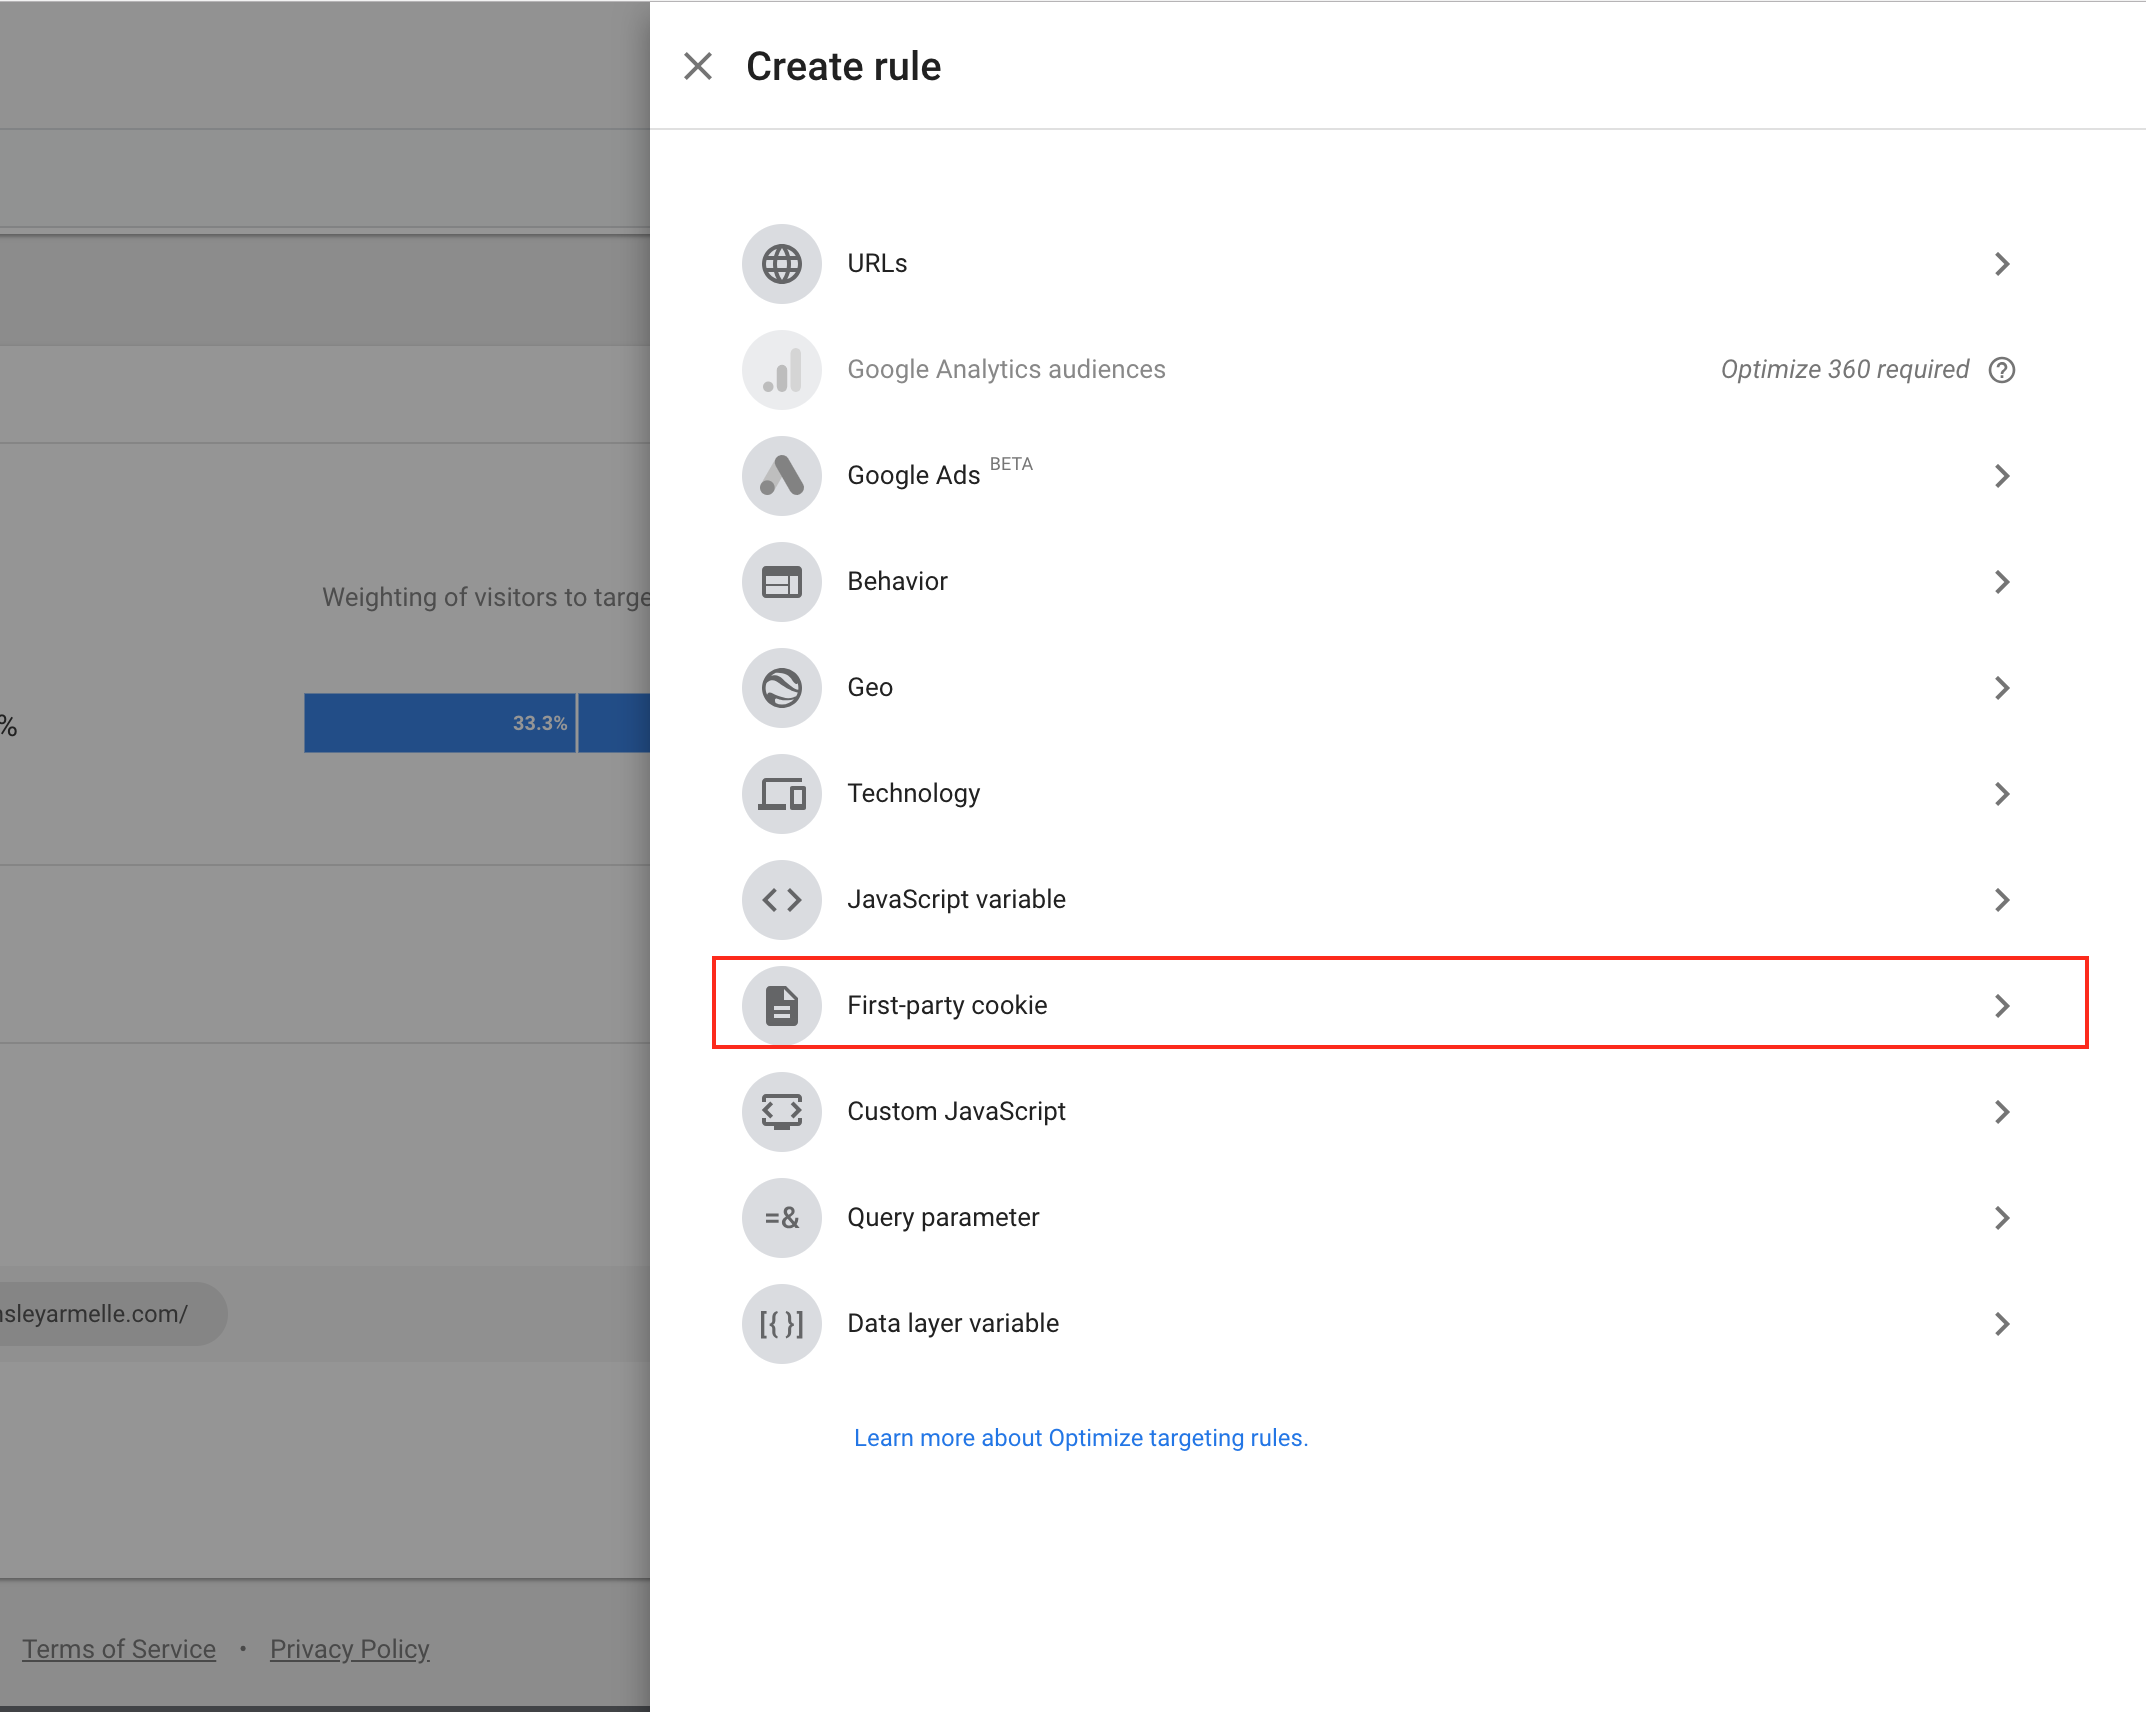
Inside of Google Optimize > Targeting > Create Rule > First-party Cookie
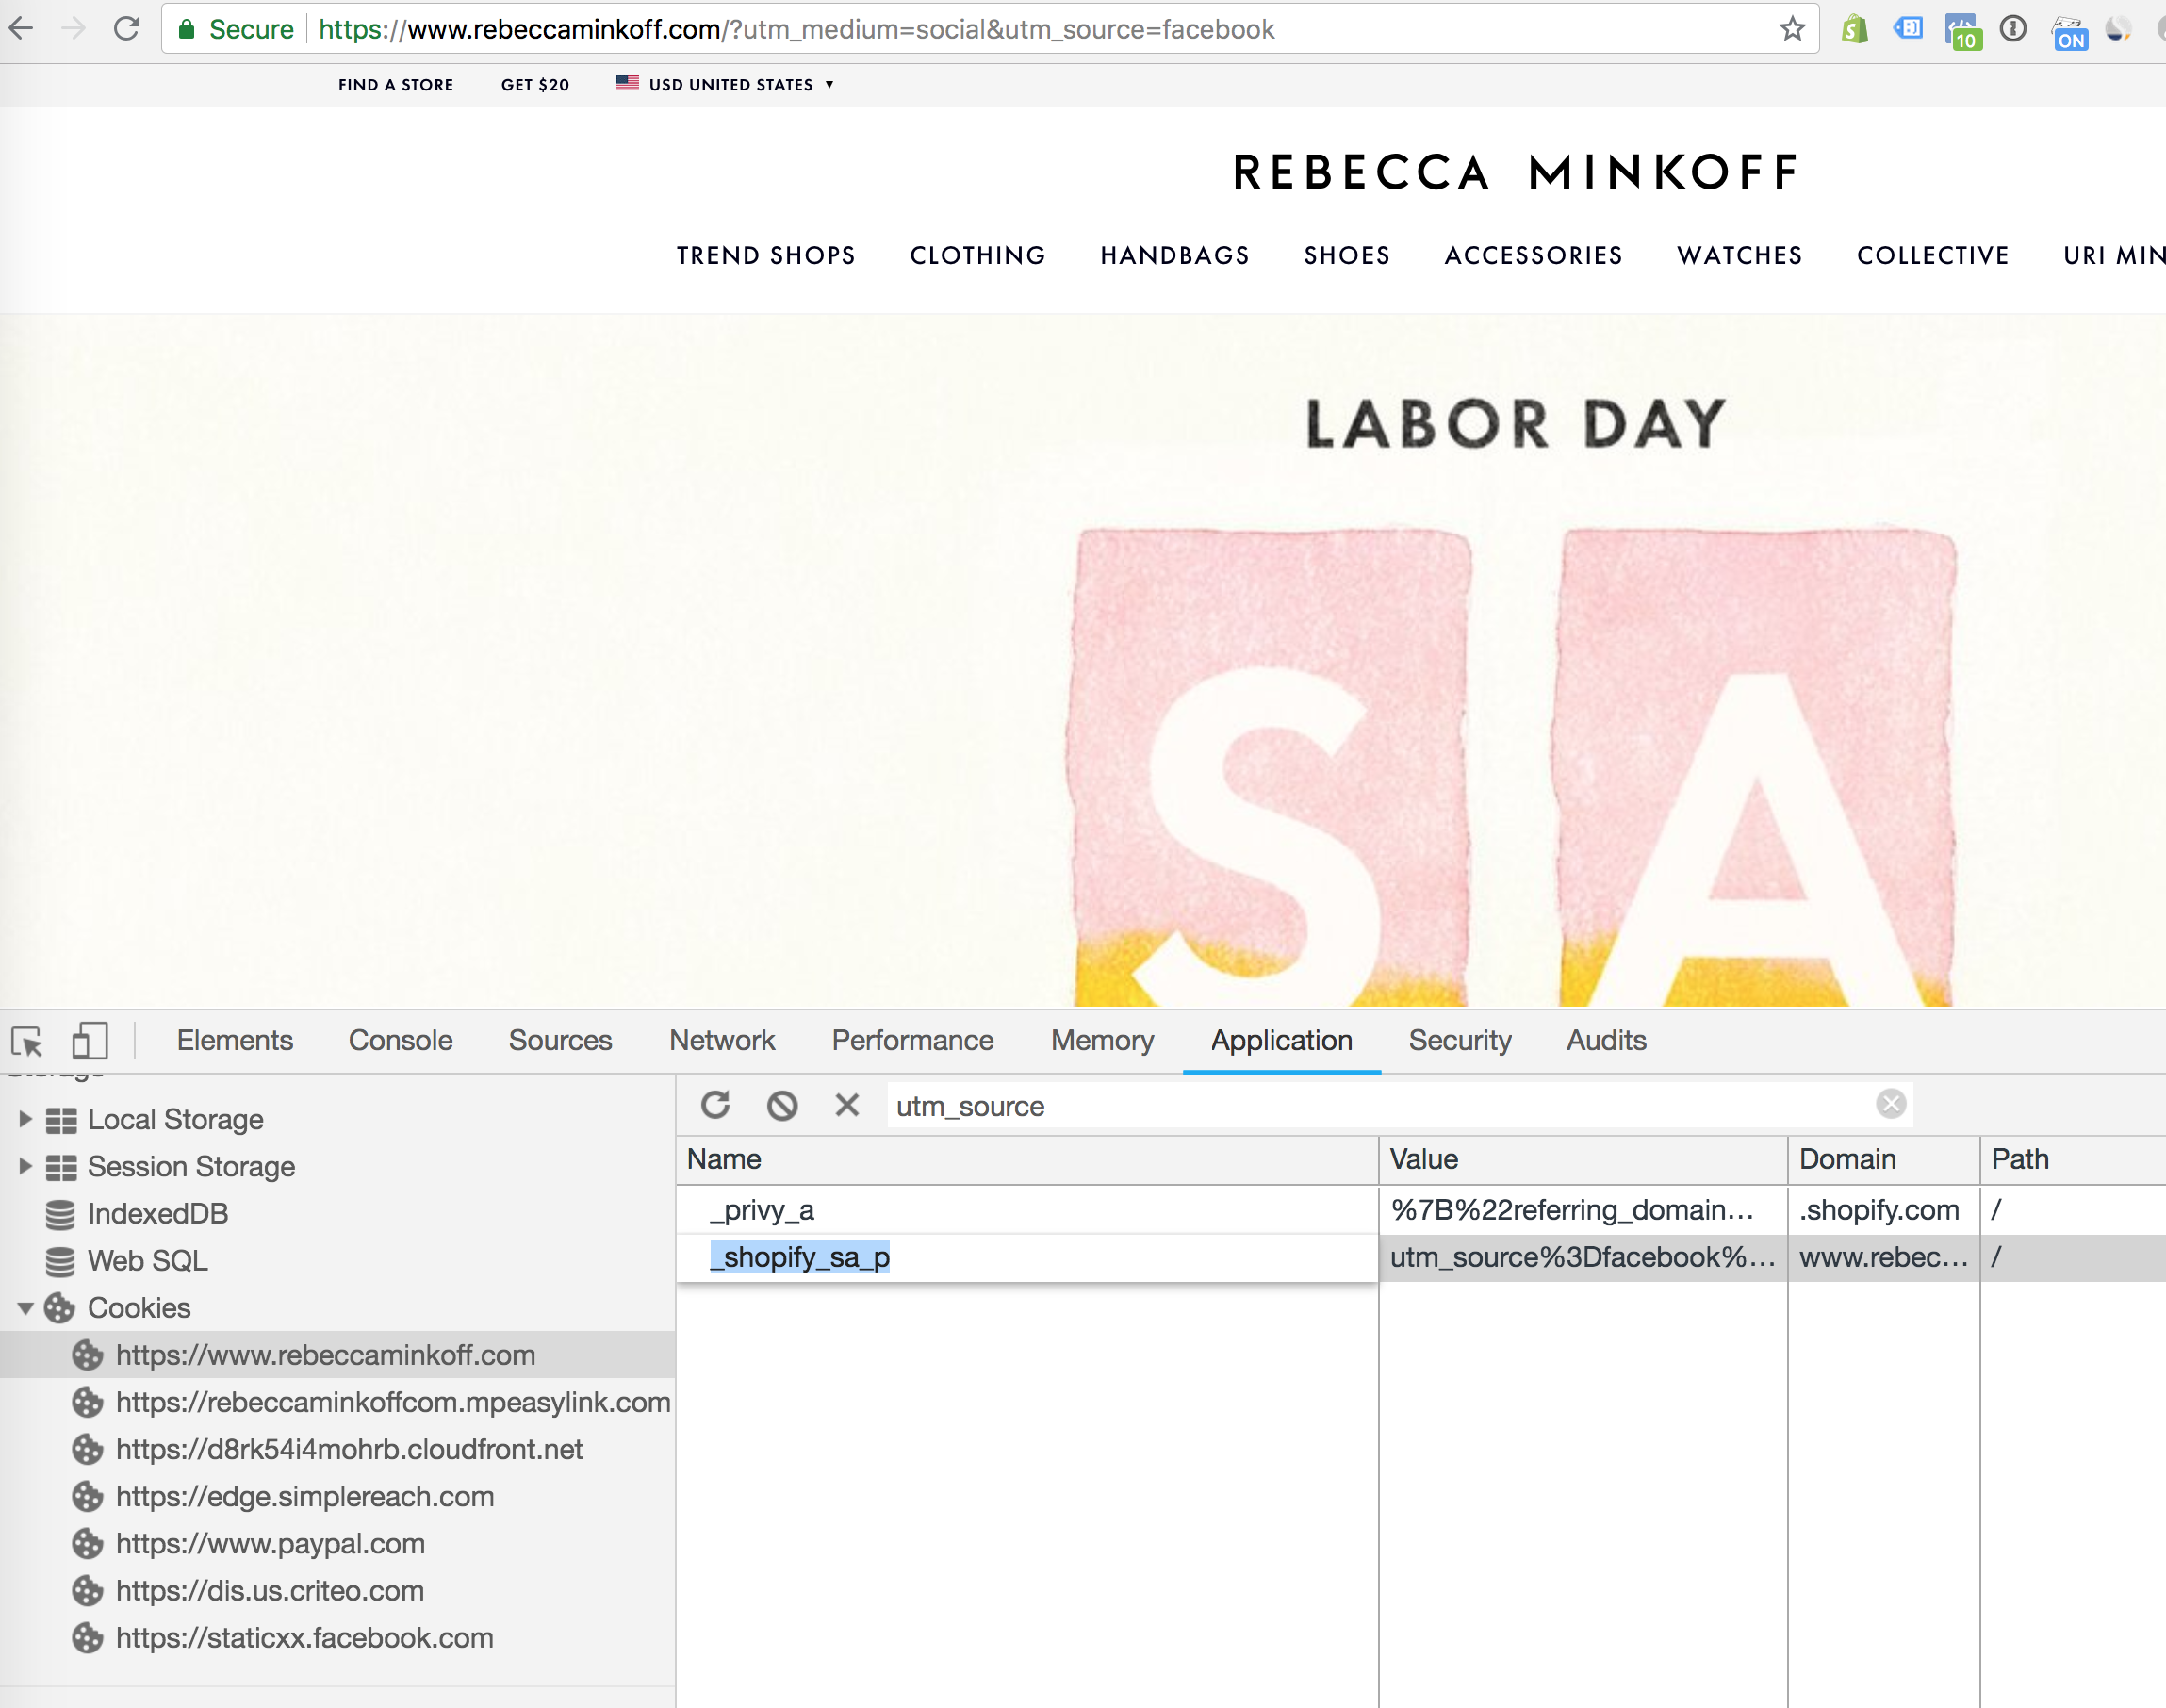
You will want to click into the Shopify cookie on your site and copy this:
And then inside of Google Optimize create a new targeting rule for first-party cookie:
Which you will then copy your Shopify cookie name into here:
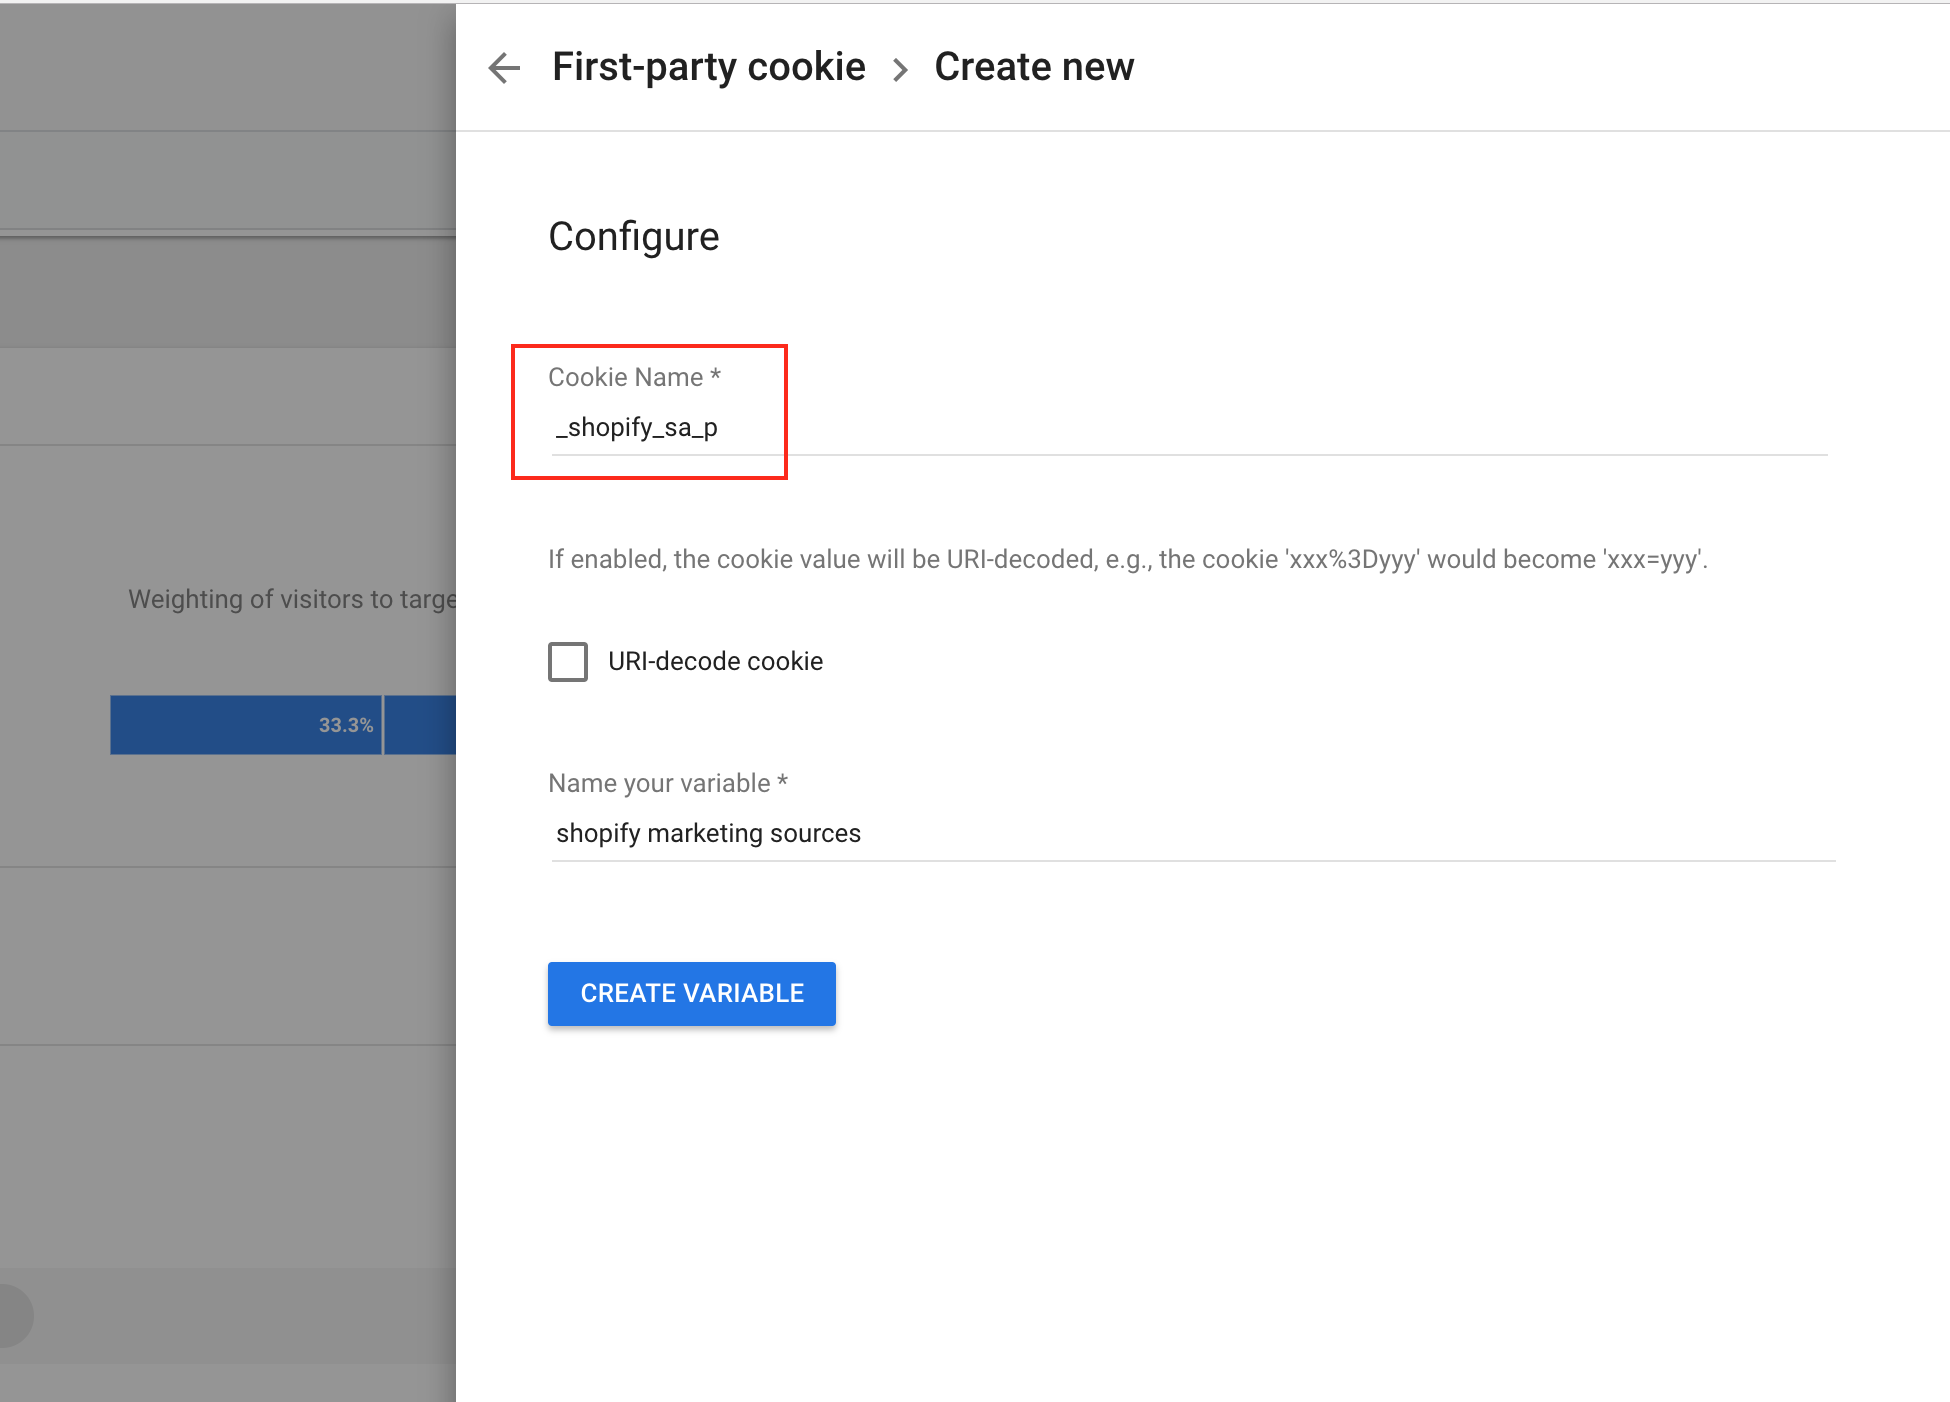
and then click Create Variable.
Step 2: Set Cookie Value
In this next step you will need to set your source value that you want to match for your targeting of this a/b test.
For example: If your utm_source contains facebook and this is the channel you want to create this test/custom UI for then you enter facebook here as shown below.
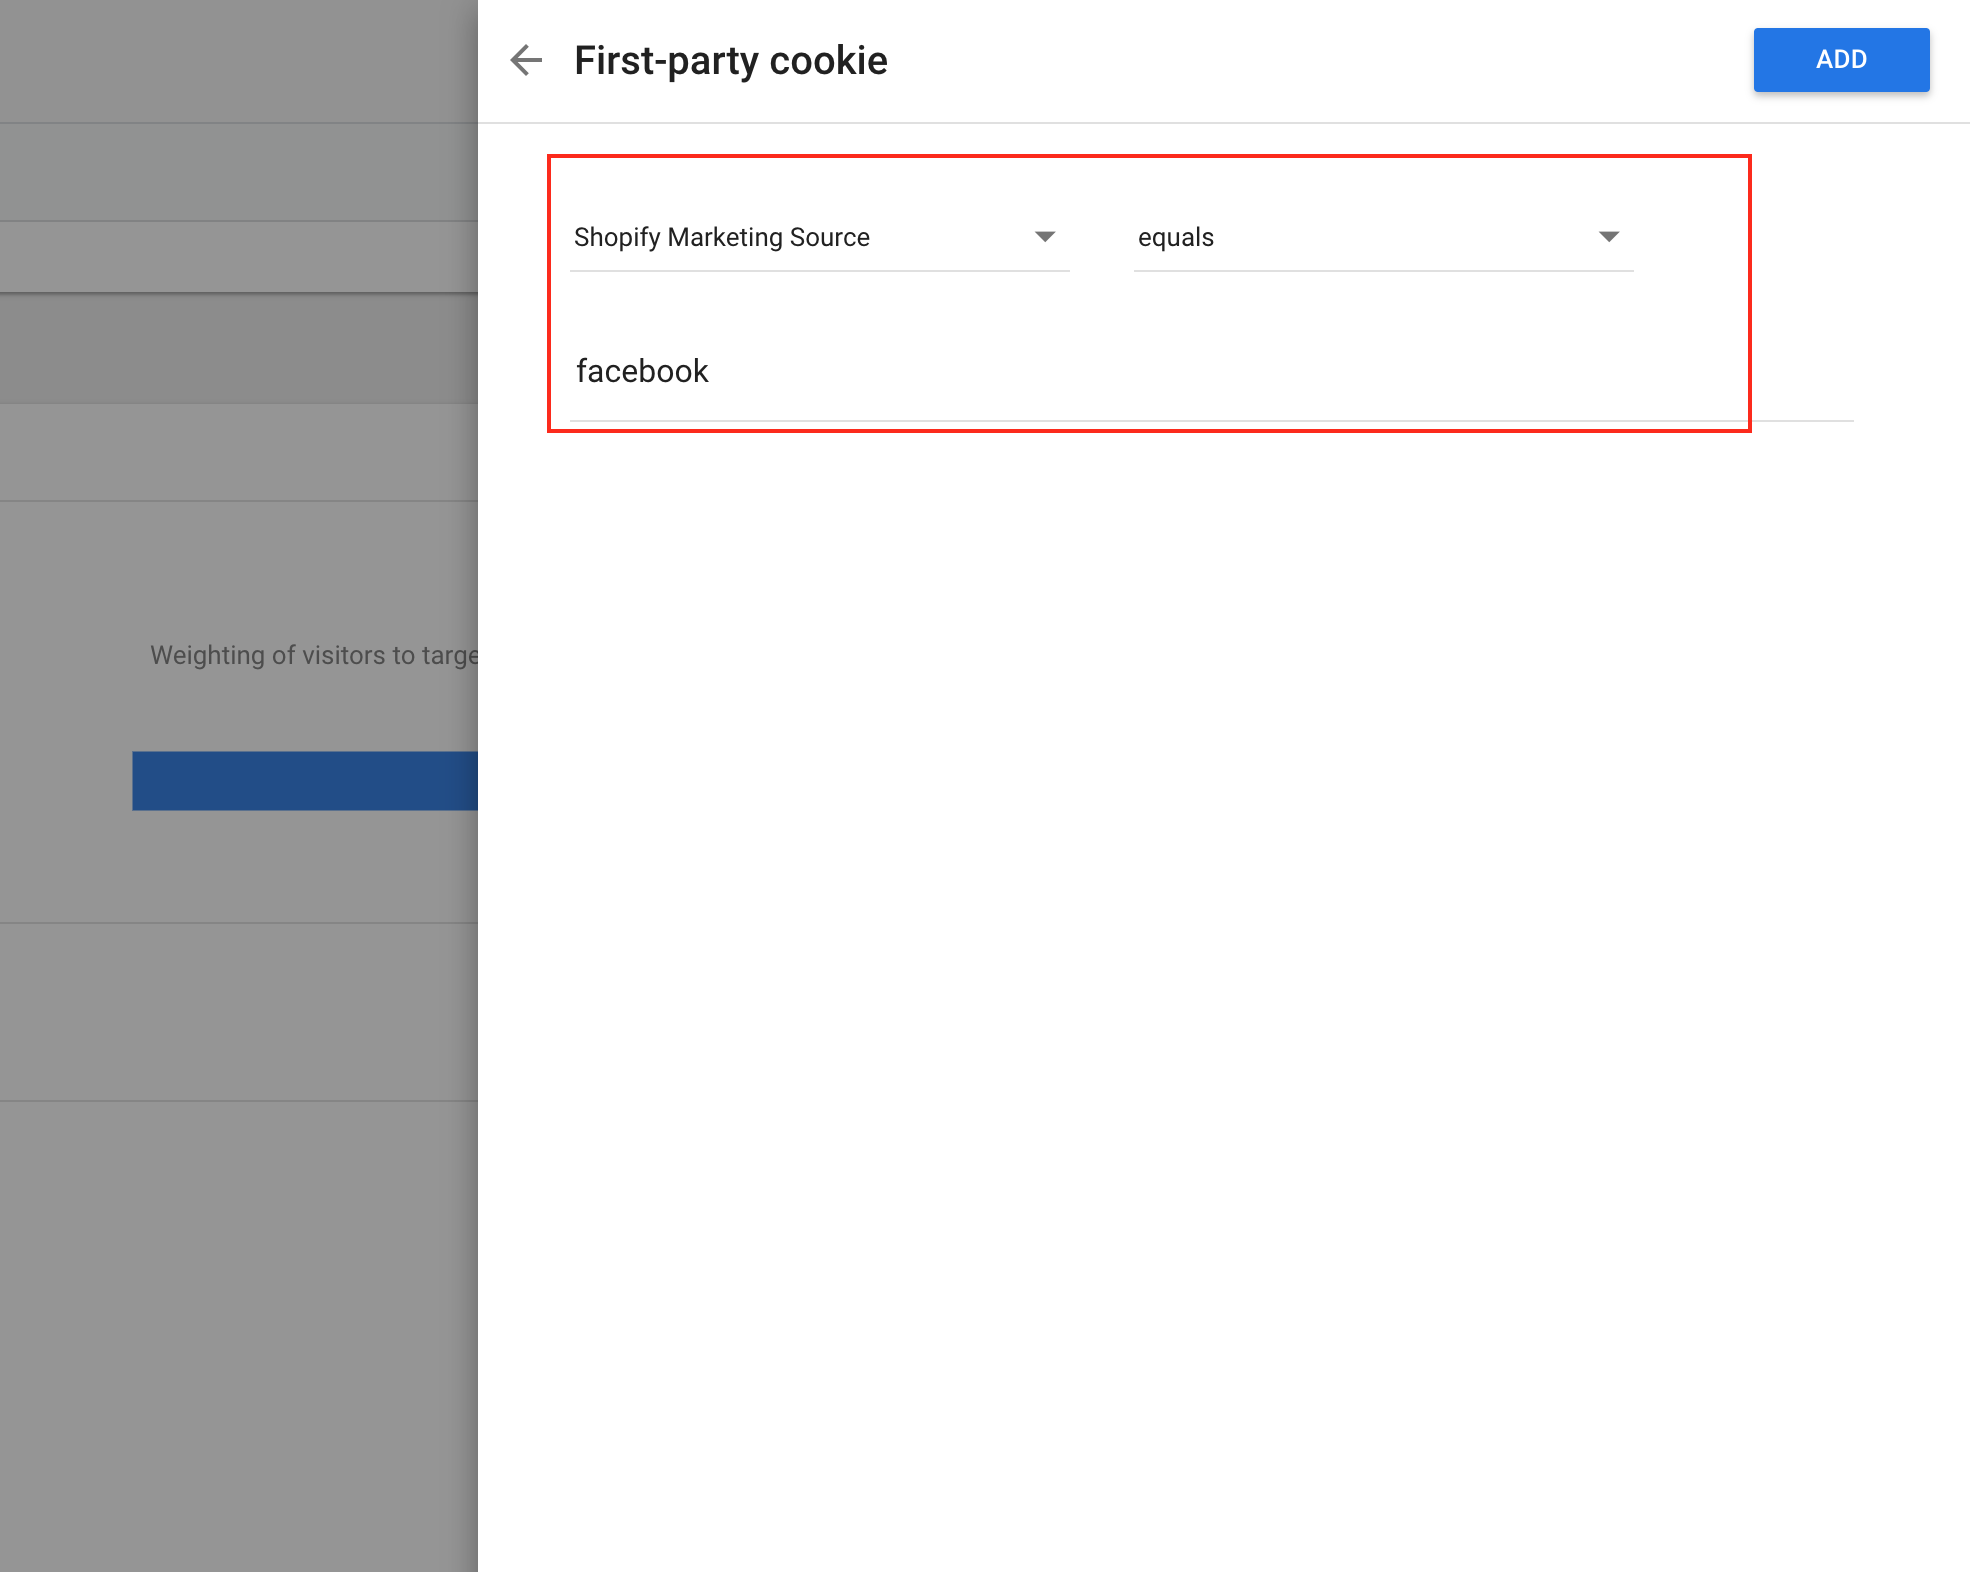
This process will work for any utm parameter – so feel free to change to utm_medium, utm_campaign, etc based on your unique needs.
Step 3: Set your Test Target for Cookie Value
In most cases this step might be done already if you created a new first party cookie value. Your targeting should include your cookie and also some type of page URL targeting before you can launch this test.

Once you have this targeting in place and the rest of your a/b test ready to go then you are all set!
If you want to really cheat and just force everyone that meets the cookie criteria into a single variation then you could set up your “Who” targeting like this where 100% of sessions are sent to your variation:

If you aren’t targeting messages or even just dabbling in this quick and dirty testing then you’re missing out. It’s a quick way for a slow revenue needle push without a lot of complex development!
If you’re looking for more Google Optimize articles on Shopify check these out:
DIY eCommerce UX Audit
Download our FREE 117 point UX audit that you can apply to your own website.



Thankfulness to my father who shared with me concerning this weblog, this
website is truly awesome.