How to Find Click Classes in Google Tag Manager
Use the GTM debug console to save you time and help find the right click classes for your triggers.
Brad Redding
Brad Redding is the Founder & CEO of Elevar. Specializing in analytics, tracking, GTM, and conversion optimization.
A solid user behavior tag plan for your website will require you to dig into Google Tag Manager (GTM) built-in click variables.
Why?
The vast majority of websites today involve user actions that don’t trigger a new pageview hit that is sent to Google Analytics (GA).
Examples:
- opening a mini cart
- clicking on product page tabs
- reading reviews
- category page quick view
- watching videos on product pages
- etc.
You get the picture 🙂
If you don’t have event tags pushing these actions into GA then you can’t measure the impact of features & content on your KPIs.
You have three options to find click classes (or click elements) to use in GTM triggers:
- GTM preview mode
- Free GTM Event Builder Chrome Extension
- Browser dev tools
Option 1: GTM Preview Mode
Use the GTM preview mode to find your click class through these 5 simple steps.
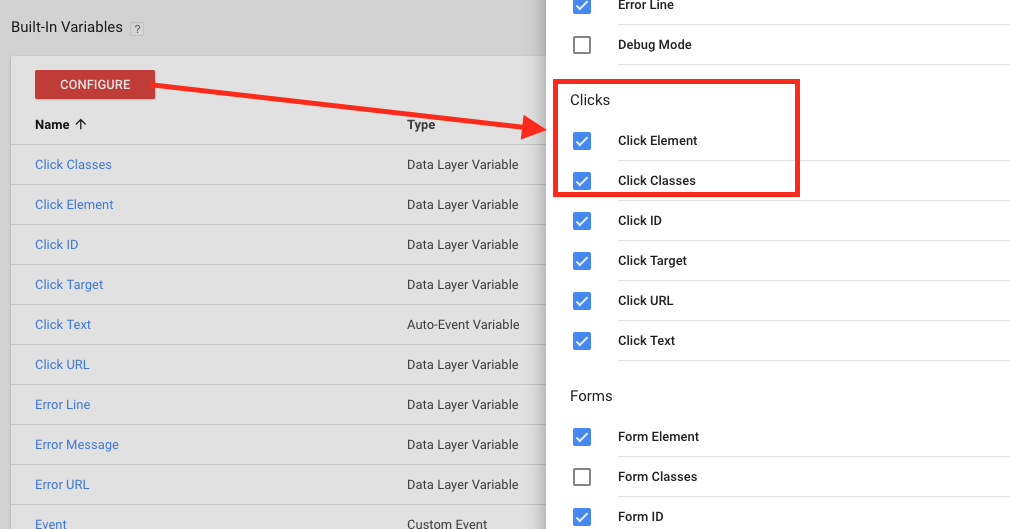
Step 1: Enable Click Classes & Click Elements Variables
If you don’t already have these two variables enabled then go to your built-in variables settings and enable as shown below.
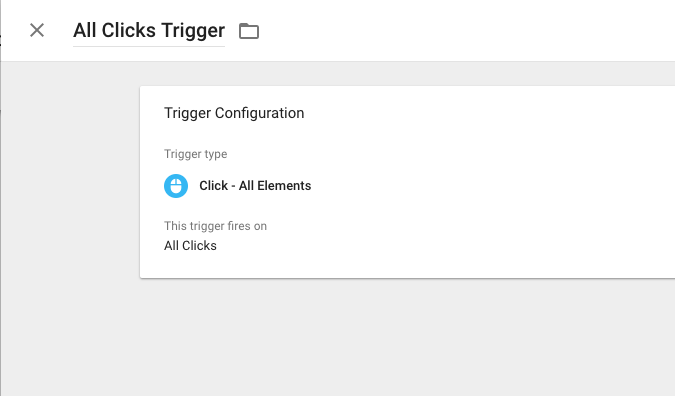
Step 2: Create a New Click Trigger
If you don’t have a click based trigger created in your account then create a generic click trigger like the one shown below so GTM will enable the gtm.click event that we’re going to use in the next step.
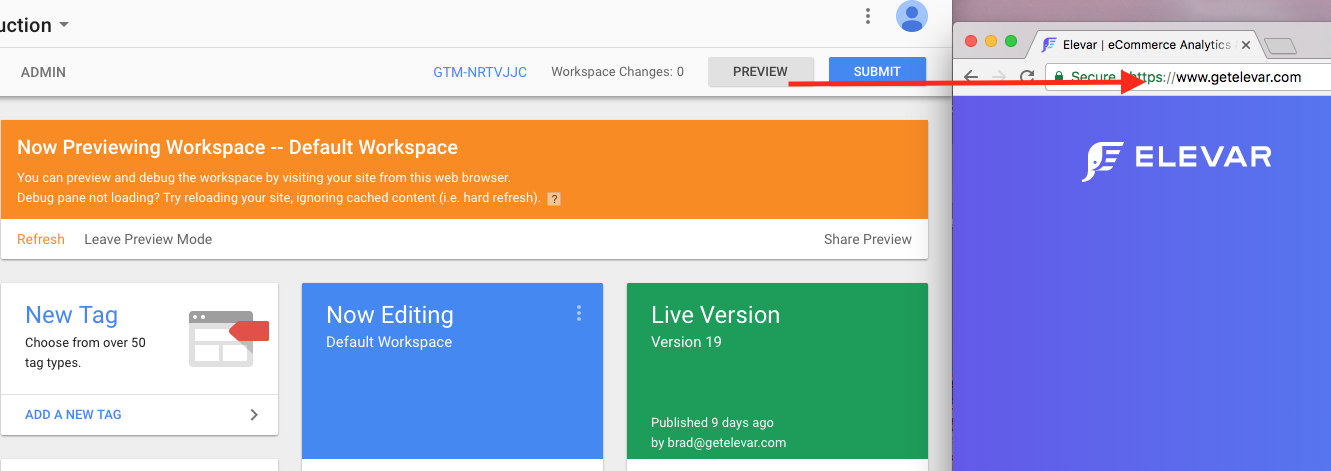
Step 3: Enable Preview Mode in GTM
Inside of GTM enable Preview mode by clicking the “Preview” button shown below.
Then navigate to your website in another tab.
Step 4: View Click Events in Preview Mode
Now when viewing your site click anywhere on the page and you should see the gtm.click events (or they might just say “Click”) on the left side of your preview mode console.
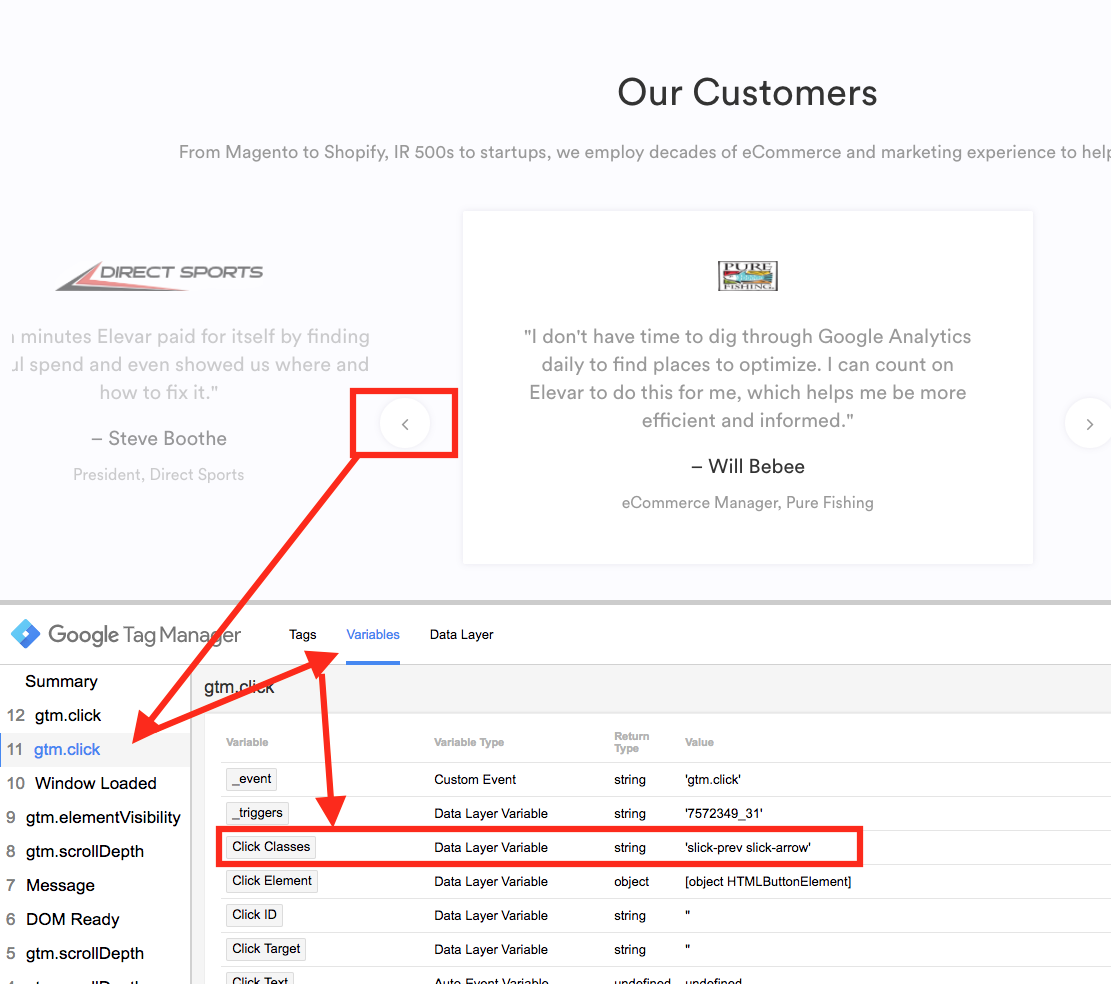
In the example above I clicked on the left arrow in our customer scroll and you can see my Click Class variable is ‘slick-prev-slick-arrow’
Step 5: Update Trigger with Click Class Variable
Now head back to GTM and find your trigger you created in step 2.
Add a rule to your trigger where Click Class equals slick-prev-slick-arrow like this:
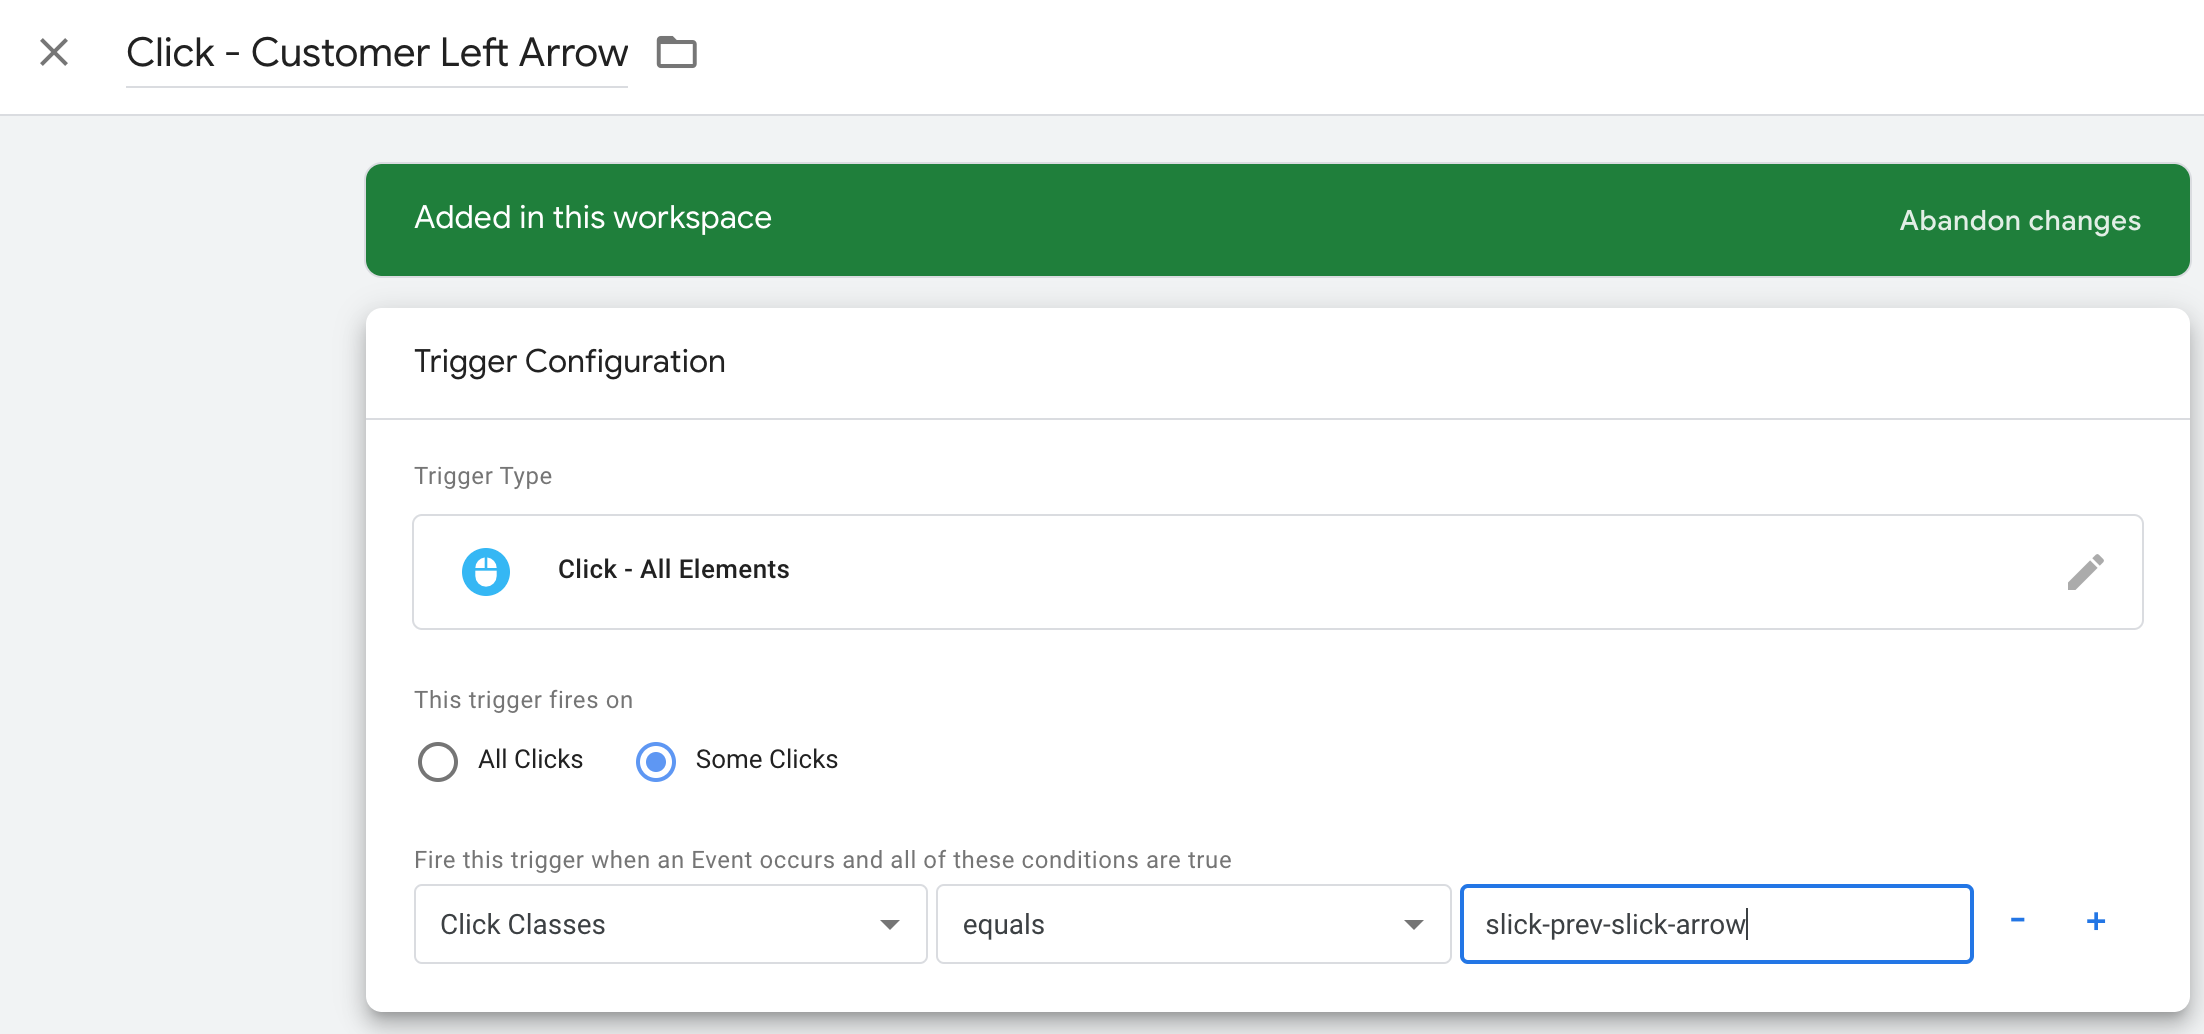
That’s it. You can now assign this trigger to any tag you’d like.
Option 2: GTM Event Builder Chrome Extension
This option will simplify the option of creating the tag and trigger needed for any Google Analytics custom event.
Download the extension here (it’s free).
Once installed then navigate to your website and open it up. You can choose between a click or visibility trigger type and then just hover your mouse over any element on your site and click.
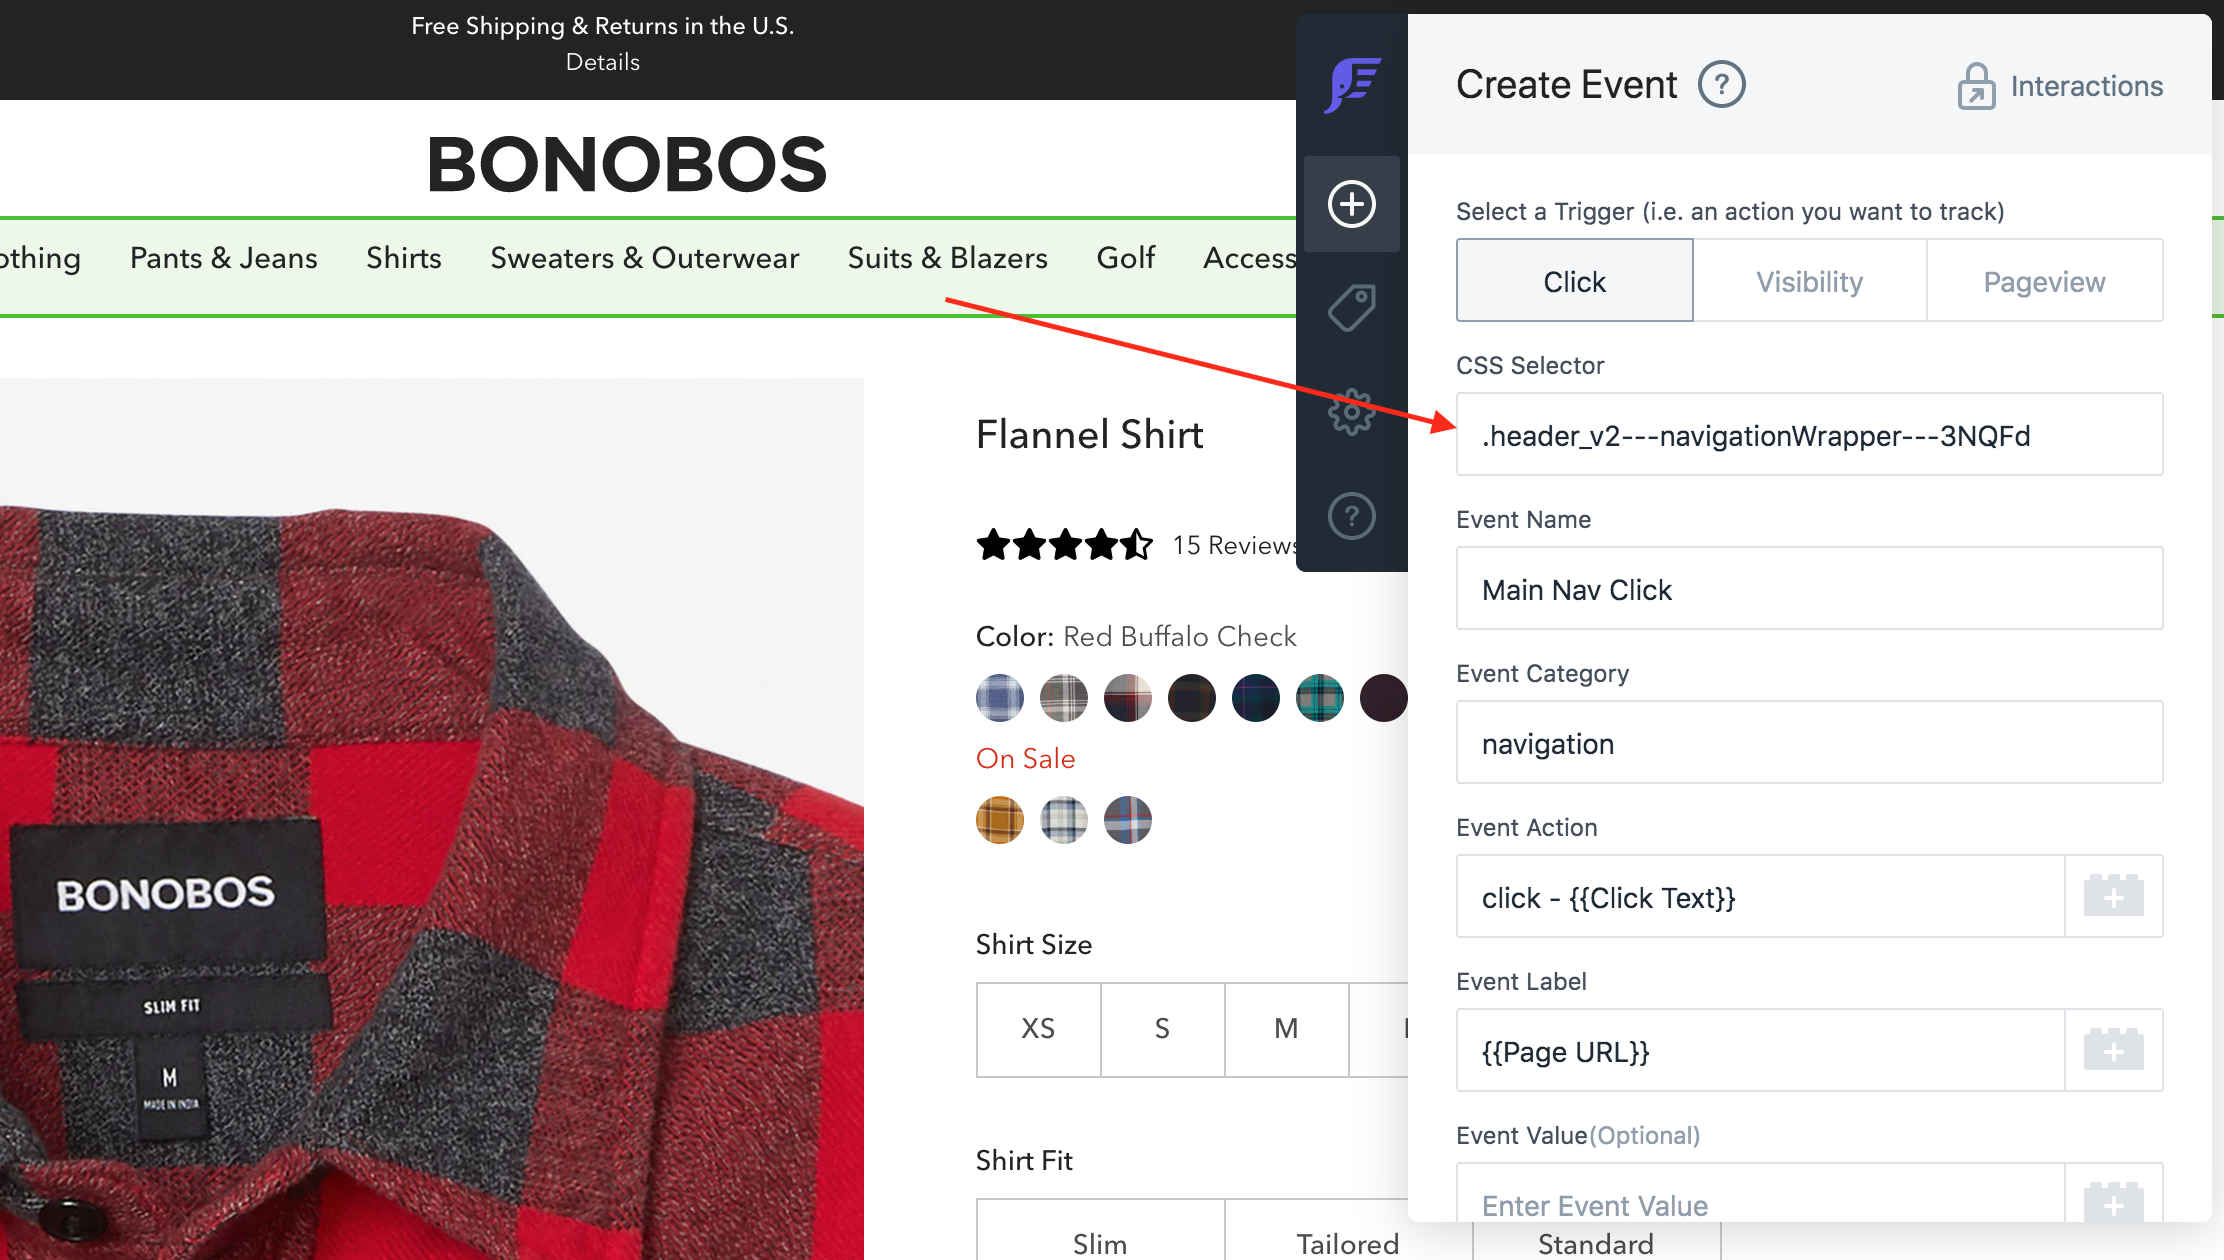
You can either just grab the CSS selector like shown above and copy into your trigger where:
Click Class Matches CSS Selector .header_v2—navigationWrapper—3NQFd
OR you can just download the event tags and import to your GTM container.
This is a great approach if you have to tag a lot of elements on your site at once. You can tag them all => download => import to GTM and all of your event tags and triggers are created for you automatically.
Option 3: Use Dev Console to Find Click Classes
You might find that your click classes in the example above are either:
- Undefined/empty (even though you clicked the darn thing!)
- Duplicates to other buttons/elements
If this is the case then you can also get very granular by using Chrome dev tools to target the exact element. Here’s how to do this in two easy steps.
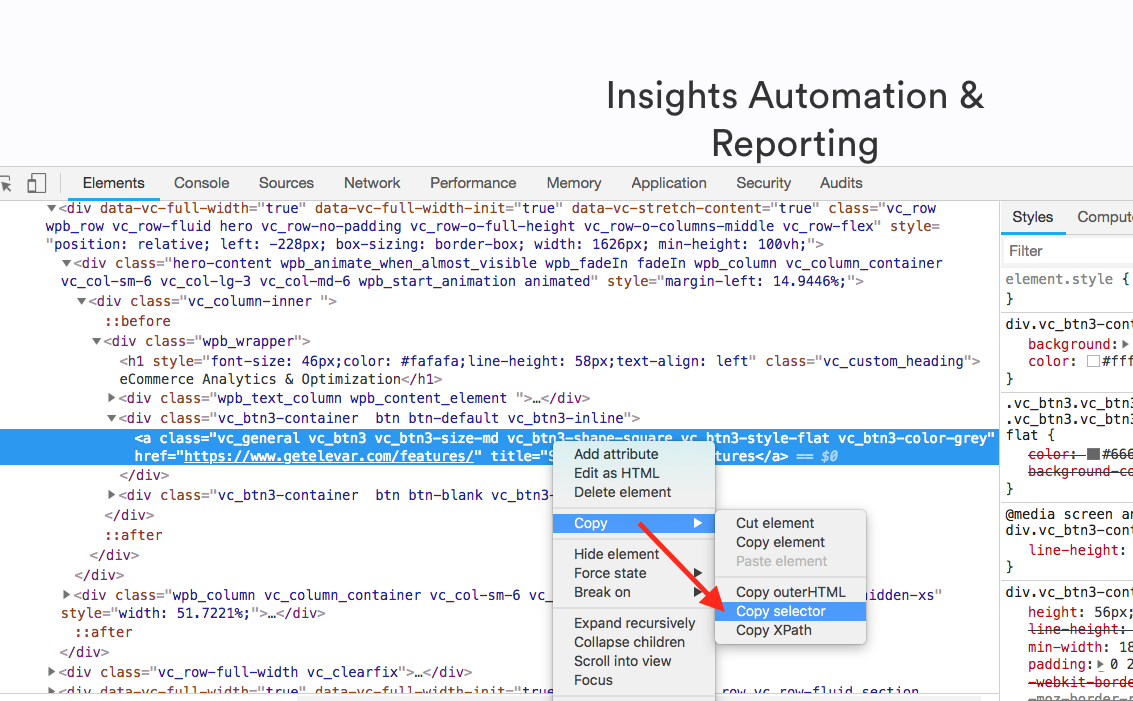
Step 1: Right click the button you want to track:
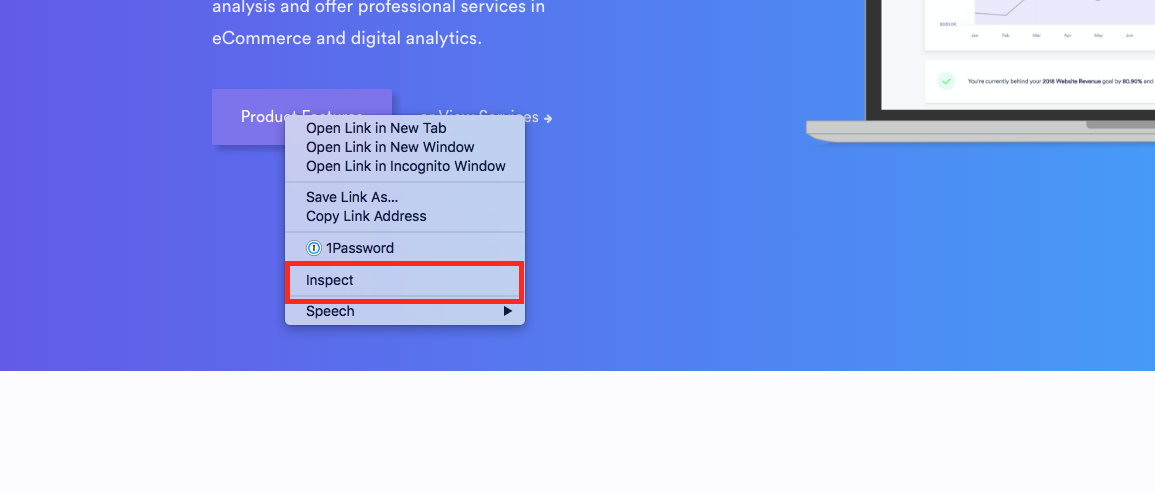
Step 2: Copy Selector in chrome dev tools
Once you’ve clicked inspect in step 1, your dev tools will open up and highlight your UI element. From here, right click and click the “copy selector”:
Then you copy this into a trigger that has Click Element Matches CSS Selector like this:
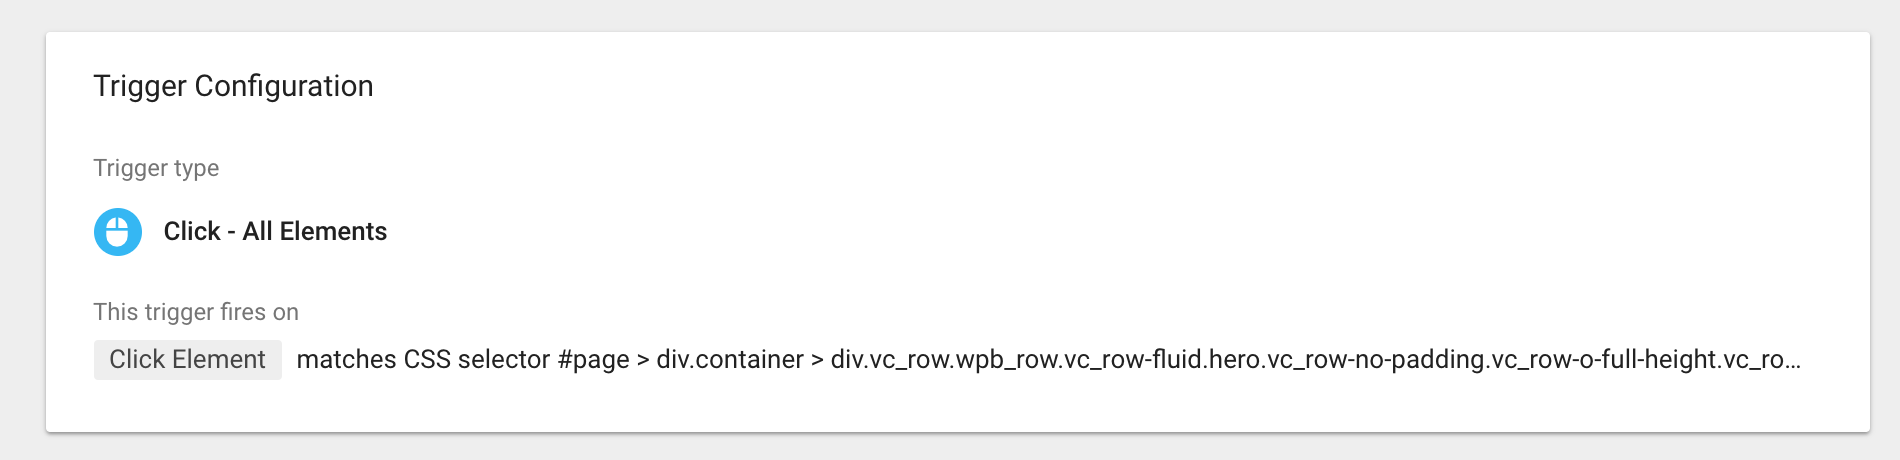
That’s it!
Conclusion
Discovering your own click classes in GTM is one of many to-do’s as part of a solid tagging plan. But, by leveraging the GTM debug console you’ll save a lot of time (and headache!) vs digging through your developer tools to find the right click classes for your trigger.
You are going to encounter edge cases (too many to list here) where you might need to deviate outside of this process. One example is when you have multiple elements on a single page that have the same click class/element. If this happens then you’ll have to go up one or more layers in your DOM to target different parent elements.
Simo Ahava has a great in-depth tutorial on digging into CSS selectors. If you have any other questions feel free to leave a comment below.