How To Set Up Microsoft Clarity via Google Tag Manager
Microsoft Clarity is a free application that provides website usage statistics, session recordings, and heatmaps. Elevar makes it easy to install and leverage Clarity's features.
Microsoft Clarity is a competitor to applications like Hotjar. It provides an easy and free way to generate screen recordings and heat maps. It's also very capable at segmenting recordings so that you see only what you're interested in. For example. Elevar will often setup click tracking for clients when a new feature is launched on a site. This helps our clients understand whether the feature is being used or not. Let's say a merchant has just launched a new product comparison tool, and they want to see how customer's are interacting with it. Using Microsoft Clarity we can use the same GTM triggers we use to track events to notify Clarity that this feature is being used. Then, in the Clarity interface, user's can choose to only see recordings of use of this particular feature. This lets us slice and dice recordings and heat maps any way we choose, so we can focus on recordings and heat maps of just the behaviour we're interested in.
Another interesting feature Clarity offers is an integration with GA & GA4. Clarity can send a link of each session's screen recording to GA/GA4 via a custom dimension. You can then use the segmentation capabilities of GA to view recordings of interest.
For more information on how Clarity and Elevar work together please review this article prepared by Clarity.
Prerequisites
- If you haven't installed our Shopify Source in your Elevar App. Follow our guide on How to Implement the Shopify Source.
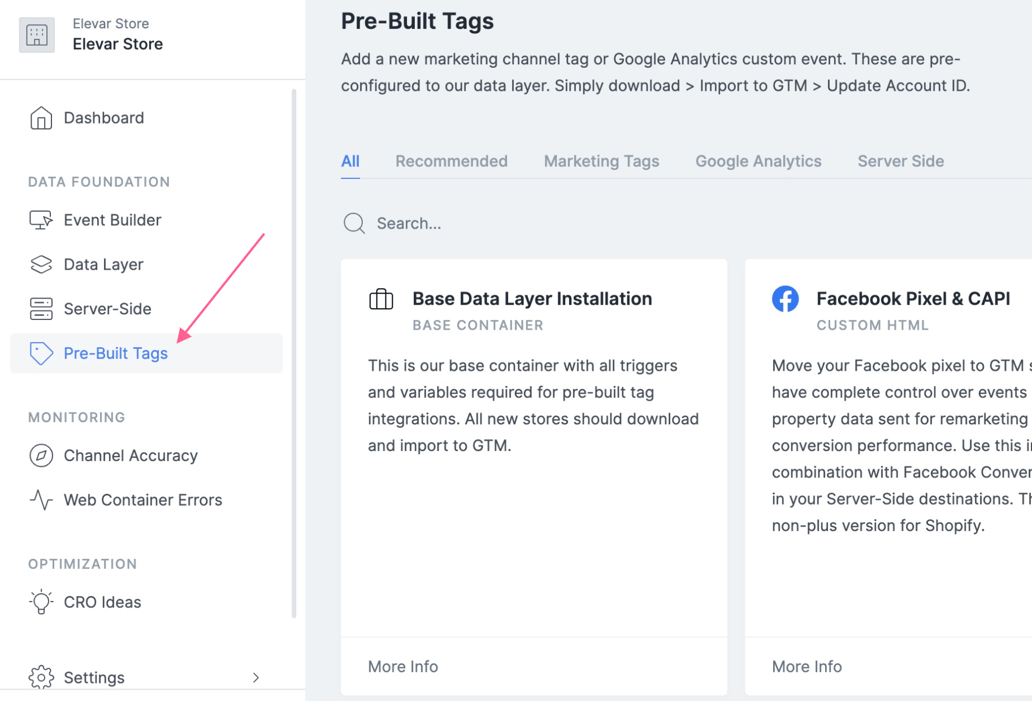
Step 1: Download the Pre-Built Microsoft Clarity Tags
In your Elevar App, navigate to Pre-Built Tags
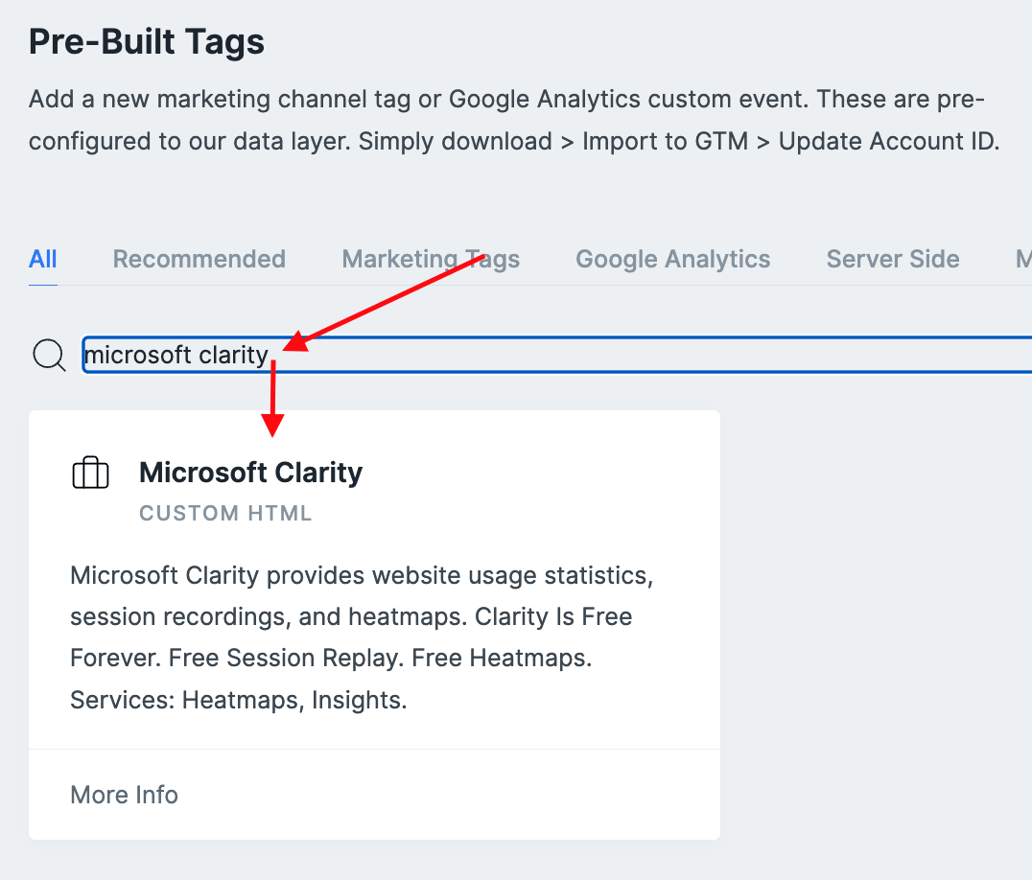
Search for Microsoft Clarity > Click into the Microsoft Clarity Container
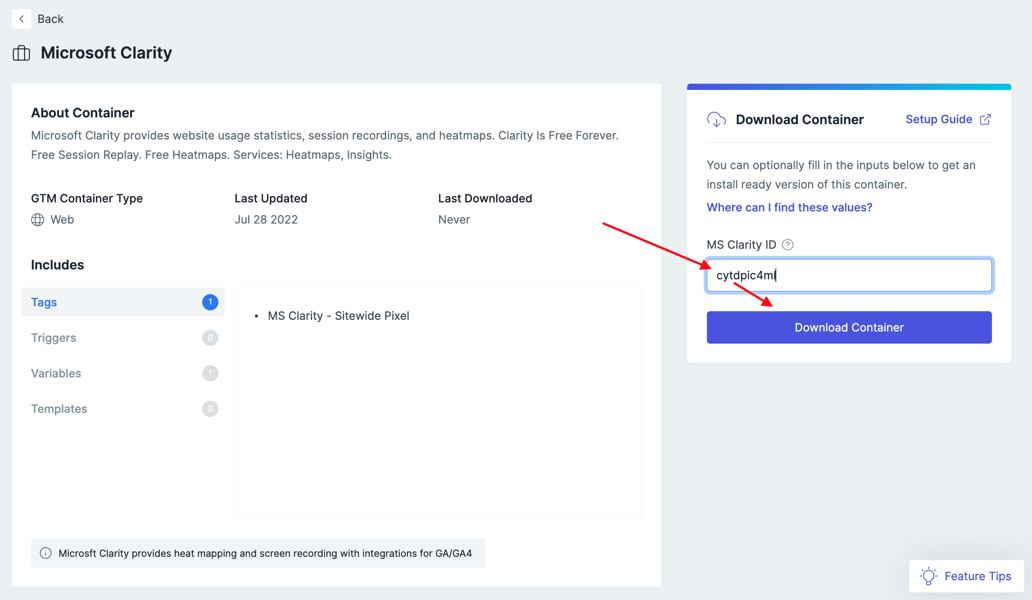
Add in your Microsoft Clarity ID [How to find this?] > Select Download Container
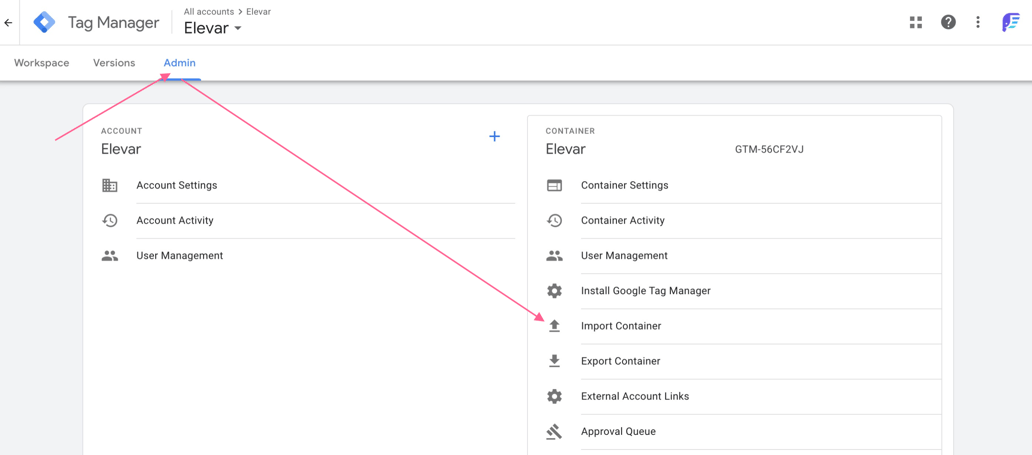
Step 2: Import the Pre-Built Microsoft Clarity Tags into your Google Tag Manager Web Container
Log in to your Google Tag Manager Account > Select your GTM Web Container
Select Admin > Import Container
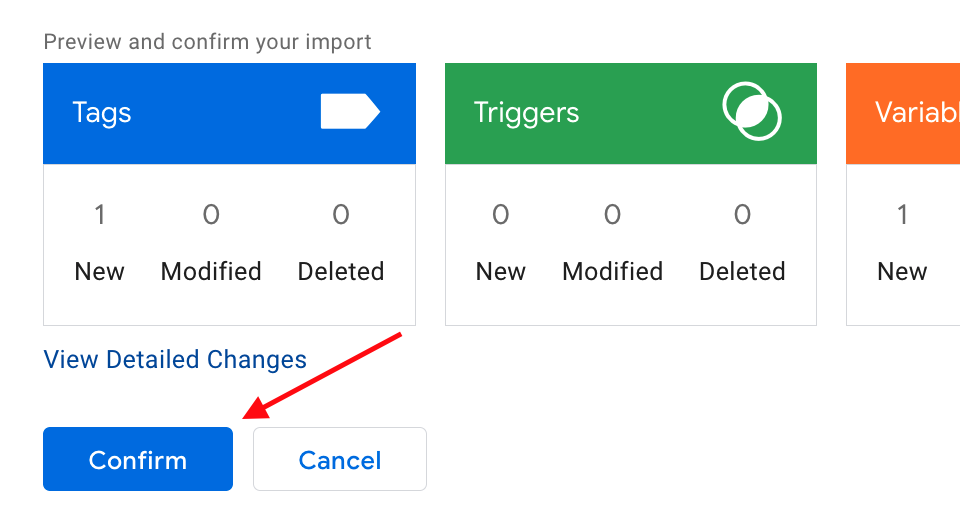
Select to import the file that you just downloaded in Step 1. Choose a New Workspace and titled it Microsoft Clarity Tracking. Then choose Merge > Overwrite. Your import will look similar to the below:

Select Confirm to import the tags
Step 3: Publish the Pre-Built Tags
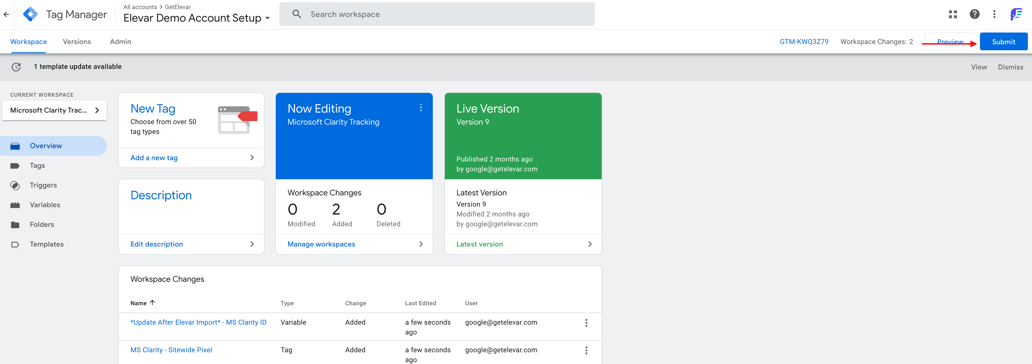
In your Micosoft Clarity Tracking workspace, select Submit
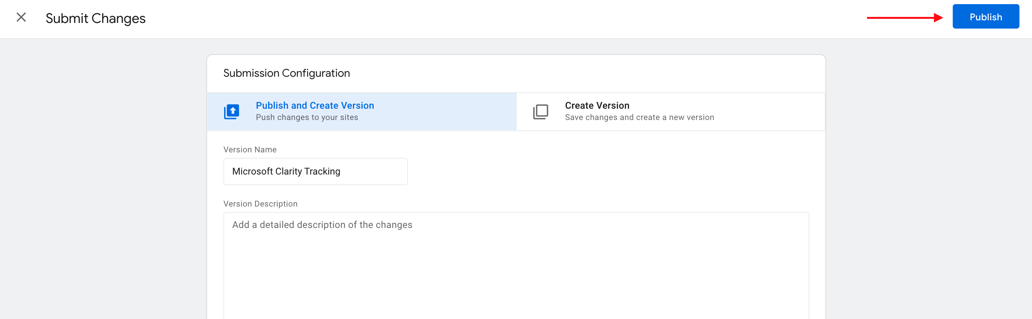
Select Publish
And now your tracking is live! Clarity will begin to collect screen recording and heat map data. Note: it can take several hours for the data to populate in the interface.
Advanced: How Do I Segment Screen Recordings So I Only See Certain Features and Usages?
Returning to our example above where a merchant has just introduced a new comparison tool feature and they'd like to see screen recordings and heat maps of only usage of this feature, how can we accomplish this? Clarity provides us an API call that can be sent at the time of interest.
clarity("set", "action", "comparisonFeatureClicked");
We might fire this code snippet as soon as the user has begun interacting with the comparison feature, which would then let us focus exclusively on recordings of the use of this feature in the Clarity interface.
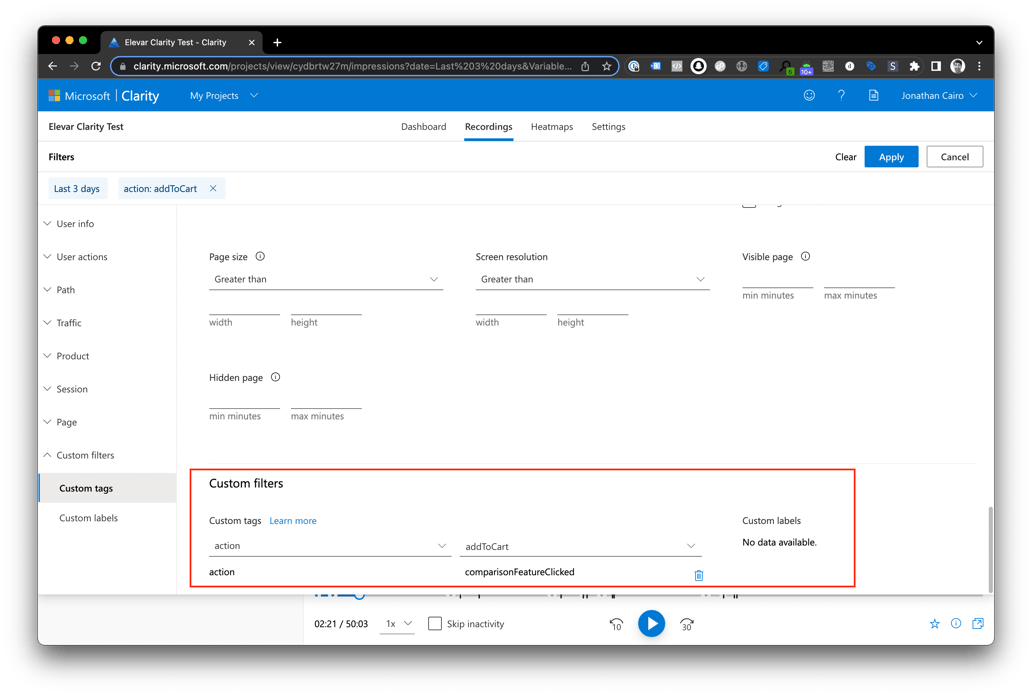
In order to segment recordings in the Clarity interface click Recordings on the main navigation bar, and then click Filters.
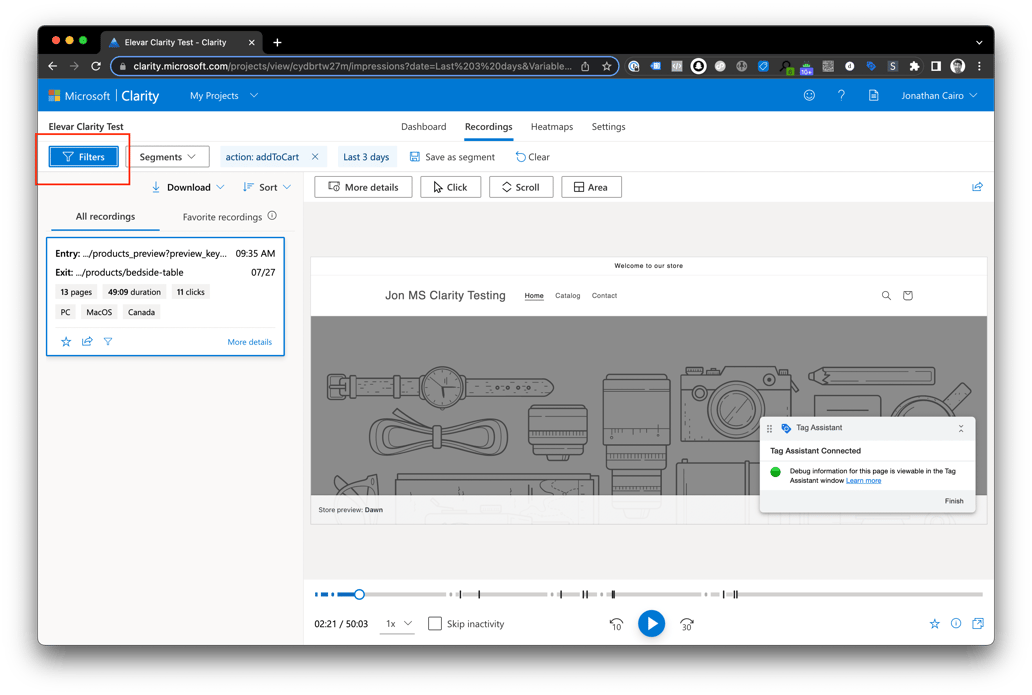
Then click Custom tags under Custom Filters, select the tag with the second argument in the above API call (here it's 'action') then select the event (the third argument, here 'comparisonFeatureClicked') and click apply. You'll now see only recordings where this tag/label ('action'/'comparisonFeatureClicked') was sent.
Updated 5 months ago