How to Set Up ShareASale Merchant API via Elevar Server-Side Destination
Follow this step by step guide to launching your ShareASale Merchant API integration!
Please note that this guide is for customers using Elevar's Server-Side integration.
Prerequisites
Install Elevar's Data Layer & Shopify Source on your store. Follow our guide on How to Implement the Shopify Source.
Prerequisites with Shareasale
You must contact Shareasale customer support prior to turning on the Elevar server side integration. Create a ticket in Shareasale by following this link. In the ticket request that the following 2 items are completed.
Enable the Merchant API in the your Shareasale account
Authorize the account to make the New Transaction API call
You should receive written confirmation from Shareasale that these steps have been performed and the account is ready to receive server side events.
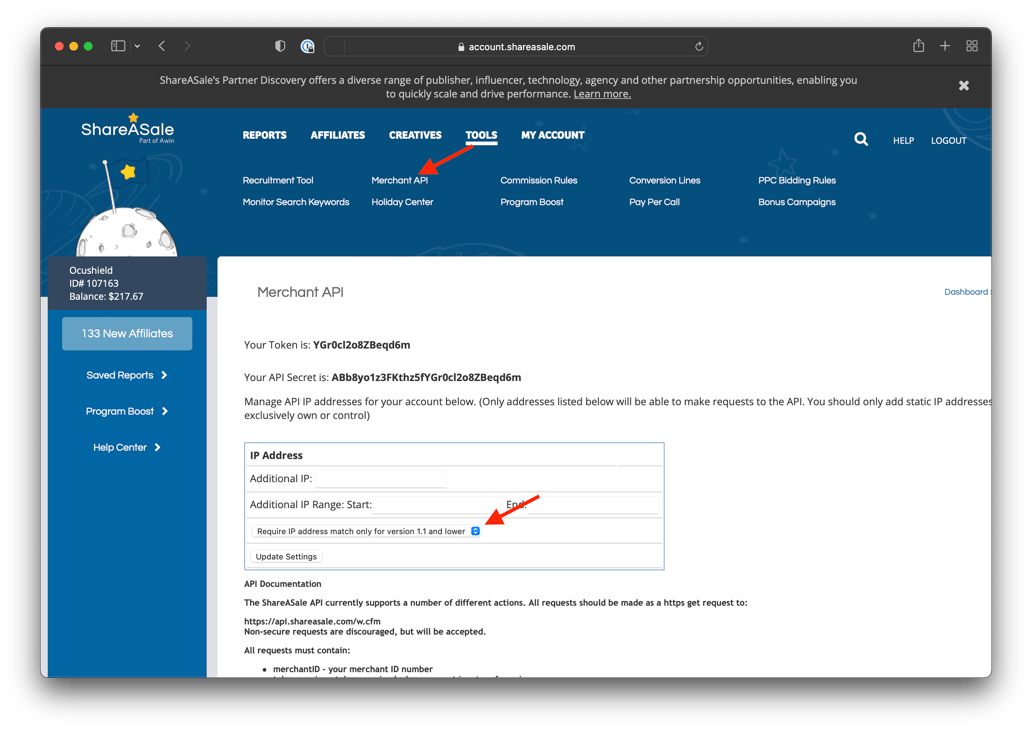
Lastly, you will need to disable IP address matching by going to "Tools" > "Merchant API" and selecting "Require IP address match only for version 1.1 or lower" and clicking "Update Settings"
Once these steps are complete, you can activate the Shareasale destination as outlined below. After that is complete, use the test url provided by your Shareasale rep to perform a test purchase, and verify with the rep this was received correctly.
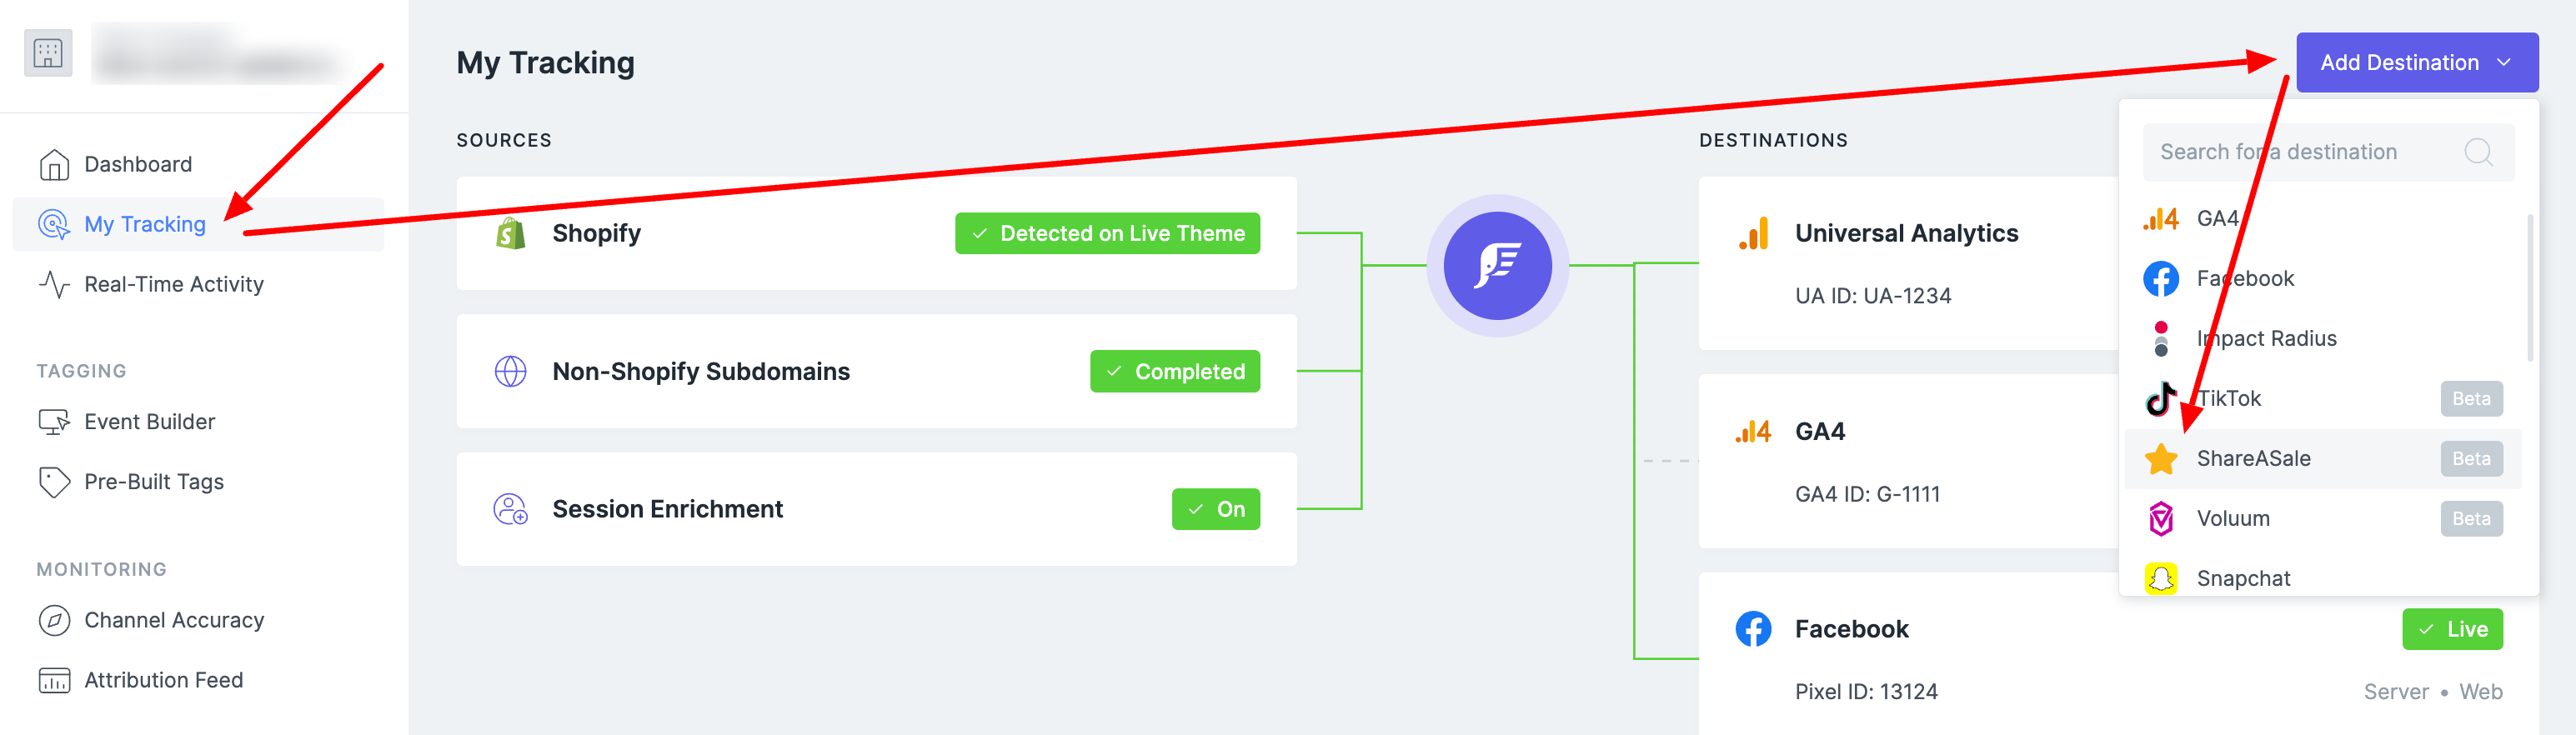
Step 1: Navigate to the ShareASale Server-Side Install Wizard in your Elevar App
-
In your Elevar App, navigate to Server-Side > Select Add Destination > Find and select ShareASale.
-
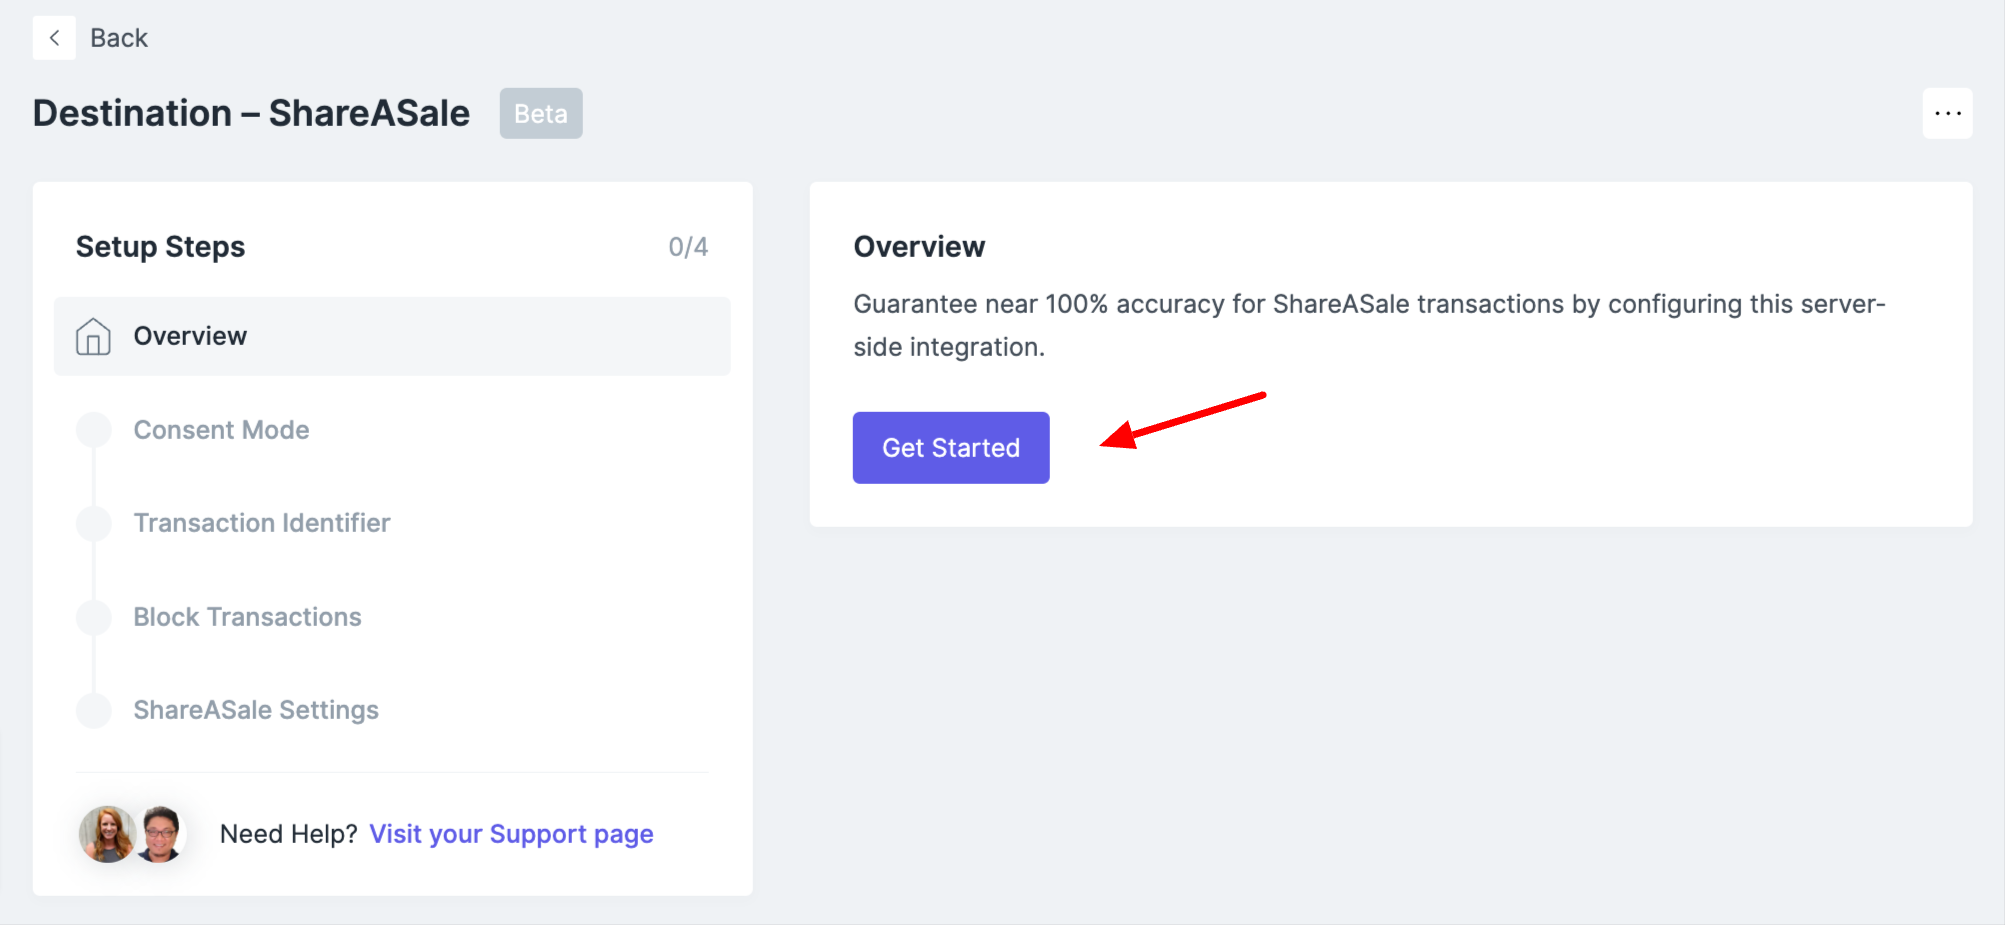
You'll be taken to an Overview Page, select Get Started
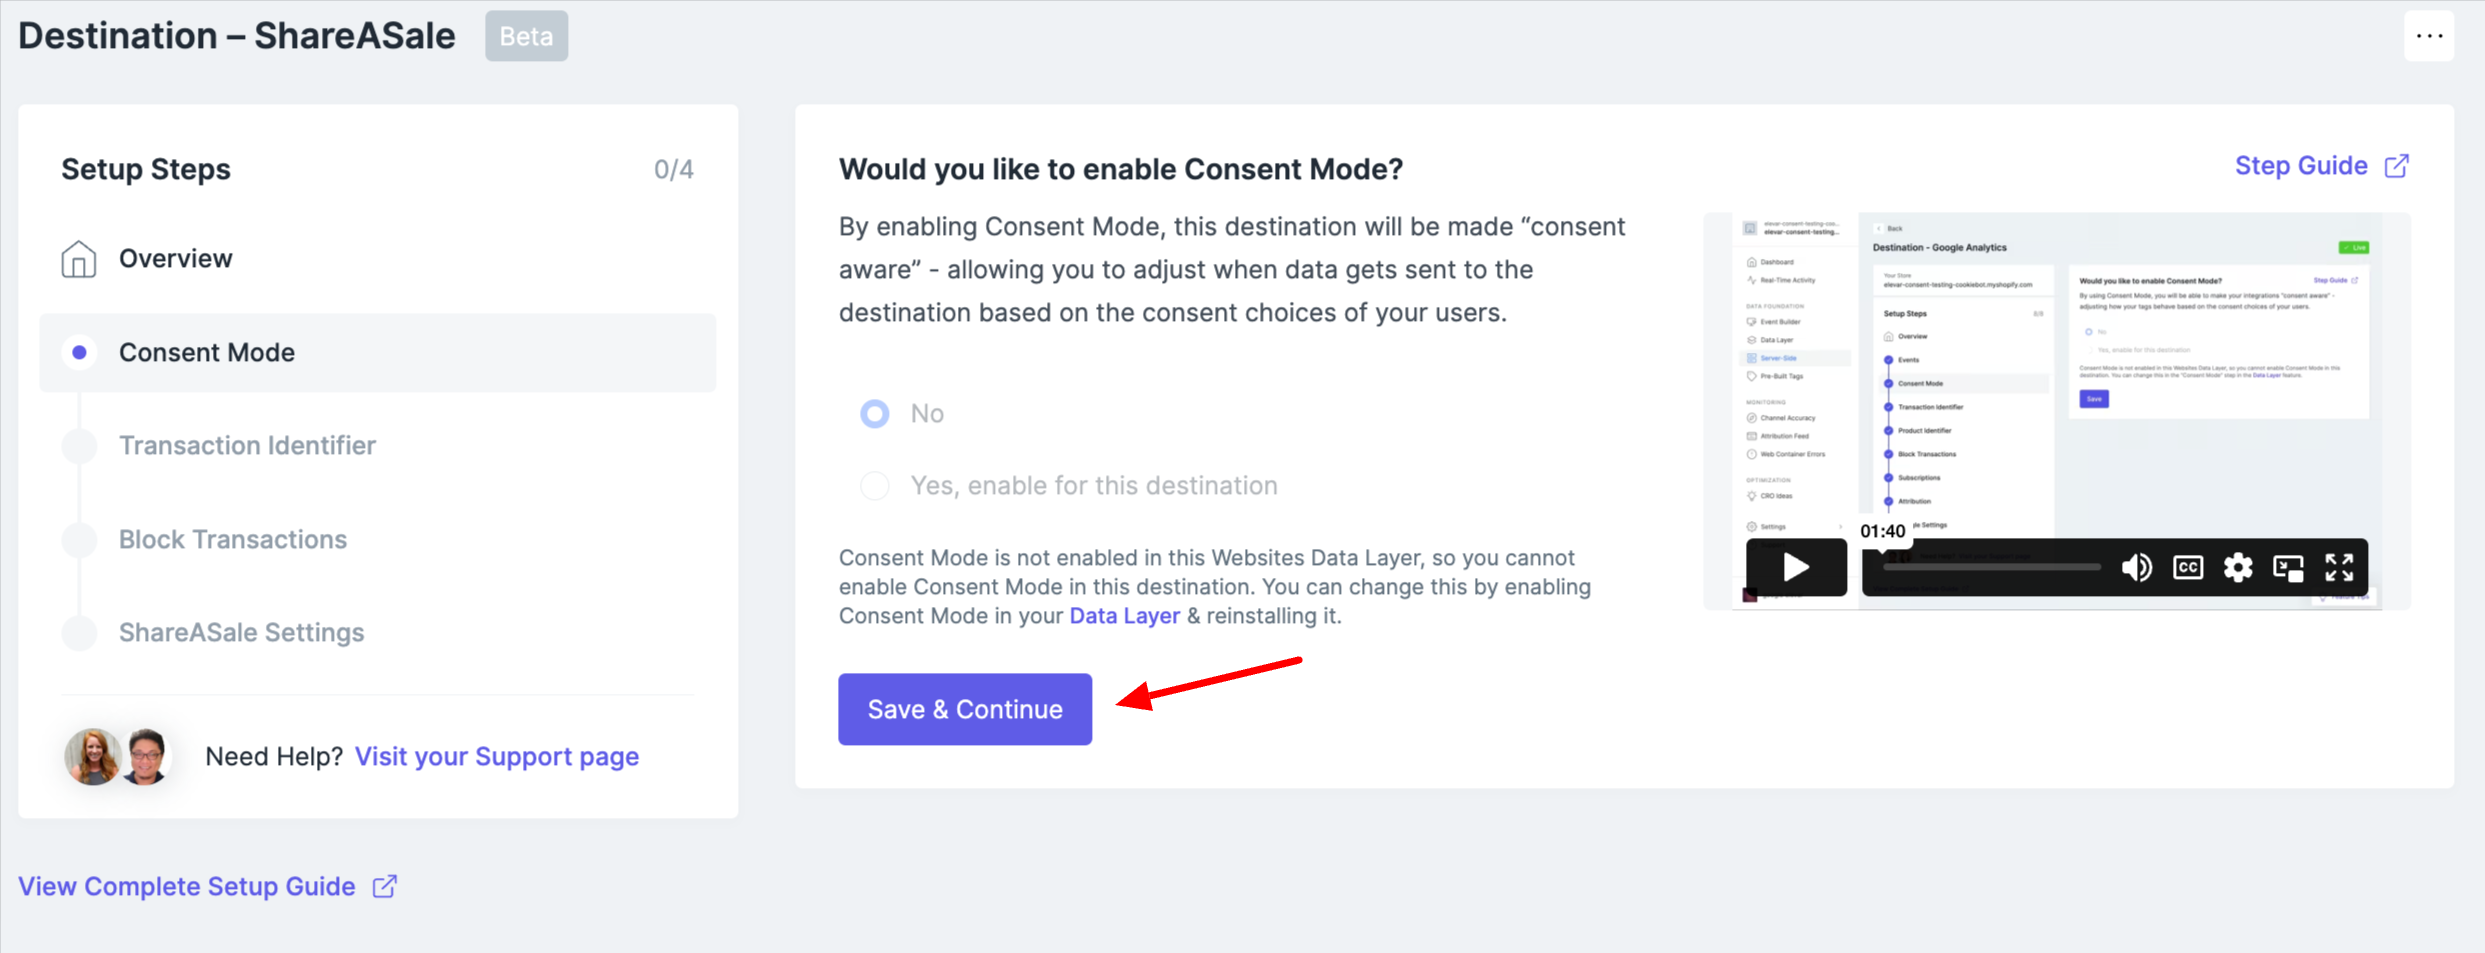
Step 2: Update Consent Mode Settings
This step allows you to customize your ShareASale destination for consent mode if you have enable. If not enable this section will only give you the option to Save & Continue. For more details on how to configure if you have consent mode enable view: Consent Mode: Customize Server-Side Destinations
Step 3: Select your Transaction Identifier
This step allows you to customize what transaction identifier to send with your ShareASale purchase events. Order Number is the most commonly used transaction identifier for ShareASale & we've selected this for you by default.

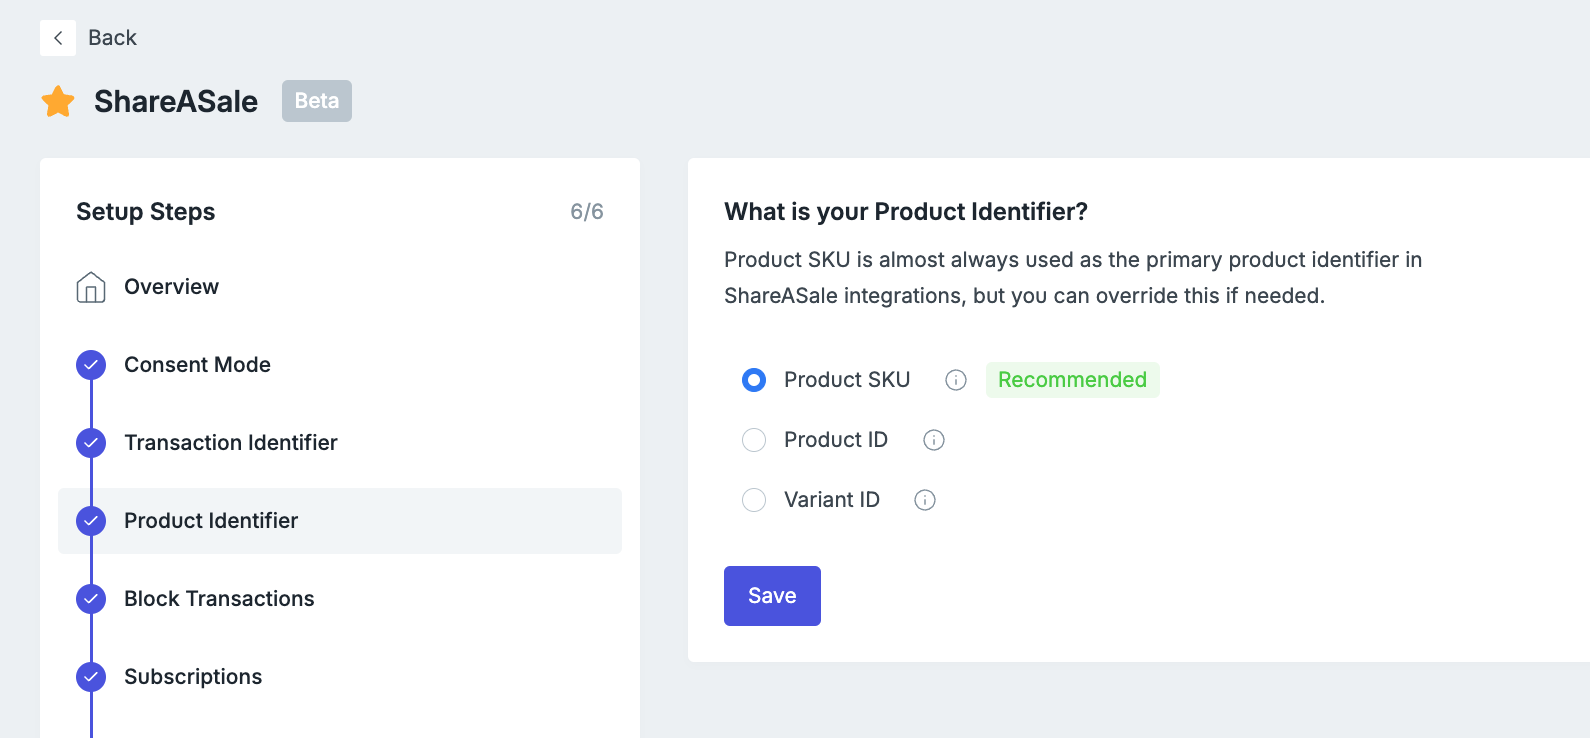
Step 4: Select your Product Identifier
This step allows you to customize what product identifier to send with your ShareASale purchase events. Product SKU is the most commonly used product identifier for ShareASale (this is what the native ShareASale/Shopify integration sends) & we've selected this for you by default.
Step 4: Block Transactions
This step allows you to control exactly what purchase events are sent to ShareASale's Merchant API. You can block orders based on Source Channel Names, Order Tags or Order Gateways.
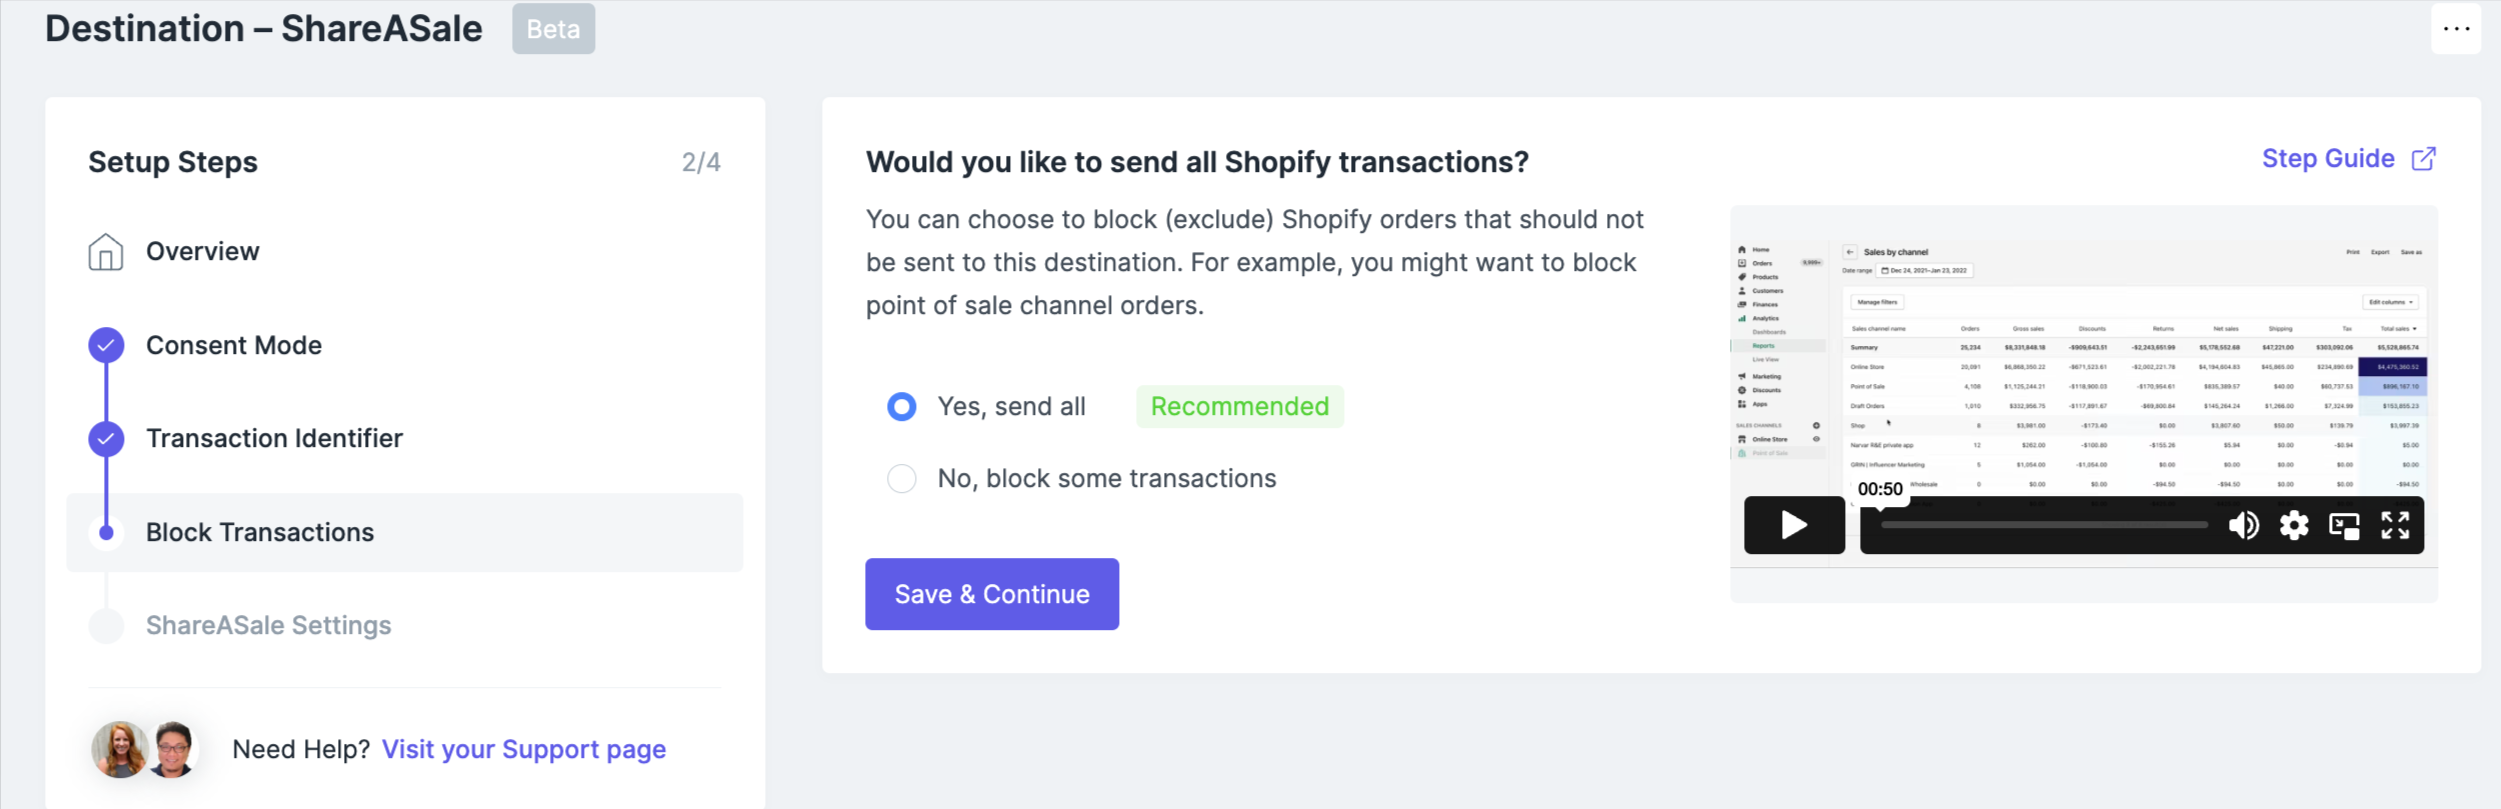
Two common scenarios where you may want to block orders are: recurring orders & offline orders. Learn how to block these orders this guide.
Not sure if you need to block orders? Look at what Sales Channels you have in Shopify!
Step 5: Add in Your ShareASale Merchant ID, Token, & Secret
1. Add in your ShareASale Merchant ID
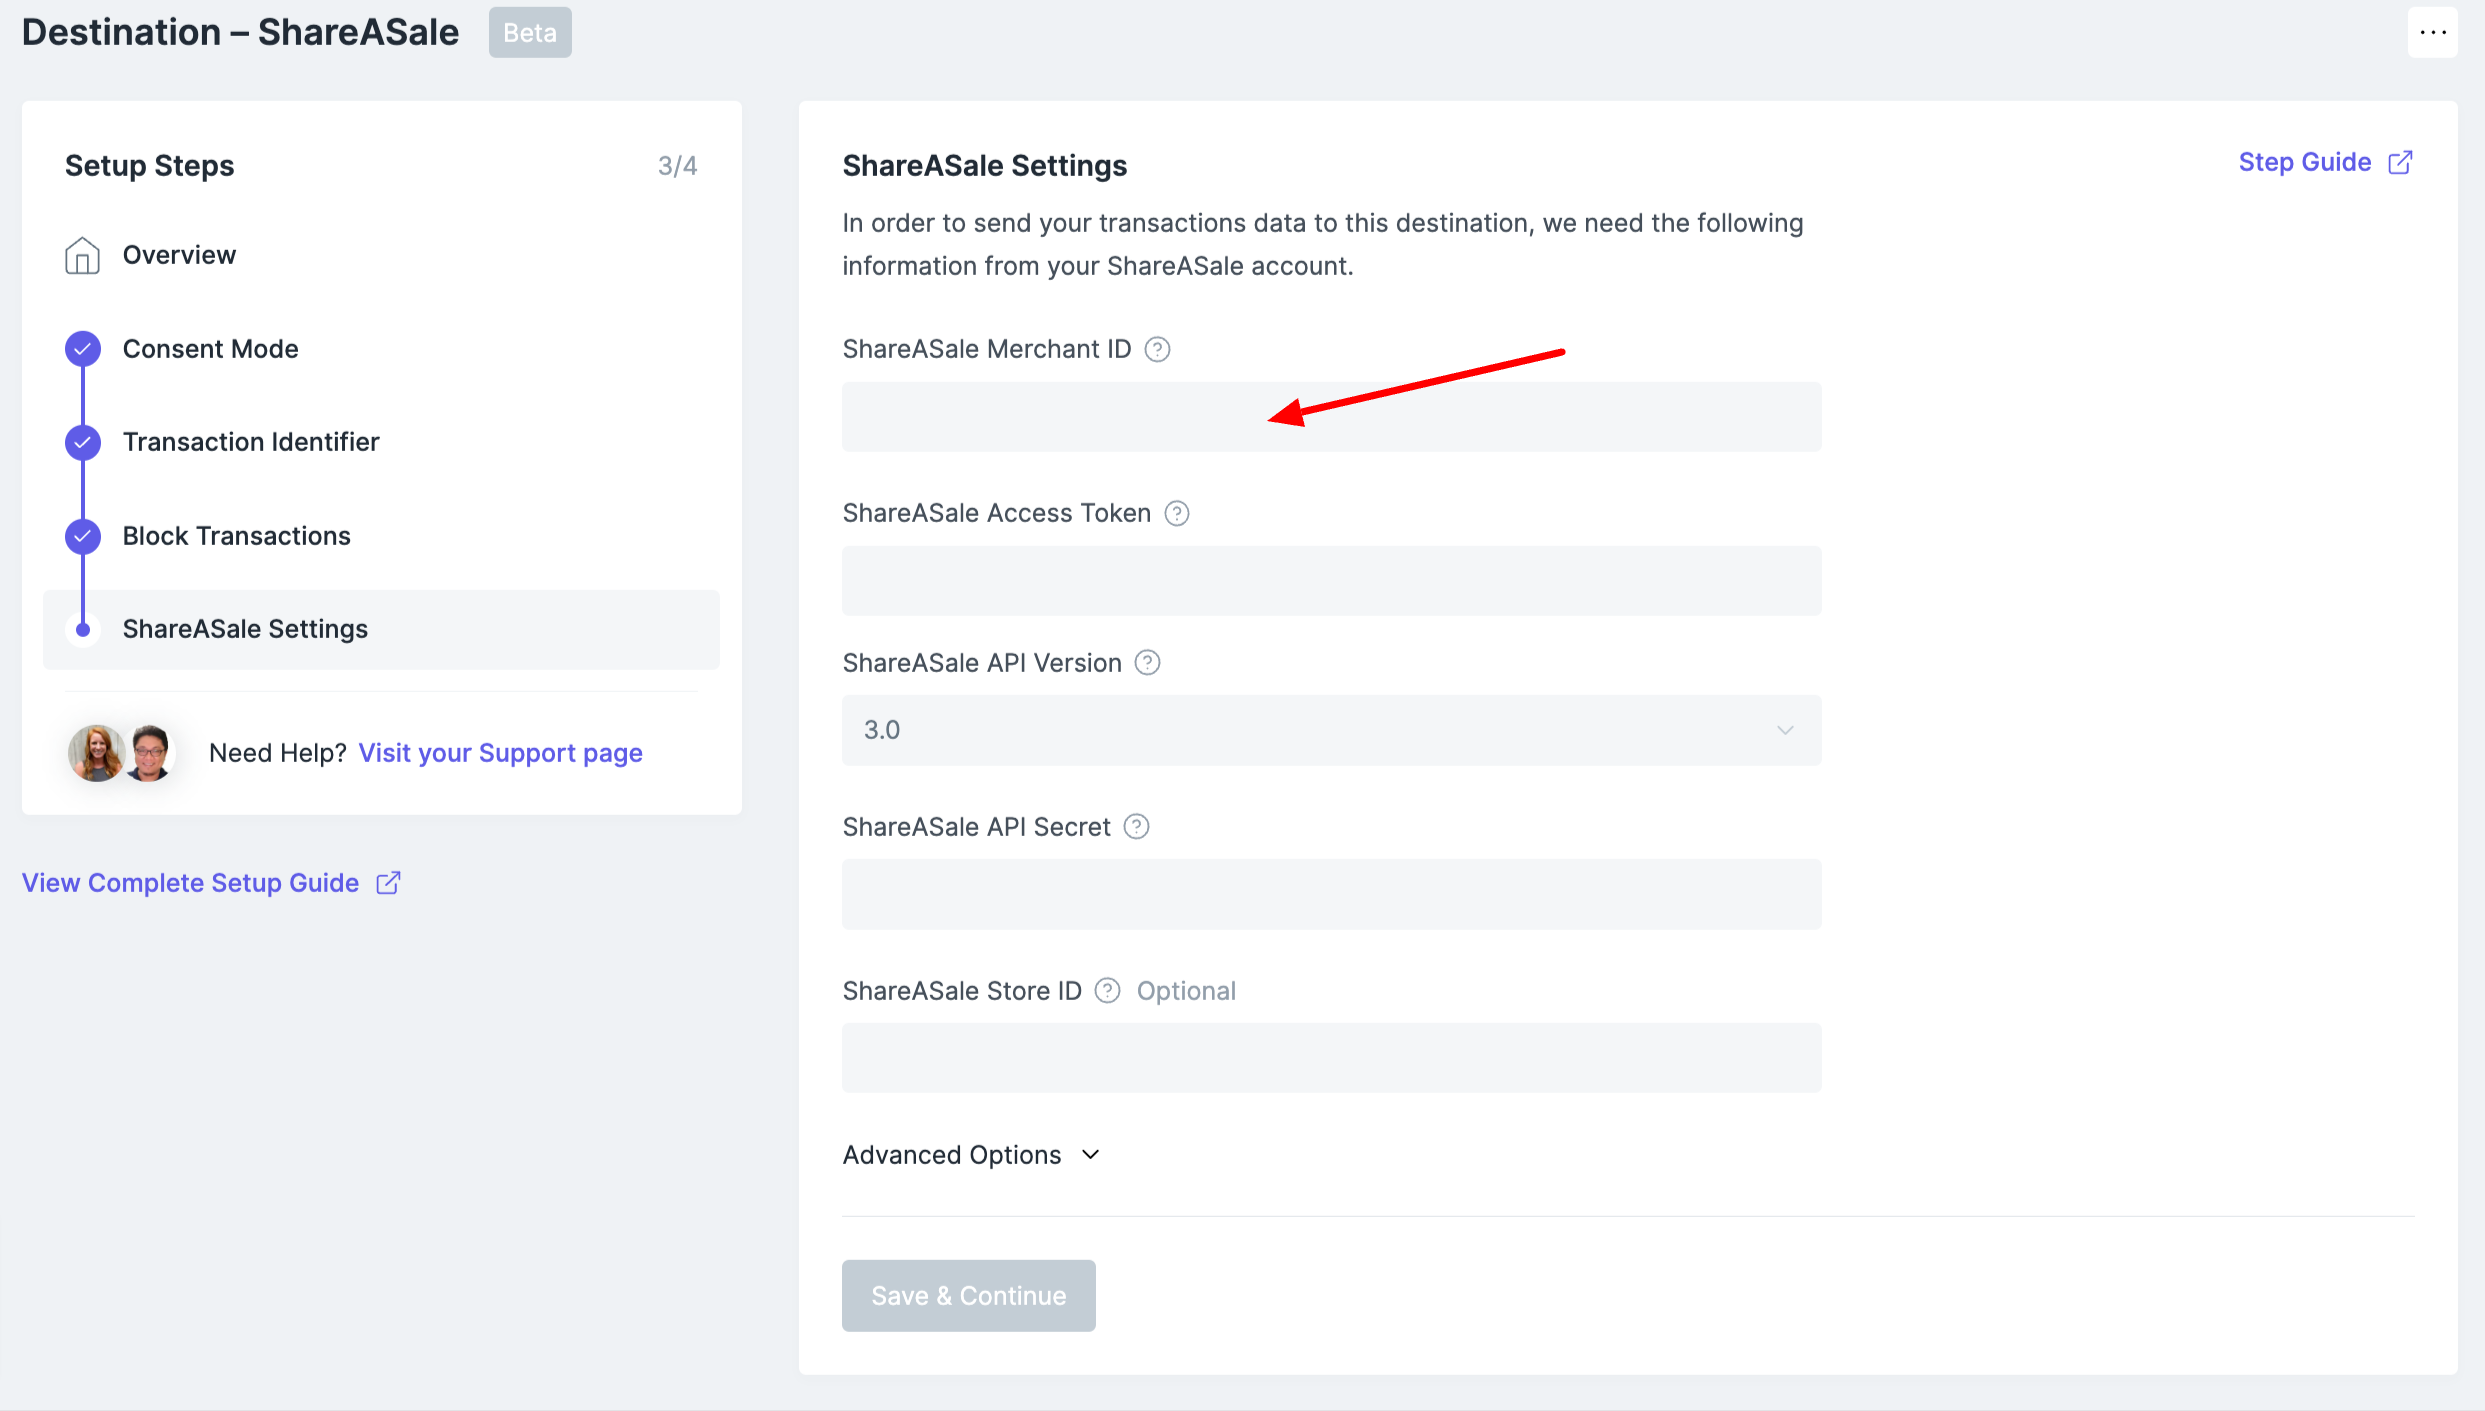
2. Add in your ShareASale Access Token
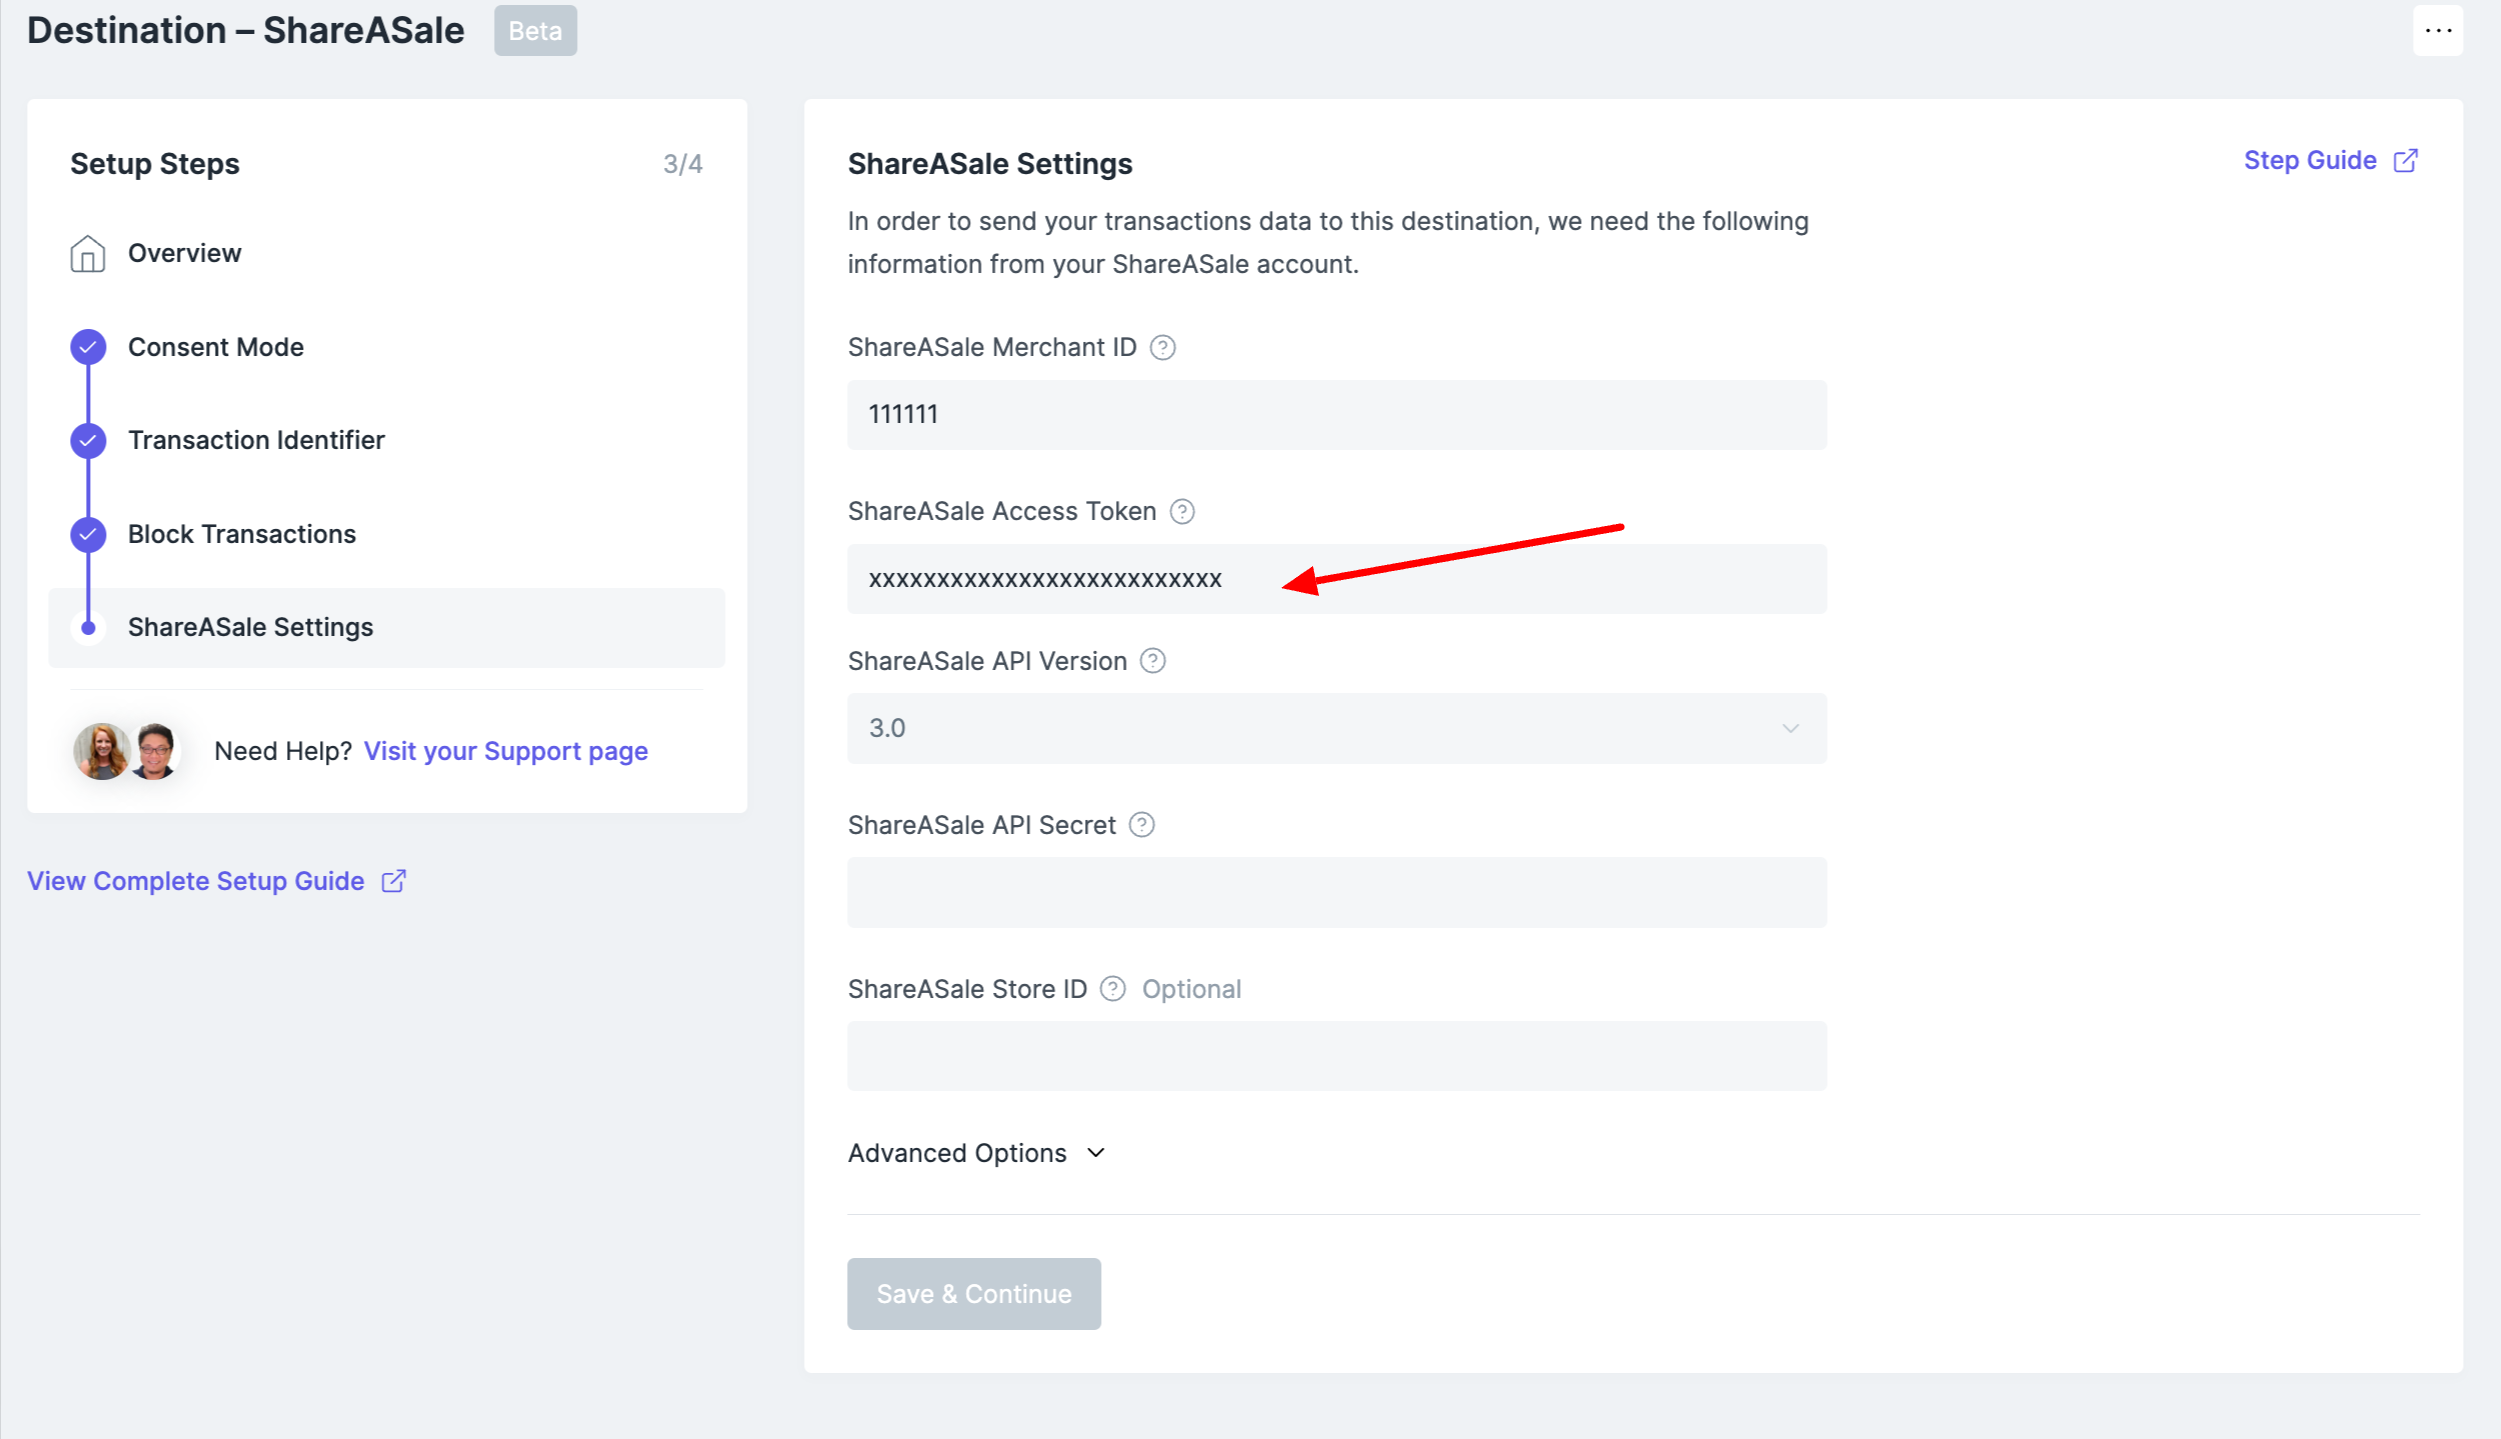
3. Add in your ShareASale API Secret
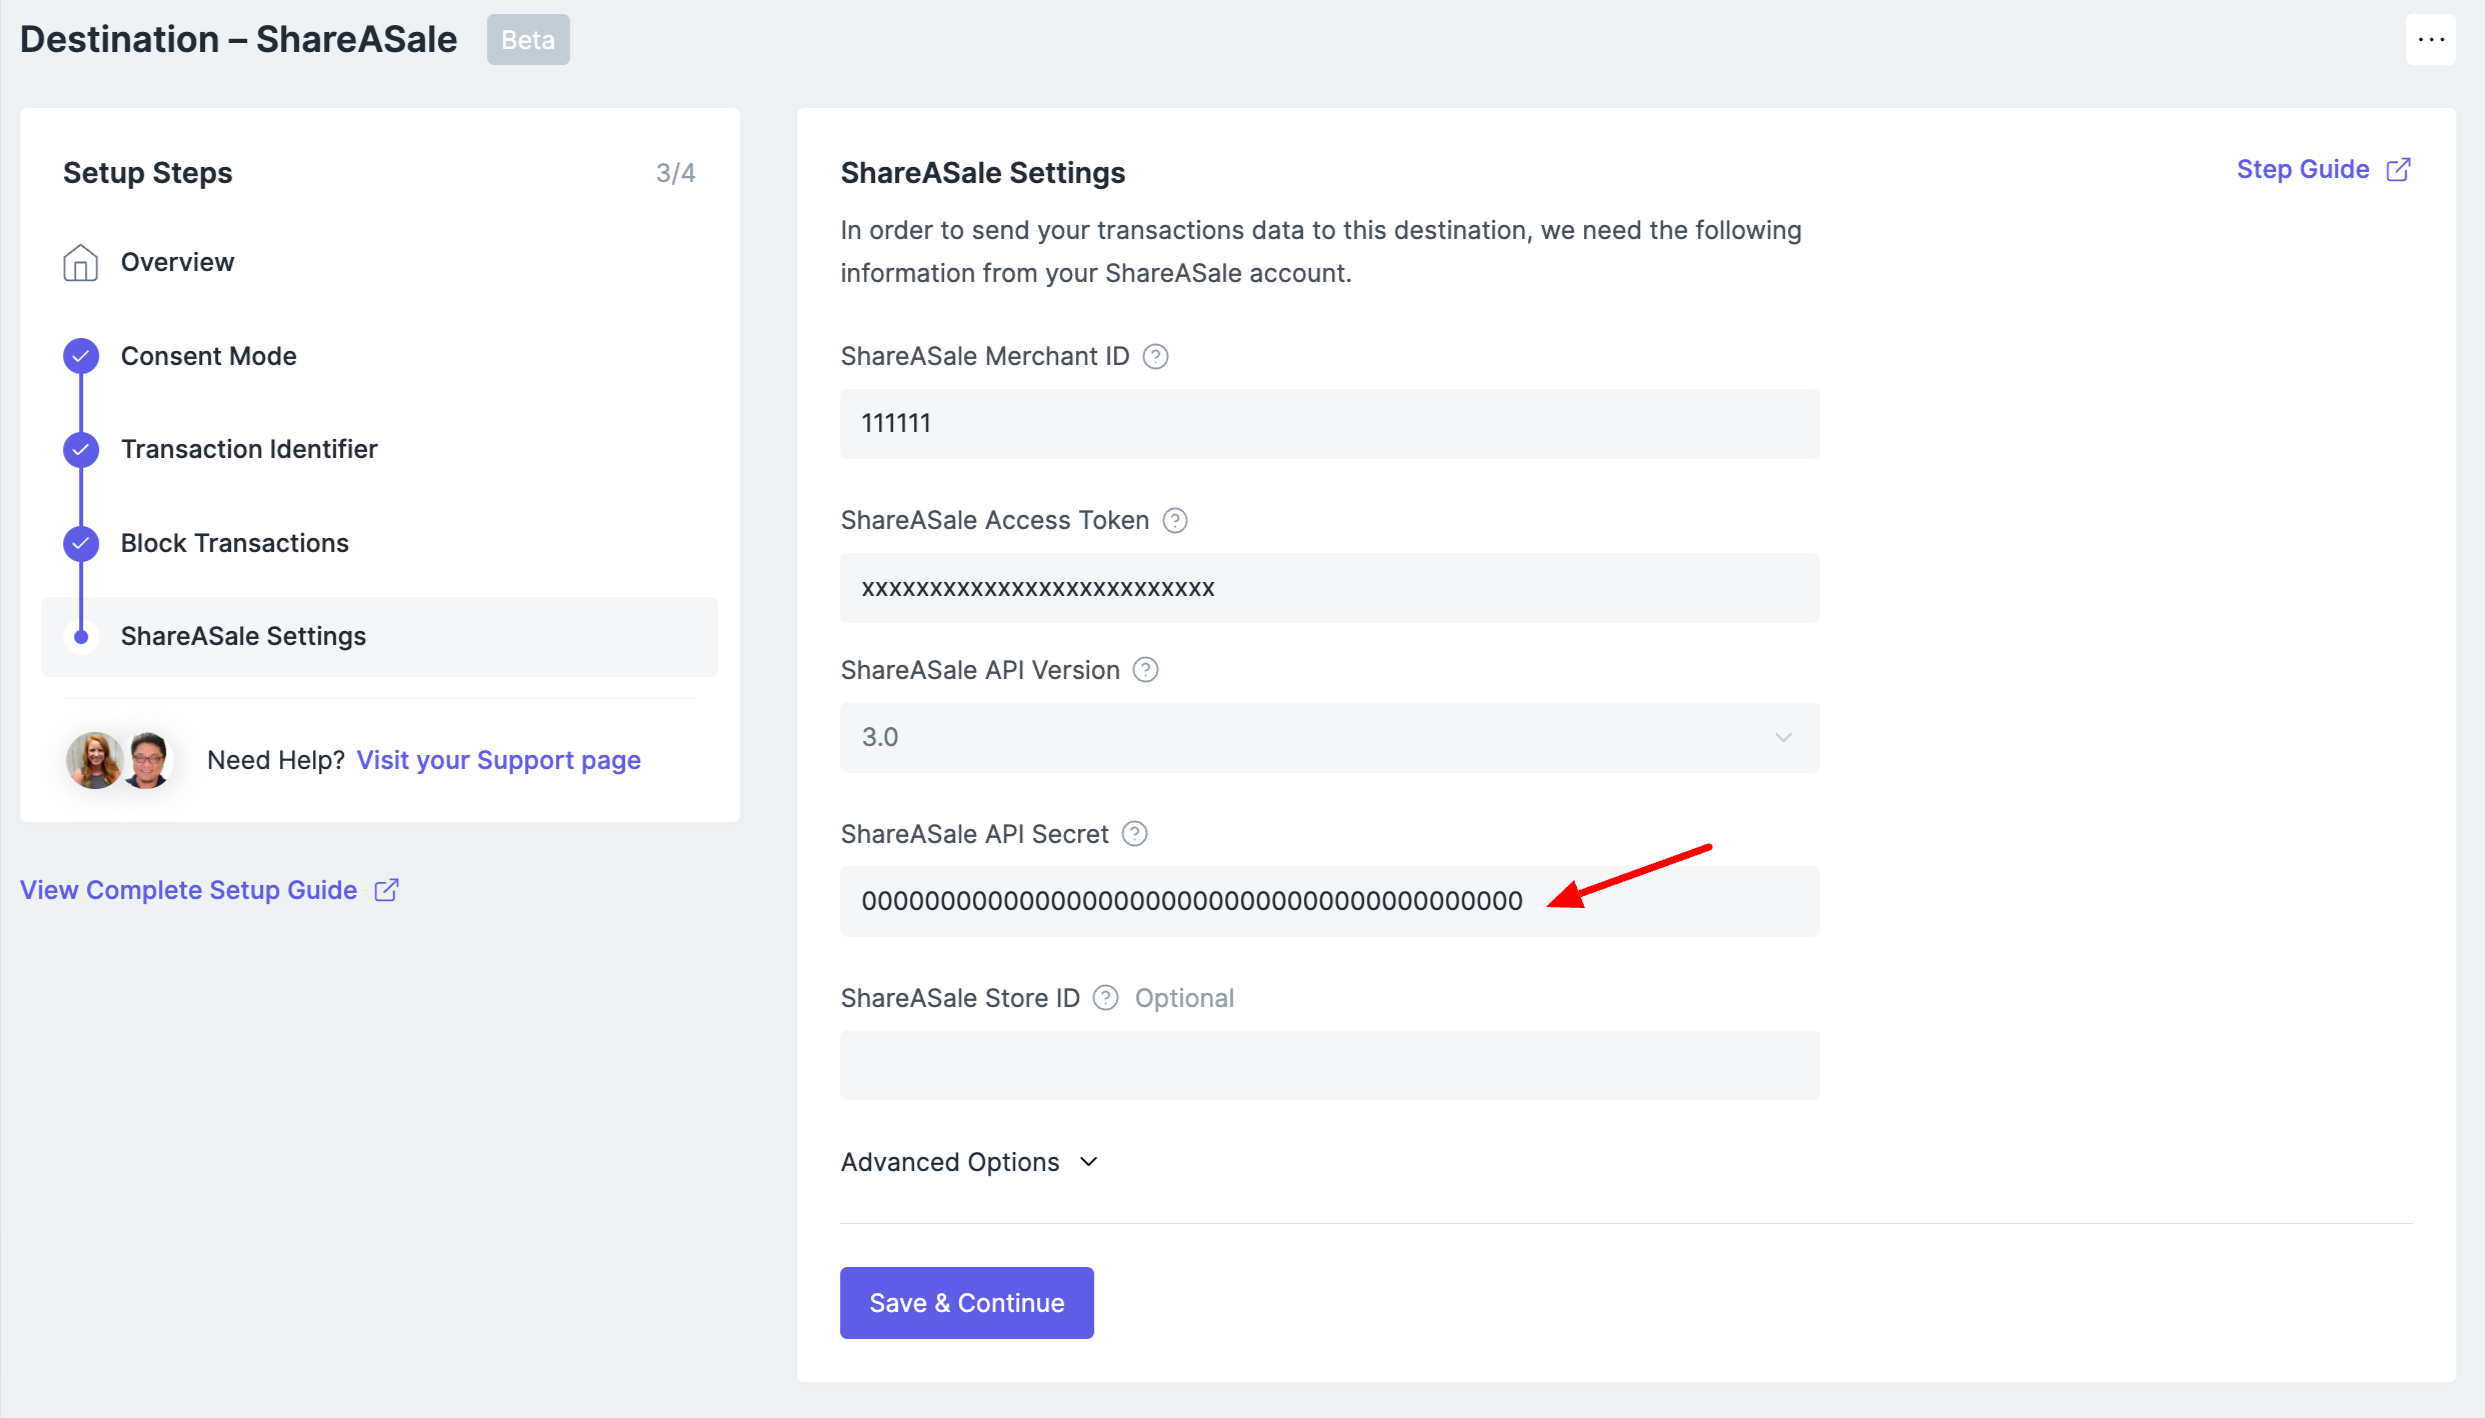
4. Add in your ShareASale Store ID (optional)
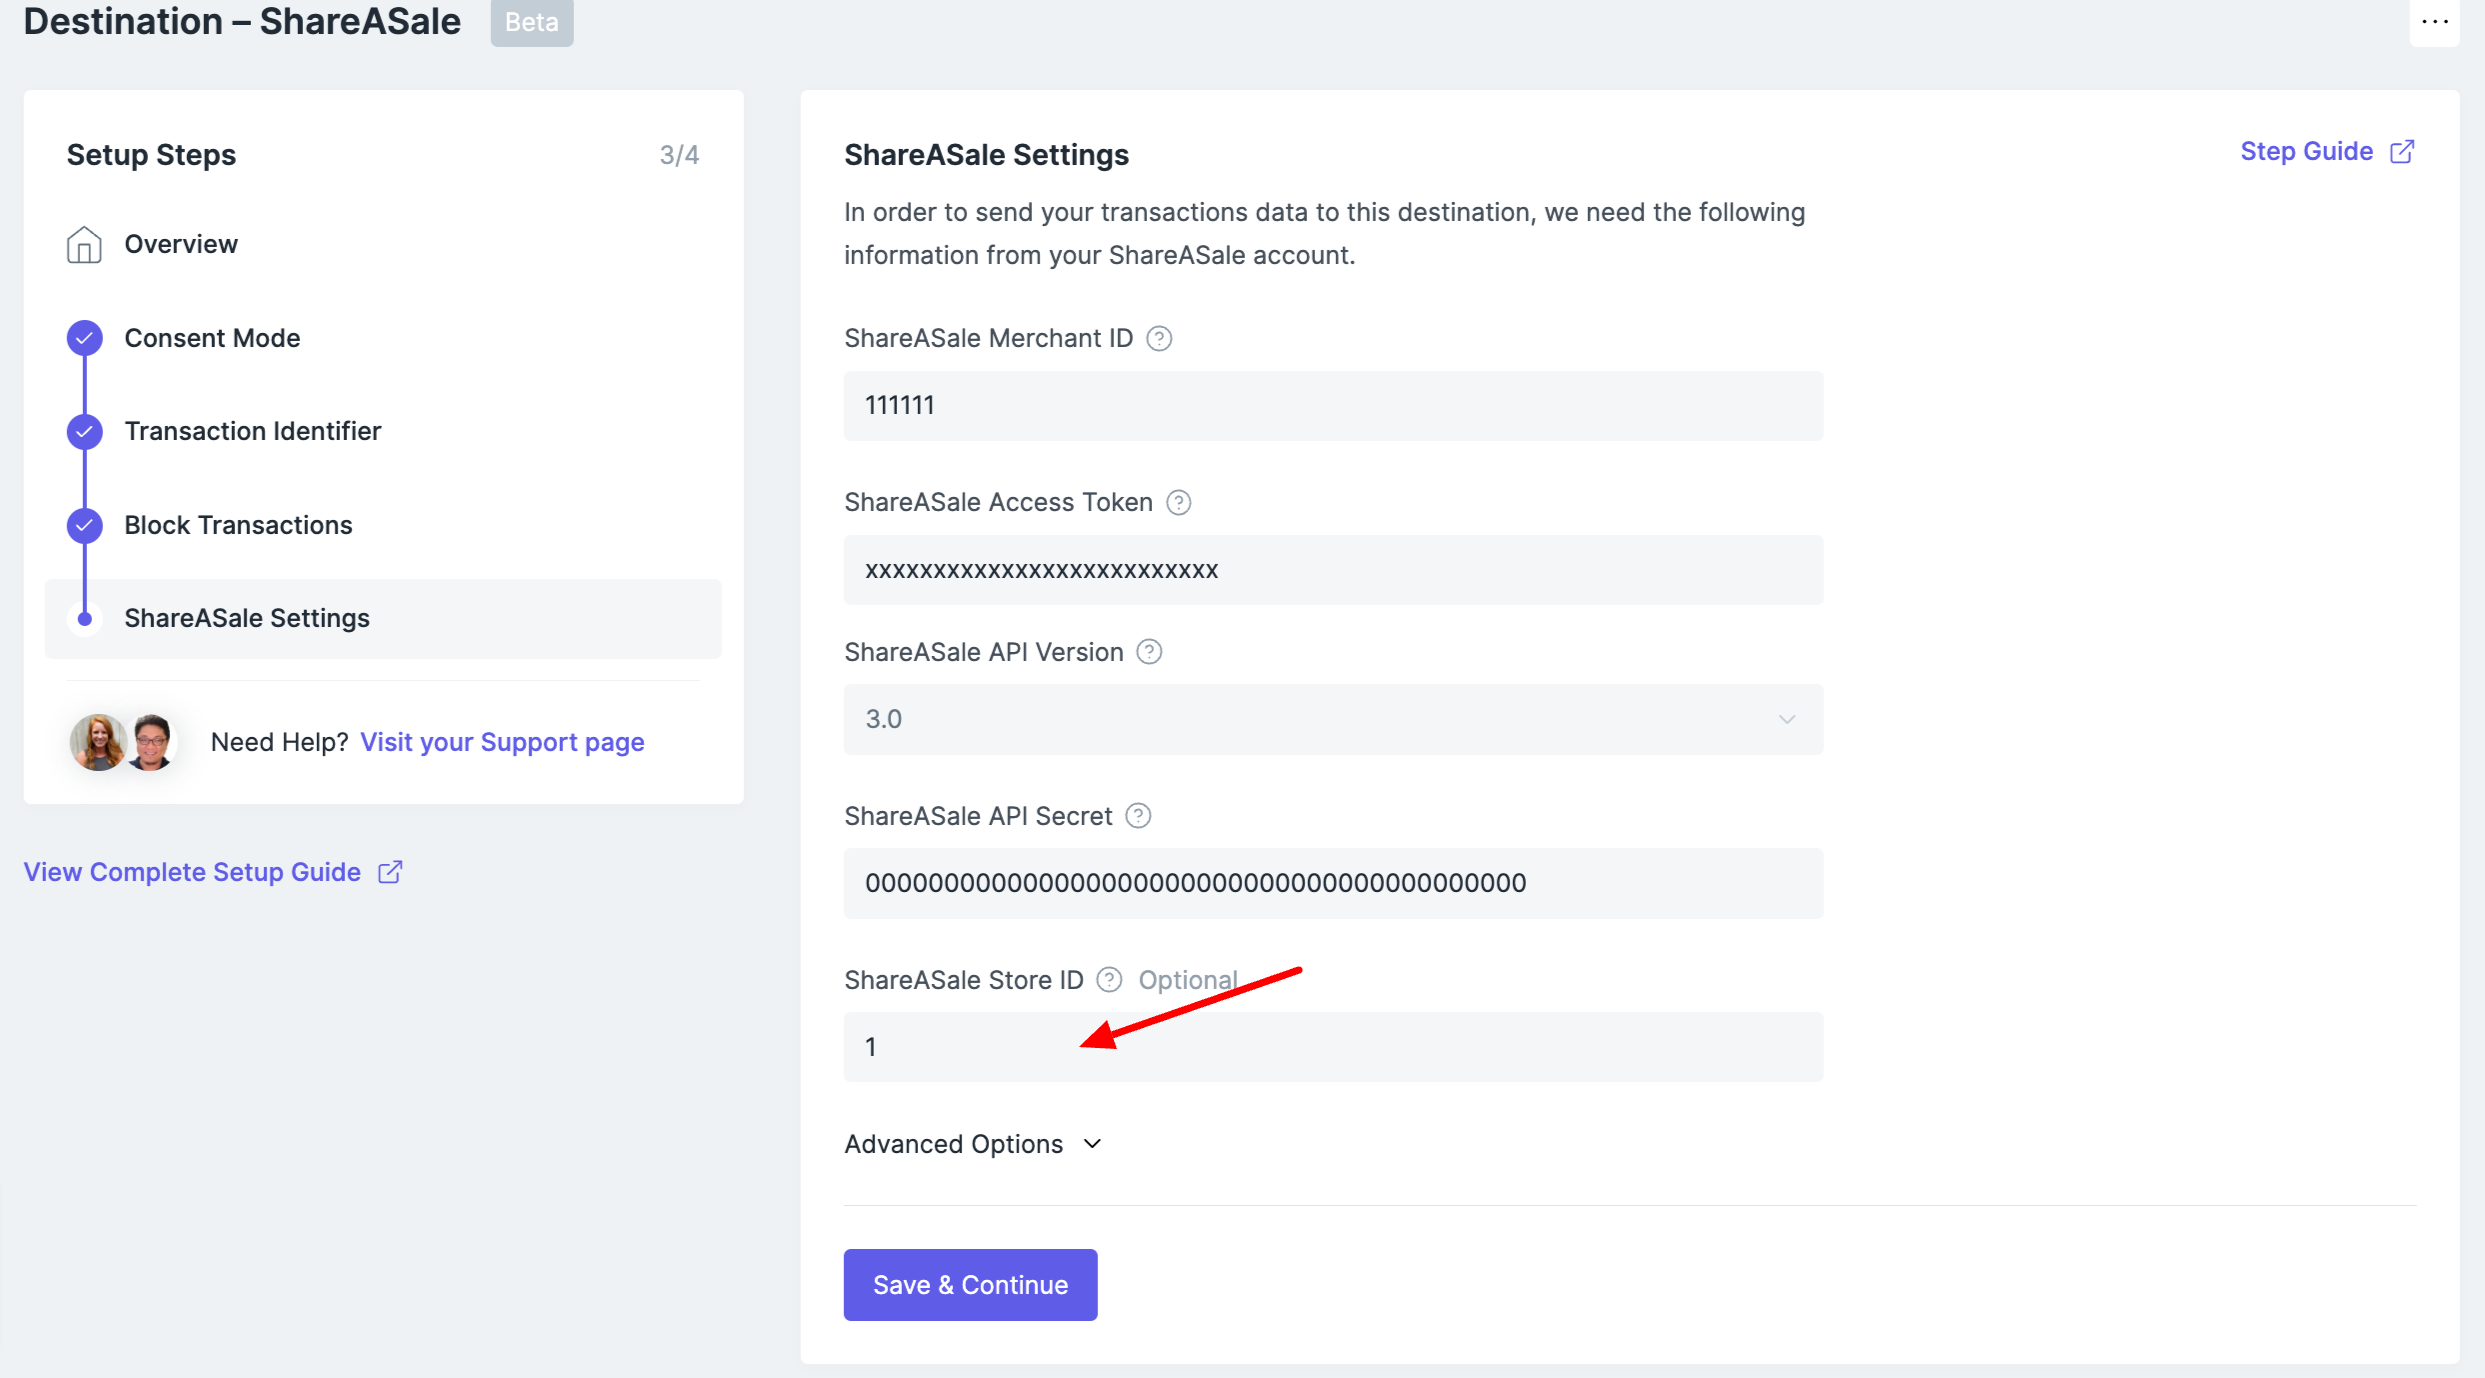
5. Select Save & Continue
Step 6: Push the Tracking Live
Back in your Elevar App, select Go Live on the Overview Page to launch your new ShareASale tracking.
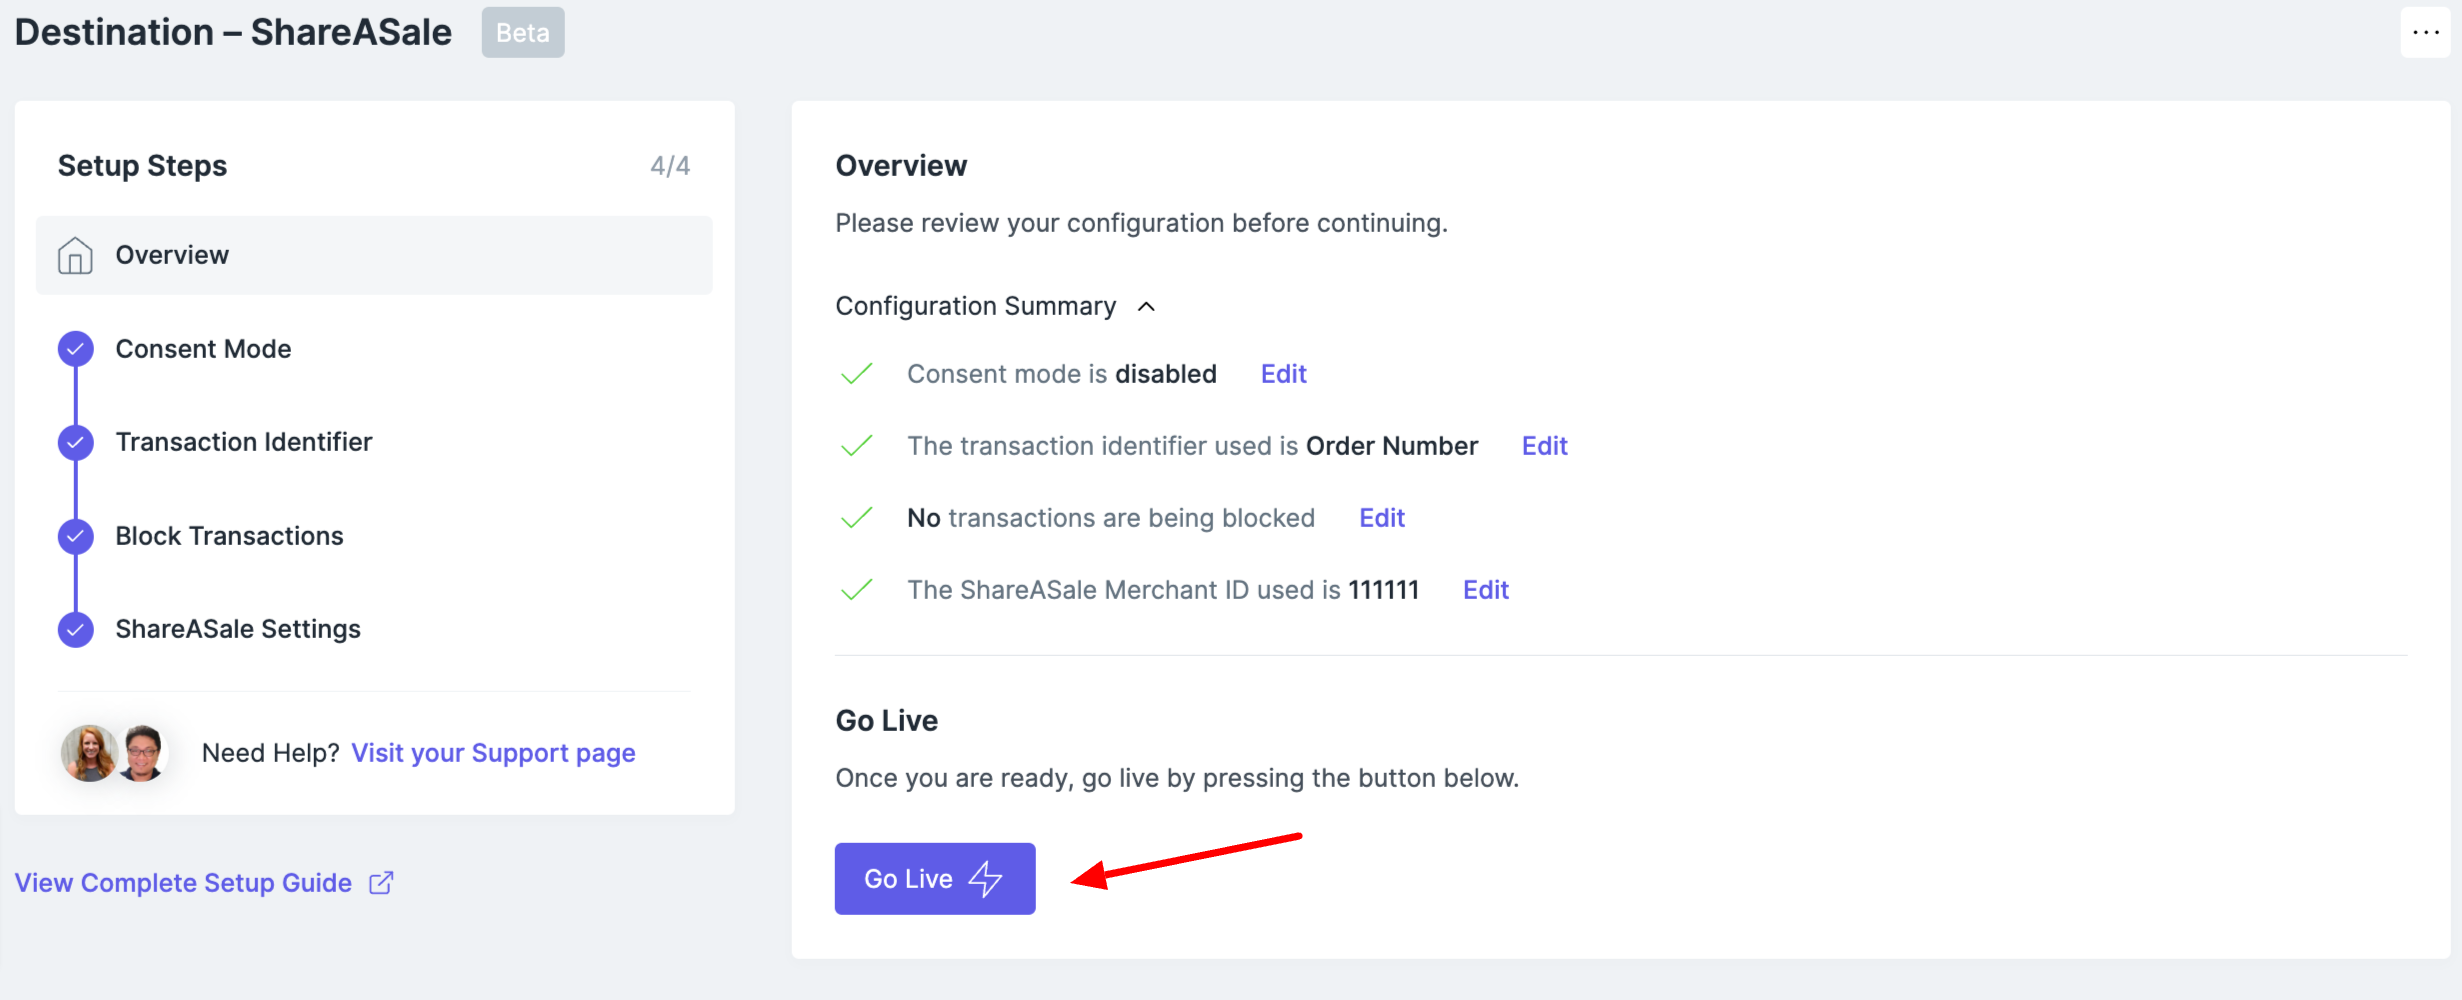
Then remove any previous ShareASale tracking you had in place pointed to the Merchant ID you just configured.
Updated 4 months ago