How to Set Up Outbrain Pixel/Web Tracking via Google Tag Manager
If you would like to implement Outbrain Pixel/Web tracking via GTM, follow these easy steps to publish
Prerequisites
- If you haven't installed our Shopify Source in your Elevar App. Follow our guide on How to Implement the Shopify Source.
Step 1: Download the Pre-Built Outbrain Tags
In your Elevar App, navigate to Pre-Built Tags
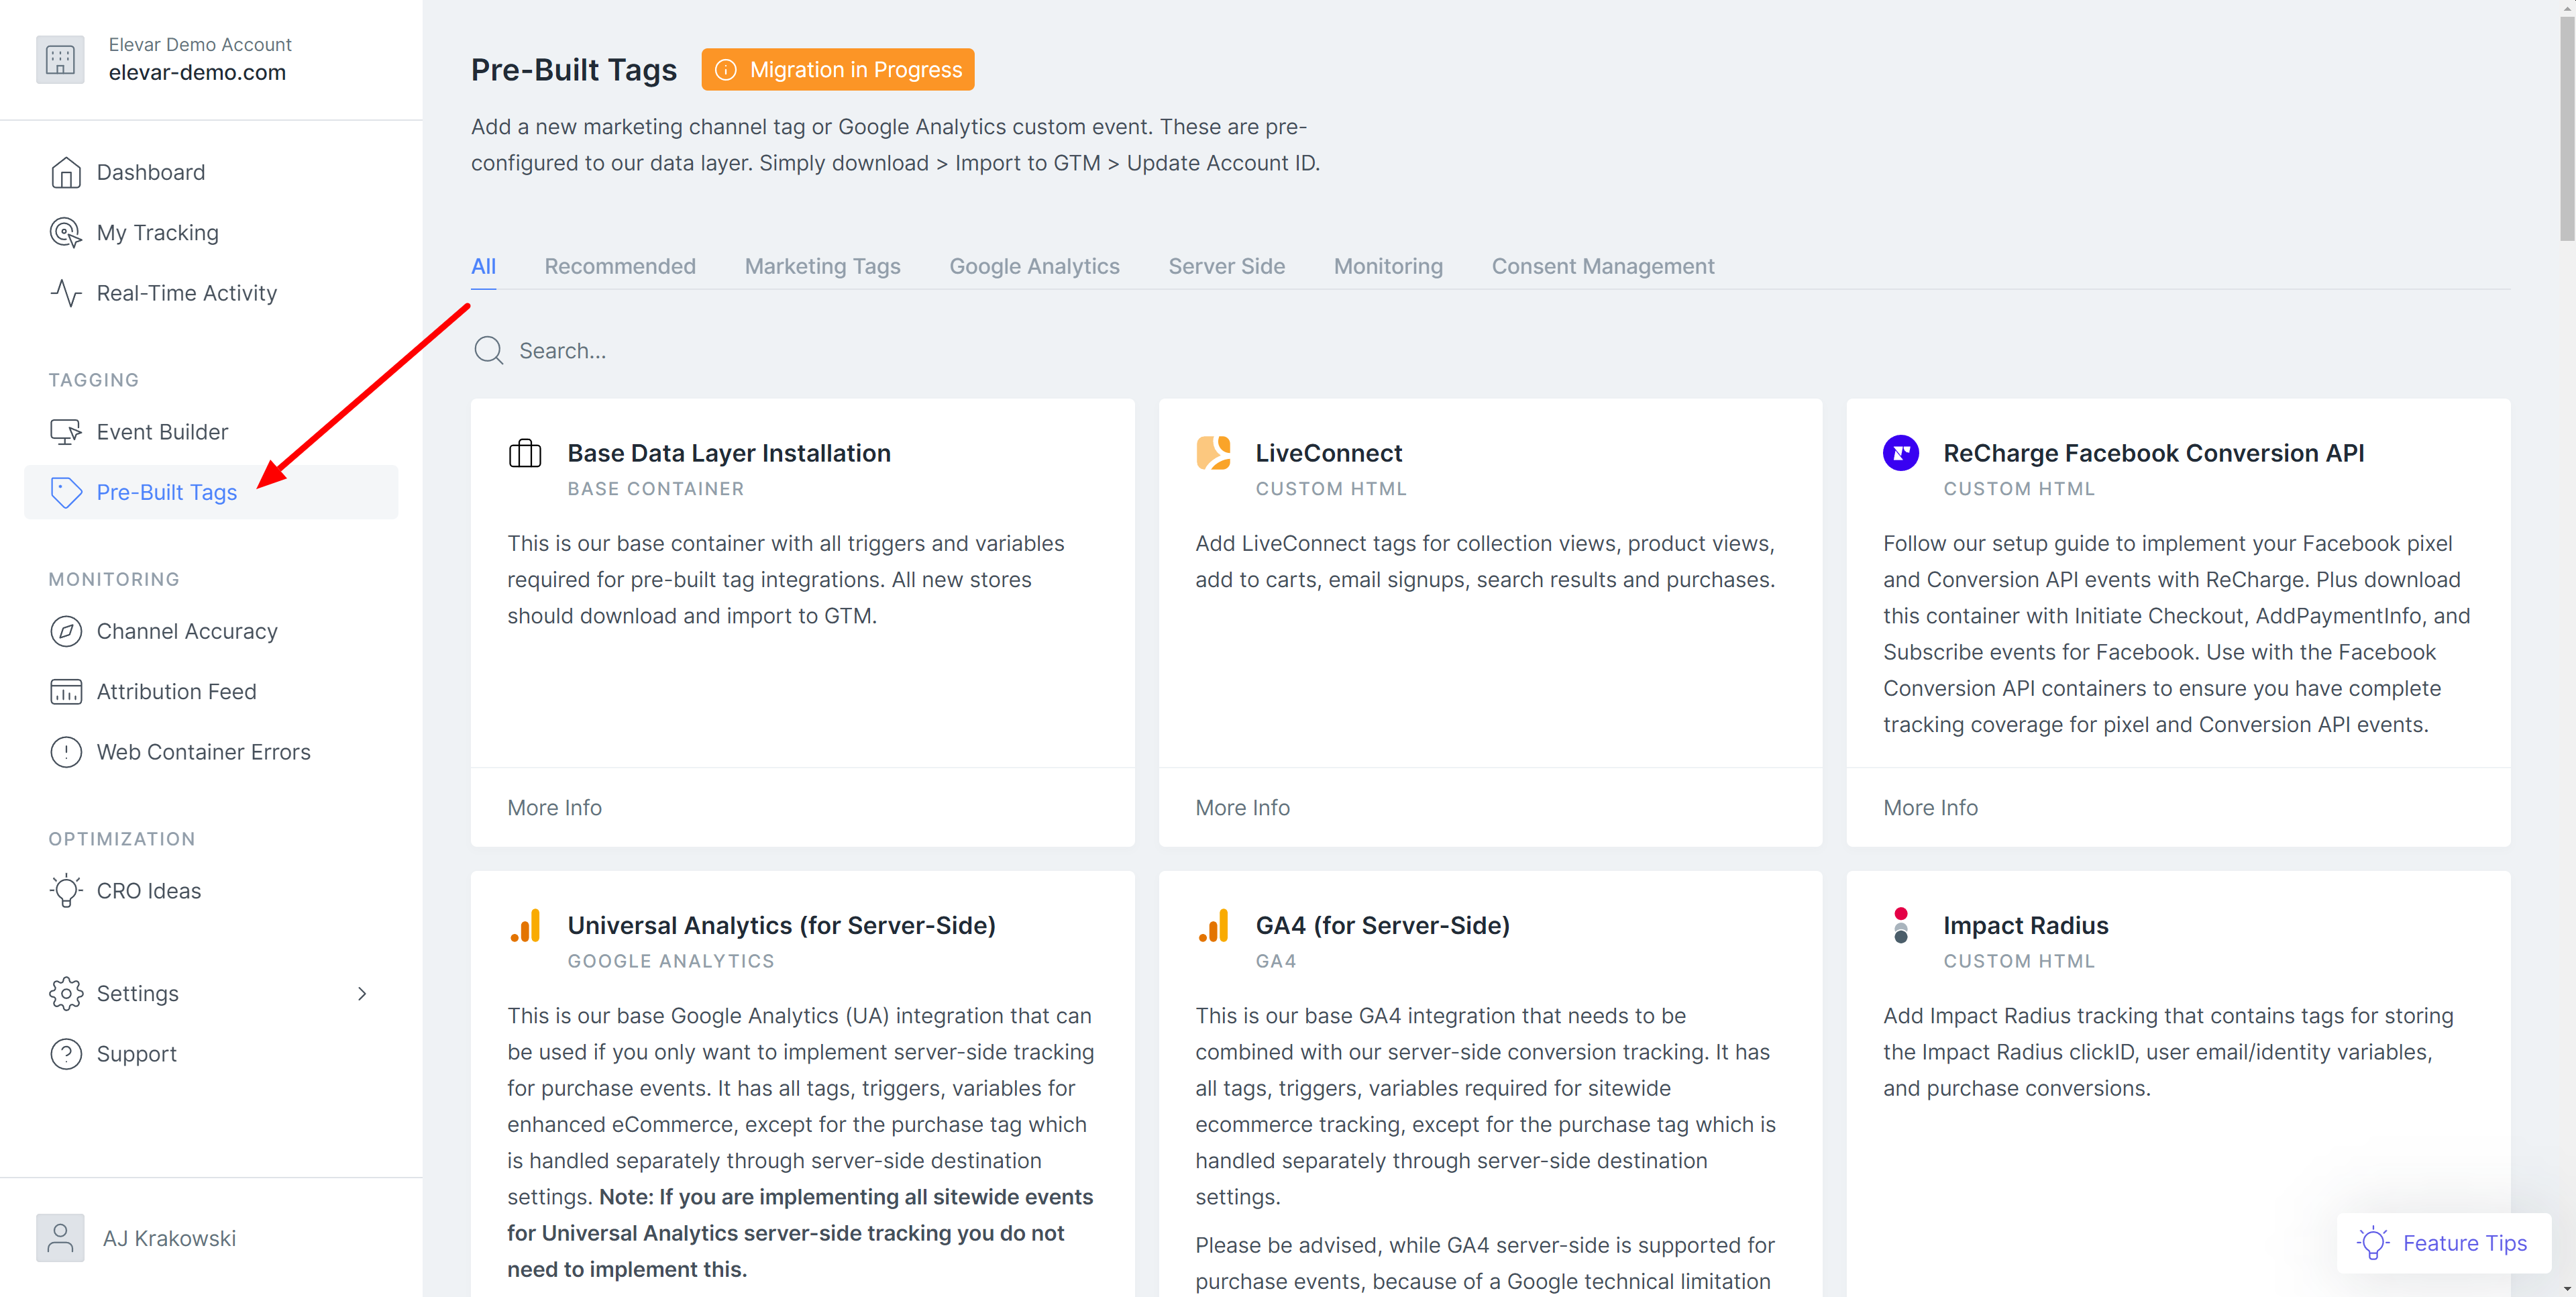
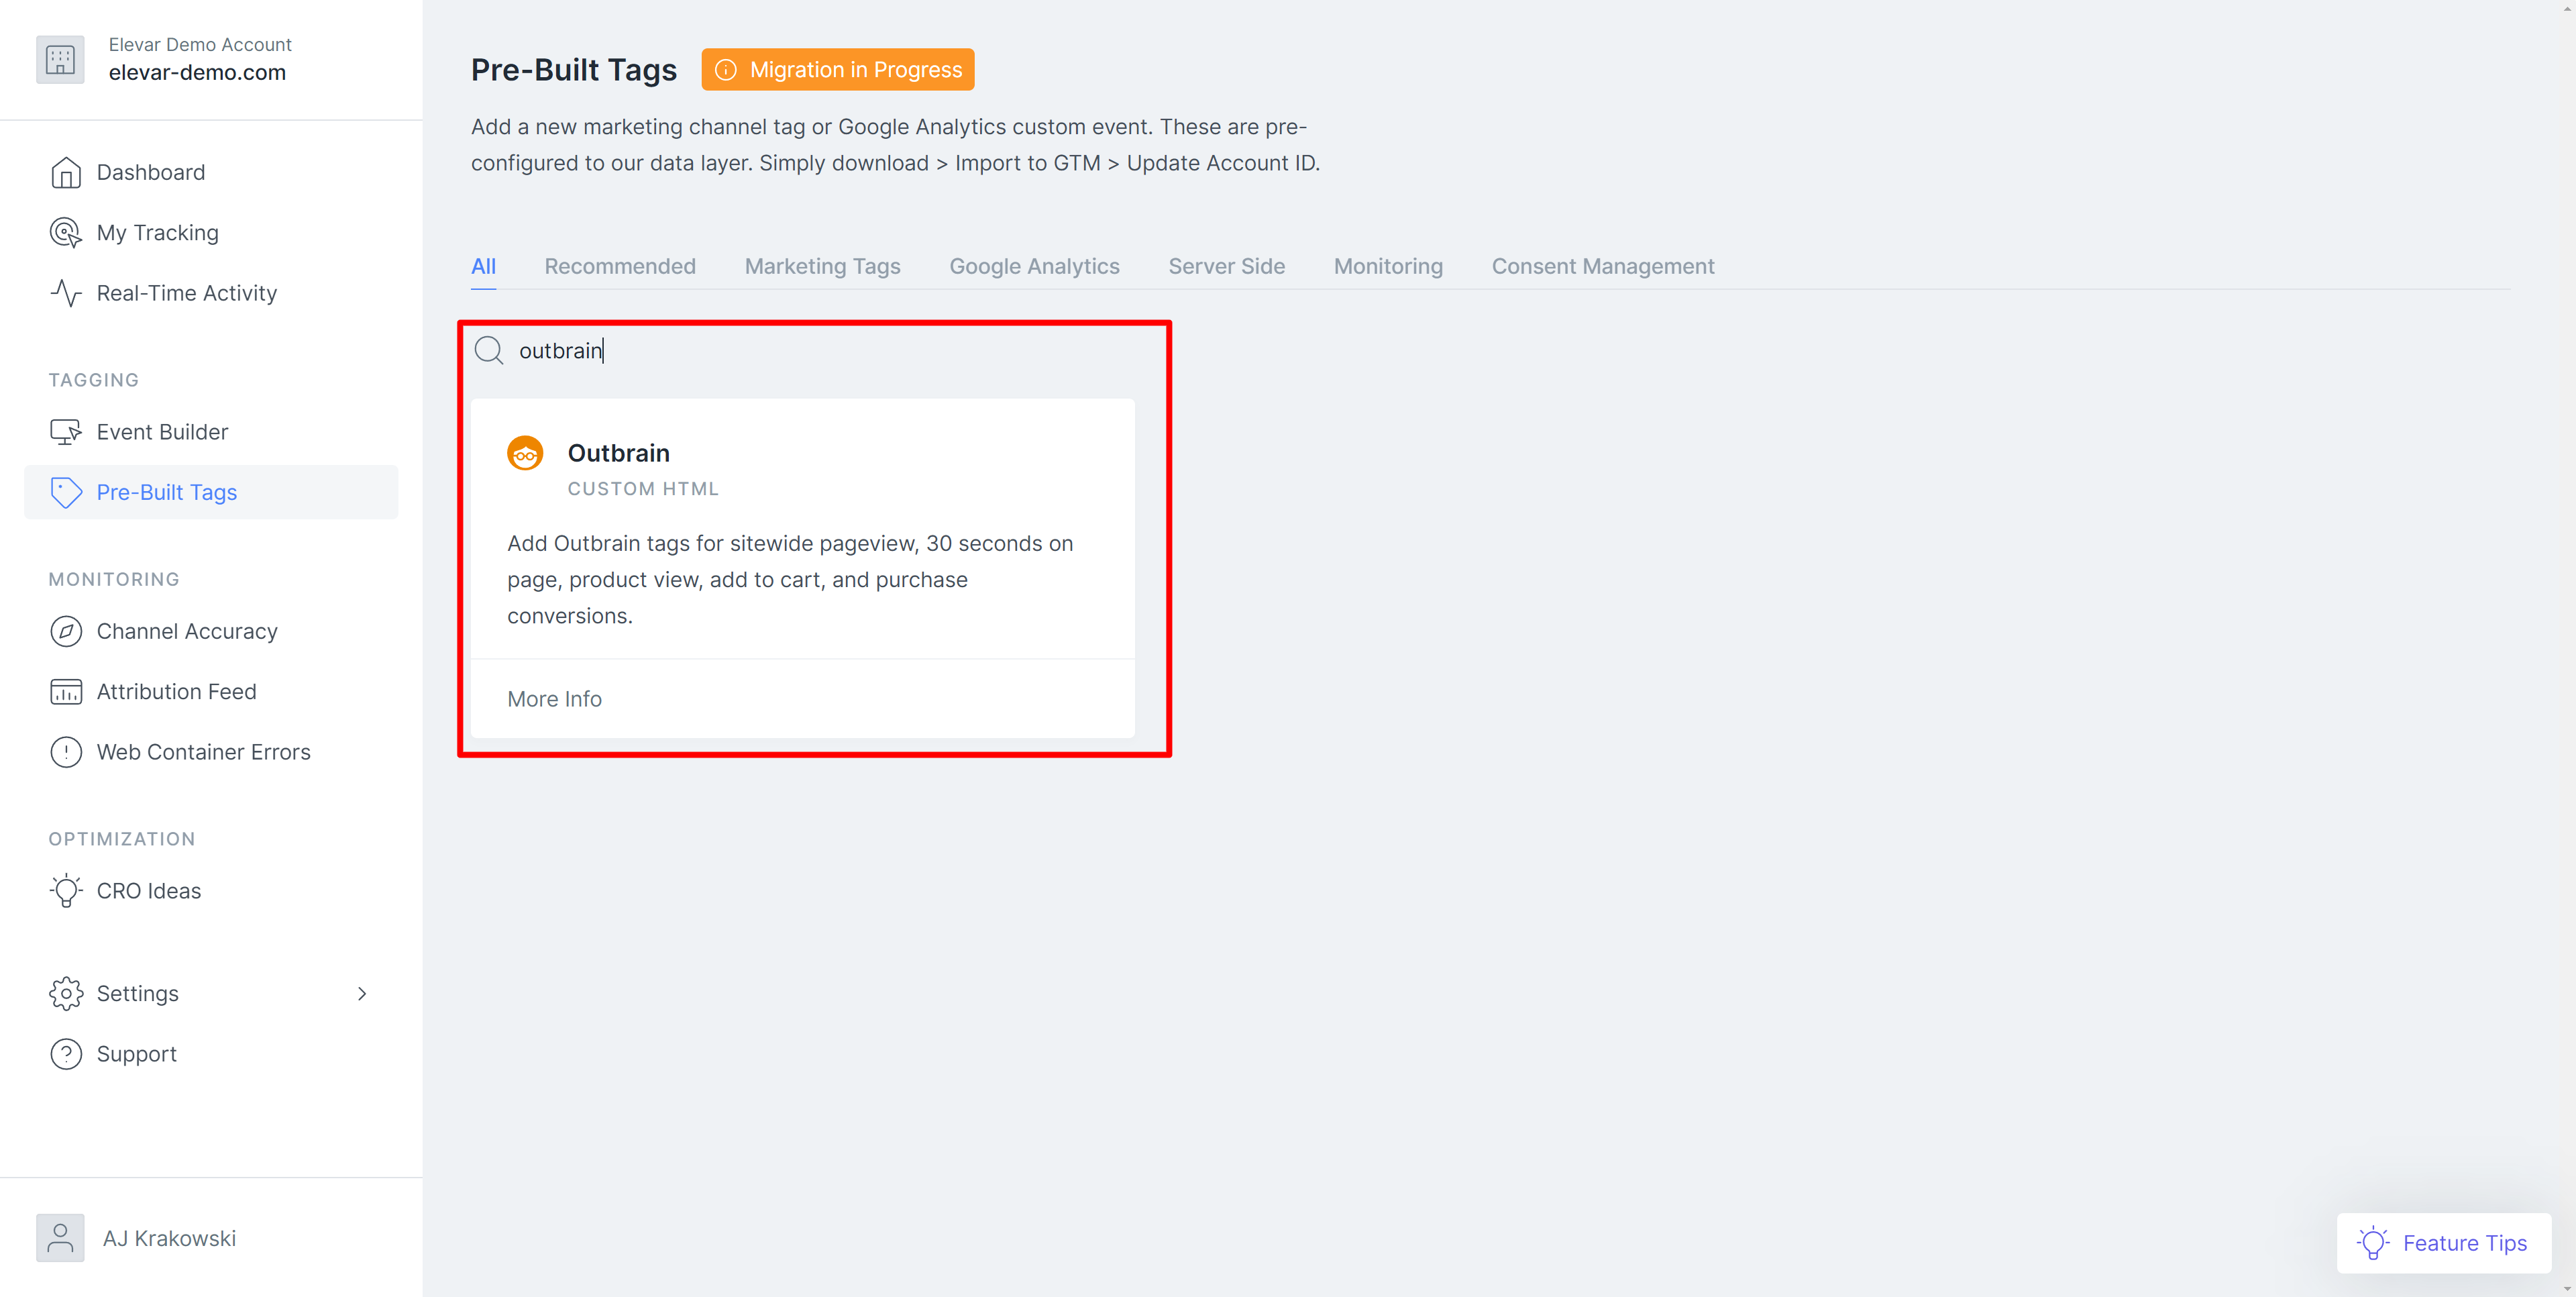
Search for Outbrain > Click into the Outbrain Container
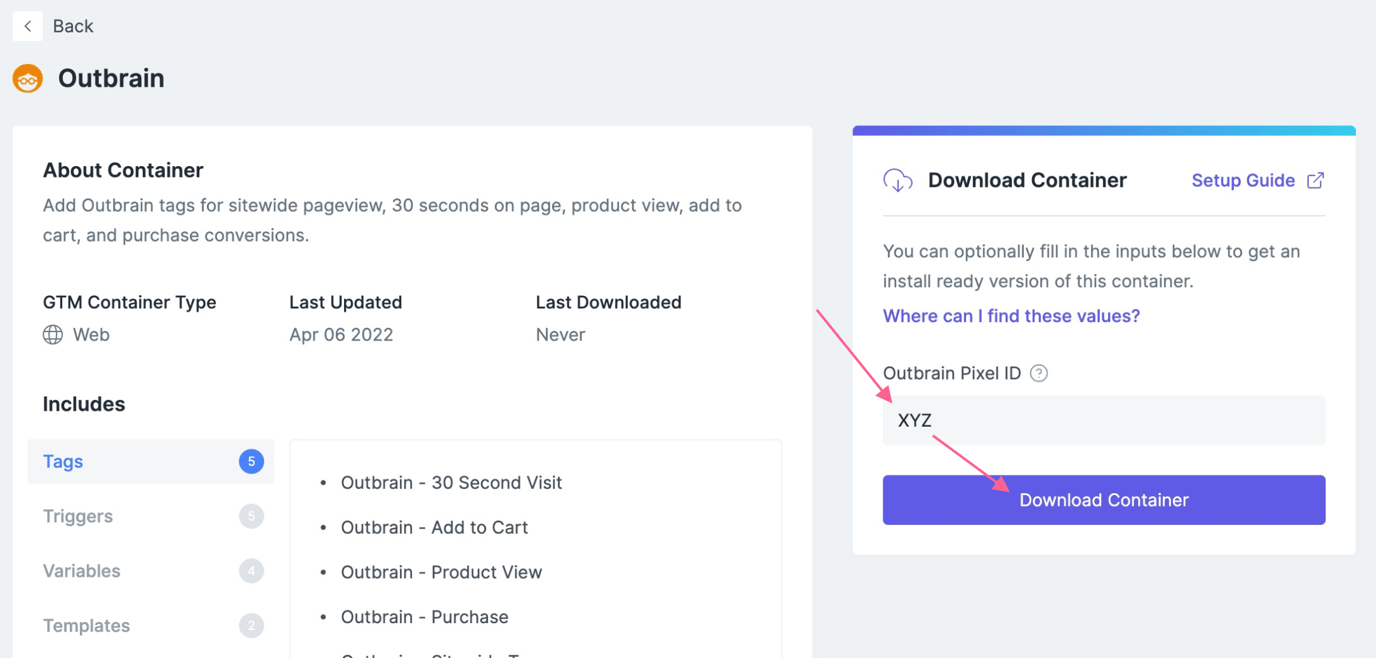
Add in your Pixel ID [How to find this?] > Select Download Container
Step 2: Import the Pre-Built Outbrain Tags into GTM Web
Log in to your Google Tag Manager Account > Select your GTM Web Container
Select Admin > Import Container

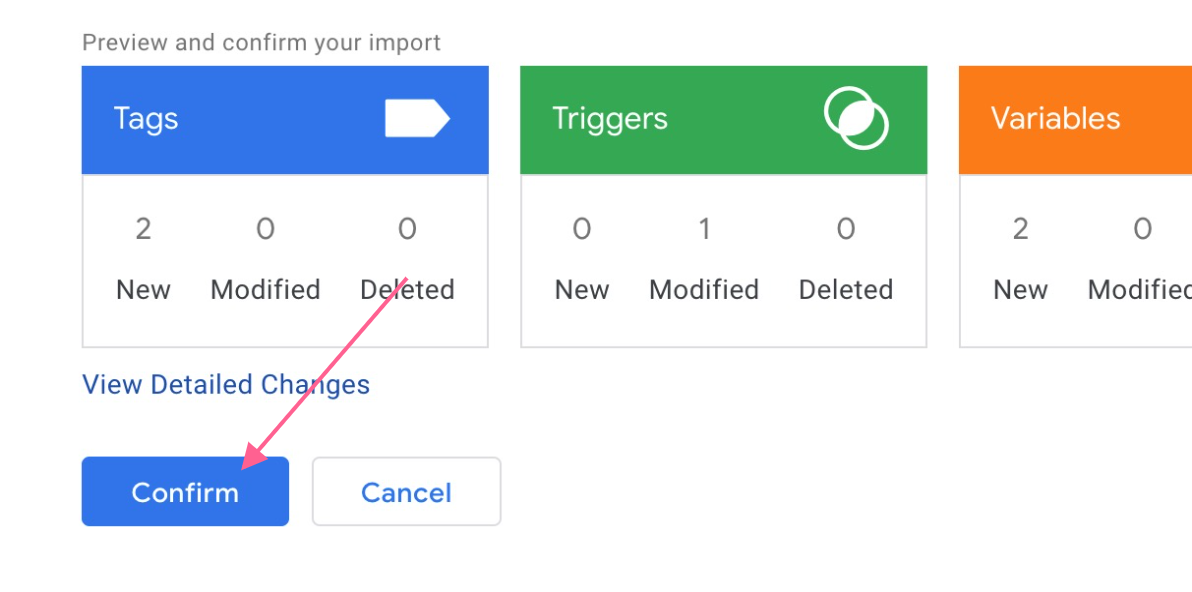
Select to import the file that you just downloaded in Step 1. Choose a New Workspace and title it Outbrain Tracking. Then choose Merge > Overwrite. Your import will look similar to the below:
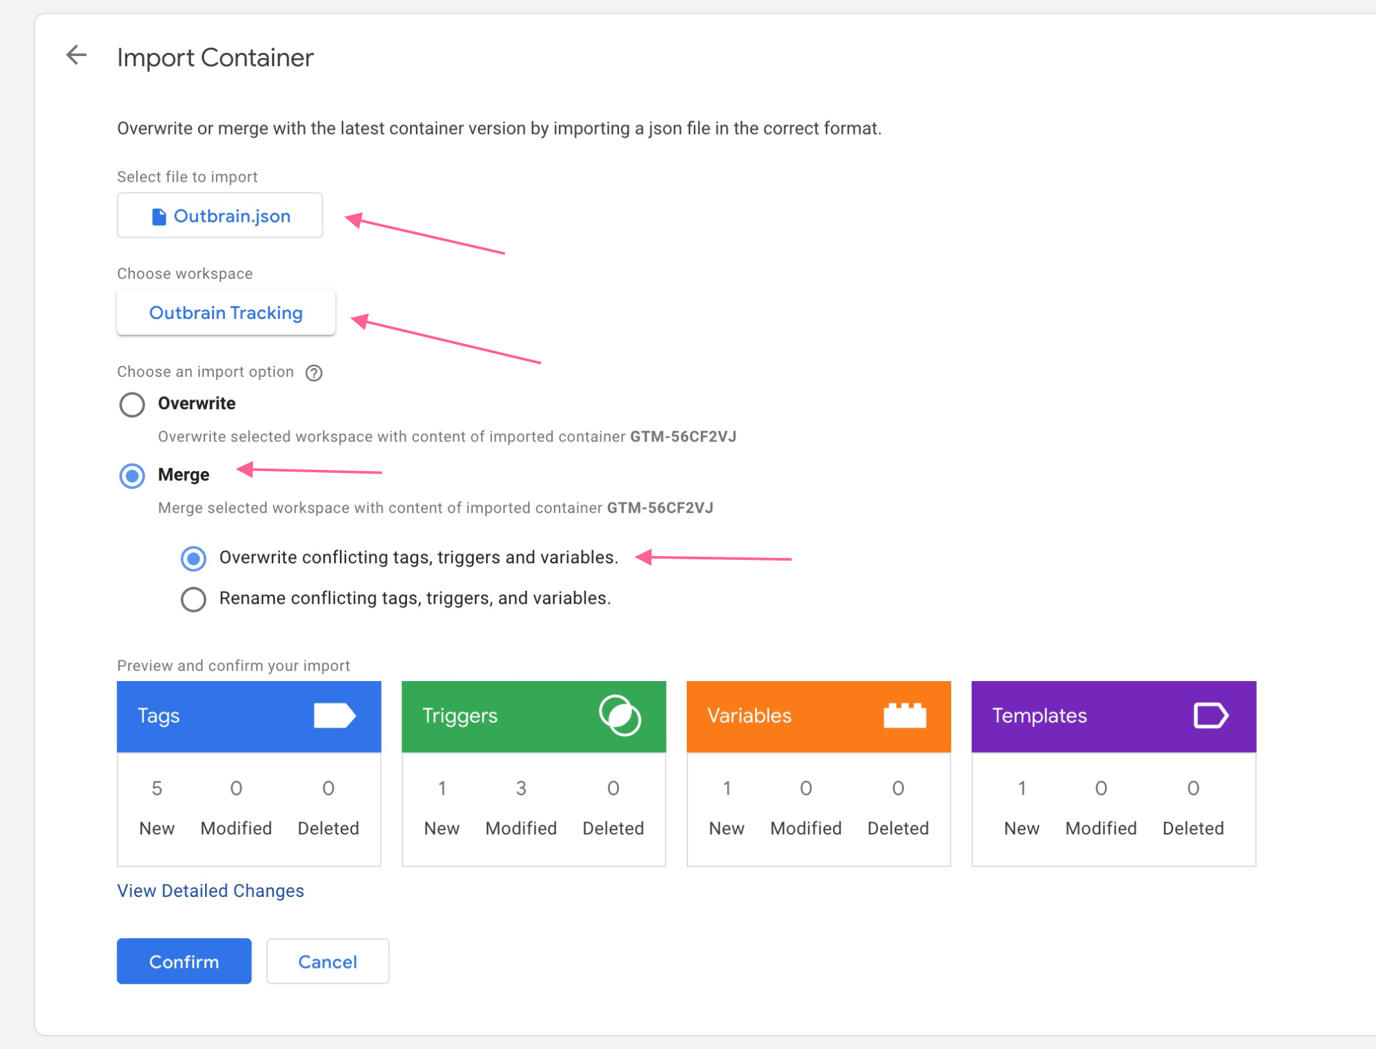
Select Confirm to import the tags
Step 3: [Optional] QA the new tags with Google Tag Manager's Preview Mode
Follow our guide to QA your tags in Google Tag Manager (GTM) preview mode.
Step 4: Publish the Pre-Built Tags
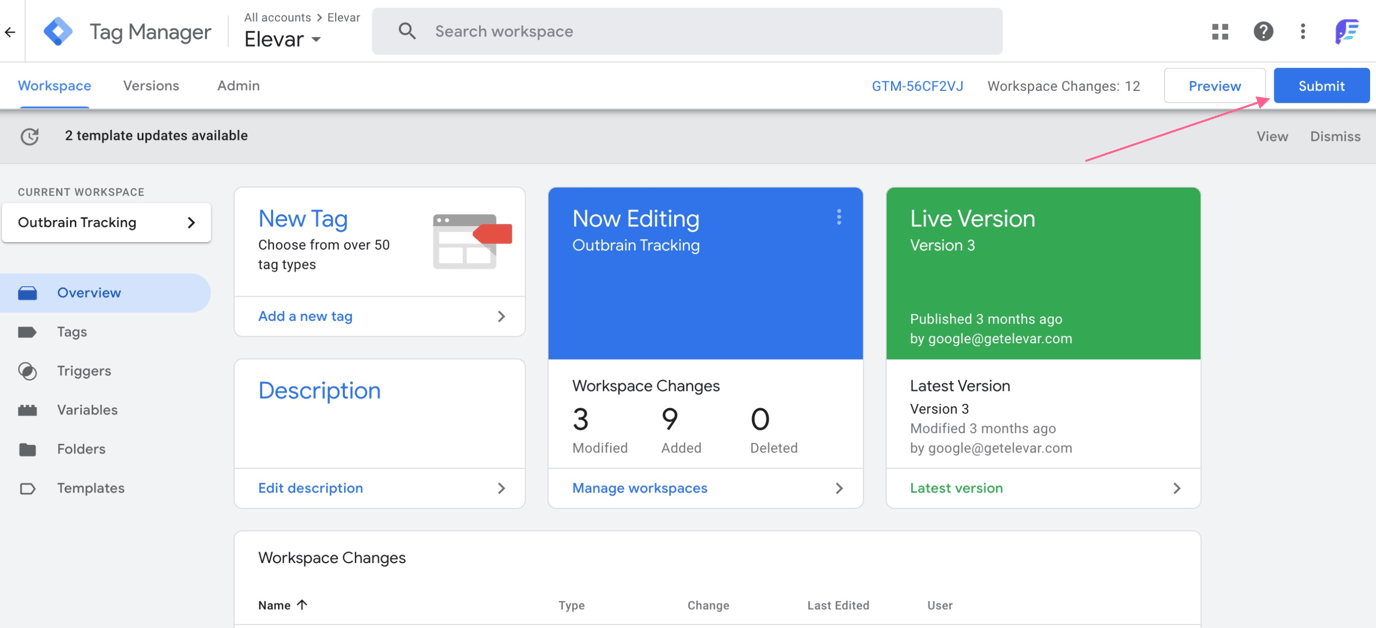
In your Outbrain Tracking workspace, select Submit
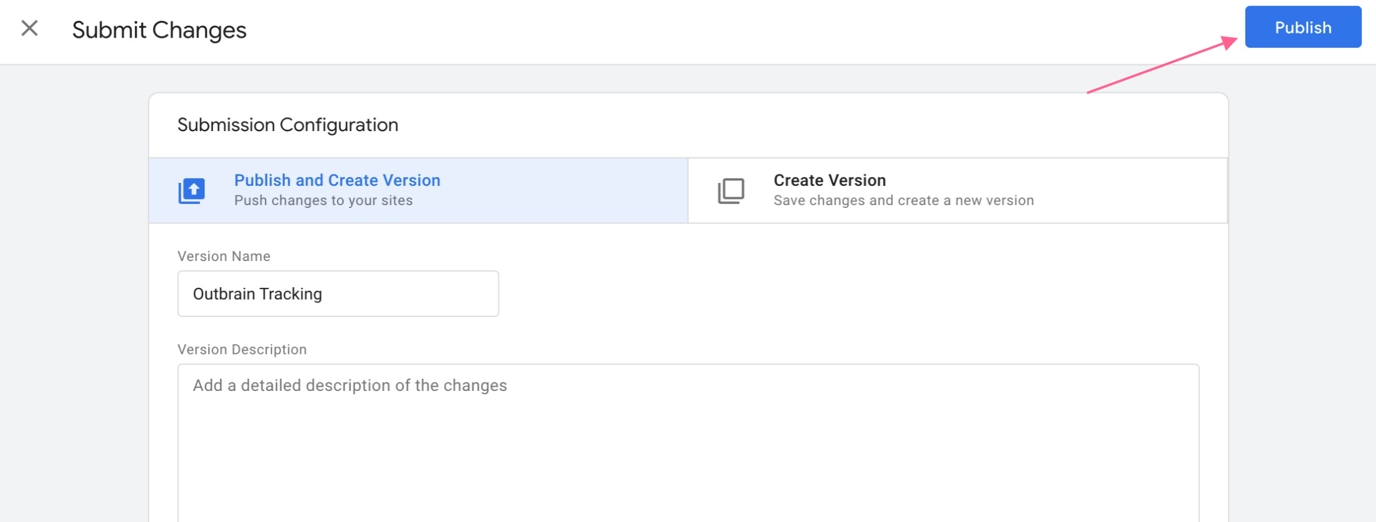
Select Publish
Step 5: Remove Previous Outbrain Tracking
That's it!
Updated 5 months ago