Wunderkind
Steps to Implement
Step 1: Overview
Without a single line of code and done in minutes, Elevar helps you implement all of your Wunderkind tags required for Shopify through Google Tag Manager using the most up-to-date requirements from each platform.
Plus – these templates come with built-in monitoring so you’re the first to know when a tag breaks and risks impacting your campaigns.
This integration supports all of the standard eCommerce tracking for your Wunderkind Pixel integration.
Wunderkind is a performance marketing channel that delivers one-to-one messages across email and text at an unmatched scale. Learn more about Wunderkind here.
Step 2: Install Data Layer to Your Store
Install Elevar's Data Layer & Shopify Source on your store. Follow our guide on How to Implement the Shopify Source.
Step 3: Download Container for GTM
Inside of your Elevar account, go to Pre Built Tags > Wunderkind.
Update your Wundekrind ID in the tag settings shown below.
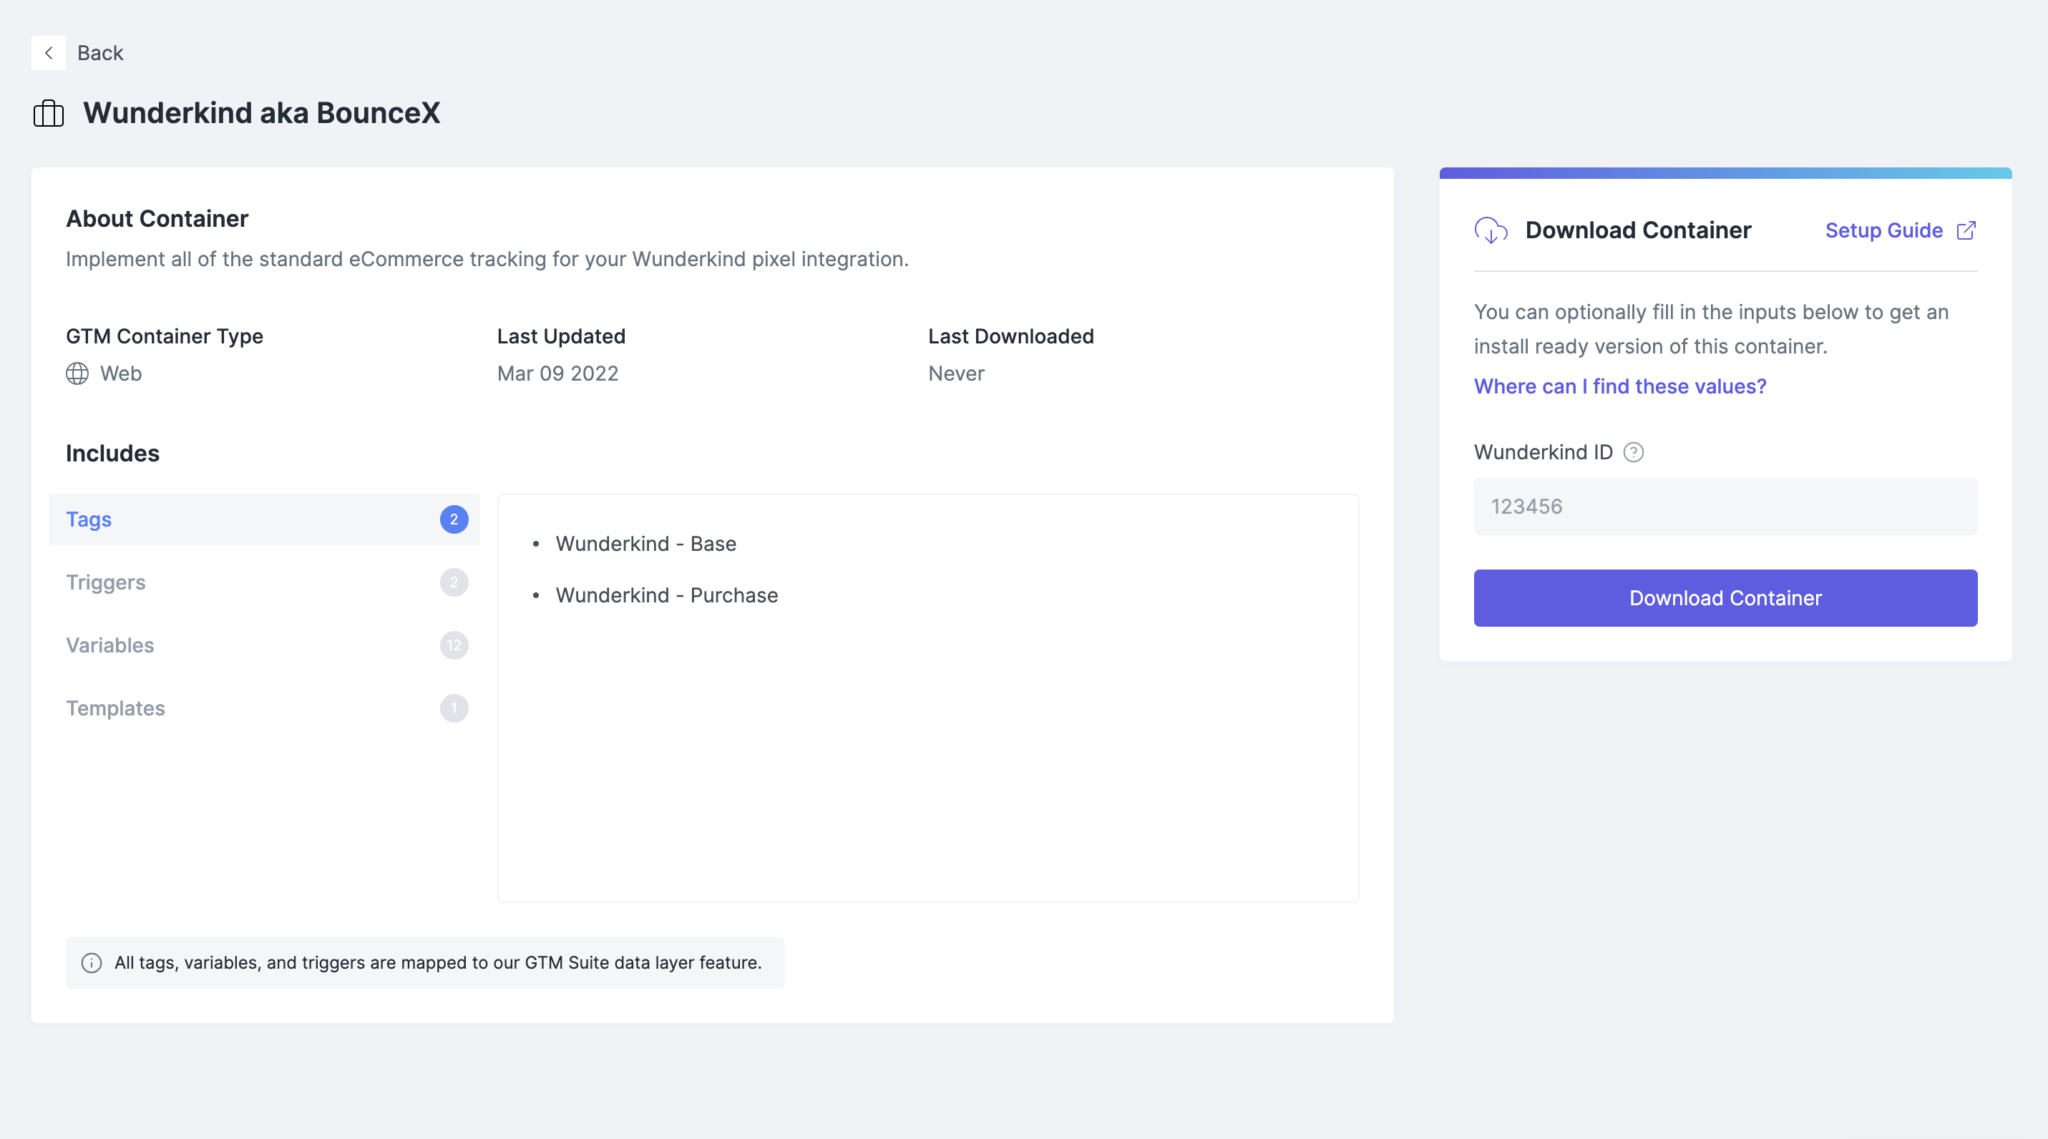
Download the container and save to your computer.
Step 4: Import Container to GTM
Next up, go to your Google Tag Manager container > Admin > Import.
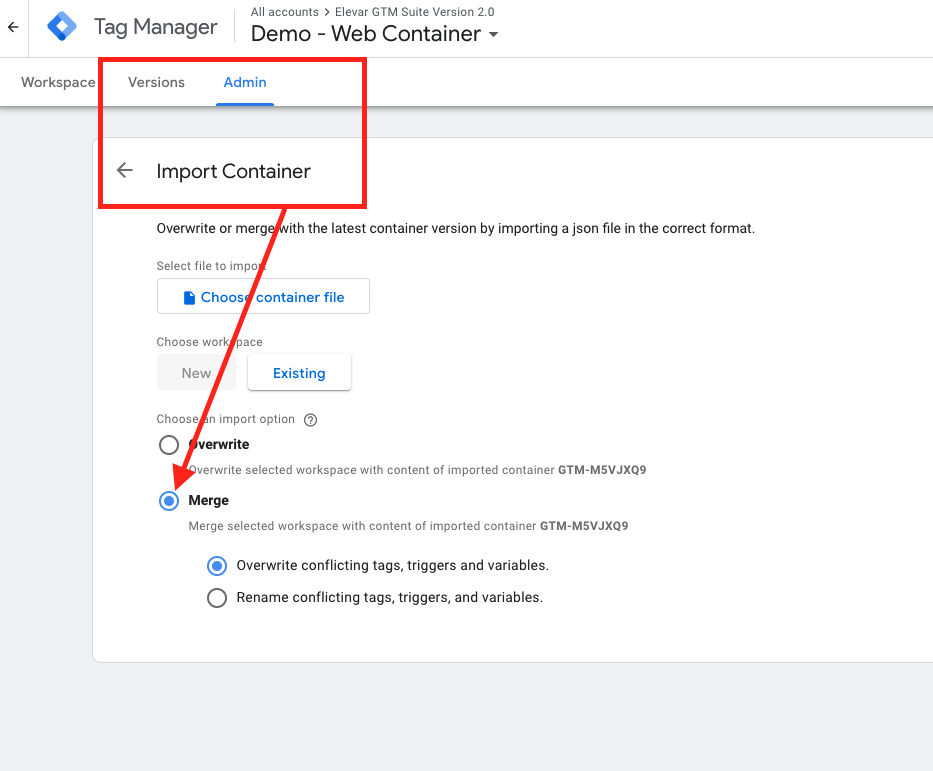
Be sure to select Merge container, not overwrite.
Once you’ve imported, verify your Wunderkind ID variable is accurate.
Step 5: QA & Publish
Once you’re ready to go live then put GTM into preview mode.
You can navigate the site and place an order to verify your Wunderkind tags trigger as expected.
Remember that the data layer from step 2 needs to be live on your store in order for the variables – like revenue and order id – to populate.
Updated 5 months ago