How to Set Up Google Tag Manager in Shopify — in Minutes
Yes, there is a creative way to implement Google Tag Manager on your Shopify store. See how!
Brad Redding
Brad Redding is the Founder & CEO of Elevar. Specializing in analytics, tracking, GTM, and conversion optimization.
Last updated: 4/13/2022
I’m all about finding creative ways to solve problems. Sometimes this results in my colleagues giving me hell for not doing it the right way.
Consider this tip on how to add Google Tag Manager to your site-wide Shopify store one of those creative solutions.
New: We’ve launched our own app that automates the install of GTM + Data Layer + FB, Google Ads and more!
I recently went through a Google Analytics audit for a store on Shopify and noticed they were missing custom event actions (other than the default Shopify Event Actions).
Custom event tracking in Google Analytics is an extremely powerful addition to your user behavior analytics analysis. If you don’t have event tracking setup to track granular user behavior on your website then you are missing out on a wealth of data that will empower your marketing and conversion optimization decisions.
Enter Google Tag Manager — my go-to for adding custom Google Analytics behavior events to enrich my data from a user’s journey to conversion.
A quick review of Shopify documentation pointed to a Shopify Plus only feature. Another Google search led me to customizing the liquid theme files.
After doing my own testing and implementation, it turns out there are a few options to add GTM to Shopify and Shopify Plus stores:
- Implement in the Google Analytics admin settings which covers all pages, including checkout and thank you pages
- Implement via theme.liquid file that covers all pages, except checkout and thank you pages
- Implement through our GTM Suite Shopify app (including all AdWords and Facebook remarketing tags!)
Since Shopify recently locked down the additional GA scripts setting for option # 1 which restricts the ability to add custom javascript to this setting, Option # 3 is my preference in order to leverage the data layer for event tracking and marketing tags like Facebook and Google AdWords.
Here are details on how to try out all three options.
Option # 1: Implement GTM via Shopify GA Settings
Implement through the Admin > Google Analytics settings
In order to get Google Tag Manager setup across the entire site, including all checkout pages, it only needs to be set up in one place within the Shopify admin.
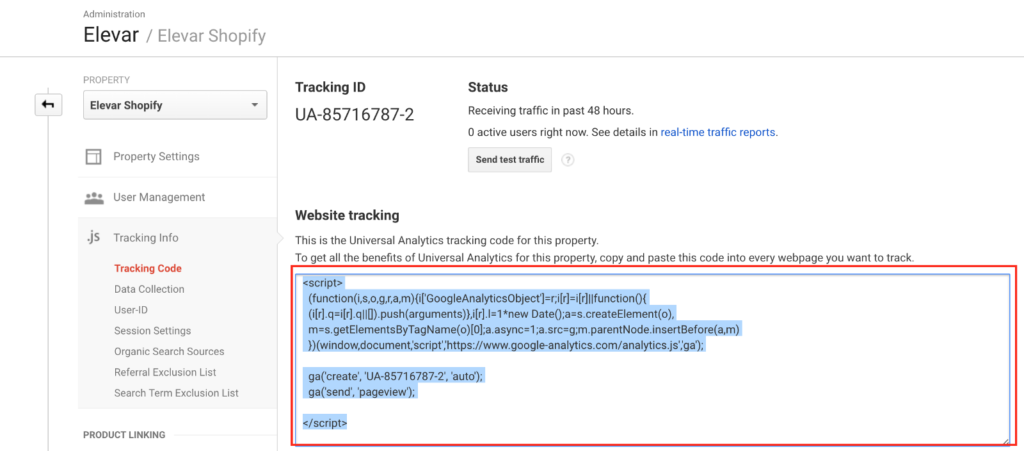
Step 1. Copy your Universal Google Analytics (GA) script from Google Analytics > Property > Tracking Info > Tracking Code
Step 2. Paste your Google Analytics script into your Shopify Admin > Sales Channels > Online Store > Google Analytics
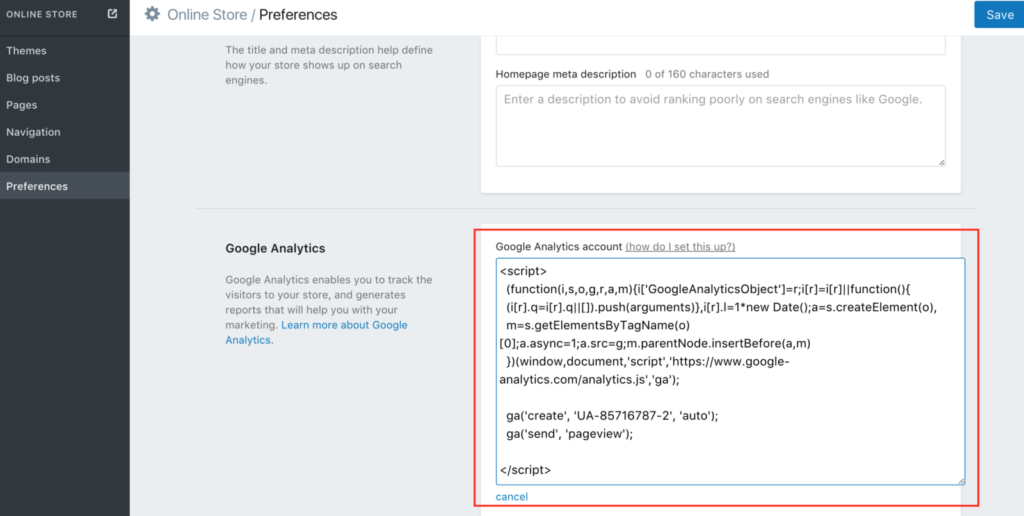
Click SAVE.
Step 3. Copy your Google Tag Manager snippet from your GTM admin (NOTE: without the opening and closing <script> </script> tags):
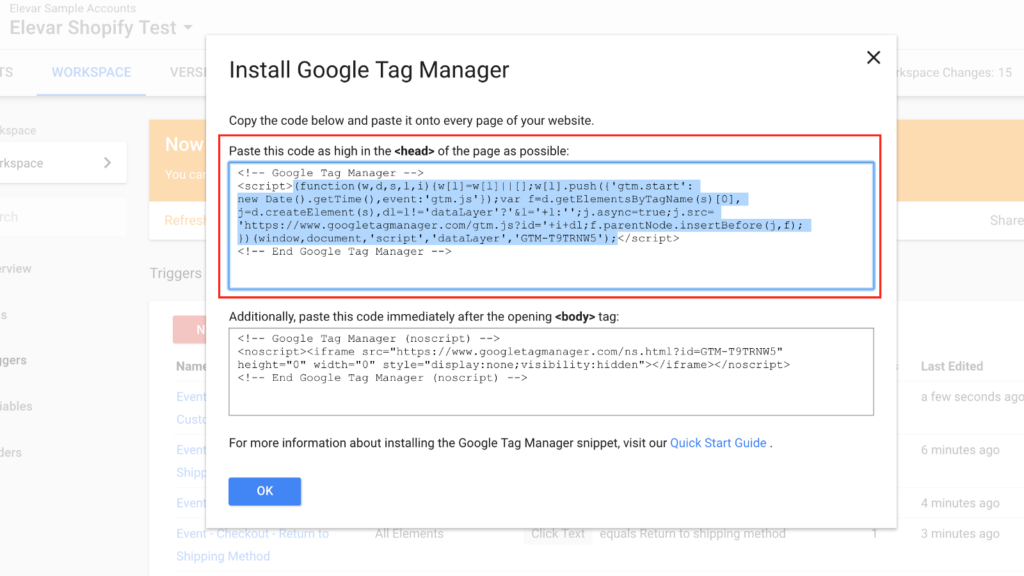
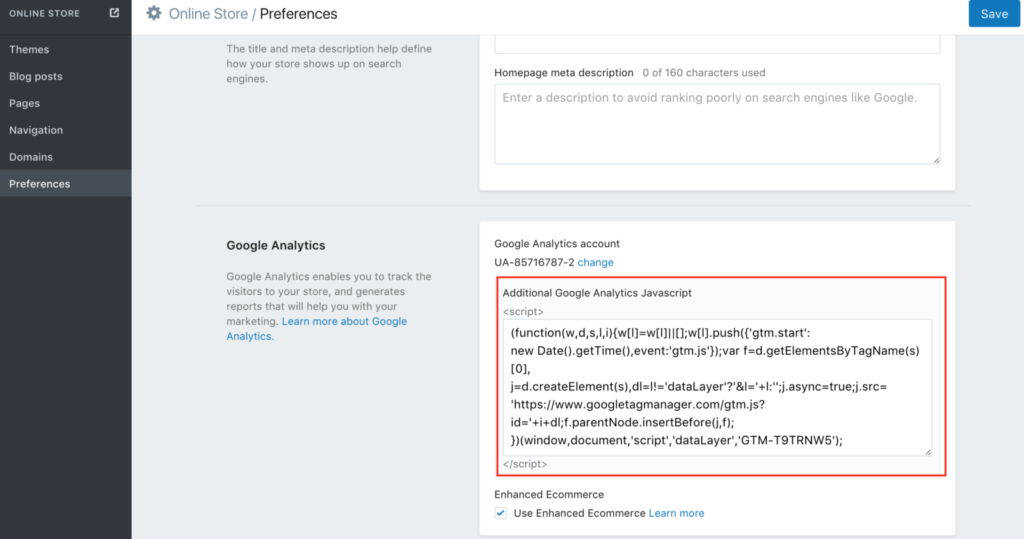
Step 4. Paste the copied script in your Shopify Account > Sales Channels > Online Store > Google Analytics > Additional Google Analytics Javascript
It should end up looking similar to the screenshot:
Don’t sweat the GTM <noscript> that they ask to be placed in the <body> of your site. This is for browsers that have JavaScript disabled which should be a very low % of users. If you want to take this step as well then you’ll need to do so via theme file updates.
That’s it!
Just in case you have placed GTM in your Shopify Account > Settings > Checkout settings, you don’t actually need this anymore since the process outlined above will work on all pages, including checkout.
Keep in mind this implementation does not include the data layer. This is simply getting the basic GTM code running on your site.
Option # 2: Implement GTM in Theme Files
This is pretty straight forward and only takes a few steps:
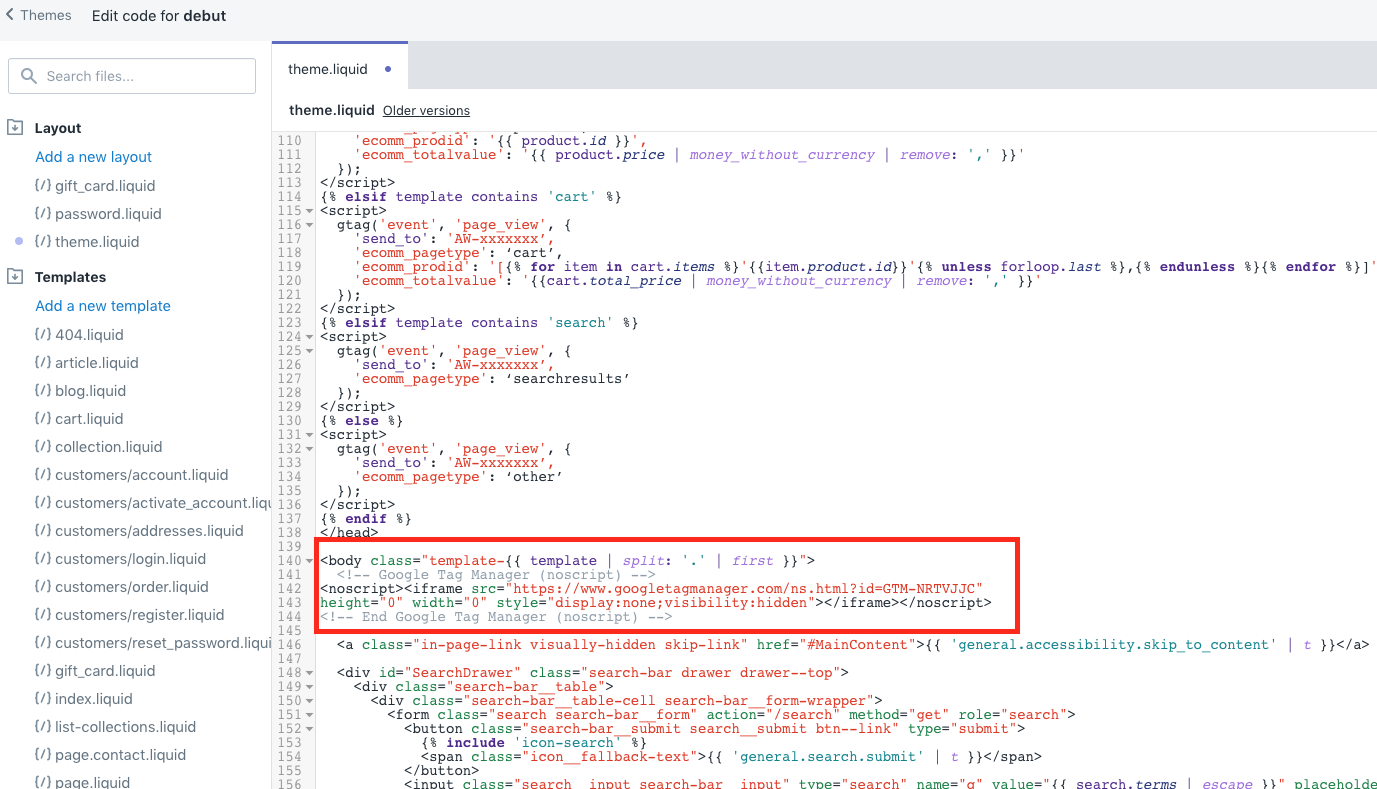
Step 1: Copy your GTM script into your theme.liquid at top of <head>
If you have a developer or agency then ensure you are requesting this to be put near the top of your opening <head>.
Copy this:
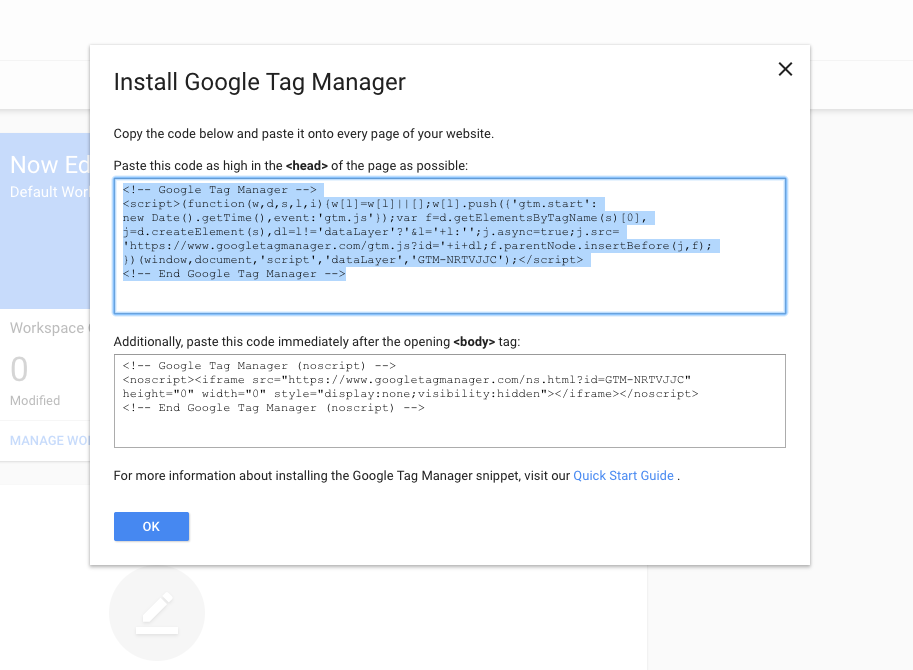
Into this:

Step 2: Copy your GTM noscript into your theme.liquid at top of <body>
Copy this:
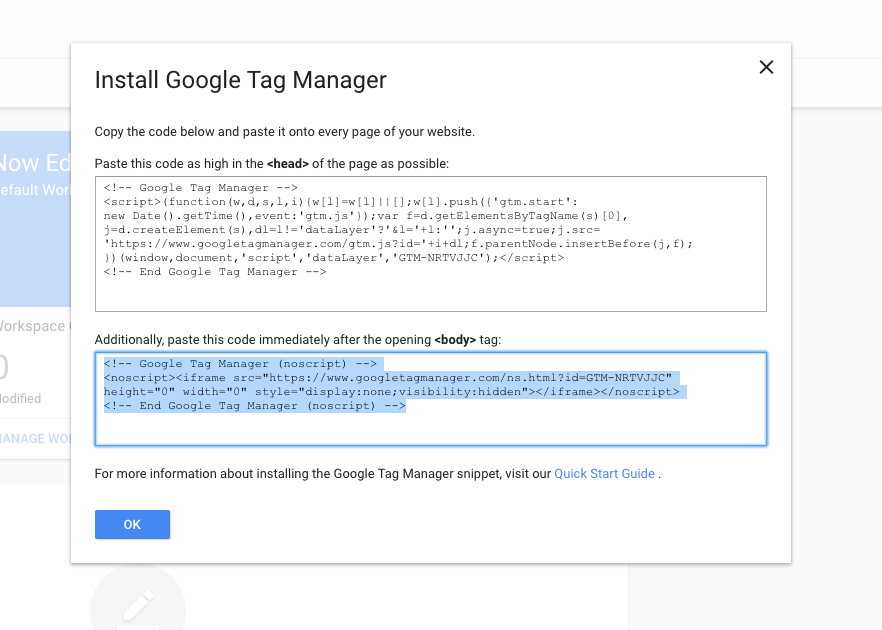
Into this:
That’s it. If you are on Shopify Plus then you’ll need to replicate this step in your checkout.liquid theme file as well.
Keep in mind this implementation does not include the data layer. This is simply getting the basic GTM code running on your site.
Option # 3: Implement GTM Suite App
After years of helping thousands of Shopify stores implement GTM, we decided to build our own app!
Our Shopify app includes the installation of GTM along with all of the dataLayer variables needed for Google AdWords dynamic remarketing, Facebook, Klaviyo, Snapchat and more.
You can view all of the details on the app here – check it out.
Once you’ve installed and configured the GTM Suite app, how can you take advantage of this?
- Add 3rd party marketing scripts/pixels without the need for a lengthy development process
- Add Google Analytics custom events that can unlock more even more insights to help in your conversion optimization strategy (use our Free Chrome Extension)
- Utilize GTM for more advanced behavior events, site speed management, etc.
The biggest time saver the app helps with is the data layer that is implemented on your store.
You’ll also receive a pre-built container that contains all of the tags, triggers, and variables needed for various marketing tags.
Verify Your Google Tag Manager is Working
Add a new Universal Analytics tag with the Event Track Type with the All Pages trigger:
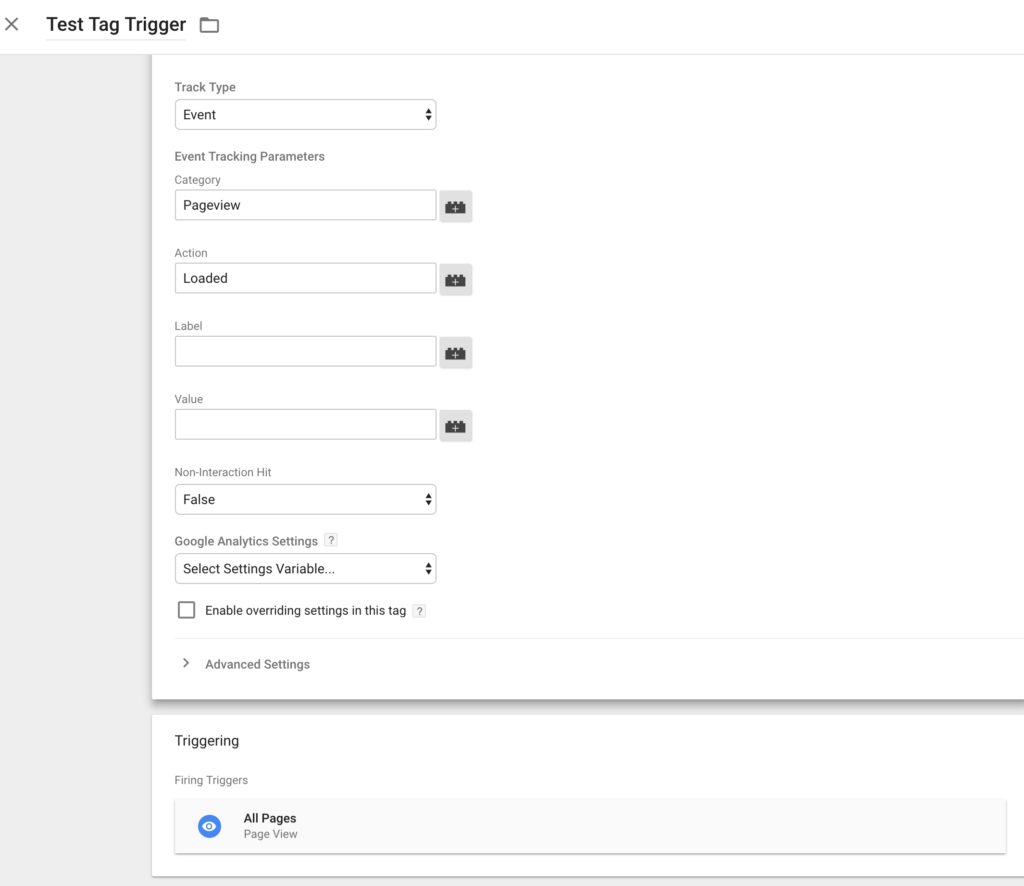
SAVE this tag.
Then:
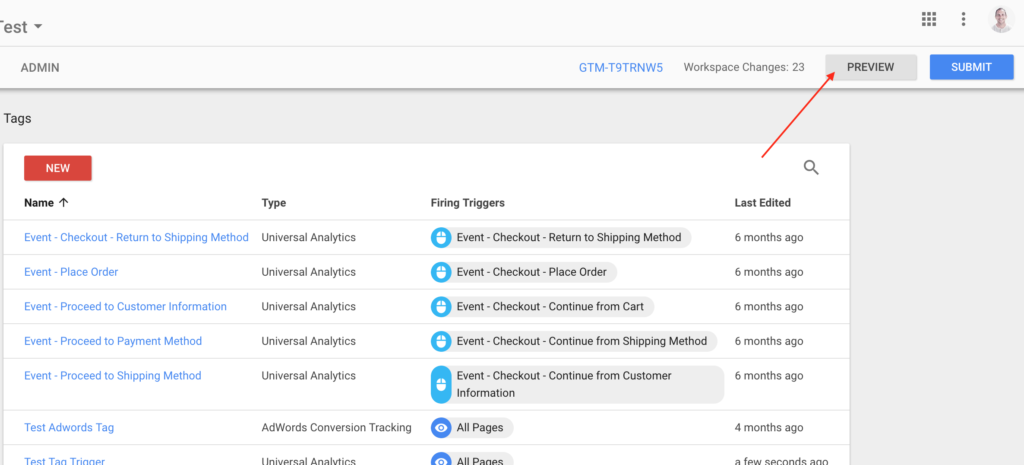
- Click the big “Preview” button in the top right corner of your GTM Workspace to enable Preview mode
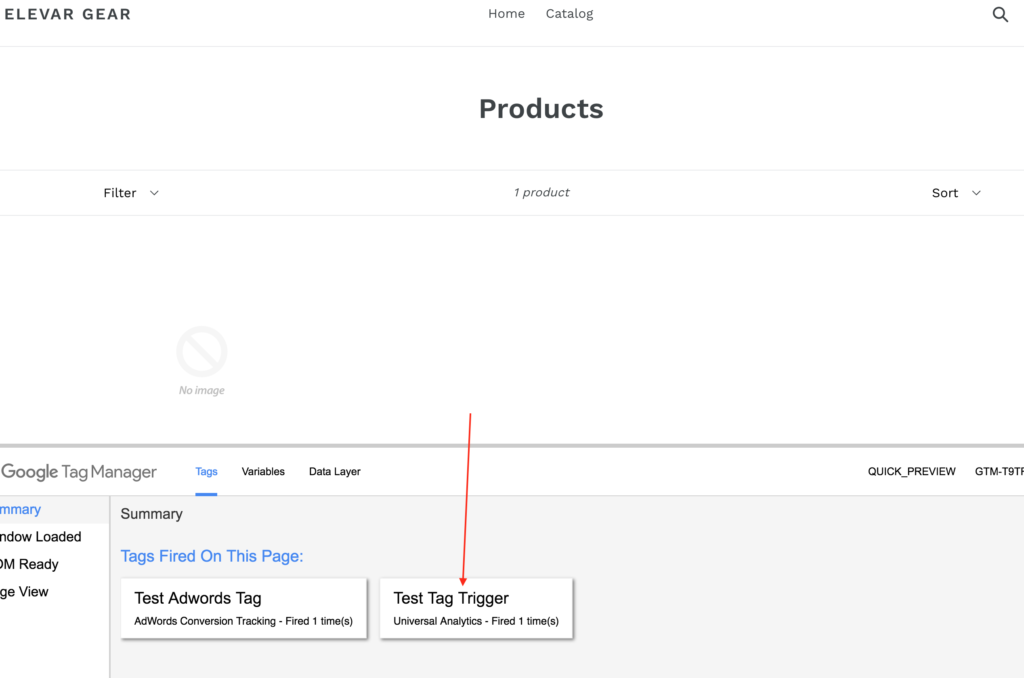
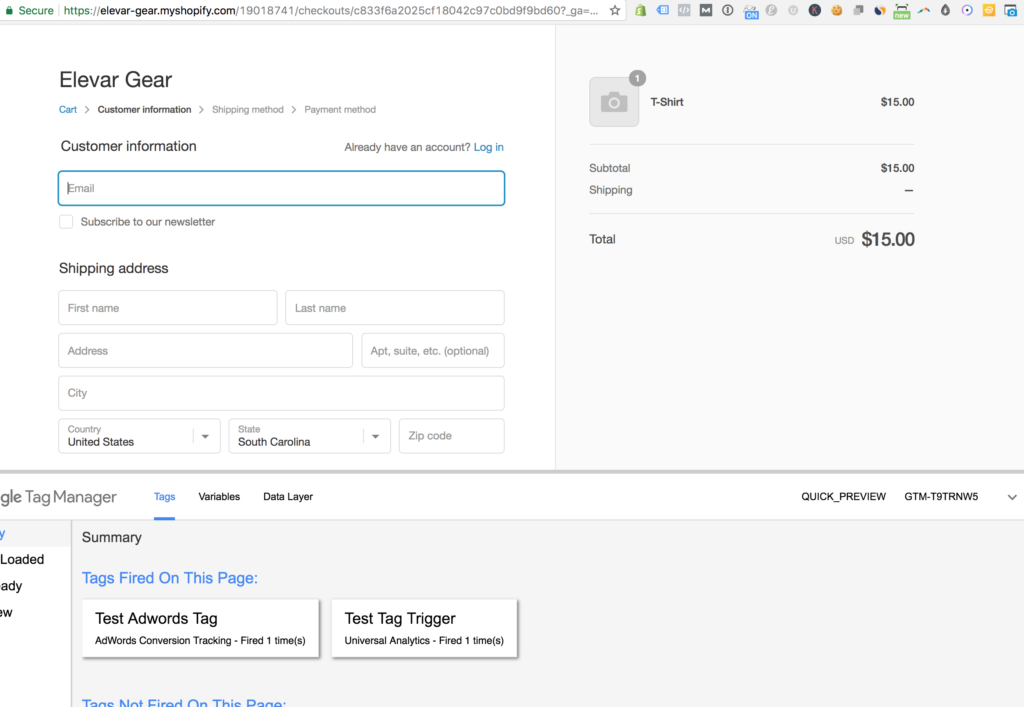
- Go to your website URL. You should see the GTM debug console at the bottom of your browser displaying the tags that have fired successfully like this below:
And you should also see this firing on your checkout pages as well (see how I show how to a/b test Shopify’s checkout here):
You can now begin adding and testing more tags to your container to verify all works as you expect it to.
Be sure to delete this test tag – you don’t want to publish this!
Related Shopify “How To’s”:
- What are benefits of GTM for eCommerce
- Implement Google Optimize w/Shopify
- How to leverage variables in GTM
Happy GTM’ing!