Combine GTM Product IDs for Facebook Conversion Tags on Magento
See how to use enhanced ecommerce product data and combine SKUs into a single comma separated variable to use in all of your marketing tags on Magento, Shopify, or any platform.
Do you advertise on Facebook, Instagram or run affiliate campaigns with prominent affiliate networks?
If the answer is yes then you need to setup conversion tags that send all SKUs included in the order in a single variable that usually live within your existing enhanced ecommerce data layer like this:
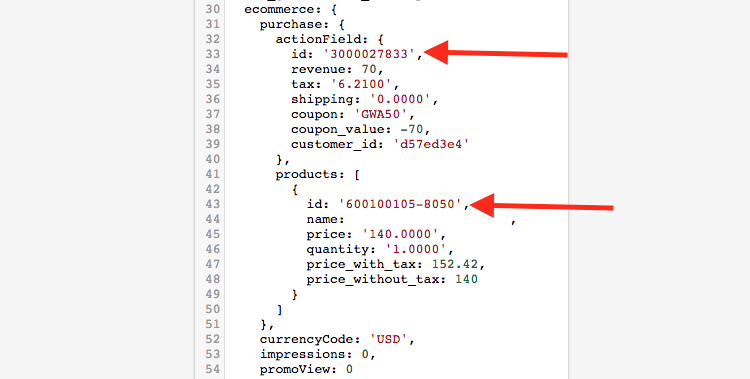
Luckily if you have the basic Enhanced eCommerce data layer setup needed to send transactions to Google Analytics then you can translate this data into a custom variable for your Facebook, Instagram, affiliatet, etc marketing tags.
Note: you may have read how to grab the SKU from your data layer (like the screenshot above) by creating a variable like this:
ecommerce.purchase.actionField.0.id
Where 0 is the position of the product in the array.
But you still need a way to combine these SKUs into a single variable if you sell more than 1 item in an order.
I’ll show an example that I see regularly on Magento but the same process can be used on Shopify, BigCommerce, etc.
Step 1: Variable Setup for Products
The first variable we need to create is for the products contained in the purchase.
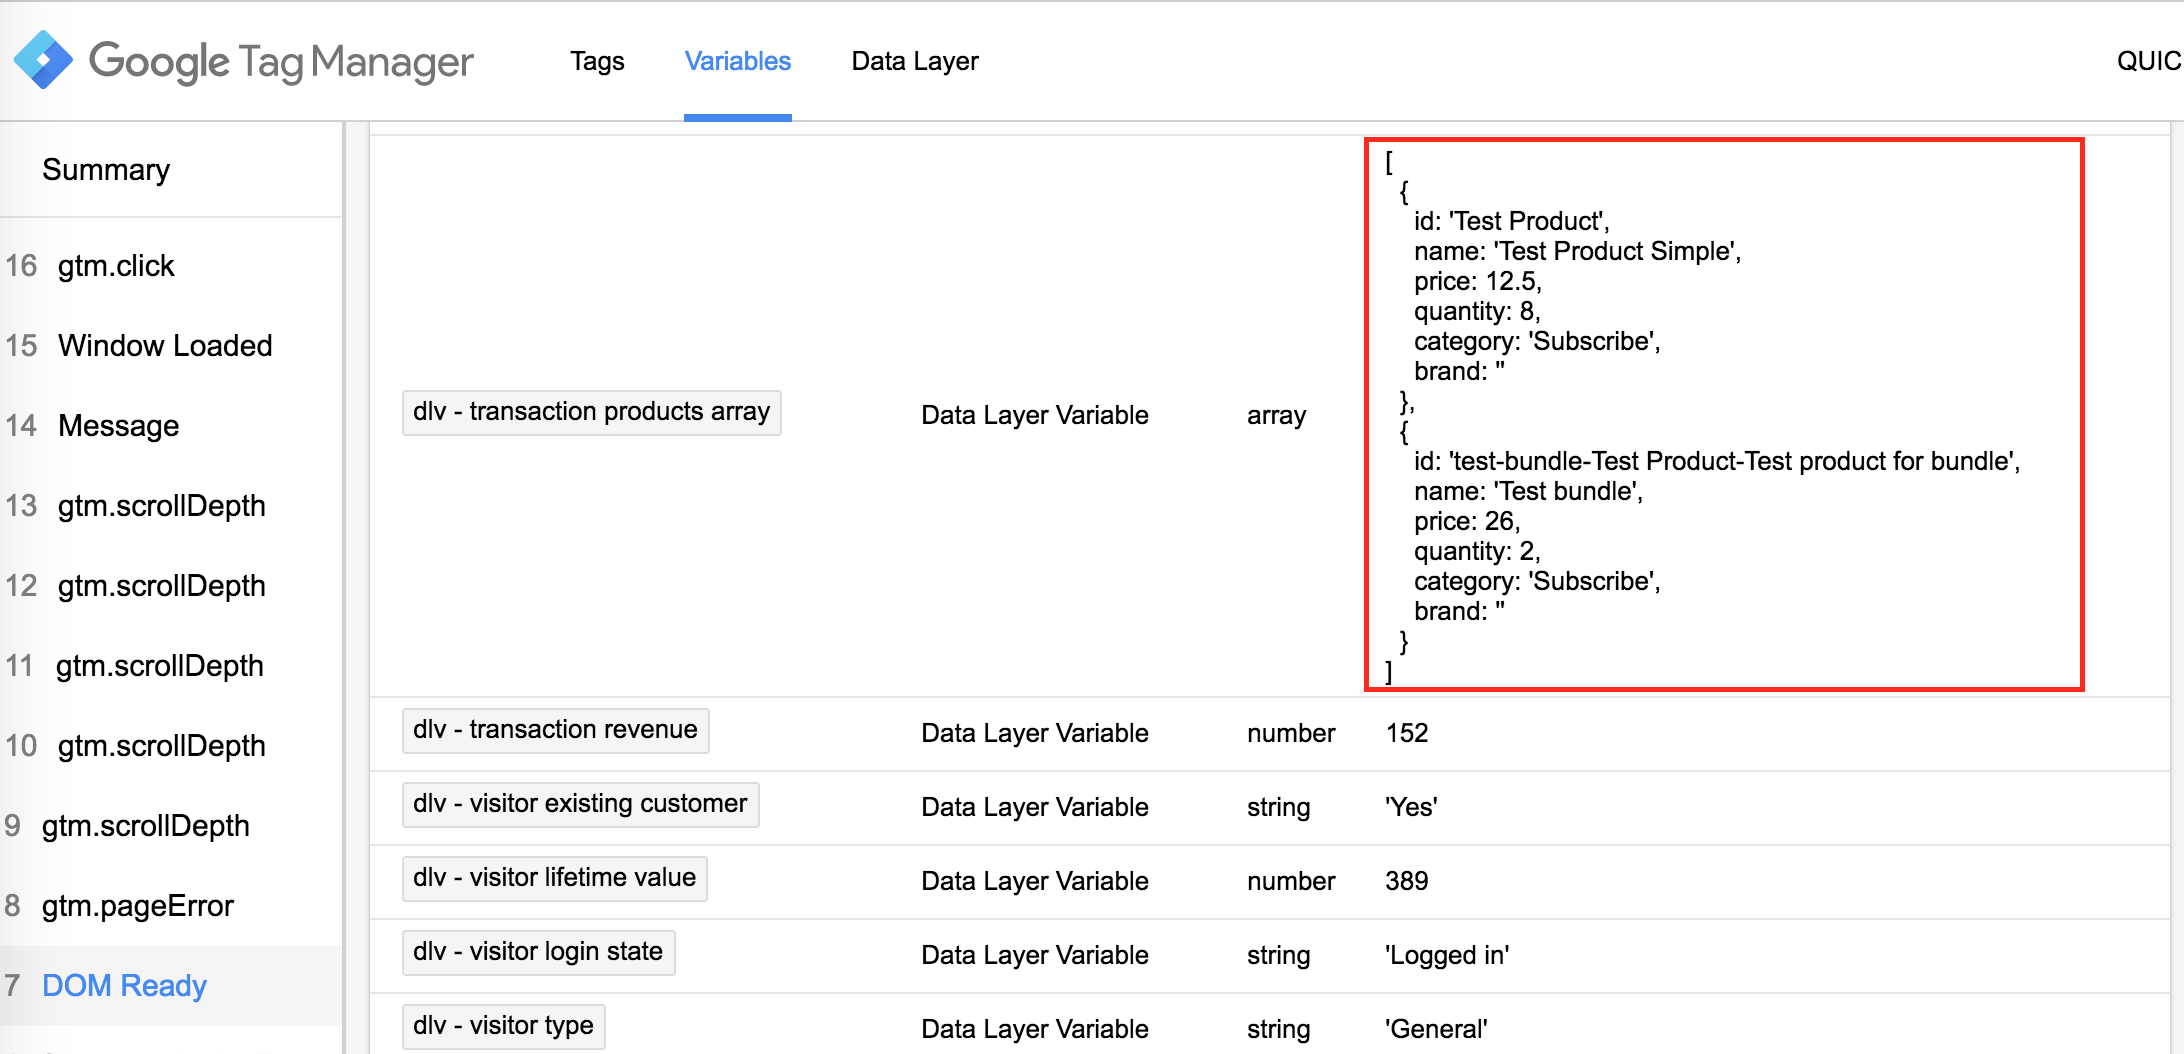
I’ve named this example: dlv – transaction products array
That looks like this:

and results in:
That’s it!
Step 2: Custom JS Variable for Combining SKUs
Now we need to create a custom Javascript variable that takes the data from the variable we just created and translate into data that Facebook or other marketing programs require.
In GTM go to Variables > User-Defined Variables > New > Custom Javascript and copy this snippet below.
I named my variable: custom js – transaction products
function() {
 var products = {{dlv - transaction products array}};
 return products.map(function(products) { return products.id; }).join();
}
You’ll notice the {{dlv – transaction products array}} variable in the 2nd row which should be your own variable name from step 1. Then in the third row you’ll see products and products.id which is basically saying:
“Hey – go to the products in my variable from step 1 and return the id for every product and then comma separate them.”
Keep in mind this copy/paste will only work if your variable output is structured the same way from the first screenshot at the top of this article. For example if you have “sku” instead of “id” when you’ll need to change .id to .sku in yours.
Step 3: Setup your Conversion Tag for Facebook (or similar tag)
The last step is creating your Facebook conversion tag and verifying it works as expected.
Here’s what your Facebook conversion tag might look like: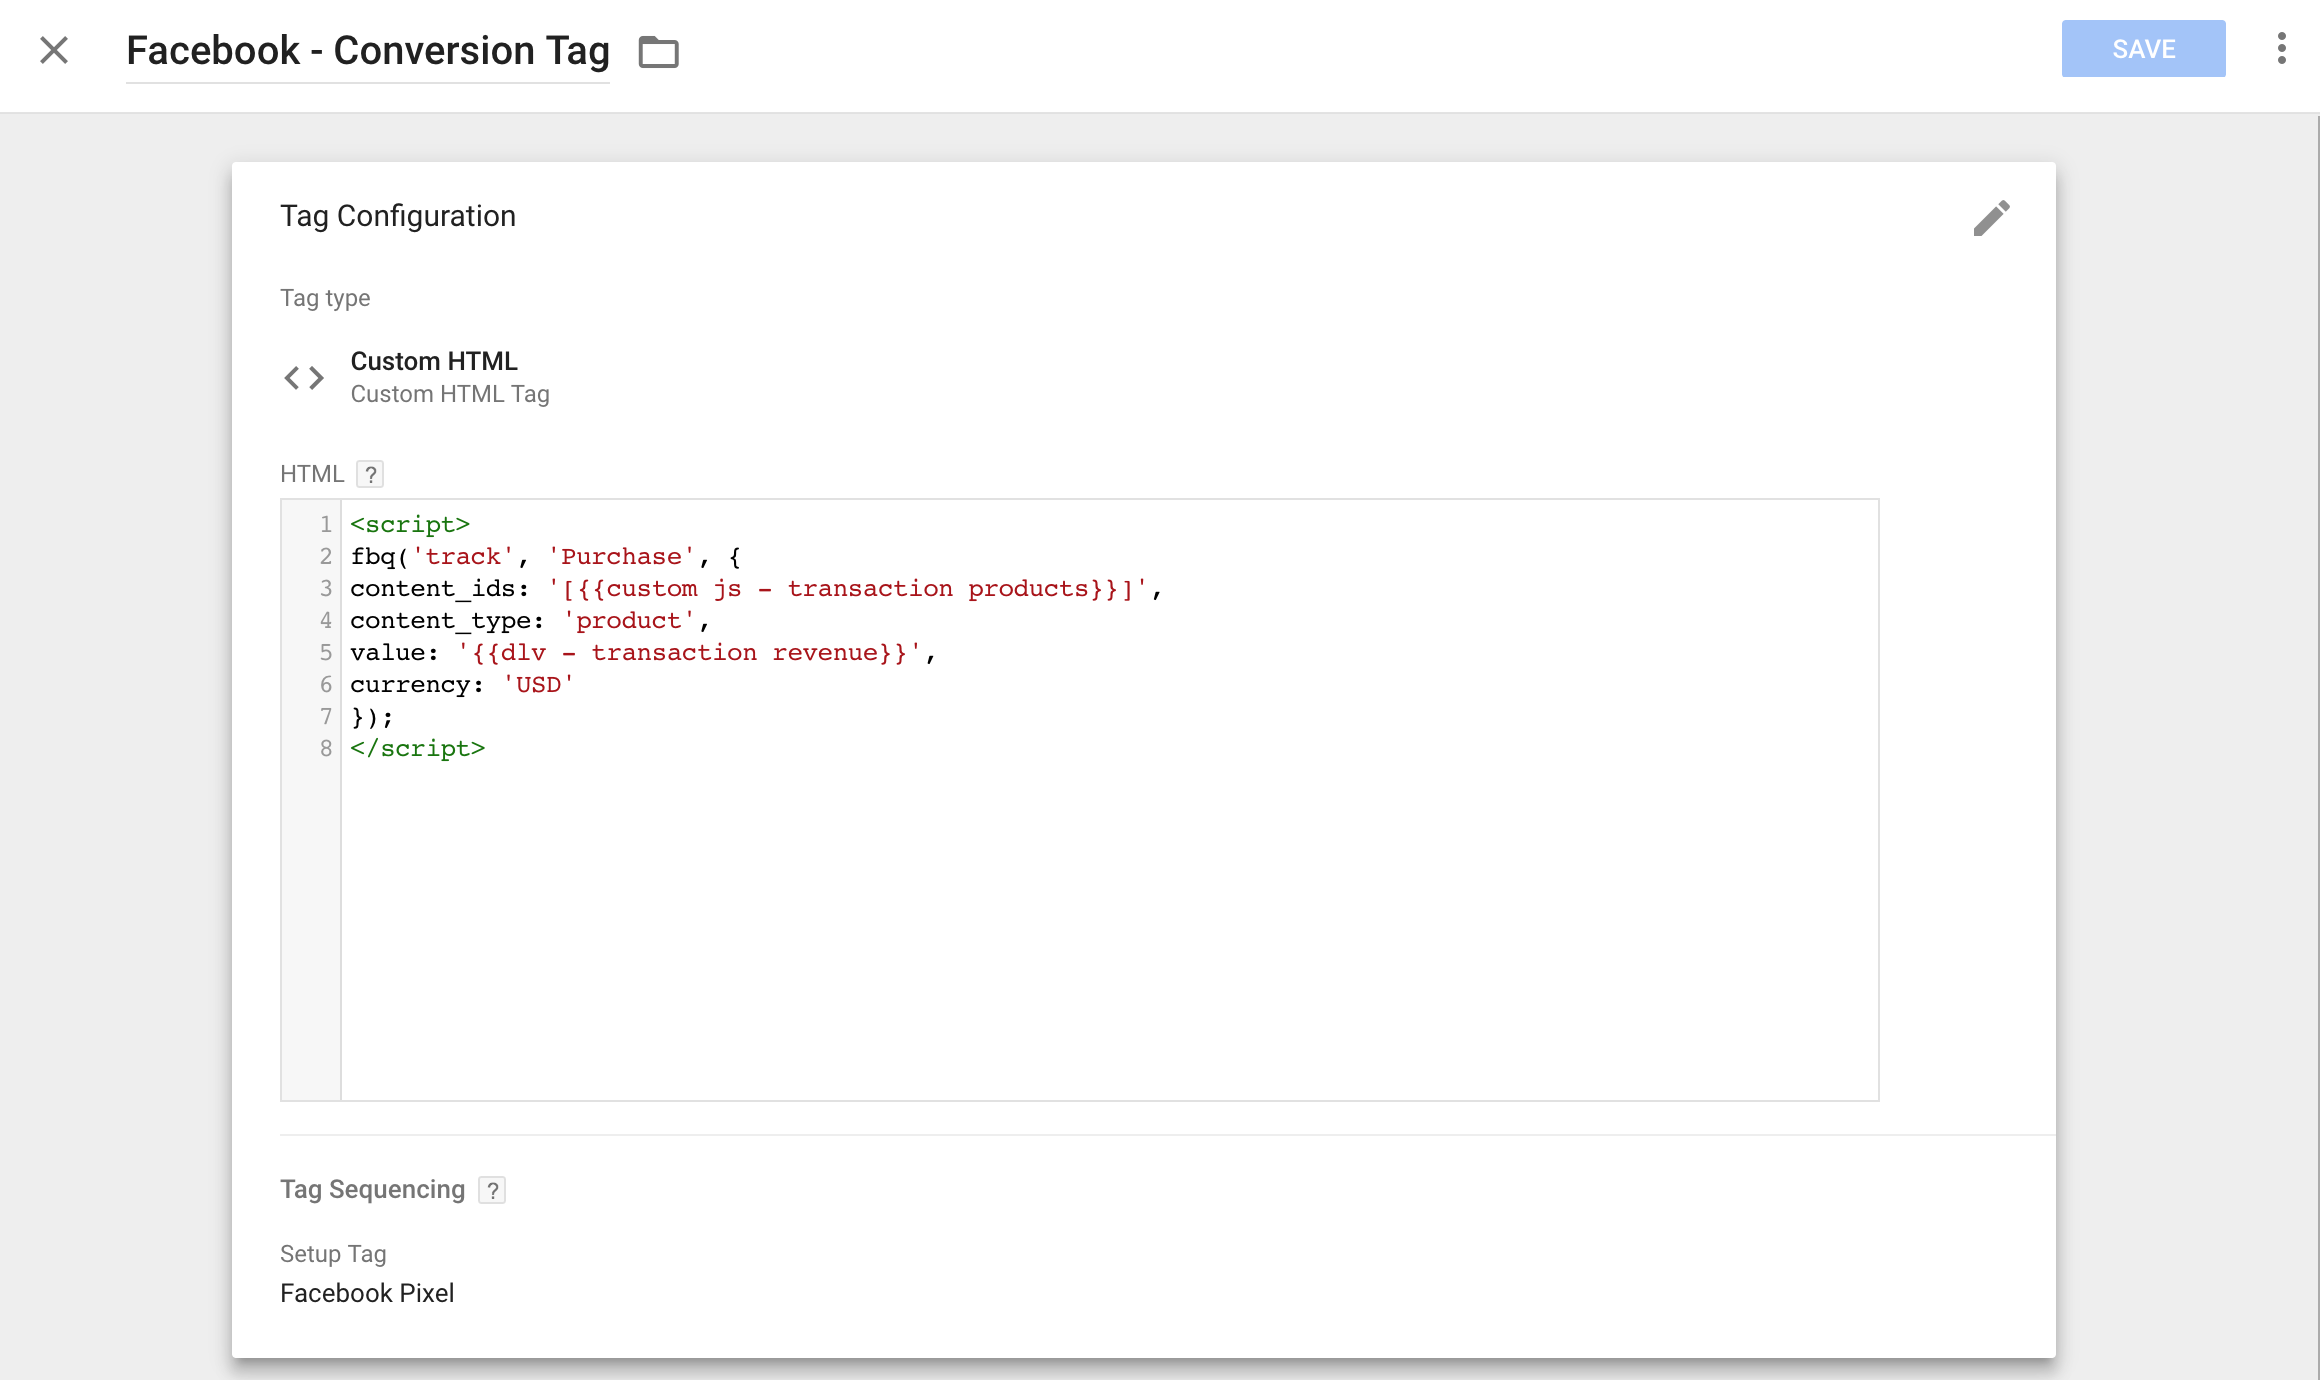
And you’ll notice I have two variables:
- One for content_ids which is the variable I created in Step 2
- Another for value which is the total transaction revenue (not shown in this article)
Put your final tag in preview mode, place an order, and hopefully you see this:
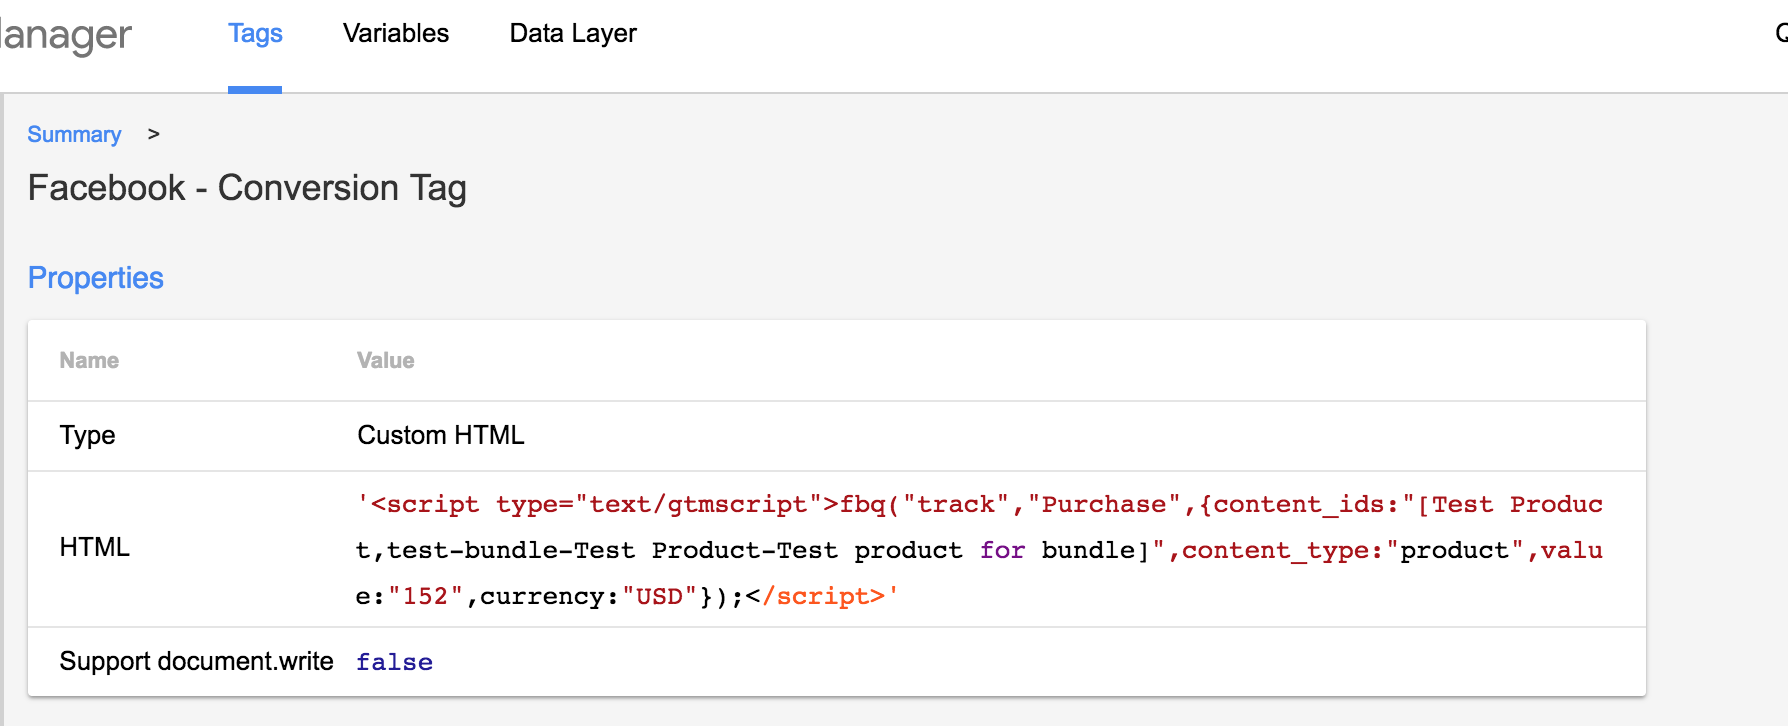
Notice the {content_ids: “[Test Product, test-bundle…]” which contains the two SKUs from my order.
If yours is undefined then you likely have a variable setup issue OR your tag is firing before your data layer populates. I usually set this tag to fire on DOM Pageviews for the checkout success URL.
If you have any questions/issues feel free to leave a comment.
Happy tagging 🙂
Related Articles:


Hi Brad.. Thanks for this guide. I have followed all the steps but I’m getting an error message when trying for preview.
This is the error message Validate Container
Type : Unknown variable name
Location : custom js – transaction products
Description :Unknown variable “dlv – transaction products array” found in another variable. Edit the variable and remove the reference to the unknown variable.
great guide. thank you