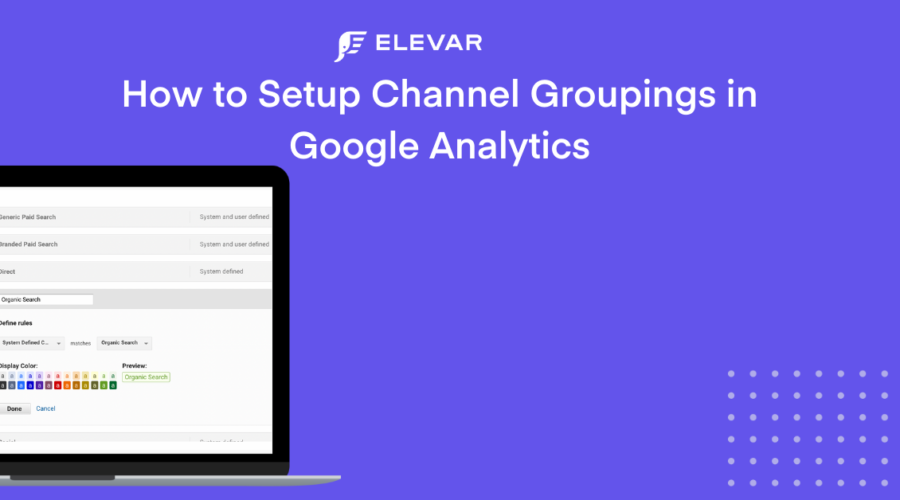
How to Setup Channel Groupings in Google Analytics
Learn the best practices for configuring your Google Analytics Channel Groupings. No technical assistance required.
Jerica Krakowski
Technical Product Manager @ Elevar
Google Analytic’s Channel Groupings are a great way to get a high level view of where your purchases are coming from… if they are configured correctly.
When you dive deeper into what Sources & Mediums make up a Channel in GA’s Default Channel Grouping, do you see Paid traffic appearing in Direct or Organic Channels? Or Sources that should be their own individual Channel?
If you do, follow the below steps to create a new Channel Grouping that’s built to the industry’s best practices.
Part 1: Copy the Default Channel Grouping
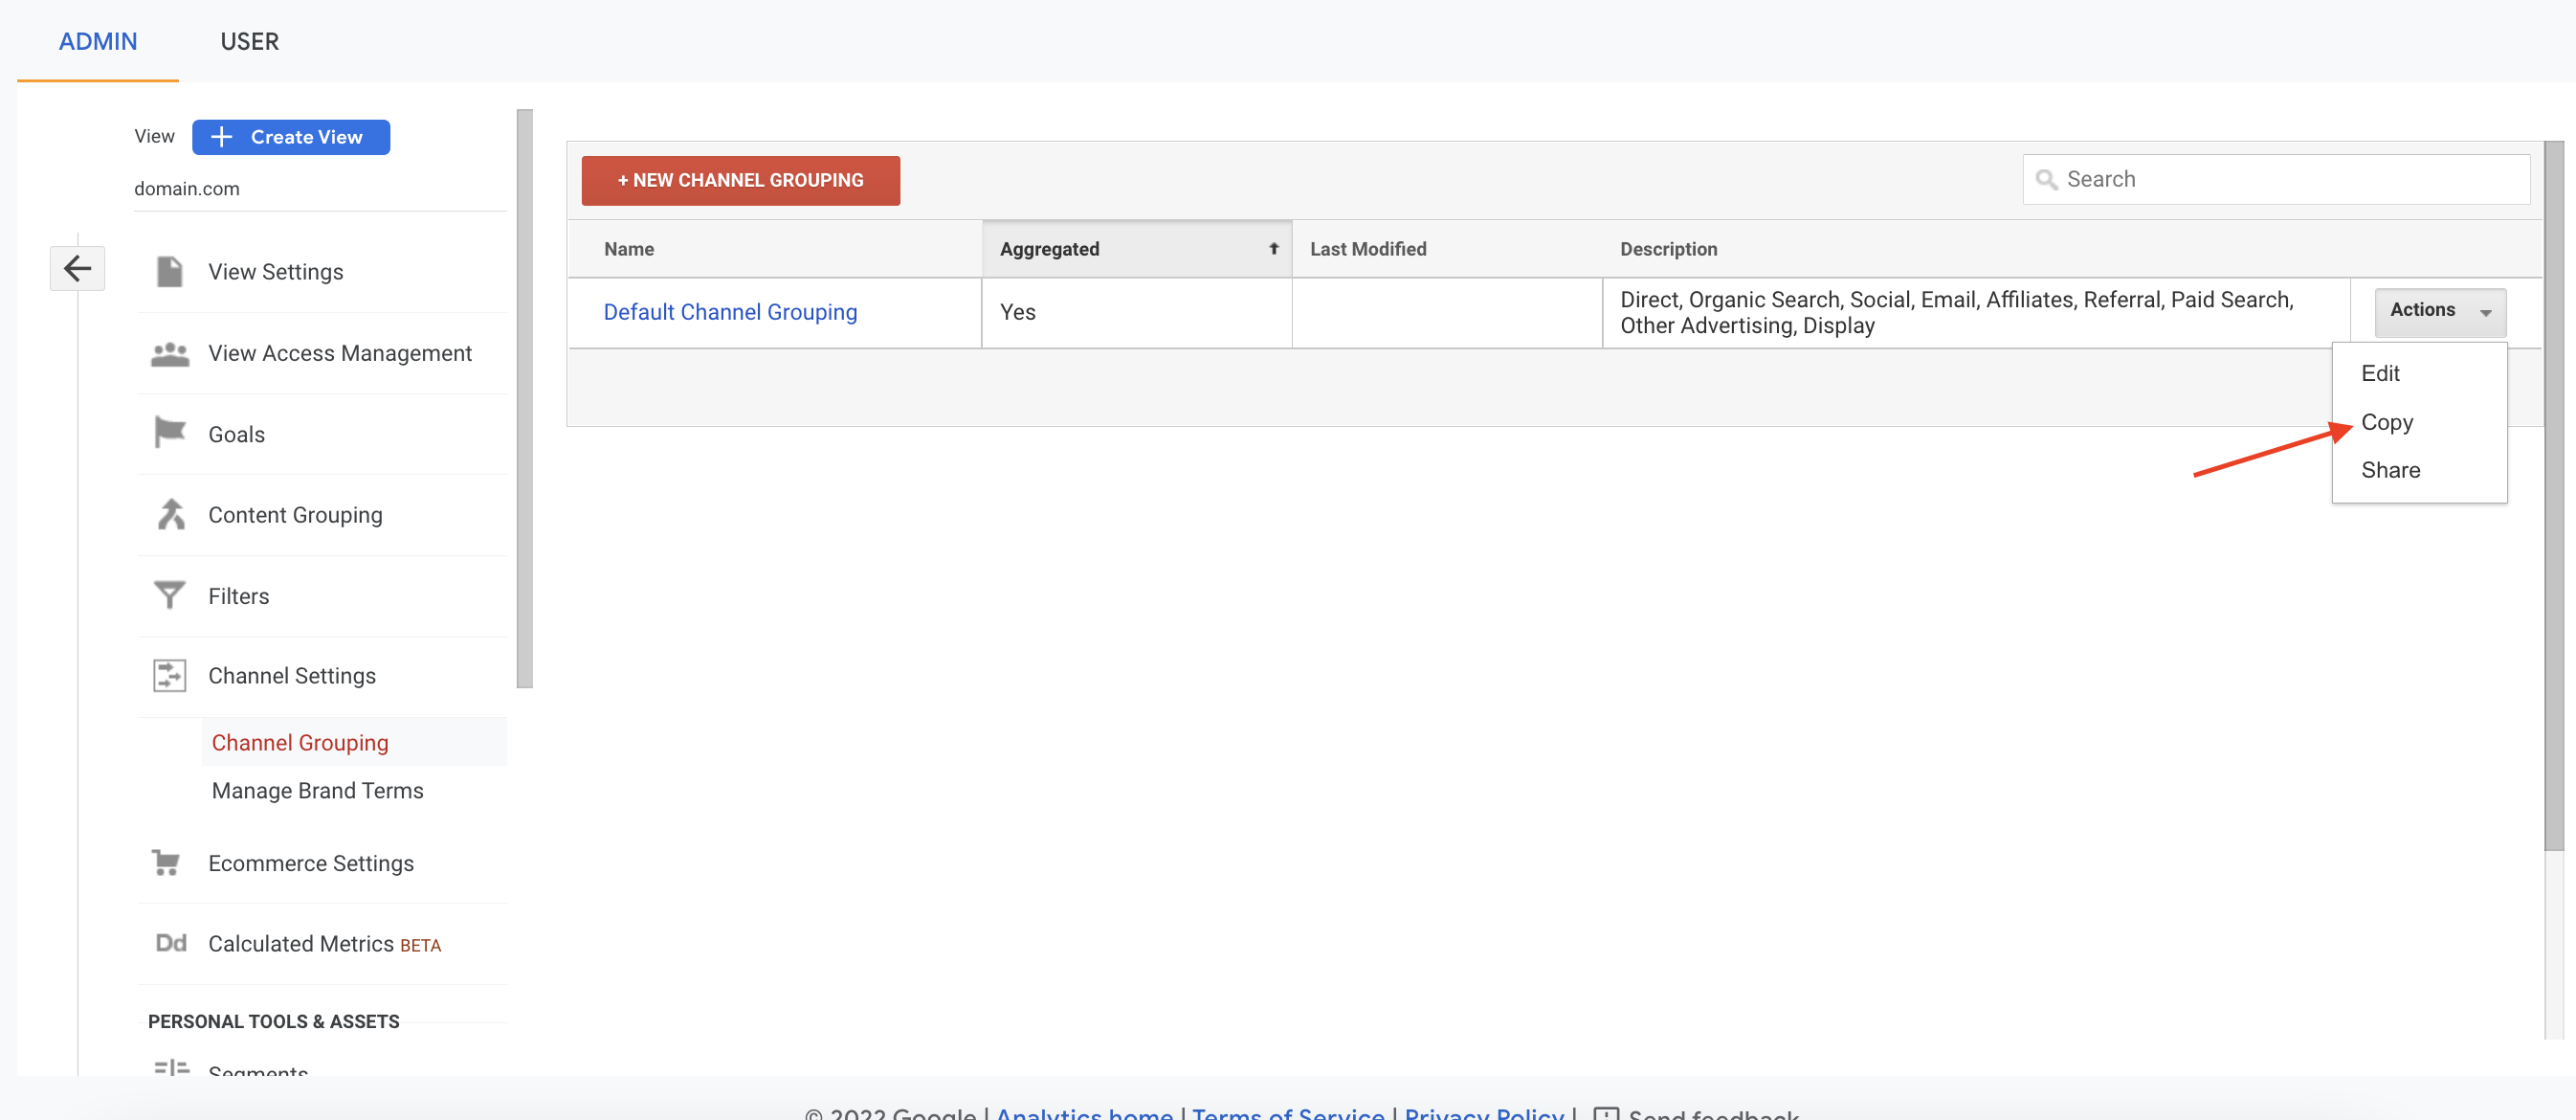
Why not just adjust the Default Channel Grouping?
That’s a fair question.
When you make changes to a the Default Channel Grouping, they will only apply to new data moving forward. It won’t apply retroactively. However, if you make changes to a new Channel Grouping, they will be retroactive.
That means you’ll be able to view historical data in their correct channel groupings!
Part 2: Separate Branded & Generic Paid Search
Next, we’re going to create separate channels for Branded vs Generic Paid Search queries.
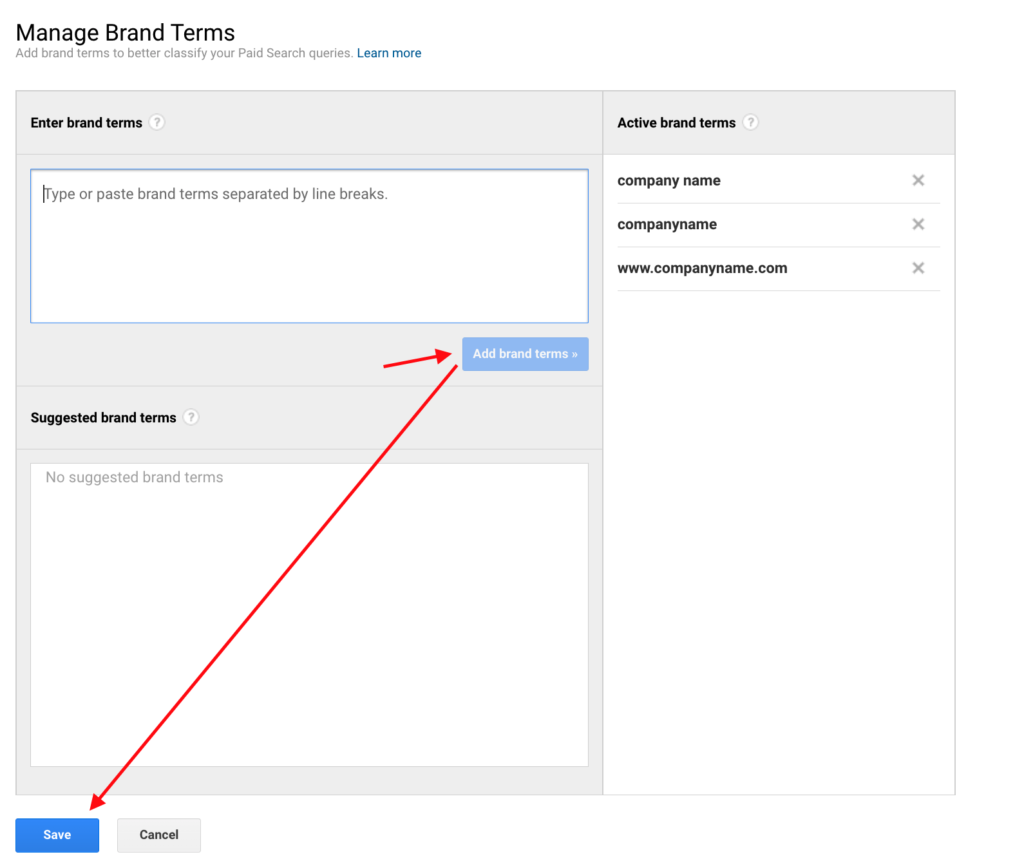
Start by Navigating to Manage Brand Terms. Then add words/phrases into the Enter Brand Terms box that you would consider “branded”.
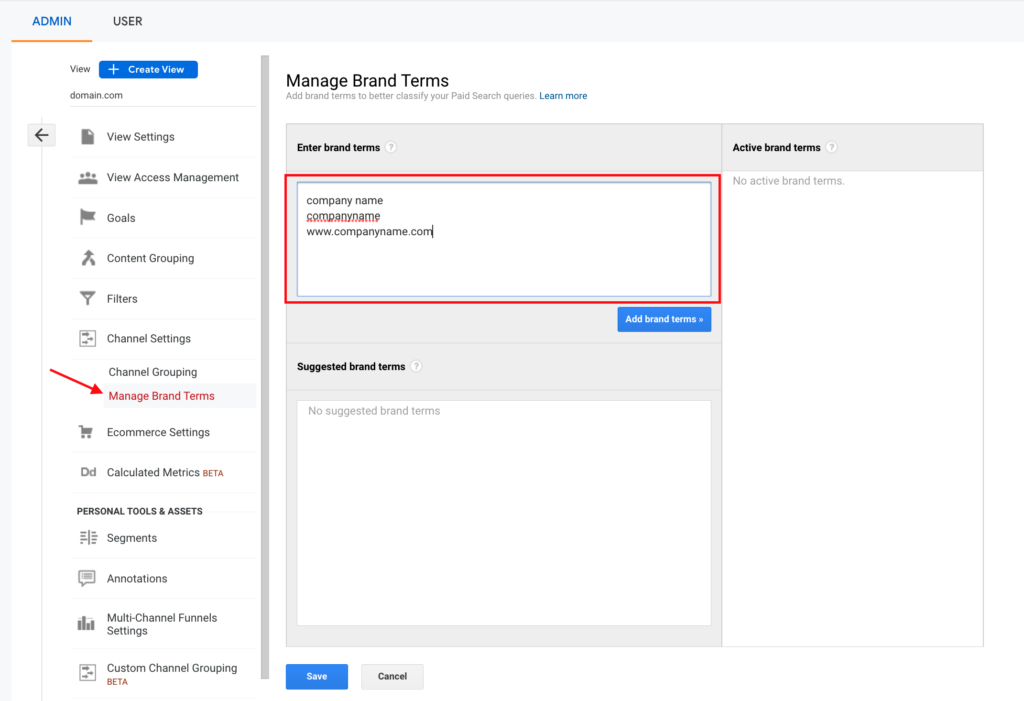
Select Add Brand Terms to make them Active. Then press Save to save your changes.
You’ll be shown a Pop-Up asking if you’d like to setup Branded vs Generic channels. Since we only want to make changes in our Custom Channel Grouping (not the default), we’ll select No, set up later.
Let’s go back to our Custom Channel Grouping & configure the following Channels for Branded vs Generic Paid Search. You’ll create one brand new Channel, but you can adjust the original “Paid Search” channel to match one of these.
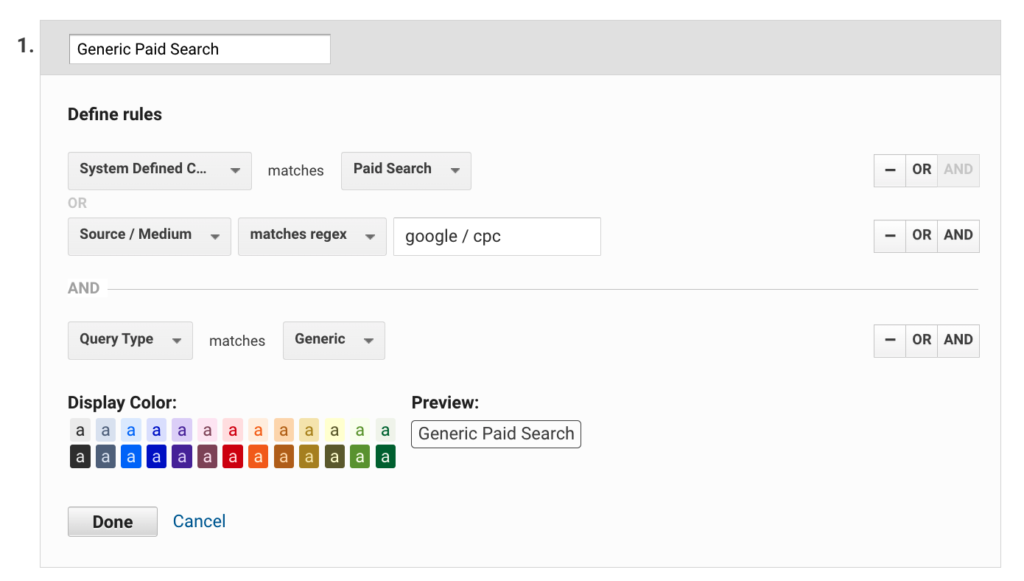
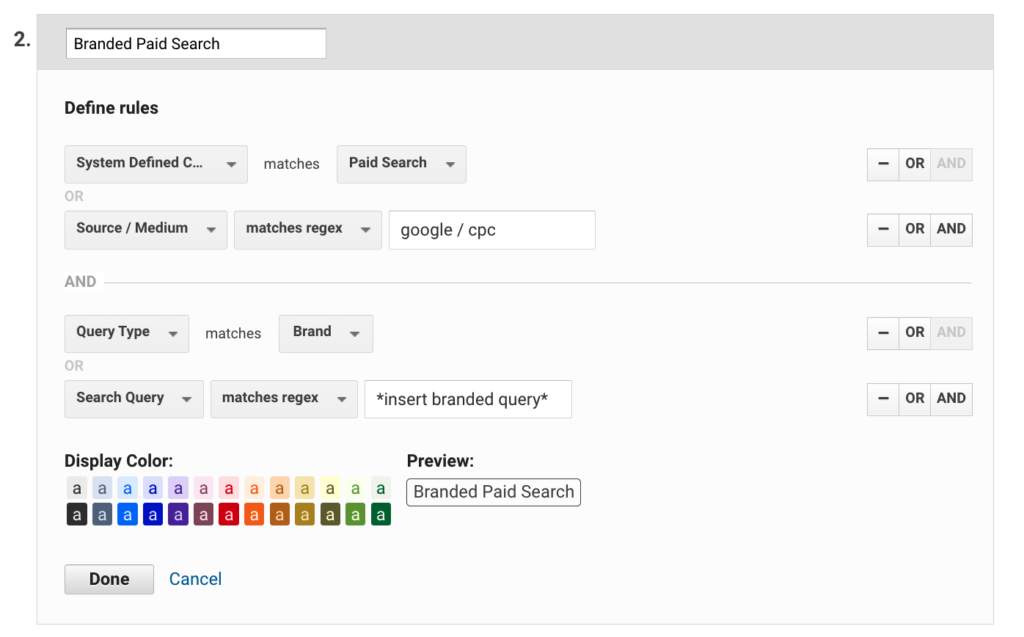
Note: Replace *insert branded query* with an actual branded query. For example, if your website is nike.com, replace *insert branded query* with Nike.
Part 3: Separate Paid Social from Organic Social
Create a New Channel in your Custom Channel Grouping & title it Paid Social. Add in the following rules.
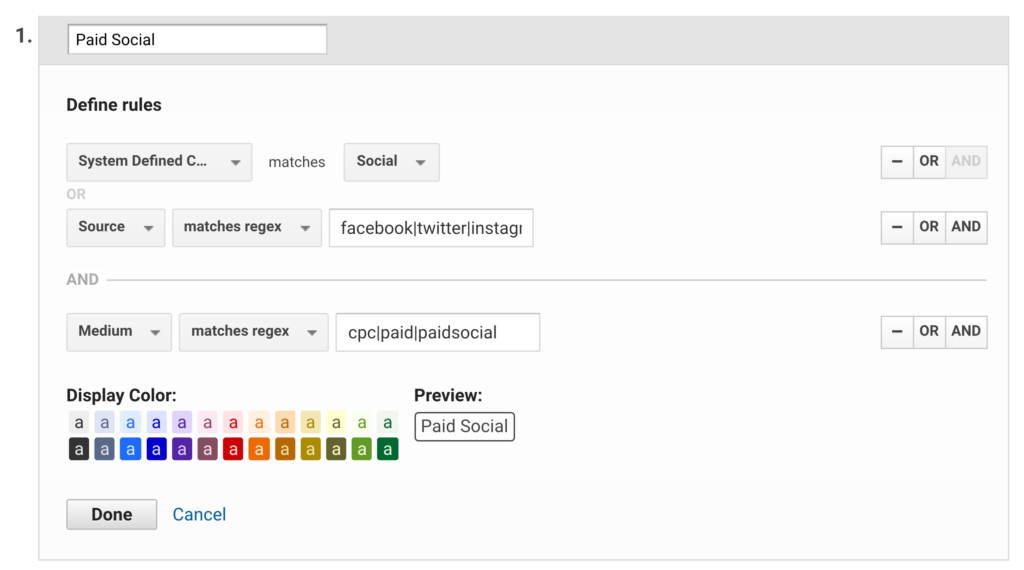
Notes:
- The regex I used for the Source rule is: facebook|twitter|instagram|youtube|quora|linkedin|tiktok|pinterest|reddit
- The Paid Social Channel should be ranked higher than the original Social Channel you have.
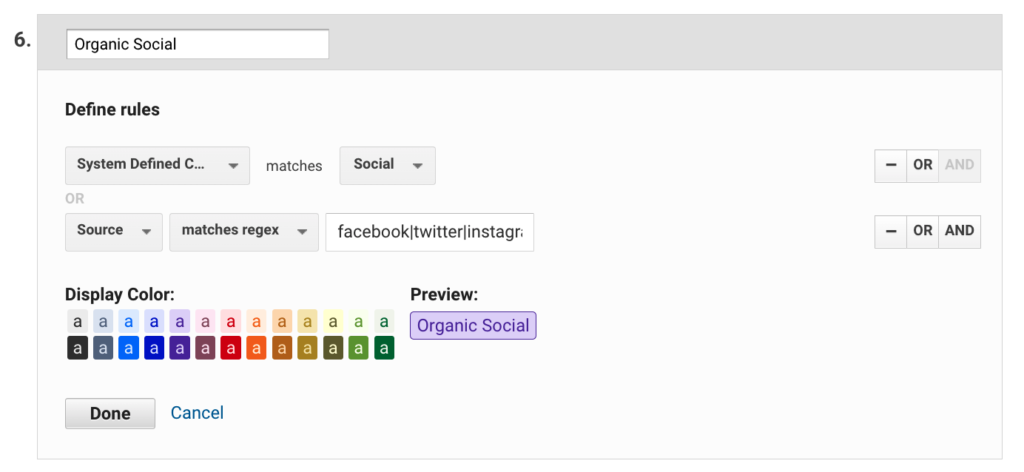
Next, let’s customize the original Social Channel. We’ll rename it Organic Social & add in the same Regex rule as above:
Part 4: Add new Channels
If you run Influencer campaigns or SMS promotions, it may make sense to create new channels for these marketing methods.
The rules you’ll need to use will depend on the UTM Parameter Structure you currently have in place. Let’s start by looking in your Source / Medium Report & identifying what Source & Mediums are showing for your unique marketing channel.
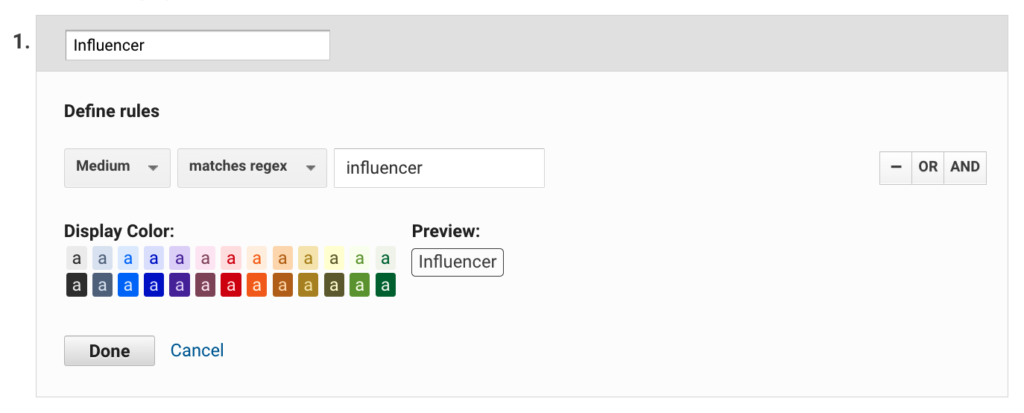
Here I’ve identified that all of my influencer traffic consistently uses “influencer” as the Medium.

So I’ve created my new Influencer Channel to reflect that!
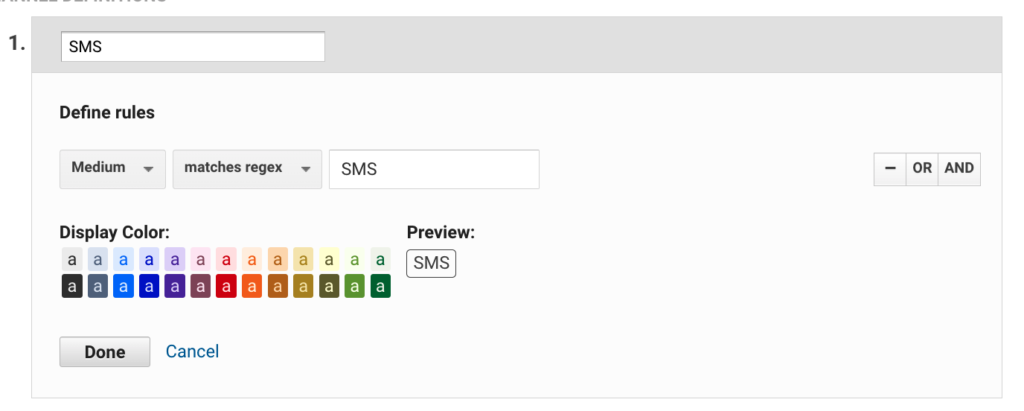
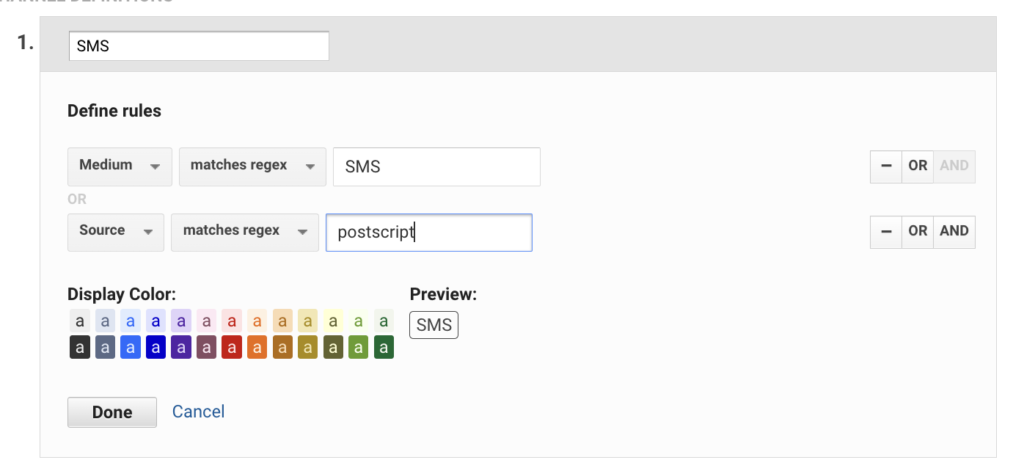
Similarly, I’ve also identified that my Text Marketing traffic consistently uses “SMS” as the Medium.
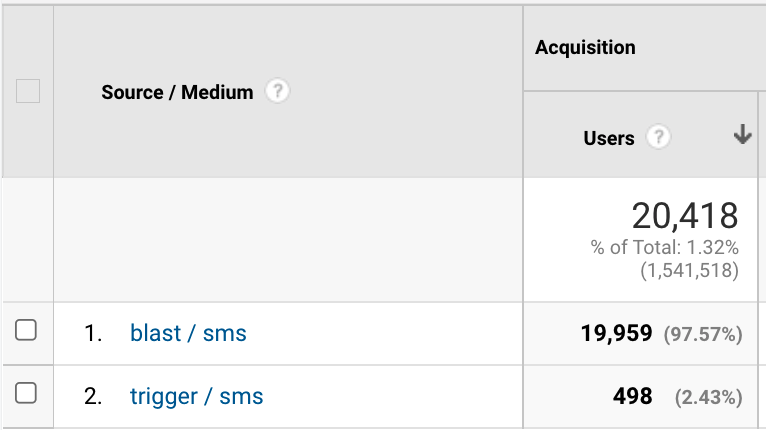
So I created my new SMS Channel to reflect this.
Part 5: Final QA Review
You are most of the way there with what we’ve just done, but all retailers’ marketing can be unique! So let’s validate that everything is the way we want it to be.
Navigate to your Channel Report & Add in Source / Medium as a secondary dimension.

Review the Sources & Mediums to confirm that the Channel they are falling into make sense. For example, I found that that some Postscript traffic has a (not set) medium:
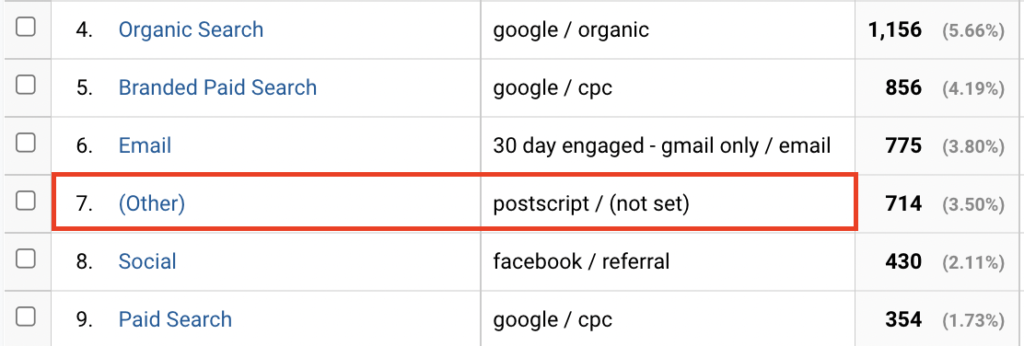
So I’ve updated my SMS channel to account for this.
Want help configuring your Google Analytics account to show actionable, accurate data? Elevar’s Complete GA/GTM Audit helps you ensure that all your data is being sent correctly and that Google Analytics is setup to receive that data properly. Connect with our Sales Team to learn more.
Get Exclusive Elevar Insights directly to your inbox.
Get free analytics tips and resources delivered directly to your inbox.
Shopify Conversion Tracking
Elevar automates conversion tracking across all marketing channels via server-side tracking. 99%+ conversion capture rate guaranteed.
Learn More

Leave a Reply